In the fast-evolving digital landscape, where speed, efficiency, and security are paramount, the foundation of your computing experience lies in a well-maintained operating system. For many, Windows 10 remains the workhorse, powering everything from professional workflows and creative endeavors to daily communication and entertainment. Over time, however, even the most robust systems can accumulate digital clutter, slow down, and become susceptible to performance issues or security vulnerabilities. This digital entropy often stems from installing and uninstalling numerous applications, driver conflicts, residual files, and even subtle malware infestations that can degrade your system’s responsiveness and overall health.

While regular maintenance and optimization tools can offer temporary relief, there comes a point when a truly fresh start is the most effective solution. This is where a “clean install” of Windows 10 enters the picture – a powerful, yet often intimidating, process that wipes your system clean and reinstalls the operating system from scratch. Far from being a mere technical chore, understanding how to perform a pristine clean installation is a fundamental skill for anyone serious about digital productivity, security, and getting the most value from their technology investments. It’s an investment in your digital future, ensuring your hardware operates at peak efficiency, free from the digital baggage that can hamper your daily operations and compromise your digital security posture.
This comprehensive guide will demystify the process, walking you through every crucial step – from meticulous preparation to the final touches of optimization – ensuring a seamless transition to a revitalized Windows 10 environment. By embracing this approach, you’re not just reinstalling an OS; you’re reclaiming control over your digital workspace, enhancing your productivity, and fortifying your digital defenses.
Preparing for Your Flawless Windows 10 Installation: The Foundation of Success
The success of any complex technical procedure lies primarily in thorough preparation. A clean Windows 10 installation is no exception. Rushing into the process without adequate safeguards and resources can lead to data loss, frustrating delays, or an incomplete setup. This preparatory phase is where you secure your valuable digital assets and gather all the necessary tools, effectively setting the stage for a smooth and successful operation. Think of it as laying the groundwork for a robust digital foundation, minimizing risks and maximizing efficiency.
Backing Up Your Essential Data: Your Digital Safety Net
This is, without exaggeration, the single most critical step in the entire process. A clean install will erase everything on the drive where Windows 10 is installed. Failing to back up your personal documents, photos, videos, projects, and any other irreplaceable files will result in permanent data loss. From a “Brand” and “Productivity” perspective, imagine the impact of losing years of work, client portfolios, or critical financial records. It’s a setback that can take days, weeks, or even months to recover from, if recovery is even possible.
- Identify Critical Data: Go through your
Documents,Pictures,Videos,Downloadsfolders, and any custom locations where you save important work. Don’t forget browser bookmarks, email archives (if using a local client like Outlook), and game saves. - Choose Your Backup Method:
- External Hard Drive: A reliable and straightforward option for local backups. Simply copy and paste your files.
- Cloud Storage: Services like OneDrive, Google Drive, Dropbox, or iCloud offer convenient synchronization and off-site storage. This is excellent for ensuring redundancy and accessibility from multiple devices.
- Network-Attached Storage (NAS): For more advanced users or small businesses, a NAS provides centralized, robust storage accessible over your local network.
- Verify Your Backup: Once the backup is complete, take a moment to browse through your backed-up files on the external drive or cloud service. Ensure they are accessible and uncorrupted. This small step can save immense heartache later.
Gathering Your Windows 10 Installation Media and Product Key: The Core Tools
You can’t install Windows without the installation files and, in most cases, a product key to activate it.
- Windows 10 Product Key:
- Digital License: If your Windows 10 was pre-installed on your computer or upgraded from an activated Windows 7/8/8.1, you likely have a digital license tied to your Microsoft account or hardware. In this case, Windows 10 should activate automatically after installation when connected to the internet.
- Retail Key: If you purchased a standalone copy of Windows 10, your product key will be on the packaging, in an email confirmation, or linked to your Microsoft account. Make sure to jot it down.
- OEM Key: For pre-built machines, the key might be on a sticker on the PC case, though this is less common with Windows 10.
- Windows 10 Installation Media: You’ll need a bootable USB flash drive (at least 8GB) or a blank DVD. Microsoft provides an official tool for this: the Media Creation Tool. We’ll cover its use in detail later. Ensure you download this tool before starting the clean install process.
Essential Drivers and Software Procurement: Proactive Tech Management
After a clean install, your computer will have only basic functionality. You’ll need specific drivers for your hardware (graphics card, sound card, network adapter, chipset, etc.) and your essential applications.
- Device Drivers:
- Manufacturer Websites: Visit your PC manufacturer’s support website (Dell, HP, Lenovo, ASUS, Acer, etc.) or individual component manufacturers (NVIDIA, AMD, Intel, Realtek). Download the latest Windows 10 drivers for your specific model. Store these on a separate USB drive or your external backup drive. Having network drivers on hand is crucial, as you might not have internet access immediately after installation.
- Chipset Drivers: Often overlooked, chipset drivers are vital for motherboard functionality and overall system stability.
- Essential Software: Make a list of all the programs you use daily – web browser, office suite (Microsoft Office, LibreOffice), security software, creative applications, etc. Download the installers for these applications and save them alongside your drivers. This streamlines the post-installation setup, allowing you to quickly restore your “Productivity” environment.
Understanding System Requirements and Compatibility: Tech Foundations
While most modern computers are compatible with Windows 10, it’s always wise to confirm. This falls under good “Tech” practice.
- Minimum Requirements: Ensure your PC meets or exceeds the minimum specifications (1 GHz processor, 1GB RAM for 32-bit or 2GB for 64-bit, 16GB storage for 32-bit or 32GB for 64-bit, DirectX 9 graphics card with WDDM 1.0 driver, 800×600 display). Modern systems typically far exceed these.
- UEFI vs. Legacy BIOS: Familiarize yourself with your system’s firmware type. Most newer systems use UEFI (Unified Extensible Firmware Interface), which offers faster boot times and enhanced security features compared to the older Legacy BIOS. This knowledge will be crucial when configuring your system to boot from the installation media.
The Step-by-Step Guide to a Pristine Windows 10 Install: A Digital Rebirth
With your preparations complete, it’s time to embark on the actual installation process. This section guides you through each critical step, ensuring you make the right choices to achieve a truly clean and optimized Windows 10 system. This is where you actively apply your “Tech” knowledge to revitalize your machine.
Creating Bootable Installation Media: Leveraging Microsoft’s Tools
- Download the Media Creation Tool: Go to Microsoft’s official Windows 10 download page (search “Windows 10 Media Creation Tool”). Download and run the tool.
- Accept Terms: Agree to the license terms.
- Choose “Create installation media (USB flash drive, DVD, or ISO file) for another PC”: This is the option for a clean install.
- Select Language, Architecture, and Edition: Usually, the tool recommends options based on your current PC. If you’re installing on a different PC or want a 64-bit version, deselect “Use recommended options for this PC” and make your choices. For most modern systems, choose 64-bit.
- Choose Media Type: Select “USB flash drive” and ensure your empty USB drive is connected. The tool will download the Windows 10 files and create the bootable drive. This process can take some time depending on your internet speed.
Configuring Your PC to Boot from USB/DVD: Entering the Firmware Interface
To start the installation, your PC needs to boot from the USB drive or DVD rather than its internal hard drive.
- Restart Your PC: Insert your bootable USB drive or DVD into your computer.
- Enter BIOS/UEFI Firmware: As your PC starts, you’ll need to press a specific key repeatedly to enter the BIOS/UEFI settings. Common keys include
Del,F2,F10,F12, orEsc. The exact key often flashes briefly on the screen during startup. If you miss it, restart and try again. - Change Boot Order: Navigate to the “Boot” or “Startup” tab within the BIOS/UEFI settings. Change the boot order to prioritize your USB drive or DVD-ROM drive. Ensure “Secure Boot” is temporarily disabled if you encounter issues, though it’s usually fine to leave it on for Windows 10.
- Save and Exit: Save your changes and exit the BIOS/UEFI. Your PC should now reboot and launch the Windows 10 setup from your installation media.
Initiating the Windows Setup Process: First Steps
- Language, Time, and Keyboard: The Windows Setup will load. Select your preferred language, time and currency format, and keyboard layout. Click “Next.”
- Install Now: Click the “Install now” button.
- Enter Product Key (or Skip): If prompted, enter your Windows 10 product key. If you have a digital license, or if you plan to enter the key later, you can select “I don’t have a product key.” Windows will usually activate automatically once connected to the internet.
- Accept License Terms: Read and accept the license terms. Click “Next.”
Selecting “Custom: Install Windows Only (advanced)”: The Clean Install Choice
This is the most critical decision point for a clean install.
- Choose Installation Type: You’ll be presented with two options: “Upgrade: Install Windows and keep files, settings, and applications” and “Custom: Install Windows only (advanced).” Select “Custom: Install Windows only (advanced).” This is the path to a truly clean slate.
Disk Partitioning and Formatting: The Clean Slate
This step is where you decide where Windows 10 will be installed and effectively erase previous data. Exercise extreme caution here.
- Identify Your Target Drive: You’ll see a list of drives and partitions. It’s crucial to identify the correct drive where you want to install Windows. Typically, this is your primary system drive (e.g., Drive 0). If you have multiple drives, ensure you select the correct one to avoid accidentally erasing data on a different drive.
- Delete Existing Partitions: For a truly clean install, you’ll want to delete all partitions associated with the previous Windows installation. Select each partition on your target drive (e.g., System Reserved, Primary, Recovery) and click “Delete.” Confirm any warnings. This will leave the entire drive as “Unallocated Space.”
- Caution: If you have another drive with important data that you want to keep, do not delete partitions on that drive.
- Create New Partition (Optional, but Recommended): With the target drive now showing as “Unallocated Space,” you can select it and click “New.” Windows will usually suggest creating a single, full-size partition. Click “Apply” and then “OK” to allow Windows to create necessary system partitions.
- Format and Select Primary Partition: Select the largest “Primary” partition (the one you just created or the main partition if you didn’t delete everything) and click “Format.” This ensures it’s ready for Windows.
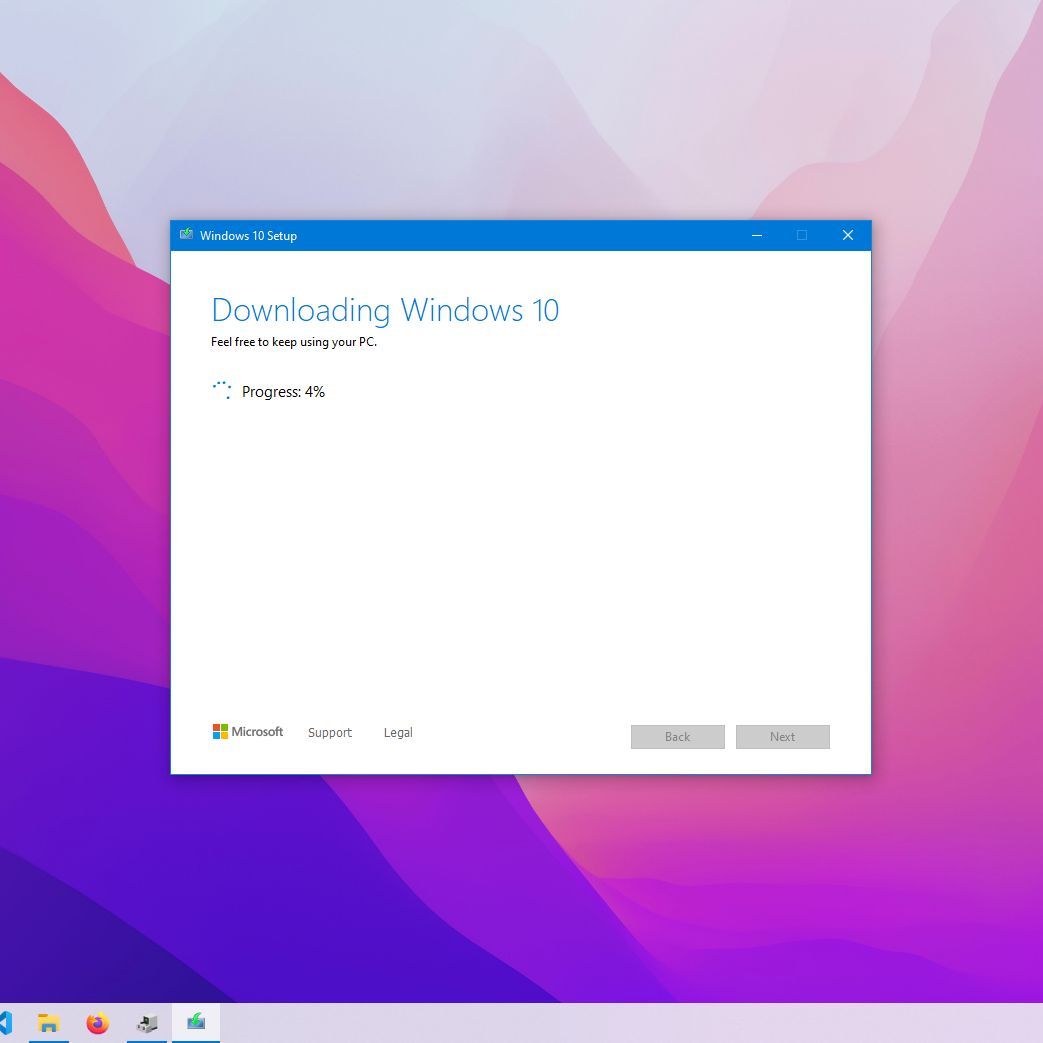
- Proceed with Installation: With the correct primary partition selected and formatted, click “Next.” Windows will now begin installing. This phase involves copying files, installing features, and performing initial setup, and your computer may restart several times.
Completing the Initial Windows Installation: Personalizing Your System
After the main installation files are copied, your PC will restart, and you’ll go through the Out-of-Box Experience (OOBE).
- Region and Keyboard Layout: Confirm your region and keyboard layout.
- Connect to a Network: Connect to your Wi-Fi or wired network. This is important for activation and updates.
- Sign in with Microsoft Account: Sign in with your Microsoft account (recommended for digital licensing and cloud integration). You can also choose to create a local account if preferred.
- PIN Setup: Create a PIN for faster and more secure login.
- Privacy Settings: Review and adjust your privacy settings. It’s advisable to disable any features you don’t need or aren’t comfortable with to enhance your “Digital Security” and data privacy.
- Cortana Setup (Optional): Choose whether to enable Cortana.
- Final Touches: Windows will go through some final preparations, and then you’ll be greeted by your new, pristine Windows 10 desktop!
Post-Installation Essentials: Optimizing Your Fresh Windows 10 System
Getting to the desktop is just the beginning. To truly leverage your clean install for maximum “Productivity,” “Digital Security,” and overall “Tech” performance, several crucial steps follow. This phase is about fine-tuning your system and restoring your operational environment.
Installing Device Drivers: Ensuring Hardware Compatibility and Performance
Even though Windows 10 has a vast library of generic drivers, it’s almost always better to install the specific drivers from your hardware manufacturers.
- Start with Network Drivers: If you don’t have internet access, install your pre-downloaded Wi-Fi or Ethernet drivers first.
- Install Chipset Drivers: Essential for motherboard functionality and communication between components.
- Graphics Card Drivers: Install the latest drivers from NVIDIA, AMD, or Intel. This is critical for display performance, gaming, and many applications.
- Audio Drivers, USB Drivers, etc.: Proceed with other essential drivers.
- Device Manager Check: After installing drivers, open Device Manager (right-click Start button > Device Manager) and look for any yellow exclamation marks, which indicate missing or problematic drivers.
Updating Windows 10: Security and Feature Updates
With drivers installed and internet access, the next priority is to fully update Windows 10.
- Check for Updates: Go to
Settings > Update & Security > Windows Updateand click “Check for updates.” - Install All Pending Updates: Install all available updates, including cumulative updates, security patches, and feature updates. This often requires multiple restarts. Keeping your system updated is a cornerstone of “Digital Security.”
Reinstalling Your Applications and Restoring Data: Productivity Resumption
Now you can bring your system back to full operational status.
- Install Essential Applications: Start with your web browser, office suite, and security software.
- Install Other Software: Work through your list of applications, installing them one by one.
- Restore Your Data: Copy your backed-up personal files (documents, pictures, etc.) back to their original locations or new preferred folders.
- Review Startup Programs: As you install software, be mindful of programs that want to launch automatically with Windows. Disable unnecessary startup programs through Task Manager (
Ctrl+Shift+Esc > Startup tab) to improve boot times and system responsiveness.
Enhancing Security and Privacy Settings: Digital Security Focus
A clean install is an opportune moment to configure your security and privacy settings from scratch.
- Windows Defender: Windows Defender (now Microsoft Defender Antivirus) is built-in and offers robust protection. Ensure it’s enabled and up-to-date.
- Firewall: Verify Windows Firewall is active (
Settings > Update & Security > Windows Security > Firewall & network protection). - Privacy Dashboard: Revisit
Settings > Privacyand adjust settings for location, camera, microphone, notifications, and app permissions to your comfort level. This protects your personal data and aligns with good “Brand” practices for data handling. - User Account Control (UAC): Ensure UAC is enabled for an added layer of security against unauthorized changes.
Performance Tweaks and Bloatware Removal: Ongoing Optimization
While a clean install inherently removes bloatware, ongoing optimization can further enhance performance and system longevity.
- Debloat (if necessary): If you find pre-installed apps you don’t want (common on OEM machines even after a clean install), you can uninstall them from
Settings > Apps > Apps & features. - Storage Sense: Enable Storage Sense (
Settings > System > Storage) to automatically free up space by deleting temporary files and managing your Downloads folder. - Power Options: Adjust your power plan (
Control Panel > Hardware and Sound > Power Options) to “High Performance” for maximum speed, or “Balanced” for energy efficiency. - Defragment (for HDDs): If you have a traditional Hard Disk Drive (HDD), regularly defragmenting it can improve performance. For Solid State Drives (SSDs), defragmentation is unnecessary and can reduce their lifespan.
Troubleshooting Common Issues and Best Practices: Sustaining Value
Even with the most careful planning, unforeseen issues can arise. Knowing how to address common problems and adopting best practices will ensure your clean install continues to provide maximum “Value” and performance over time.
Dealing with Driver Problems and Activation Issues
- Driver Rollback/Reinstallation: If a new driver causes instability, you can often roll back to a previous version in Device Manager. If a driver fails to install, try downloading an older version from the manufacturer’s site or using Windows Update’s optional driver updates.
- Activation Troubleshooting: If Windows doesn’t activate automatically, ensure you’re connected to the internet. Go to
Settings > Update & Security > Activation. If you have a digital license, try running the “Troubleshoot” option. If you entered a product key, double-check its accuracy. For persistent issues, Microsoft Support chat can often help.
Regular Maintenance for Sustained Performance: Long-term Value
A clean install isn’t a one-and-done solution; it’s a foundation. Regular maintenance is key to preserving its benefits.
- Routine Updates: Consistently install Windows Updates and driver updates.
- Disk Cleanup: Periodically use Disk Cleanup (search for it in the Start Menu) to remove temporary files, old Windows update files, and other clutter.
- Antivirus Scans: Run full system scans with your antivirus software regularly.
- Review Startup Programs: As you install more software, periodically check your startup programs to ensure nothing unnecessary is slowing down your boot.
- Backup Strategy: Maintain a consistent backup strategy for your evolving personal data.

Conclusion: Empowering Your Digital Journey with a Pristine Windows 10 System
Performing a clean installation of Windows 10 is more than just a technical procedure; it’s an act of digital renewal. By meticulously preparing, executing the installation, and diligently following post-installation optimization steps, you effectively reset your computing experience to its optimal state. This process eliminates years of accumulated digital cruft, resolves hidden software conflicts, and fortifies your system against potential security threats, leading to a computer that is faster, more responsive, and more reliable.
In a world where “Tech” drives “Productivity” and “Digital Security” safeguards your “Brand” and “Money,” a well-maintained operating system is an invaluable asset. A clean Windows 10 install empowers you to reclaim peak performance, ensuring your technology serves as an efficient tool rather than a source of frustration. Embrace this skill, and you’ll not only extend the lifespan and utility of your hardware but also gain a deeper understanding of your digital environment, ultimately fostering a more productive, secure, and satisfying computing journey. Your fresh Windows 10 system is now ready to take on the challenges and opportunities of the digital world, operating with the speed, stability, and security you deserve.
aViewFromTheCave is a participant in the Amazon Services LLC Associates Program, an affiliate advertising program designed to provide a means for sites to earn advertising fees by advertising and linking to Amazon.com. Amazon, the Amazon logo, AmazonSupply, and the AmazonSupply logo are trademarks of Amazon.com, Inc. or its affiliates. As an Amazon Associate we earn affiliate commissions from qualifying purchases.