In the rapidly evolving landscape of personal computing, the graphics card, often referred to as the GPU (Graphics Processing Unit), stands as the undisputed heart of visual processing. Whether you’re a hardcore gamer seeking the highest frame rates and most immersive experiences, a creative professional rendering complex 3D models or editing high-resolution video, or simply someone looking to extend the life and capability of an aging system, upgrading your graphics card is one of the most impactful enhancements you can make. This guide will walk you through the entire process, from understanding why an upgrade is necessary to the meticulous steps of installation and post-setup, ensuring a smooth transition to enhanced graphical prowess. We’ll delve into the technicalities, provide practical advice, and help you navigate this crucial PC upgrade with confidence, all while keeping an eye on the smart investment a new GPU represents in your tech arsenal.
I. Why Upgrade Your Graphics Card? Unlocking New Levels of Performance and Potential
The decision to upgrade your graphics card is often driven by a clear desire for improved performance and a more seamless computing experience. A new GPU isn’t just about faster frame rates; it’s about unlocking the full potential of your system across a spectrum of applications.
Enhanced Gaming Performance
For gamers, the motivation for a GPU upgrade is usually straightforward: to play the latest titles at higher resolutions, with more graphical fidelity, and at smoother frame rates. Modern games are incredibly demanding, pushing the limits of graphical processing. An outdated GPU can lead to stuttering gameplay, low-resolution textures, and the inability to experience games as their developers intended. A powerful new graphics card can transform your gaming experience, allowing you to immerse yourself in stunning virtual worlds with crisp visuals and responsive controls, often making the difference between a frustrating experience and an exhilarating one. Furthermore, a new card can enable features like ray tracing, which delivers incredibly realistic lighting, shadows, and reflections, truly elevating the visual realism of supported games. This direct impact on entertainment value makes a GPU upgrade a prime investment for any serious gamer.
Improved Creative Workflows (Video Editing, 3D Rendering)
Beyond gaming, professional and enthusiast creators stand to gain immensely from a GPU upgrade. Software for video editing (e.g., Adobe Premiere Pro, DaVinci Resolve), 3D modeling and rendering (e.g., Blender, Autodesk Maya, Cinema 4D), graphic design, and even scientific simulations heavily leverage the parallel processing power of modern GPUs. Tasks such as real-time playback of high-resolution video, applying complex filters, rendering intricate scenes, or accelerating AI-driven content creation tools can be agonizingly slow on an underpowered card. A high-performance GPU can dramatically cut down render times, enable smoother previews, and enhance productivity, effectively translating into more efficient workflows and the ability to tackle more complex projects without frustrating delays. This makes a new graphics card not just a component, but a critical tool for professionals seeking to optimize their output and expand their creative capabilities.
Future-Proofing Your System (to an Extent)
While “future-proofing” a PC in the rapidly evolving tech landscape is a challenging endeavor, investing in a powerful graphics card does offer a degree of longevity for your system. A current-generation GPU will allow you to run upcoming software and games for years to come, albeit potentially at reduced settings as technology advances. It buys you time before another major component upgrade is necessary, ensuring your system remains capable and relevant for a longer period. This strategic investment can save you money in the long run by delaying the need for an entirely new PC build, allowing you to maximize the value of your existing components. It’s about making a smart tech decision that extends your system’s useful life and keeps you competitive in an ever-changing digital world.
Maximizing Your Investment
From a financial perspective, upgrading a graphics card can be a highly cost-effective way to revitalize an otherwise capable PC. Instead of spending significantly more on a brand-new system, a targeted GPU upgrade can breathe new life into an older CPU, motherboard, and RAM combination, provided those components aren’t severe bottlenecks. This approach allows you to achieve significant performance gains for a fraction of the cost of a full system replacement. It’s a smart financial play that demonstrates an understanding of component value and strategic resource allocation. Furthermore, should you decide to sell your old card, its resale value can offset part of the cost of your new investment, further enhancing the financial wisdom of the upgrade. This thoughtful approach to PC maintenance and upgrading aligns perfectly with prudent money management in the realm of technology.
II. Before You Begin: Essential Preparations for a Smooth Upgrade
Embarking on a graphics card installation requires more than just enthusiasm; it demands careful preparation. Skipping these crucial preliminary steps can lead to compatibility issues, system instability, or even damage to your components. A methodical approach ensures a seamless and successful upgrade.
Compatibility Check (Motherboard, PSU, Case Size)
Before you even consider purchasing a new graphics card, thorough compatibility checks are paramount. First, verify your motherboard’s PCIe slot. Most modern graphics cards use a PCIe x16 slot, which has been standard for many years, but ensure your motherboard has an available slot, ideally a PCIe 3.0 or 4.0 (or even 5.0 for the latest cards) for optimal performance. Next, and critically, assess your Power Supply Unit (PSU). New, powerful GPUs often have significant wattage demands and require specific PCIe power connectors (e.g., 6-pin, 8-pin, 12-pin, or 16-pin connectors). Check your new GPU’s specifications for its recommended PSU wattage and connector requirements, then compare it to your current PSU’s output and available connectors. An underpowered PSU can lead to system instability, crashes, or even component damage. Finally, measure your PC case. Modern graphics cards, especially high-end models, can be incredibly long and thick. Ensure there’s enough physical clearance within your case to accommodate the card’s length, height, and width, including any necessary airflow space. Pay attention to drive cages or other internal obstructions.
Gathering Your Tools
Having the right tools at hand will make the installation process much smoother and safer. You’ll primarily need a Phillips head screwdriver (magnetic tips are a bonus for preventing dropped screws). An anti-static wrist strap is highly recommended to protect your sensitive components from electrostatic discharge (ESD), which can cause irreversible damage. If you don’t have one, regularly touching a grounded metal object (like your PC’s unpainted metal chassis) before handling components can offer some protection. A small flashlight can be invaluable for illuminating dark corners inside your case, especially when connecting power cables or dealing with small screws. Cable ties or Velcro straps can help with cable management once the card is installed, improving airflow and aesthetics. A can of compressed air is useful for cleaning out any dust inside your case before installing the new card.
Backing Up Data & Driver Uninstallation
While installing a new graphics card generally doesn’t directly impact your data, it’s always prudent to perform a full system backup before any significant hardware change. This safeguards against unforeseen issues during the installation or subsequent driver setup that could lead to data corruption. Once your data is secure, the next critical step is to uninstall your old graphics drivers. Leaving old drivers installed can lead to driver conflicts, performance issues, or system instability with your new card. For NVIDIA GPUs, use the “Display Driver Uninstaller” (DDU) tool in Windows Safe Mode for a clean removal. AMD also provides a cleanup utility. Running these tools ensures that all remnants of the old drivers are eradicated, providing a fresh slate for your new GPU’s drivers. This step is often overlooked but is crucial for optimal performance and stability.
Powering Down and Disconnecting
Safety is paramount when working inside your PC. Before touching any internal components, completely power down your computer. Not just a software shutdown, but a physical shutdown. Unplug the power cable from the wall outlet and from the back of your PSU. It’s also a good practice to hold down your PC’s power button for a few seconds after unplugging it to discharge any residual power stored in the capacitors. Disconnect all peripherals (monitor, keyboard, mouse, USB devices) to clear your workspace and prevent accidental damage. Move your PC to a well-lit, clean, and static-free work surface, preferably on a non-carpeted floor. Taking these precautions minimizes the risk of electric shock and static discharge, protecting both you and your valuable hardware.
III. The Installation Process: A Step-by-Step Guide
With preparations complete, you’re ready to dive into the hands-on process of installing your new graphics card. Patience and attention to detail are key to a successful upgrade.
Opening Your PC Case
Carefully place your PC case on its side on your clean workspace. Identify and remove the screws holding the side panel in place – typically two to four thumbscrews or Phillips head screws at the rear of the case. Once the screws are removed, slide the side panel backward and then lift it off. Take care to set it aside in a safe place where it won’t be scratched or damaged. With the side panel off, you should have clear access to your motherboard and existing components. At this stage, it’s a good idea to take a moment to observe the current layout and perhaps snap a quick photo for reference, especially if you have a complex cabling setup. This is also a good opportunity to use your compressed air to gently blow out any accumulated dust from fans, heatsinks, and vents, ensuring optimal cooling for your new components.
Removing the Old Graphics Card (if applicable)
If you’re replacing an existing graphics card, this is your next step. First, identify and disconnect any PCIe power cables running from your PSU to the old graphics card. These usually have clips that need to be squeezed or pressed down before the connector can be pulled free. Next, locate the screw or latch that secures the graphics card to the PC case’s expansion slot bracket. Unscrew it or release the latch. Finally, and very importantly, locate the small retention clip at the end of the PCIe slot on the motherboard. This clip automatically locks the card in place. You will need to gently push or pull this clip to release the card. Once the clip is disengaged, you can carefully and evenly pull the old graphics card straight out of its PCIe slot. Avoid wiggling or forcing it. Place the old card in its anti-static bag or a safe, static-free location.
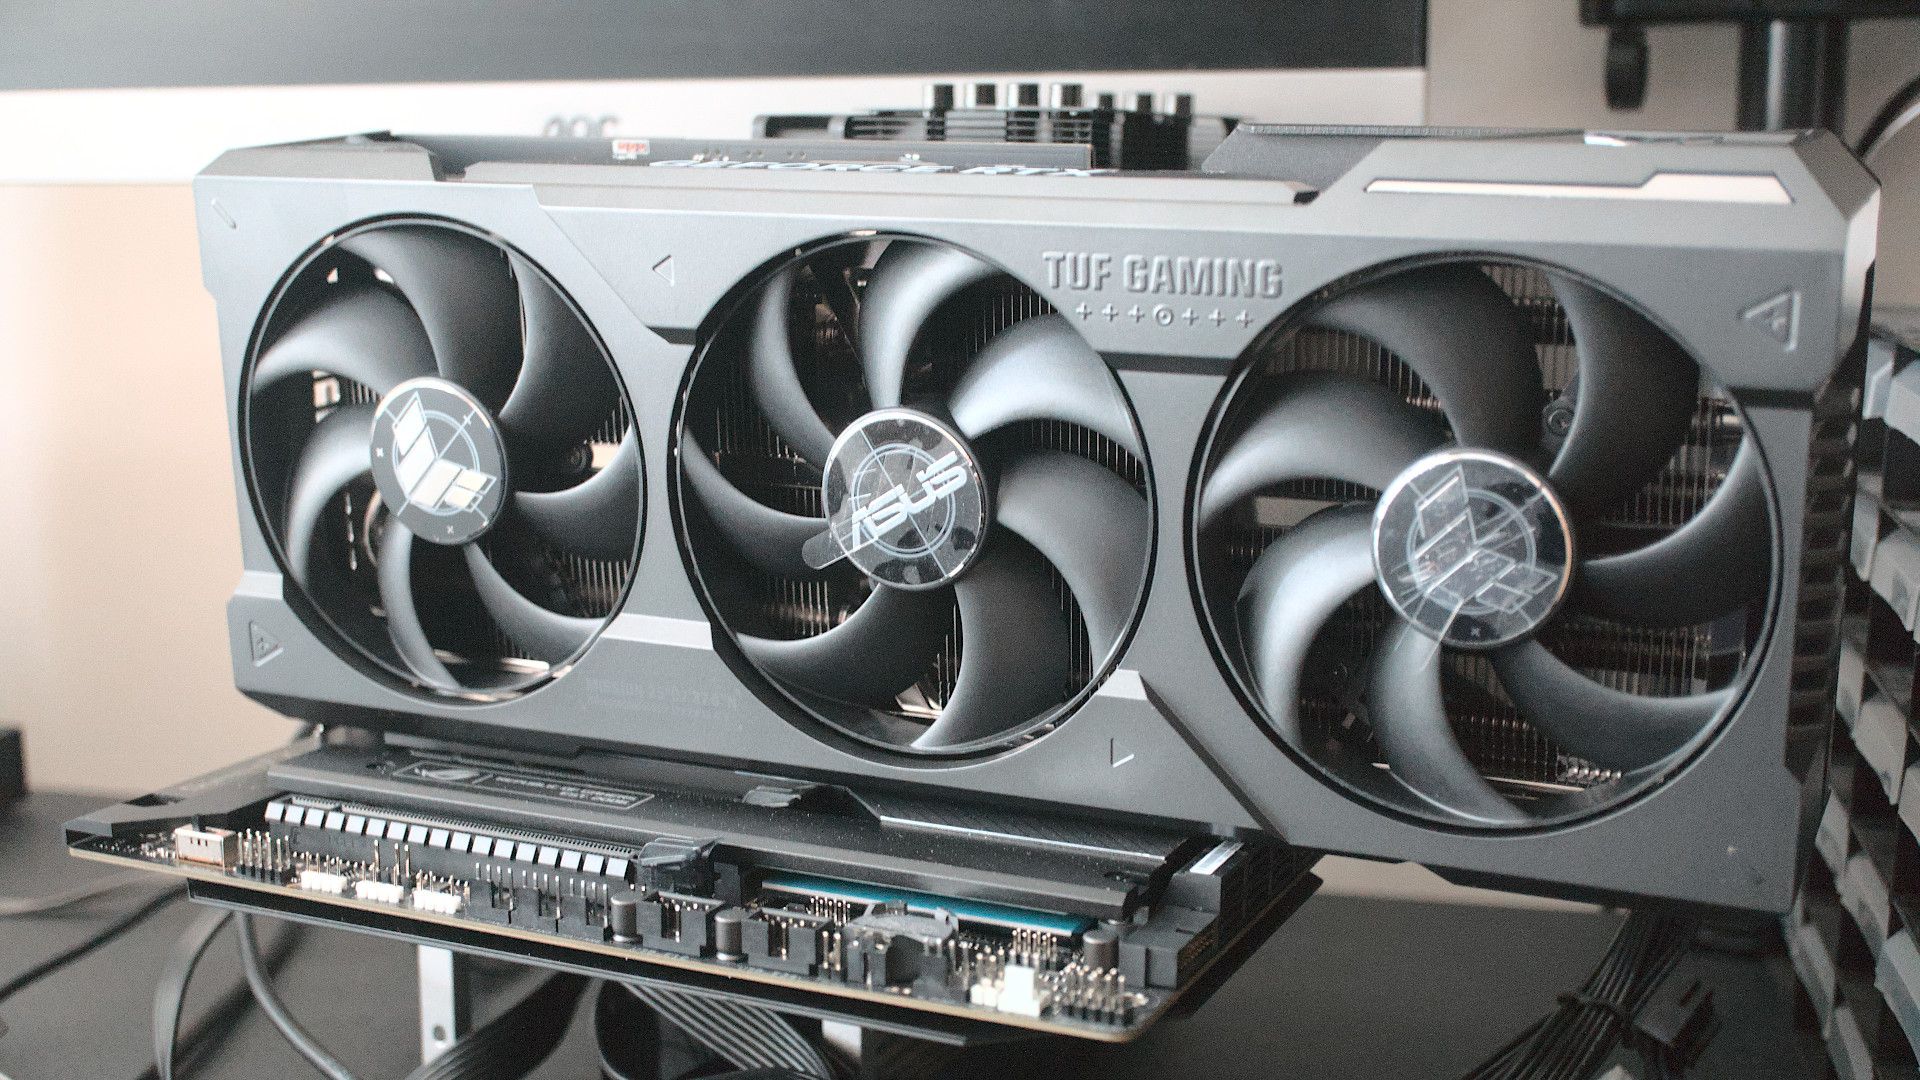
Installing the New Graphics Card
Now for the exciting part! Carefully remove your new graphics card from its anti-static packaging. Hold the card by its edges, avoiding touching the golden PCIe contacts or any delicate components on the PCB. Align the PCIe connector of the new graphics card with the available PCIe x16 slot on your motherboard. If your case has slot covers, you may need to remove one or more metal covers from the rear of the case to accommodate the card’s display outputs. Gently but firmly push the card straight down into the slot until you hear or feel a click, indicating that the retention clip has engaged and the card is fully seated. Visually confirm that the card is level and completely inserted into the slot. If it’s a particularly heavy card, it might come with a support bracket or you might consider purchasing one to prevent sag over time.
Connecting Power Cables
With the new graphics card firmly seated, it’s time to connect the necessary power cables. Refer to your new graphics card’s manual for its specific power requirements. High-performance GPUs typically require one or more 6-pin, 8-pin, or the newer 12-pin/16-pin (12VHPWR) PCIe power connectors directly from your PSU. Locate the appropriate cables from your power supply and carefully plug them into the corresponding ports on the graphics card. Ensure the connectors click firmly into place. Never force a connector, as they are usually keyed to fit only one way. If your PSU doesn’t have enough of the required connectors, you might need to use adapter cables (often included with the GPU or PSU), but it’s generally recommended to use direct PSU cables for stability and power delivery, especially for high-wattage cards. Route the cables neatly to prevent them from interfering with airflow or coming into contact with fans.
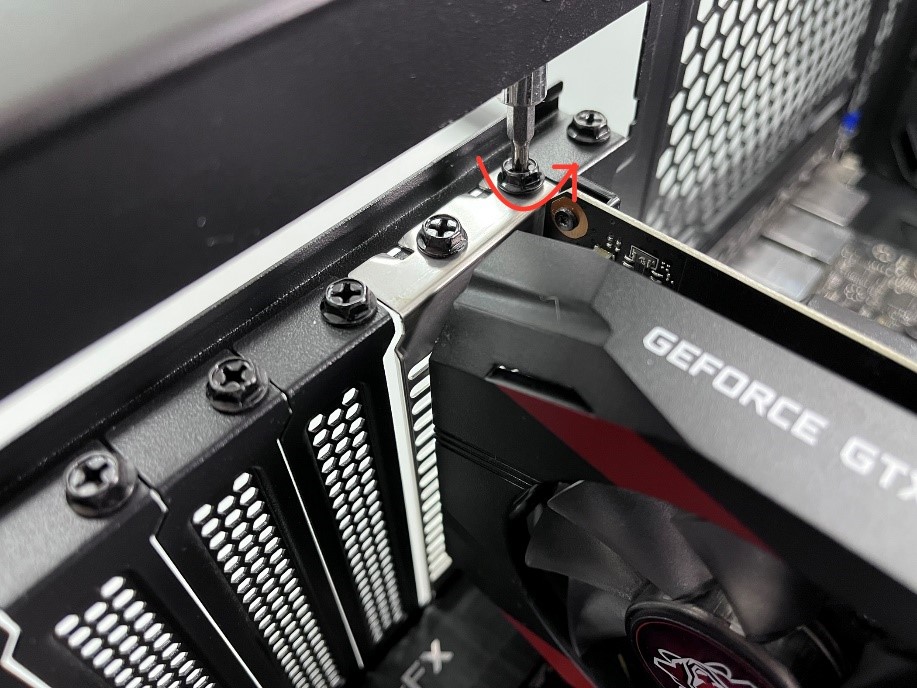
Securing the Card and Closing the Case
Once the card is powered and seated, secure it to the PC case’s expansion slot bracket with the screw or latch you removed earlier. This prevents the card from moving or sagging. Double-check all connections: ensure the graphics card is fully seated, power cables are firmly plugged in, and any other internal cables you might have disturbed are reconnected. With everything in place, replace the side panel of your PC case, ensuring it slides into its grooves correctly before securing it with the screws. Take a final look around your workspace to ensure no tools or loose screws are left inside the case. Your hardware installation is now complete!
IV. Post-Installation: Driver Setup and Testing
Installing the physical hardware is only half the battle. The next crucial steps involve software setup to bring your new GPU to life and ensure it’s performing optimally.
Connecting to Your Monitor
With the PC case closed, reconnect your monitor’s display cable (HDMI, DisplayPort, DVI, or VGA) to one of the output ports on your new graphics card. It’s vital to connect your monitor directly to the dedicated graphics card, not to the motherboard’s integrated graphics ports (unless you specifically intend to use integrated graphics or have a multi-monitor setup where one monitor will use iGPU). Once connected, plug your PC’s power cable back into the wall outlet and the PSU, and reconnect your keyboard, mouse, and other peripherals. Power on your computer. If everything is working correctly, you should see your PC boot up on your monitor, likely at a basic resolution until the proper drivers are installed.
Installing Latest Drivers (NVIDIA, AMD)
This is perhaps the most critical post-installation step. Even if your PC boots, the new graphics card won’t perform optimally without its dedicated drivers. Navigate to the official website of your GPU manufacturer (NVIDIA or AMD). Use their driver download tools or manually search for the latest drivers specific to your graphics card model and your operating system (Windows 10, Windows 11, etc.). Download the recommended driver package. Once downloaded, run the installer and follow the on-screen prompts. Typically, you’ll want to perform a “clean installation” to ensure no residual files interfere. Your screen may flicker or go black momentarily during the installation process; this is normal as the drivers are being applied. Once the installation is complete, a reboot of your system is usually required.
Testing and Benchmarking
After a successful driver installation and system reboot, it’s time to test your new GPU’s capabilities. Start by opening a demanding game or a graphics-intensive application you frequently use. Monitor performance and visual quality. To get a more objective measure, consider running a dedicated benchmarking tool like 3DMark, Unigine Heaven, or FurMark. These programs will push your GPU to its limits and provide scores that you can compare with other users or against your old card’s performance, giving you a clear indication of your upgrade’s impact. Pay attention to temperatures and fan noise during benchmarking to ensure proper cooling. Tools like MSI Afterburner or HWMonitor can help you monitor these metrics in real-time.
Troubleshooting Common Issues
While we aim for a flawless installation, issues can sometimes arise. If your PC doesn’t boot, double-check all power connections, especially to the GPU itself, and ensure the card is fully seated in the PCIe slot. If you’re experiencing crashes, blue screens, or strange graphical artifacts, try reinstalling the drivers using DDU in Safe Mode for a fresh start. Ensure your PSU is adequate for your new card. If you’re using an older monitor or cable, check for compatibility issues or try a different cable. For persistent problems, consult your graphics card’s manual, the manufacturer’s support forums, or online tech communities, providing detailed descriptions of the problem and your system specifications.
V. Maximizing Your New GPU’s Potential
With your new graphics card installed and running, there are additional steps you can take to ensure you’re getting the absolute most out of your investment.
Understanding Overclocking (with Caution)
Overclocking involves increasing your GPU’s clock speeds beyond its factory settings to squeeze out additional performance. Software like MSI Afterburner or EVGA Precision X1 allows you to adjust core clocks, memory clocks, and voltage. While it can yield a few extra frames per second, overclocking also increases power consumption and heat output, potentially reducing the lifespan of your card if not done carefully. It’s recommended only for experienced users who understand the risks and are willing to experiment gradually, monitoring temperatures and stability closely. Always prioritize stable operation over marginal performance gains.
Monitoring Temperatures and Performance
Regularly monitoring your GPU’s temperatures and performance metrics is crucial for its longevity and optimal operation. Tools like HWMonitor, GPU-Z, or the aforementioned MSI Afterburner can display real-time data on core temperature, fan speed, clock speeds, and usage percentages. High temperatures can lead to thermal throttling (where the GPU automatically reduces performance to prevent overheating) or, in extreme cases, damage. Ensuring good case airflow and keeping your GPU’s fans clean can help maintain healthy operating temperatures. Understanding these metrics helps you identify potential issues before they become serious.

The Long-Term Value of a GPU Upgrade
A new graphics card is more than just a component; it’s a strategic enhancement that ripples through your entire computing experience. By following this comprehensive guide, you’ve not only unlocked superior performance for gaming and creative work but also extended the useful life of your PC. This savvy investment not only offers immediate gratification through enhanced visuals and speed but also serves as a smart financial decision, deferring the need for a full system overhaul. Embracing regular maintenance, staying updated with drivers, and understanding your GPU’s limits will ensure you continue to maximize its value for years to come, keeping you at the forefront of digital technology without breaking the bank.
aViewFromTheCave is a participant in the Amazon Services LLC Associates Program, an affiliate advertising program designed to provide a means for sites to earn advertising fees by advertising and linking to Amazon.com. Amazon, the Amazon logo, AmazonSupply, and the AmazonSupply logo are trademarks of Amazon.com, Inc. or its affiliates. As an Amazon Associate we earn affiliate commissions from qualifying purchases.