In the intricate symphony of a modern computer, the processor, often referred to as the Central Processing Unit (CPU), stands as the undisputed conductor. It’s the brain, the core component responsible for executing instructions, performing calculations, and managing the flow of information that makes your digital world tick. Whether you’re assembling a brand-new custom PC, upgrading an aging system, or simply replacing a faulty unit, understanding how to properly install a processor is an indispensable skill for any tech enthusiast. A correctly installed CPU ensures optimal performance, system stability, and longevity, safeguarding your investment in cutting-edge technology. Conversely, a rushed or incorrect installation can lead to frustrating issues, system failures, or even permanent damage to vital components.
This comprehensive guide will walk you through every critical step of processor installation, from understanding compatibility to the crucial post-installation checks. We’ll delve into the nuances that differentiate Intel from AMD sockets, the vital role of thermal paste, and the best practices to protect your delicate hardware. Beyond the mechanics, we’ll also touch upon how this fundamental act of building impacts your broader digital life, from enhancing productivity and leveraging AI tools to even influencing your potential for online income and personal branding. Embark on this journey with confidence, and let’s unlock the full potential of your computing power.
Understanding Your Processor and Motherboard: The Foundation of Compatibility
Before a single screw is turned or a component unboxed, the most critical phase of processor installation is ensuring absolute compatibility between your chosen CPU and motherboard. This isn’t merely a suggestion; it’s a non-negotiable prerequisite that underpins the success and stability of your entire system. A mismatch here will, at best, prevent your system from booting and, at worst, lead to irreversible damage.
Processor Types and Compatibility
The world of desktop processors is primarily dominated by two titans: Intel and AMD. While both strive for innovation and performance, their fundamental architecture and how they physically connect to the motherboard differ significantly.
- Intel Processors (LGA Sockets): Intel typically utilizes a Land Grid Array (LGA) socket design. In an LGA setup, the pins are located on the motherboard socket itself, while the processor has corresponding flat contact pads on its underside. This design minimizes the risk of bending pins on the CPU, as the more robust motherboard socket is designed to withstand greater stress. Common Intel sockets include LGA1200, LGA1700, and previously LGA1151, each compatible with specific generations of Intel CPUs (e.g., 10th/11th Gen for LGA1200, 12th/13th/14th Gen for LGA1700).
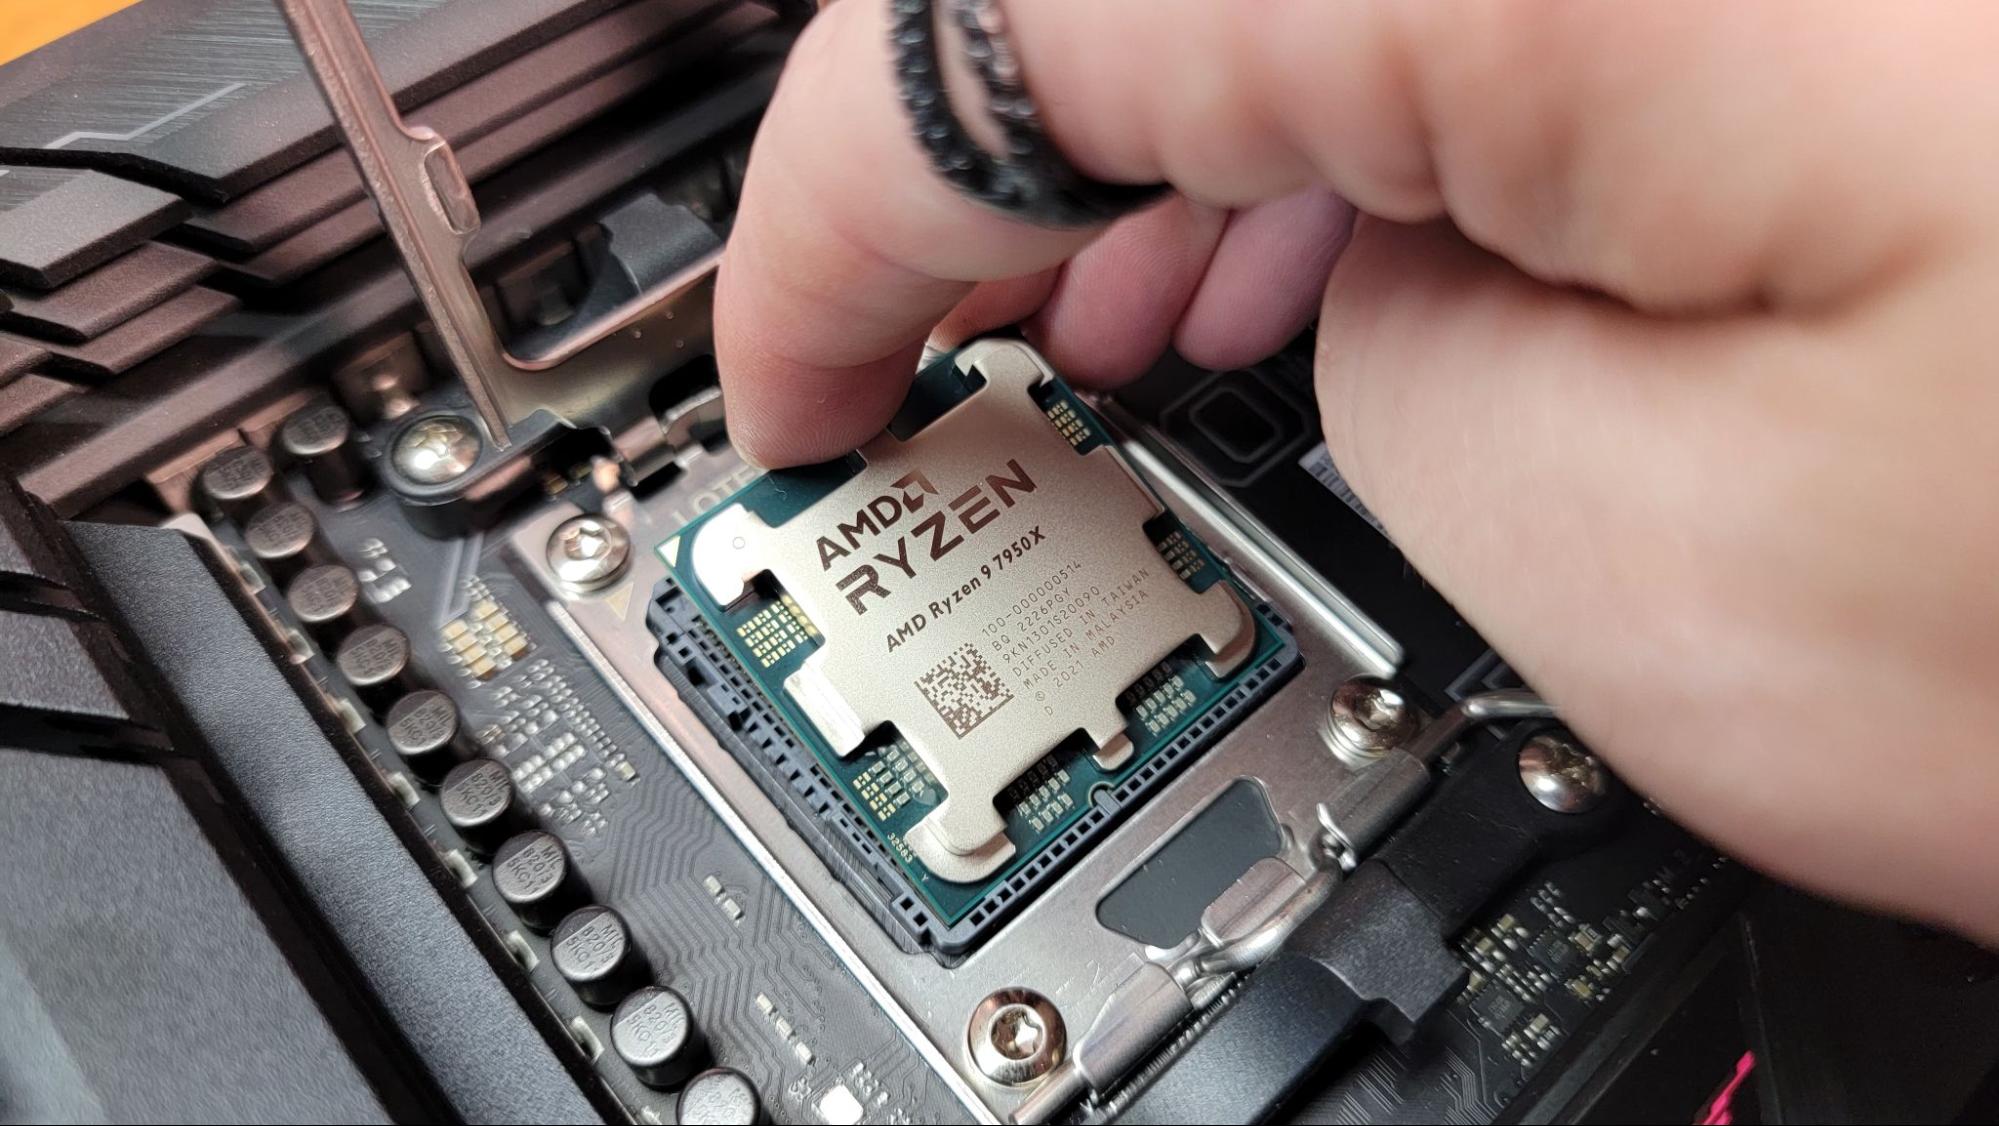
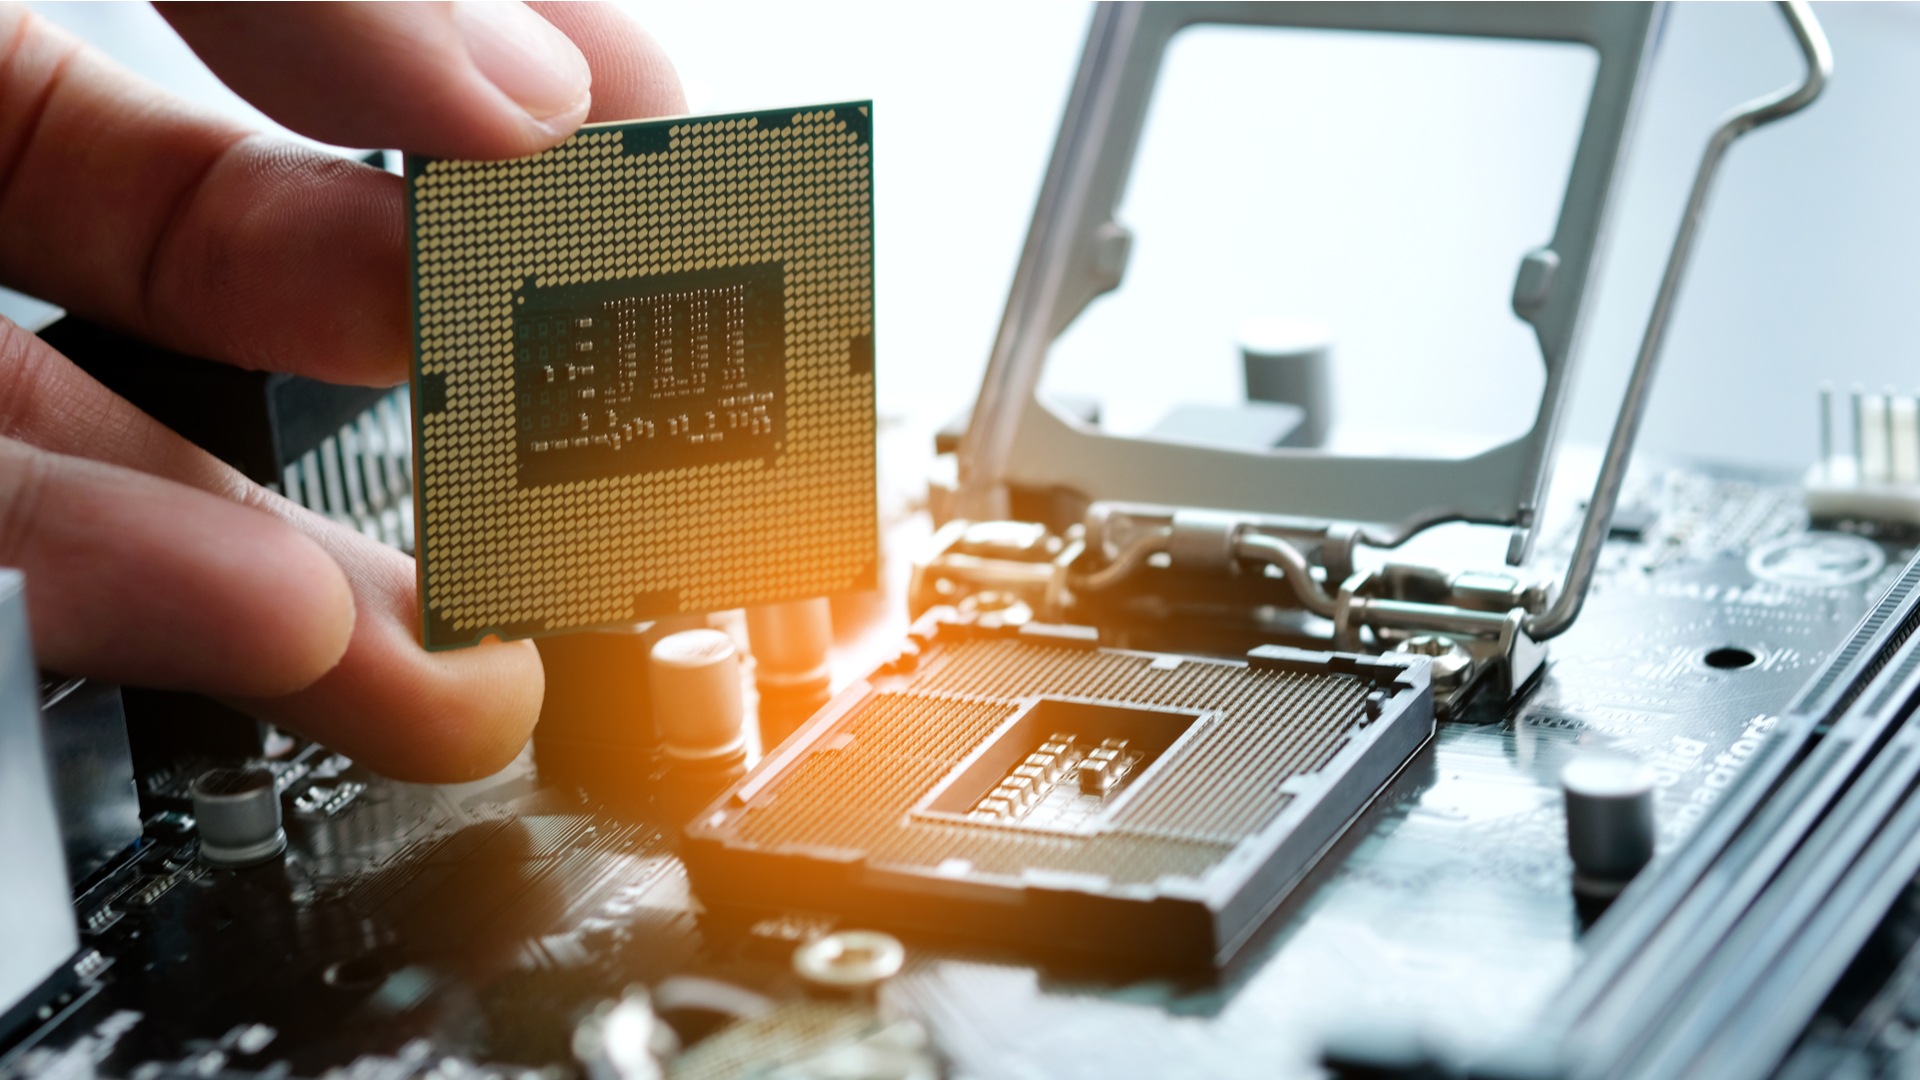
- AMD Processors (PGA/LGA Sockets): Historically, AMD has largely favored Pin Grid Array (PGA) sockets for its mainstream desktop CPUs. In a PGA design, the pins are located on the bottom of the processor, which then slots into corresponding holes in the motherboard socket. This design requires extreme care when handling the CPU to avoid bent pins. The most prevalent AMD PGA socket for modern Ryzen processors is AM4. However, with their latest high-end desktop (HEDT) and server platforms (like Threadripper and EPYC), and also for their new mainstream Raphael series, AMD has also adopted LGA designs (e.g., AM5 for Ryzen 7000 series and newer, which features pads on the CPU and pins on the motherboard).
Beyond the physical socket type, compatibility also hinges on the motherboard’s chipset. The chipset is a set of specialized chips on the motherboard that manage communication between the CPU, RAM, storage devices, and peripherals. Each CPU generation is designed to work with specific chipsets. For instance, an Intel 12th Gen CPU requires a motherboard with an LGA1700 socket and a 600-series (e.g., Z690, B660, H610) or 700-series (e.g., Z790, B760) chipset. Similarly, an AMD Ryzen 5000 series CPU needs an AM4 socket with a 400-series (e.g., X470, B450) or 500-series (e.g., X570, B550) chipset, although older chipsets might require a BIOS update to support newer processors. Always consult your motherboard’s manual or the manufacturer’s website to confirm CPU compatibility and supported BIOS versions. This diligence is not just about avoiding frustration; it’s a fundamental step in protecting your financial investment in these core components.
Essential Tools and Preparations
Successful processor installation isn’t just about knowledge; it’s also about having the right tools and a prepared environment. Proper preparation minimizes risks and streamlines the entire process.
- Anti-Static Wrist Strap or Mat: Electrostatic discharge (ESD) is the silent killer of electronics. A static shock, imperceptible to humans, can fry delicate components. An anti-static wrist strap, clipped to a grounded metal object (like your PC case), or an anti-static mat is your best defense.
- Phillips Head Screwdriver: For mounting the CPU cooler and securing other components. Magnetic tips are convenient but ensure they don’t accidentally touch sensitive areas.
- Thermal Paste: Essential for transferring heat from the CPU to the cooler. Most new CPU coolers come with pre-applied paste or a small tube, but having a quality aftermarket tube is a wise backup, especially if reusing an old cooler.
- Isopropyl Alcohol (90% or higher) and Lint-Free Cloth/Coffee Filters: Crucial for cleaning off old thermal paste from a used CPU or cooler.
- Motherboard and CPU Manuals: These are your bibles. They contain specific instructions, pin layouts, and troubleshooting tips unique to your components.
- Clean, Well-Lit Workspace: A clutter-free, static-safe environment reduces the chance of dropping tiny screws or misplacing components. Avoid carpeted areas if possible, or take extra static precautions.
Before you even touch the CPU, take a moment to review the manuals. Familiarize yourself with the motherboard’s CPU socket mechanism, the CPU cooler mounting process, and any specific warnings. This proactive approach not only enhances your productivity during the build but also minimizes potential errors that could lead to costly replacements, protecting your investment.
Pre-Installation Rituals: Unboxing and Inspection
With compatibility confirmed and your workspace prepared, the next phase involves carefully unboxing your new processor and motherboard, focusing on meticulous handling and thorough inspection. This stage is crucial for identifying any potential manufacturing defects or shipping damage before installation.
Handling with Care: Protecting Your Delicate Hardware
The CPU is arguably the most sensitive component you’ll handle during a PC build. Its exposed pins (PGA) or contact pads (LGA) are incredibly delicate and prone to damage from improper handling or static discharge.
- ESD Precautions: Reiterate the use of an anti-static wrist strap or ensuring you frequently touch a grounded metal object. Handle the CPU by its edges only, avoiding contact with the pins or contact pads on the underside.
- Unboxing the CPU: Carefully remove the CPU from its packaging. AMD PGA processors typically come in a small plastic clam shell, while Intel LGA processors are often in a slightly larger plastic carrier. Keep the protective plastic cover for the socket (if applicable) and the CPU packaging in case you need to return it.
- Inspecting Pins/Pads:
- For AMD PGA CPUs: Gently hold the CPU at an angle to inspect all pins on the underside. They should be perfectly straight, uniformly spaced, and free from any bends, smudges, or debris. Even a slightly bent pin can prevent the CPU from seating correctly or cause it to malfunction. If you find a bent pin, it might be possible to carefully straighten it with a very fine tool (like a mechanical pencil lead, an exacto knife, or a credit card) but proceed with extreme caution, as this can easily break the pin.
- For Intel LGA CPUs (and AMD AM5/LGA CPUs): Inspect the contact pads on the CPU for any scratches, smudges, or foreign material. The more critical inspection, however, is of the pins within the motherboard socket itself. Use good lighting to check for any bent, missing, or damaged pins. Socket damage is often a return policy nightmare, so confirming its integrity before installing the CPU is vital.
Preparing the Motherboard Socket
Your motherboard’s CPU socket is designed to hold the processor securely and ensure proper electrical contact. Familiarizing yourself with its mechanism is essential.
- Locating the Socket: The CPU socket is typically the largest square component on the motherboard, usually centrally located.
- Opening the Socket Retention Mechanism:
- For Intel LGA Sockets (and AMD AM5/LGA): Locate the small metal lever on the side of the socket. Gently push it down and outward to release it from its clasp. The retention frame (a metal bracket) will then lift. Crucially, for Intel sockets, there will also be a protective plastic cover over the pins. This cover will either pop off automatically when the lever is opened, or you may need to gently lift it away. Do not discard this cover! It should be kept and replaced if you ever remove the CPU for transport or return the motherboard.
- For AMD PGA (AM4) Sockets: Locate the small metal lever adjacent to the socket. Gently push it down and pull it sideways to release it. This will unlock the socket, allowing the CPU pins to be inserted without force. There is typically no protective cover that needs to be removed from the socket itself, though the motherboard may have a generic plastic cap for shipping.
The key takeaway here is gentle yet firm handling. These components are precision-engineered, and forcing anything can result in irreparable damage. Taking your time during this preparatory phase safeguards your hardware and, by extension, your investment in your new system.
The Core Installation Process: Seating the Brain
With all preparations meticulously handled, it’s time for the most delicate and critical step: physically installing the processor into its socket. This stage requires precision, a steady hand, and unwavering attention to detail to ensure perfect alignment and secure seating.
Seating the Processor: Precision and Care
This is the moment of truth. Whether you’re dealing with an Intel LGA chip or an AMD PGA/LGA chip, the principle remains the same: align, lower, and secure, all without applying any force.
- Aligning the CPU:
- For AMD PGA (AM4) CPUs: Look for a small golden triangle or arrow on one corner of the CPU’s top surface. Match this triangle with the corresponding triangle or arrow etched onto one corner of the motherboard socket. This alignment is absolutely critical.
- For Intel LGA CPUs (and AMD AM5/LGA): Look for small arrows or notches on the edges of the CPU that correspond to similar markings or cutouts on the motherboard socket’s frame. These alignment keys ensure the CPU is oriented correctly. The CPU can only fit one way.
- Gently Lowering the CPU:
- For AMD PGA (AM4) CPUs: Once aligned, slowly and carefully lower the CPU straight down into the socket. Do NOT press it down. The CPU’s pins should slide effortlessly into the socket’s holes under its own weight. If you encounter any resistance, do not force it. Lift the CPU, recheck your alignment, and inspect for any bent pins on the CPU or debris in the socket. Forcing it will bend pins and potentially damage the socket.
- For Intel LGA CPUs (and AMD AM5/LGA): With the retention arm and frame lifted, carefully place the CPU onto the socket. The CPU should drop squarely onto the pins (which are on the motherboard) with minimal effort. Ensure the alignment notches are engaged. Again, do not apply any force. If it doesn’t seat perfectly flat, lift it and re-align.
- Closing the Retention Mechanism:
- For AMD PGA (AM4) CPUs: Once the CPU is seated flush in the socket, gently push the retention lever back into its original locked position. This secures the CPU in place.
- For Intel LGA CPUs (and AMD AM5/LGA): Once the CPU is seated, lower the metal retention frame over the CPU. Then, push the lever back down and inward until it latches securely. This action will apply pressure to the CPU, ensuring good contact with the socket pins. It might require a bit of force, and you might hear a small crunching sound as the protective plastic cover (if it’s still there) is released. This is normal for Intel sockets, as the plastic cover is designed to pop off when the lever is engaged.
The mantra here is: “If it doesn’t go in easily, something is wrong.” Patience and a light touch are your greatest allies.
Applying Thermal Paste and Mounting the CPU Cooler
Once the CPU is securely installed, the next crucial step is ensuring efficient heat dissipation. This is where thermal paste and the CPU cooler come into play. Without them, your CPU would quickly overheat and shut down (or worse, get damaged).
- Why Thermal Paste is Crucial: Thermal paste fills the microscopic air gaps and imperfections between the CPU’s Integrated Heat Spreader (IHS – the metal lid on top of the CPU) and the flat surface of the CPU cooler’s base. Air is a poor conductor of heat, so these gaps act as insulators. Thermal paste, with its high thermal conductivity, facilitates efficient heat transfer from the CPU to the cooler, allowing the cooler to do its job effectively.
- Cleaning the Old Paste (if applicable): If you are reusing a CPU cooler or upgrading a CPU, you must thoroughly clean off any old, dried thermal paste from both the CPU’s IHS and the cooler’s base. Use isopropyl alcohol (90% or higher purity) and a lint-free cloth or coffee filter. Gently wipe until both surfaces are shiny and free of residue.
- Applying Thermal Paste: A common point of debate among builders, there are several effective methods. The goal is to apply a thin, even layer that covers the entire IHS without excessive squeezing.
- The “Pea” or “Rice Grain” Method: The most popular. Squeeze a small, pea-sized dot of thermal paste directly onto the center of the CPU’s IHS. The pressure from the CPU cooler will spread it evenly.
- The “Line” Method: For rectangular CPUs, some prefer to draw a thin line of paste down the center of the IHS.
- The “Five-Dot” Method: A small dot in the center and one in each corner.
- The “Spreading” Method: Some pre-spread a thin layer with a spatula or even a credit card. While effective, it introduces a higher chance of air bubbles.
- Avoid: Applying too much paste can create a mess, potentially shorting components if it’s electrically conductive, while too little will hinder cooling performance. Generally, a pea-sized amount for a standard CPU is sufficient.
- Mounting the CPU Cooler: This process varies significantly between cooler models (stock, air, AIO liquid coolers).
- Consult the Cooler’s Manual: This is paramount. It will detail the specific bracket installation, screw patterns, and fan orientation.
- Backplate Installation: Many coolers require a backplate to be installed on the rear of the motherboard. This provides structural support and even pressure distribution.
- Mounting the Heatsink: Carefully align the cooler over the CPU, ensuring even contact. Gently lower it.
- Securing the Cooler: Fasten the cooler using its designated screws or clips. For screws, tighten them in an alternating “X” pattern (e.g., top-left, bottom-right, top-right, bottom-left) to ensure even pressure. Do not overtighten, but ensure it’s firm and doesn’t wiggle.
- Connecting the Fan: Don’t forget to connect the CPU fan power cable to the designated “CPU_FAN” header on the motherboard. This is often an easily overlooked step that can lead to overheating.
Proper thermal management is not just about keeping your system cool; it’s about maximizing the efficiency and longevity of your processor. An undercooled CPU will throttle its performance to prevent damage, directly impacting your user experience, whether you’re gaming, rendering videos, or running complex AI simulations. Investing a little extra time here protects your expensive hardware and ensures you get the full value out of your purchase.
Post-Installation Considerations and First Boot: The Moment of Truth
With the CPU securely seated and its cooler firmly in place, you’re just a few steps away from bringing your system to life. This phase involves connecting essential power and peripherals, followed by the exhilarating (and sometimes nerve-wracking) first boot.
Connecting Power and Peripherals
Before powering up, ensure all necessary connections are made. These connections provide the vital electricity and communication pathways for your components.
- Motherboard Power (24-pin ATX): The main power connector, typically a large 20+4 pin cable, plugs into the largest header on your motherboard. Ensure it clicks firmly into place.
- CPU Power (EPS 8-pin/4+4-pin): Also known as the EPS connector, this dedicated cable powers the CPU. It’s usually located near the top-left of the CPU socket on the motherboard. Modern motherboards and CPUs often require an 8-pin connector, sometimes split into two 4-pin sections for compatibility with older power supplies. Some high-end motherboards may even feature two 8-pin CPU power connectors for extreme overclocking.
- CPU Fan Header: As mentioned, ensure the CPU cooler fan (or pump, for AIO liquid coolers) is connected to the “CPU_FAN” header on the motherboard. This header is specifically monitored by the BIOS, and failing to connect it will often trigger a boot error.
- Graphics Card (GPU) and Power: If your CPU does not have integrated graphics, or if you require discrete graphics performance, install your GPU into the primary PCIe x16 slot. Connect any necessary PCIe power cables from your power supply to the GPU (e.g., 6-pin, 8-pin, 12VHPWR).
- RAM (Memory): Install your RAM sticks into the appropriate DIMM slots as per your motherboard manual (often slots 2 and 4 for dual-channel configurations). Ensure they click firmly into place.
- Storage (SSD/HDD): Connect your SATA data cables from your SSDs or HDDs to the motherboard, and connect SATA power cables from your power supply to these drives. If using an M.2 NVMe SSD, install it into the M.2 slot on the motherboard and secure it with the provided screw or toolless mechanism.
- Front Panel Connectors: Connect the small, fiddly wires from your PC case’s front panel (power button, reset button, USB ports, audio jacks, LED indicators) to their respective headers on the motherboard. Refer to your motherboard manual for the exact pin layout; this is crucial for the system to power on correctly.
Double-check every connection. A loose cable is a common culprit for a non-booting system. This meticulous attention to detail is part of the digital security and productivity aspect of tech – preventing issues before they arise.
The Moment of Truth: First Boot and Troubleshooting
With all components connected, it’s time to power on for the first time. This is often a tense but exciting moment.
- Initial Power On: Ensure your monitor is connected and powered, and your keyboard and mouse are plugged in. Flip the power supply switch to “on.” Press the case’s power button.
- What to Look For:
- Fans Spinning: Do the CPU cooler fan, case fans, and GPU fans (if present) spin up?
- LED Indicators: Many modern motherboards have diagnostic LEDs (sometimes labeled “CPU,” “RAM,” “VGA,” “BOOT”) that illuminate to indicate which component is failing during POST (Power-On Self-Test). Observe these.
- POST Beep Codes: If your motherboard has a small speaker connected, listen for a single short “beep,” which typically indicates a successful POST. Multiple beeps or specific patterns usually signify an error (refer to your motherboard manual for codes).
- Display Output: Does anything appear on your monitor? Ideally, you’ll see the motherboard’s splash screen, followed by access to the BIOS/UEFI settings.
- Troubleshooting Common Issues:
- No Power/No Fans: Check the 24-pin and CPU 8-pin power connections firmly. Ensure the power supply switch is on and the wall outlet works. Double-check front panel power button connection.
- Fans Spin, No Display: This is a common one.
- RAM: Reseat RAM sticks. Try booting with just one stick in the recommended slot.
- GPU: Ensure the graphics card is fully seated in its PCIe slot and has all necessary power cables connected. Try a different PCIe slot if available, or try integrated graphics (if your CPU has them) by removing the GPU.
- CPU: While less common if installed correctly, issues here could mean a bent pin (if PGA) or improper seating. If all else fails, you might need to re-seat the CPU, but this should be a last resort.
- Monitor Input: Ensure your monitor is set to the correct input source (HDMI, DisplayPort).
- Boot Loops/Random Restarts: Often related to unstable RAM, an unstable CPU overclock, or power delivery issues.
- CPU LED Stays Lit: This directly points to a CPU issue. Re-check seating, cooler mounting pressure (too much or too little), or potentially a compatibility issue (BIOS update needed?).
If you can access the BIOS/UEFI, congratulations! This is a major milestone. You can then begin installing your operating system. If your CPU LED is still lit and nothing else works, consult the motherboard manual for specific troubleshooting steps or consider seeking assistance from tech forums. This is where the wider community of tech enthusiasts (and perhaps some AI tools for searching solutions) can be invaluable.
Beyond Installation: Optimizing Your Investment
Successfully installing your processor is a monumental achievement, but it’s just the beginning of maximizing your computing potential. A powerful CPU, correctly installed, lays the groundwork for a robust and high-performing system. The next phase involves fine-tuning, maintenance, and understanding how this core component impacts your broader digital life and even your financial endeavors.
Performance Tuning and Longevity: Getting the Most Out of Your CPU
Optimizing your CPU’s performance isn’t just for extreme enthusiasts; it’s about ensuring you receive the full value from your investment.
- BIOS/UEFI Settings: Once in your motherboard’s BIOS/UEFI, explore CPU-related settings.
- XMP/DOCP: Enable this profile for your RAM to run at its advertised speeds. This significantly impacts CPU performance, especially in gaming and productivity tasks.
- Fan Curves: Adjust fan speeds for your CPU cooler based on temperature to balance acoustics and cooling performance.
- Virtualization Technology (VT-x/AMD-V): If you plan to run virtual machines or use Android emulators, ensure this is enabled.
- Overclocking (with caution): For advanced users, overclocking (running the CPU at speeds higher than factory specifications) can yield significant performance gains.
- Risks: It requires adequate cooling, a robust power supply, and carries the risk of system instability or component degradation if done improperly.
- Rewards: For tasks like competitive gaming, video rendering, or scientific computations, the extra clock speed can be a game-changer.
- Research: Always research your specific CPU and motherboard’s overclocking capabilities and follow reputable guides. Monitor temperatures closely using software like HWMonitor or AIDA64.
- Monitoring Tools: Install software like HWMonitor, Core Temp, or HWiNFO to keep an eye on your CPU temperature, clock speeds, and utilization. This helps you identify potential overheating issues or performance bottlenecks.
- Regular Maintenance:
- Dusting: Dust buildup is the enemy of cooling. Regularly clean your CPU cooler and case fans with compressed air to maintain optimal airflow.
- Re-pasting: Over time, thermal paste can dry out and become less effective. Consider re-applying fresh thermal paste every 2-3 years, or if you notice your CPU temperatures creeping up.
By actively managing and maintaining your CPU, you’re not just extending its lifespan; you’re ensuring consistent peak performance, maximizing the return on your financial investment in high-quality hardware. This approach is akin to brand maintenance – keeping your personal or corporate computing infrastructure in top shape reflects positively on your digital capabilities.
The Bigger Picture: Your Digital Ecosystem and Financial Impact
A powerful, reliably installed processor is more than just a piece of hardware; it’s the heart of your digital ecosystem, directly influencing your productivity, creative output, and even your financial opportunities.
- Enhanced Productivity: A fast CPU significantly reduces loading times for applications, speeds up complex calculations in spreadsheets, and makes multitasking seamless. For professionals, this translates into more efficient workflows, quicker project completion, and the ability to handle more clients or tasks, directly impacting business finance and online income potential. Think of faster video exports for content creators, quicker code compilation for developers, or smoother data analysis for consultants.
- Leveraging AI Tools and Machine Learning: Many modern AI applications, from complex data analysis to local large language models (LLMs) and image generation, are CPU-intensive. A robust processor can dramatically reduce processing times, making these advanced tools more accessible and practical for everyday use or specialized projects. This empowers individuals and businesses to explore new AI trends and incorporate cutting-edge technology into their brand strategy.
- Gaming and Entertainment: For gamers, the CPU, alongside the GPU, dictates frame rates and overall gaming experience. A powerful CPU ensures smooth gameplay, especially in CPU-intensive titles or when streaming. This can even open avenues for online income through streaming platforms like Twitch or YouTube.
- Content Creation and Digital Design: Whether you’re editing 4K video, rendering 3D models, or compiling high-resolution images, your CPU is constantly engaged. Faster rendering and processing times directly translate into more output in less time, enhancing your creative brand and potentially increasing your earnings from client work or personal projects. This directly impacts financial gain through side hustles or core business activities.
- Digital Security and Privacy: While not directly a performance aspect, a fast CPU can contribute to digital security by enabling quicker encryption/decryption processes, more efficient antivirus scans, and smoother operation of secure virtual environments. This contributes to a more secure and productive digital workspace.
In essence, installing and maintaining your processor correctly is an investment that reverberates through all aspects of your digital life. It’s not just about turning on a computer; it’s about empowering your technological capabilities, enhancing your personal and corporate brand through efficient and powerful tools, and ultimately opening doors to new opportunities for income generation and financial growth in an increasingly digital world.

Conclusion
The act of installing a processor, while seemingly a singular technical task, is a foundational rite of passage for anyone serious about understanding and harnessing the power of modern computing. We’ve navigated the intricate path from ensuring vital compatibility and preparing your workspace to the delicate process of seating the CPU, applying thermal paste, and securing the cooler. Each step, executed with precision and care, builds confidence and ensures the optimal function and longevity of this most critical component.
Beyond the physical installation, we’ve explored the broader implications of a well-chosen and correctly installed processor. It’s the engine that drives technological trends, empowers the latest software and AI tools, and boosts your overall productivity. It’s an investment that directly correlates with your ability to generate online income, foster successful side hustles, and build a strong personal or corporate brand in a competitive digital landscape.
So, whether you’re a first-time builder or a seasoned veteran, remember that attention to detail, adherence to best practices, and a proactive approach to maintenance will yield not just a functional computer, but a powerful, reliable tool. Your processor is more than just silicon and copper; it’s the gateway to your digital future, a testament to your tech prowess, and a crucial asset in your journey towards digital mastery and financial success. Embrace the challenge, enjoy the process, and unlock the full potential that lies within your machine.
aViewFromTheCave is a participant in the Amazon Services LLC Associates Program, an affiliate advertising program designed to provide a means for sites to earn advertising fees by advertising and linking to Amazon.com. Amazon, the Amazon logo, AmazonSupply, and the AmazonSupply logo are trademarks of Amazon.com, Inc. or its affiliates. As an Amazon Associate we earn affiliate commissions from qualifying purchases.