In an increasingly digital world, a reliable operating system is the bedrock of productivity, creativity, and connection. While Windows 11 has certainly captured headlines, Windows 10 remains an incredibly popular, stable, and powerful choice for millions of users worldwide. Whether you’re setting up a new PC, upgrading from an older version of Windows, or simply performing a clean reinstallation to revitalize a sluggish system, mastering the Windows 10 installation process is a fundamental skill for any tech-savvy individual.
Far from being a daunting technical challenge, installing Windows 10 is a straightforward procedure when approached systematically. This comprehensive guide will walk you through every step, from initial preparations to post-installation essentials, ensuring you achieve a smooth and successful setup. We’ll cover critical considerations like system requirements, data backup, creating installation media, navigating the setup wizard, and optimizing your new system. By the end of this article, you’ll not only have Windows 10 up and running flawlessly but also gain a deeper understanding of your computer’s core functionality, empowering you to maintain and manage your digital workspace with confidence.

Preparing for a Smooth Windows 10 Installation
The key to any successful technical endeavor lies in thorough preparation. Before you even think about booting from a USB drive, there are several crucial steps to undertake that will save you time, prevent data loss, and ensure a seamless installation experience. Skipping these preliminary actions can lead to frustrating delays or, worse, irreversible data loss.
Understanding System Requirements
Before embarking on the installation journey, confirm that your hardware meets the minimum specifications for Windows 10. While Windows 10 is remarkably adaptable, ensuring your system can handle it will prevent performance bottlenecks and compatibility issues.
- Processor: 1 GHz or faster compatible processor or System on a Chip (SoC).
- RAM: 1 GB for 32-bit or 2 GB for 64-bit. We strongly recommend at least 4GB for a usable experience, with 8GB or more being ideal.
- Hard Disk Space: 16 GB for 32-bit OS or 32 GB for 64-bit OS. Again, more is always better, with at least 128 GB SSD recommended for primary drives.
- Graphics Card: DirectX 9 or later with WDDM 1.0 driver.
- Display: 800×600 resolution.
- Internet Connection: Required for updates and some features.
Verifying these specifications ensures that your fresh installation will run efficiently and support the applications you intend to use for productivity, creative work, or personal finance management.
Essential Pre-Installation Backups
This cannot be stressed enough: back up all your important data! A clean installation of Windows 10 will erase everything on the drive you choose to install it on. Personal documents, photos, videos, financial records, software licenses, and any other irreplaceable files must be secured before proceeding.
Consider these backup strategies:
- External Hard Drive: A reliable and straightforward method for local backups.
- Cloud Storage: Services like OneDrive, Google Drive, or Dropbox offer convenient offsite storage and synchronization.
- Network Attached Storage (NAS): Ideal for home users with large data volumes or small businesses requiring centralized storage.
- USB Flash Drive: Suitable for smaller, critical files.
Ensure your backups are tested and accessible. The time invested in a robust backup strategy is an invaluable safeguard against potential data loss, preserving your digital assets and peace of mind.
Gathering Your Installation Tools
With your data secured, it’s time to gather the necessary physical and digital tools for the installation.
- Empty USB Flash Drive (8GB or larger): This will become your bootable Windows 10 installation media. Ensure it’s empty as its contents will be erased.
- Stable Internet Connection: Crucial for downloading the Windows Media Creation Tool and for initial updates post-installation.
- Windows 10 Product Key (Optional but Recommended): While you can install Windows 10 without a key, you’ll need one to activate it and unlock all features. The key is typically found on a sticker on your PC, in an email from an online retailer, or linked to your Microsoft account for digital licenses. If you’re upgrading from a genuine Windows 7/8/8.1, your system may automatically activate.
- Another Working Computer: You’ll need access to another computer to download the Media Creation Tool and create the bootable USB.
Having these items readily available will streamline the entire process, preventing mid-installation delays and frustrations.
Creating Your Bootable Installation Media
Microsoft provides an official and free tool for creating bootable Windows 10 installation media, known as the Media Creation Tool.
- Download the Media Creation Tool: Visit the official Microsoft Windows 10 download page on a working computer and click “Download tool now.”
- Run the Tool: Once downloaded, run the
MediaCreationTool.exe. Accept the license terms. - Select Options: Choose “Create installation media (USB flash drive, DVD, or ISO file) for another PC” and click Next.
- Language, Edition, and Architecture: The tool will usually recommend options based on your current PC. Uncheck “Use recommended options for this PC” if you need to create media for a different system (e.g., a 32-bit version for an older machine). Select “Windows 10” for the edition and choose 64-bit, 32-bit, or both. For modern PCs, 64-bit is almost always the correct choice.
- Choose Media Type: Select “USB flash drive” and click Next.
- Select USB Drive: From the list, choose your empty USB drive. Double-check that you’ve selected the correct drive to avoid erasing the wrong one!
- Download and Create: The tool will then download the Windows 10 files and write them to your USB drive. This process can take a significant amount of time depending on your internet speed.
Once completed, your bootable Windows 10 installation media is ready. Safely eject the USB drive from the working computer.
A Step-by-Step Guide to Installing Windows 10
With your bootable media ready and backups secured, you are now prepared to install Windows 10. This section will guide you through the core installation wizard, from initial boot-up to the crucial steps of drive partitioning and user account setup.
Initiating the Setup Process
- Connect the USB Drive: Insert the bootable Windows 10 USB flash drive into the computer where you want to install the operating system.
- Boot from USB:
- Restart your computer. As it starts, you’ll need to repeatedly press a specific key to enter the BIOS/UEFI setup or the Boot Menu. Common keys include
Del,F2,F10,F12, orEsc. Consult your motherboard or PC manufacturer’s manual if unsure. - In the BIOS/UEFI settings, navigate to the “Boot” tab or section. Change the boot order to prioritize your USB drive (often listed as “USB-HDD,” “Removable Device,” or by the drive’s brand name) as the first boot device. Save your changes and exit.
- Alternatively, directly access the “Boot Menu” (often
F12) and select your USB drive from the list. - Your computer should now boot from the USB drive. You might see a “Press any key to boot from USB…” message. Do so.
- Restart your computer. As it starts, you’ll need to repeatedly press a specific key to enter the BIOS/UEFI setup or the Boot Menu. Common keys include
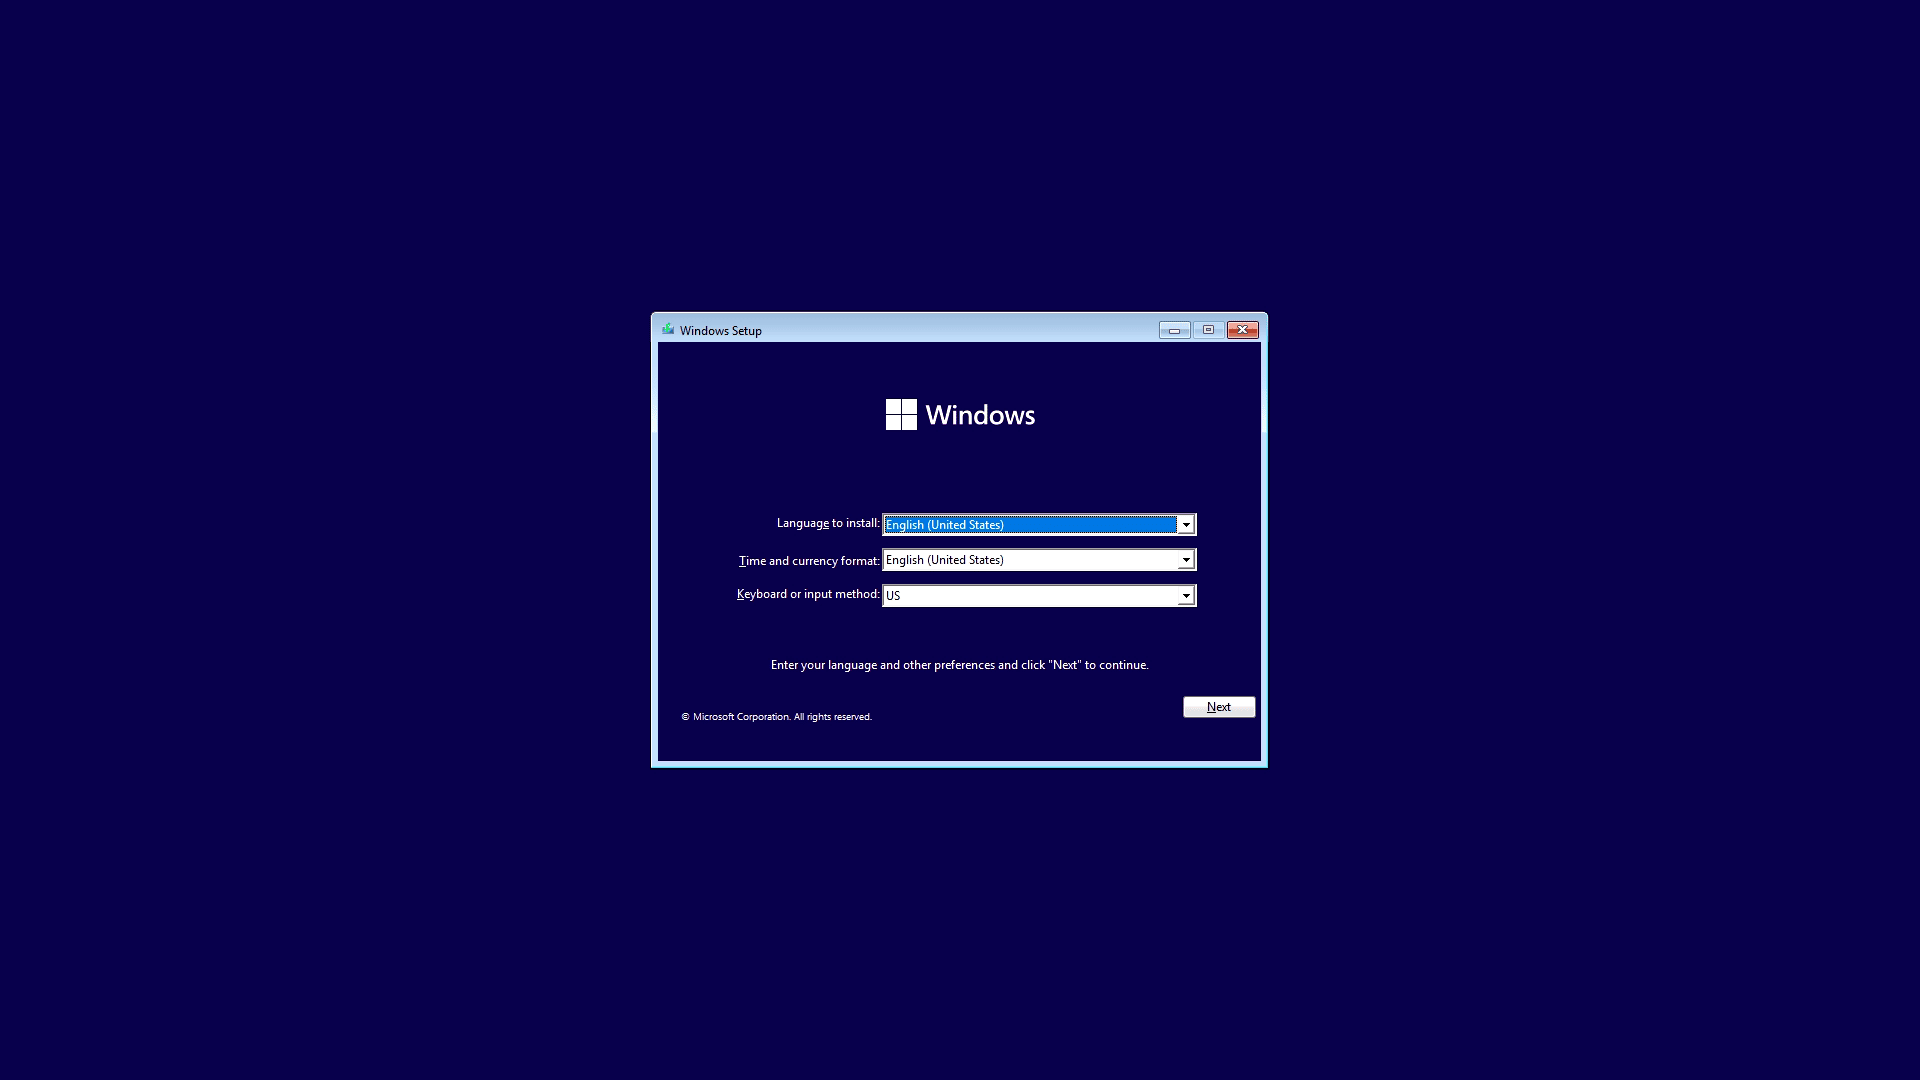
- Windows Setup Screen: Once booted, the Windows Setup screen will appear.
- Language, Time, and Keyboard: Select your preferred language, time and currency format, and keyboard or input method. Click “Next.”
- Install Now: Click the “Install now” button to proceed.
Navigating Drive Partitioning and Selection
This is one of the most critical stages, where you decide where Windows 10 will be installed.
- Product Key: If prompted, enter your Windows 10 product key. If you don’t have one or plan to activate later, click “I don’t have a product key.” Windows will install, and you can activate it once you’re online.
- License Terms: Read and accept the Microsoft Software License Terms. Click “Next.”
- Type of Installation:
- Upgrade: Install Windows and keep files, settings, and applications: Choose this if you’re upgrading an existing Windows installation and want to retain your data (though a backup is still recommended). This option is usually only available when running the setup from within your current Windows OS.
- Custom: Install Windows only (advanced): This is the option you’ll almost always choose for a clean installation, which is the focus of this guide. It allows you to select and manage the installation drive.
- Where do you want to install Windows?: This screen lists all detected drives and partitions.
- Clean Installation: To perform a truly clean install, you’ll want to delete existing partitions on the drive where you plan to install Windows 10.
- Select each partition on your target drive (e.g., “Drive 0 Partition 1,” “Drive 0 Partition 2”) and click “Delete.” Be extremely careful here; deleting the wrong partition will erase data permanently! If you have multiple drives, ensure you select partitions only on the correct physical disk.
- Once all partitions on the target drive are deleted, you’ll see a single entry labeled “Drive X Unallocated Space.”
- Create New Partition (Optional): You can select the “Unallocated Space” and click “New” to create a specific size partition. Windows will usually create additional small system partitions automatically. For most users, simply selecting the “Unallocated Space” and clicking “Next” is sufficient; Windows will automatically create the necessary partitions.
- Select Target Drive: Choose the “Unallocated Space” or the primary partition you’ve prepared for Windows 10 and click “Next.”
- Clean Installation: To perform a truly clean install, you’ll want to delete existing partitions on the drive where you plan to install Windows 10.
- Installation Progress: Windows will now begin copying files and installing features. Your computer will restart several times during this process. Do not remove the USB drive until after the first major restart, or if prompted to do so.
Initial Configuration and Personalization
After the main installation files are copied and the system restarts, you’ll be greeted by the Out-Of-Box Experience (OOBE) setup.
- Region Selection: Choose your country or region.
- Keyboard Layout: Select your preferred keyboard layout. You can add a second layout if needed.
- Network Connection: Connect to a Wi-Fi network or plug in an Ethernet cable. An internet connection is highly recommended for updates and account setup.
User Account and Privacy Settings
- Sign in with Microsoft Account: Windows 10 encourages you to sign in with a Microsoft account (Outlook, Hotmail, Live). This provides benefits like OneDrive integration, syncing settings, and access to the Microsoft Store.
- If you sign in, follow the prompts to enter your email and password. You may be asked to create a PIN for faster login.
- To create a Local Account: If you prefer not to use a Microsoft account (or don’t have internet access), you might see an option like “Offline account” or “Domain join instead.” On recent versions, you may need to disconnect from the internet during this step to force the “Offline account” option.
- Privacy Settings: Microsoft will present a series of privacy settings. Review each one carefully and toggle off anything you’re uncomfortable with (e.g., location tracking, diagnostic data, tailored experiences). Click “Accept” after making your choices.
- Cortana Setup: You’ll be asked if you want to use Cortana, Microsoft’s virtual assistant. You can choose to accept or decline.
- Finalizing Setup: Windows will now take a few more minutes to prepare your desktop. You’ll see messages like “Getting things ready for you,” “This might take a few minutes,” and “Don’t turn off your PC.”
Finally, you will arrive at your brand-new Windows 10 desktop!
Post-Installation Essentials for Optimal Performance
Installing Windows 10 is just the beginning. To ensure your system runs smoothly, securely, and efficiently, there are several crucial post-installation steps you should take. These actions will not only enhance performance but also protect your investment in your new operating system.
Updating Drivers and Windows OS
The first and most critical step after installation is to ensure all your hardware has the latest drivers and that Windows itself is fully updated.
- Windows Update:
- Go to
Start > Settings > Update & Security > Windows Update. - Click “Check for updates.” Windows will download and install the latest security patches, feature updates, and often, many device drivers. This process might take some time and require multiple restarts.
- Go to
- Graphics Card Drivers: While Windows Update provides basic display drivers, for optimal performance, especially in gaming or graphically intensive tasks, download the latest drivers directly from your graphics card manufacturer’s website (NVIDIA, AMD, Intel).
- Motherboard Chipset Drivers: Visit your motherboard manufacturer’s website (e.g., ASUS, MSI, Gigabyte, ASRock) and download the latest chipset drivers for your specific model. This ensures optimal communication between all your system components.
- Other Device Drivers: Check your Device Manager (
Right-click Start > Device Manager) for any devices with yellow exclamation marks. These indicate missing or problematic drivers. You may need to download these from your PC or component manufacturer’s website.
Keeping drivers updated prevents crashes, improves stability, and unlocks the full potential of your hardware, which can significantly impact productivity and the longevity of your machine.
Securing Your New System
A fresh operating system is vulnerable until properly secured. Implementing robust security measures is paramount to protecting your data and privacy.
- Windows Security (Built-in Antivirus): Windows 10 comes with Windows Security (formerly Windows Defender), which provides excellent real-time protection against malware, viruses, and other threats. Ensure it’s active and up to date. You can find it by searching “Windows Security” in the Start Menu.
- Firewall: The Windows Firewall is enabled by default. Verify it’s active to control incoming and outgoing network traffic, protecting your system from unauthorized access.
- Strong Passwords/PIN: Ensure your user account is protected by a strong, unique password or a secure PIN. Consider using Microsoft’s built-in passwordless options like Windows Hello (facial recognition, fingerprint, or PIN) for convenience and enhanced security.
- Browser Security: Install your preferred web browser and configure its security and privacy settings. Consider using browser extensions for ad-blocking and tracking prevention (e.g., uBlock Origin, Privacy Badger).
- Backup Strategy (Revisited): With your system now stable, re-establish your regular backup routine for your personal files. Consider using Windows’ built-in File History or a third-party backup solution. Regular backups are your ultimate defense against data loss due to hardware failure, malware, or accidental deletion, critical for both personal and financial data.
Installing Core Applications
With your system secure and updated, it’s time to install the software you need for daily use.
- Web Browser: Install your preferred browser (Chrome, Firefox, Edge, Brave, etc.).
- Productivity Suite: Install an office suite (Microsoft 365, LibreOffice, Google Workspace via browser). This is essential for documents, spreadsheets, and presentations, often directly impacting personal and business finance management.
- Communication Tools: Install communication apps like Zoom, Microsoft Teams, Slack, or Discord.
- Media Players: Install any specific media players or codecs you prefer (VLC Media Player, Spotify, etc.).
- Cloud Storage Sync Clients: If you use cloud storage, install their desktop clients (OneDrive, Google Drive, Dropbox) to sync your files automatically.
- Utility Software: Consider utilities like a password manager, file archiver (7-Zip), or a PDF reader.
Install software only from trusted sources to avoid inadvertently introducing malware. Regularly update your applications to benefit from new features, performance improvements, and security patches.
Common Troubleshooting Tips for Windows 10 Installation
While the Windows 10 installation process is generally robust, occasional hiccups can occur. Knowing how to address common issues can save you considerable frustration and downtime. This section outlines solutions to frequently encountered problems, helping you diagnose and resolve them efficiently.
Addressing Boot and Driver Issues
Some of the most common problems revolve around the system failing to boot correctly or devices not functioning after installation.
- “No Boot Device Found” or “Operating System Not Found”:
- Check Boot Order: Re-enter your BIOS/UEFI settings and ensure your primary hard drive (the one with Windows 10 installed) is set as the first boot option.
- Secure Boot/CSM: Sometimes, toggling “Secure Boot” or “Legacy Support (CSM)” in BIOS settings can resolve boot issues, especially on older hardware or when switching between different boot modes.
- Installation Media Removed: Ensure you’ve removed the USB installation media after the initial reboots, allowing the system to boot from the hard drive.
- System Instability or Blue Screens (BSODs) Post-Installation:
- Driver Issues: This is the most common cause. Revisit the “Updating Drivers” section. Ensure all critical drivers (chipset, graphics, network) are installed directly from the manufacturer’s website. Use Device Manager to check for any problematic devices.
- Windows Updates: Ensure Windows is fully updated. Go to
Settings > Update & Security > Windows Updateand check for all available updates. - Hardware Problems: In rare cases, a fresh install can expose underlying hardware issues. If crashes persist, consider testing RAM (using Windows Memory Diagnostic) or checking disk health.
- Network Connectivity Problems:
- Ethernet/Wi-Fi Drivers: Ensure your network adapter drivers are installed. If you can’t connect, you might need to download them on another computer and transfer them via USB.
- Router/Modem: Restart your router and modem.
- Windows Network Troubleshooter: Use the built-in troubleshooter (
Settings > Network & Internet > Status > Network troubleshooter) for automated diagnosis.
Resolving Activation Challenges
After installation, your copy of Windows 10 needs to be activated to unlock all features and receive ongoing support.
- “Windows isn’t activated” Error:
- Internet Connection: Ensure your computer is connected to the internet. Activation often requires contacting Microsoft’s servers.
- Enter Product Key: Go to
Settings > Update & Security > Activation. If you have a product key, click “Change product key” and enter it. - Digital License: If your Windows 10 license is linked to your Microsoft account, ensure you’re signed in with that account. You might see an option to “Troubleshoot” in the Activation settings, which can help re-activate using your digital license.
- Check Key Correctness: Double-check that you’ve entered the product key correctly. Typographical errors are common.
- Previous Version Upgrade: If you upgraded from a genuine Windows 7/8/8.1, the system should activate automatically. If it doesn’t, troubleshooting with your Microsoft account is usually the fix.
- “This product key didn’t work” or “Error Code” during activation:
- Retail vs. OEM Key: Ensure you’re using the correct type of key for your installation (e.g., an OEM key is typically tied to specific hardware and won’t work on a different PC).
- Contact Microsoft Support: If all else fails, contact Microsoft Support directly. They can often help diagnose and resolve activation issues, especially with complex licensing scenarios. Have your product key and any purchase proof ready.
Persistence and systematic troubleshooting are key when encountering installation or activation problems. Often, a simple driver update or a careful re-check of settings is all that’s needed to get your system running perfectly.
Why Windows 10 Remains a Smart Choice
Despite the emergence of its successor, Windows 10 continues to be a highly relevant and practical operating system. Its enduring appeal lies in a combination of factors that make it a robust platform for both personal and professional use, offering significant value to users.
Longevity and Support
Microsoft has committed to supporting Windows 10 until October 14, 2025. This means users can expect continued security updates, bug fixes, and compatibility improvements for several more years. For individuals and businesses alike, this extended support period offers immense stability and peace of mind. It allows for planned transitions to newer operating systems at a convenient pace, without the pressure of immediate upgrades or concerns about unsupported software. For those prioritizing long-term reliability and budget management, sticking with Windows 10 is a sound financial and operational decision.
Performance and Productivity Benefits
Windows 10 is a mature and highly optimized operating system. It boasts excellent compatibility with a vast range of hardware and software, ensuring that your existing applications and peripherals continue to function seamlessly. Its performance is consistently solid, offering fast boot times, responsive multitasking, and efficient resource management. Features like Virtual Desktops, Action Center, and a refined Start Menu enhance productivity, allowing users to organize their workspaces and manage notifications effectively. For anyone focused on maximizing their output – whether it’s managing personal finances, running a small business, or engaging in creative endeavors – Windows 10 provides a stable and feature-rich environment designed to boost efficiency. Its established ecosystem of apps and tools also contributes to a frictionless workflow, an invaluable asset in today’s fast-paced digital landscape.

Conclusion
Successfully installing Windows 10 is a rewarding accomplishment, transforming your computer into a clean, efficient, and secure workspace. By meticulously following the steps outlined in this guide – from crucial preparatory backups and creating bootable media to navigating the installation wizard and performing essential post-installation tasks – you’ve laid a strong foundation for a reliable computing experience.
Windows 10, with its robust performance, extensive software compatibility, and continued support, remains an excellent choice for a wide spectrum of users. It empowers you with the tools necessary for productivity, entertainment, and digital security, contributing significantly to both your personal and professional efficiency. Embrace your newly installed system, optimize it with the latest drivers and applications, and enjoy the seamless experience it offers. Your journey into a world of refreshed digital possibilities starts now.
aViewFromTheCave is a participant in the Amazon Services LLC Associates Program, an affiliate advertising program designed to provide a means for sites to earn advertising fees by advertising and linking to Amazon.com. Amazon, the Amazon logo, AmazonSupply, and the AmazonSupply logo are trademarks of Amazon.com, Inc. or its affiliates. As an Amazon Associate we earn affiliate commissions from qualifying purchases.