A fresh installation of Windows 10 is akin to giving your computer a brand-new start. It’s a process that wipes the slate clean, removing accumulated digital clutter, potential software conflicts, and lingering performance issues. Whether your system feels sluggish, you’re experiencing persistent errors, or you’re simply looking to optimize your machine for peak performance, a clean install is often the most effective solution. This guide will walk you through every step of the process, ensuring you can achieve a pristine computing experience with confidence.
This endeavor falls squarely within the Tech domain of our website, specifically under Software and Tutorials. While a fresh install might not directly touch upon Brand, Money, or Investing, the underlying principles of efficiency, optimization, and problem-solving are universally applicable. A well-functioning computer directly impacts productivity, which in turn can influence your financial pursuits and even the perception of your personal or corporate brand.
Why Opt for a Fresh Install of Windows 10?
Before diving into the “how,” let’s understand the “why.” Over time, our computers become repositories of installed programs, temporary files, registry entries, and leftover data from uninstalled software. This constant accumulation, while normal, can lead to several undesirable outcomes:
- Performance Degradation: As your system fills up and various processes compete for resources, your computer can start to feel sluggish. Boot times increase, applications take longer to open, and multitasking becomes a chore.
- Software Conflicts: Incompatible drivers, leftover registry keys from uninstalled programs, or even certain background processes can clash, leading to unexpected errors, crashes, and instability.
- Malware and Virus Residue: While antivirus software is crucial, some stubborn malware can leave traces that are difficult to eradicate completely. A fresh install effectively purges your system of any such lingering threats.
- Unnecessary Bloatware: Many pre-installed applications (bloatware) or programs you’ve installed and no longer use can consume disk space and system resources without providing any benefit.
- Troubleshooting Difficult Issues: When faced with persistent problems that standard troubleshooting methods can’t resolve, a clean installation is often the most reliable way to ensure a problem-free operating system.
In essence, a fresh install is like a digital decluttering. It ensures that Windows 10 starts from a clean slate, free from the baggage of its past, leading to a faster, more stable, and more secure computing environment.
Preparing for the Windows 10 Fresh Install
This is arguably the most critical phase of the entire process. Skipping these preparatory steps can lead to data loss, frustration, and the need to restart the entire operation.
1. Back Up Your Important Data
This cannot be stressed enough: back up everything that matters to you. A fresh installation will format your primary drive (usually the C: drive), erasing all existing data.
- Personal Files: Documents, photos, videos, music, downloads, and any other files you’ve created or saved.
- Application Settings and Data: If you have specific software that stores critical data (e.g., browser bookmarks, email client data, game save files, custom settings for specialized software), ensure these are backed up. Many applications have built-in export/backup features.
- Licenses and Product Keys: If you have software that requires a product key for reinstallation, make sure you have these readily available. For Microsoft Office and other Microsoft products, ensure your Microsoft account is linked to your licenses, as this can simplify re-activation.
- Desktop and Documents Folders: These are common locations for important files.
Where to back up your data:
- External Hard Drive or USB Flash Drive: The most straightforward and reliable method.
- Cloud Storage Services: OneDrive, Google Drive, Dropbox, etc., are excellent for smaller amounts of data or for syncing important files regularly.
- Network Attached Storage (NAS): For users with more extensive data or who prefer a local network solution.
2. Gather Your Installation Media
To perform a fresh install, you’ll need a bootable Windows 10 installation medium.
-
Create a Bootable USB Drive: This is the most common and recommended method. You’ll need a USB flash drive with at least 8GB of space.
- Download the Media Creation Tool: Visit the official Microsoft website and search for “Download Windows 10.” Download the Media Creation Tool.
- Run the Tool: Launch the tool and accept the license terms.
- Choose “Create installation media (USB flash drive, DVD, or ISO file) for another PC.”
- Select Language, Edition, and Architecture: Typically, you’ll want the same version of Windows 10 you currently have (e.g., Windows 10 Home or Pro). If you’re unsure, the tool can usually recommend options based on your current PC, but for a fresh install, it’s best to be explicit.
- Choose “USB flash drive” and select your connected USB drive from the list.
- The tool will then download the Windows 10 files and make your USB drive bootable. This process can take some time depending on your internet speed.
-
Download an ISO File (Optional): The Media Creation Tool also allows you to download an ISO file. You can then use separate software like Rufus or the built-in Windows Disk Image Burner to create a bootable USB or DVD from this ISO.
3. Note Down Your Windows Product Key (If Applicable)
Modern Windows installations often use digital licenses tied to your Microsoft account or hardware, meaning you might not need a physical product key. However, if you purchased a retail copy of Windows 10 or have a product key from a previous installation, it’s wise to have it handy.
- Check Your System: You can often find your product key embedded in your system’s UEFI firmware if it came pre-installed with Windows. You can also use third-party tools (use with caution and from reputable sources) or PowerShell commands to retrieve it if it’s not linked to your Microsoft account.
- Microsoft Account: If your Windows 10 license is linked to your Microsoft account, you can usually re-activate Windows by signing in with that account after the installation.
4. Update Drivers (Optional, but Recommended)
While Windows 10 is excellent at automatically detecting and installing drivers, it’s a good idea to have a few essential drivers ready, especially your network adapter driver. If Windows doesn’t recognize your Wi-Fi or Ethernet card after installation, you won’t be able to connect to the internet to download others.
- Visit Your Manufacturer’s Website: Go to the support section of your computer’s manufacturer (Dell, HP, Lenovo, etc.) or your motherboard manufacturer’s website.
- Download Drivers: Download the latest drivers for your specific model, particularly for:
- Network adapters (Wi-Fi and Ethernet)
- Chipset
- Graphics card (NVIDIA, AMD, Intel)
- Audio
Save these drivers to a separate USB drive or cloud storage that you can access after the fresh install.
Performing the Fresh Install of Windows 10
With your preparations complete, it’s time to begin the installation process.

1. Boot from Your Installation Media
This is where you tell your computer to start from the USB drive (or DVD) instead of your internal hard drive.
- Insert the Bootable USB Drive: Plug in the USB drive you created.
- Restart Your Computer: Reboot your PC.
- Access the Boot Menu or BIOS/UEFI Settings: As your computer starts to boot, you’ll need to press a specific key repeatedly to access either the Boot Menu or the BIOS/UEFI settings. Common keys include:
- F2, F10, F12, DEL, ESC
- The exact key depends on your computer’s manufacturer (check your computer’s startup screen or manual).
- Change Boot Order:
- Boot Menu: If you accessed the Boot Menu, select your USB drive from the list of boot devices and press Enter.
- BIOS/UEFI Settings: Navigate to the “Boot” or “Boot Order” section. Change the primary boot device to your USB drive (it might be listed as “USB HDD,” “Removable Devices,” or the specific name of your USB drive). Save changes and exit (usually by pressing F10).
Your computer should now boot from the USB drive, and you’ll see the Windows 10 setup screen.
2. Follow the Windows Setup Wizard
The Windows 10 setup wizard is generally straightforward.
-
Language, Time, and Keyboard Input: Select your preferred language, time format, and keyboard layout. Click “Next.”
-
Install Now: Click the “Install now” button.
-
Enter Product Key (If Prompted): If you have a product key, enter it here. If your license is digital or you plan to activate later, you can click “I don’t have a product key.”
-
Select Operating System Version: If you didn’t enter a product key, you’ll be asked to choose the edition of Windows 10 you want to install (e.g., Windows 10 Home, Windows 10 Pro). Ensure this matches your license.
-
Accept License Terms: Read and accept the Microsoft license terms.
-
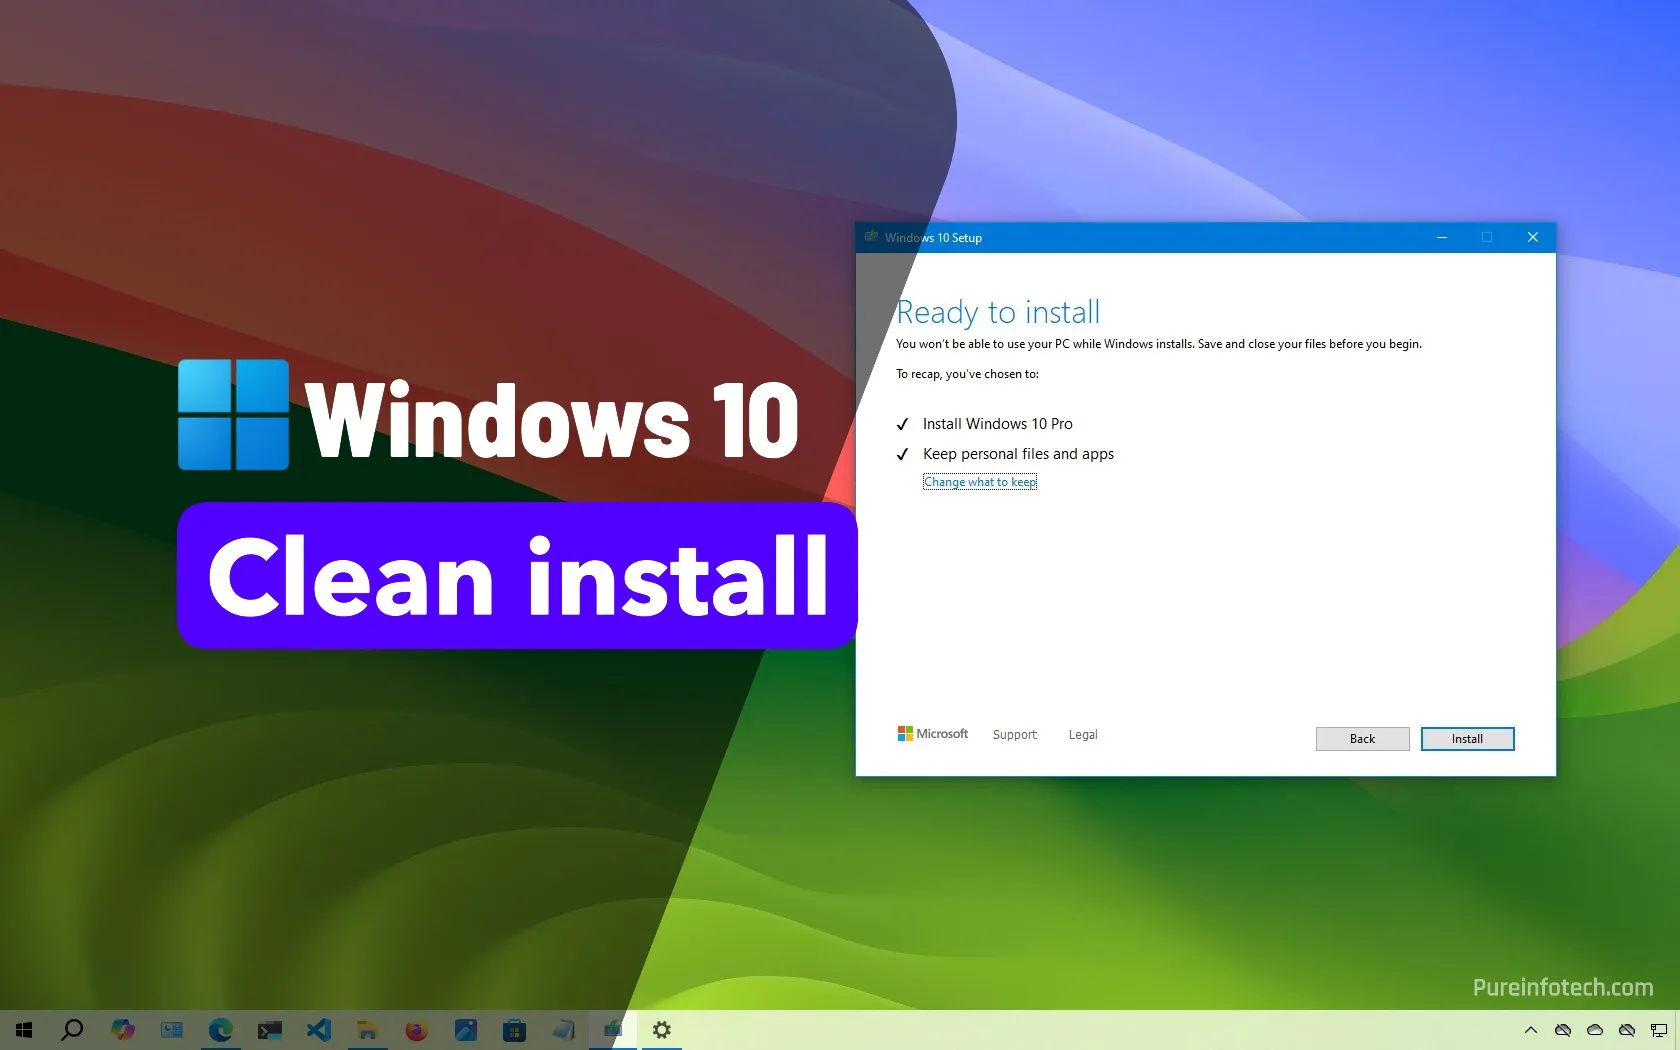
Choose Installation Type: “Custom: Install Windows only (advanced)” This is the crucial step for a fresh install.
-
Partitioning and Formatting: This is where you’ll manage your hard drive.
- Identify Your Primary Drive: Look for the drive labeled “Primary” or “C: Drive.” This is where Windows is typically installed.
- Delete Existing Partitions (for a truly clean slate): To ensure a completely fresh installation and remove all previous data and partitions on the drive you intend to install Windows on, select each partition related to your current Windows installation (usually labeled “System,” “Recovery,” “Primary,” etc.) and click “Delete.” Be extremely careful here to not delete partitions on other drives if you have them.
- Create a New Partition (Optional but Recommended): After deleting, you’ll have “Unallocated Space.” Select this space and click “New” to create a new partition for Windows. Windows will usually create a few smaller system partitions automatically alongside the main one. You can accept the default size or adjust it if you’re creating multiple partitions.
- Select the Partition for Installation: Select the main partition you just created (or the largest one if Windows created them automatically) and click “Next.”
- Formatting: The setup will automatically format the selected partition before installing Windows.
-
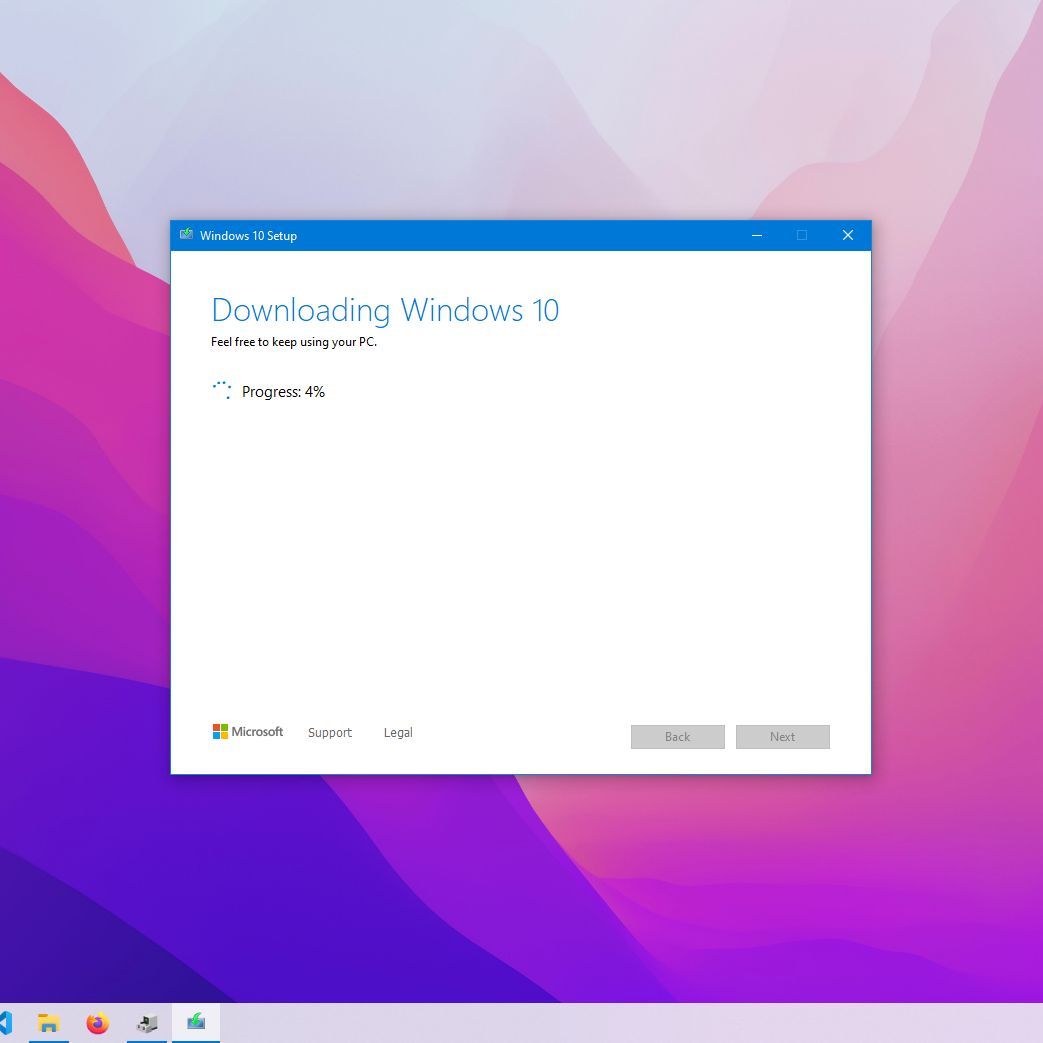
Windows Installation: The setup will now copy files, install features, and install updates. Your computer will restart several times during this process. Important: Do NOT press any key when prompted to “Press any key to boot from CD or DVD…” Let it boot from the hard drive. You might need to remove the USB drive after the first restart if your computer continues to boot from it.
3. Initial Windows 10 Setup (Out-of-Box Experience – OOBE)
After the main installation, Windows 10 will guide you through its initial setup.
- Region and Keyboard Layout: Confirm your region and keyboard layout.
- Connect to a Network: Connect to your Wi-Fi or wired network. This is essential for activating Windows and downloading updates.
- Sign in with a Microsoft Account or Create a Local Account:
- Microsoft Account: Recommended for seamless integration with Microsoft services like OneDrive, Microsoft Store, and easier license management.
- Local Account: If you prefer not to use a Microsoft account, you can create a local one.
- Create a PIN: For faster sign-in.
- Privacy Settings: Review and adjust your privacy settings for location, diagnostics, tailored experiences, etc.
- Cortana (Optional): Choose whether to set up Cortana.
- “Get started”: Once these steps are completed, you’ll be presented with your brand-new, clean Windows 10 desktop.
Post-Installation Steps for an Optimized System
Your fresh Windows 10 install is complete, but the work isn’t entirely done. A few more steps will ensure your system is running optimally and securely.
1. Install Drivers
As mentioned in the preparation phase, now is the time to install the drivers you may have downloaded.
- Network Drivers: If your internet is not working, install your network drivers first from the USB drive you prepared.
- Chipset Drivers: Install these from your motherboard or laptop manufacturer’s website.
- Graphics Drivers: Crucial for display performance. Get the latest from NVIDIA, AMD, or Intel.
- Audio Drivers: For sound.
- Other Peripheral Drivers: Install drivers for any other hardware (printers, webcams, etc.) that Windows hasn’t automatically detected.
You can also use Windows Update to scan for and install drivers, but manually installing from the manufacturer’s website often provides the most up-to-date and stable versions.
2. Run Windows Update
Windows Update is your gateway to security patches, bug fixes, and feature updates.
- Go to Settings > Update & Security > Windows Update.
- Click “Check for updates.”
- Install all available updates. Your computer will likely need to restart multiple times. Keep checking for updates until no more are found.
3. Install Essential Software and Re-download Your Data
Now you can start populating your clean system.
- Essential Software: Reinstall your most-used applications. Consider the principle of only installing what you truly need to avoid reintroducing bloat.
- Web Browsers: Chrome, Firefox, Edge (if not your primary).
- Productivity Suites: Microsoft Office, LibreOffice.
- Media Players: VLC Media Player.
- Security Software: If you prefer a third-party antivirus, install it now.
- Utilities: Compression tools, PDF readers, etc.
- Restore Your Data: Copy your backed-up personal files from your external drive or cloud storage back to their appropriate locations on your computer.
- Re-activate Software: If you had paid software, re-enter product keys or sign in with your accounts to re-activate them.
4. Optimize and Secure
- Disk Cleanup: Run Disk Cleanup (search for it in the Start menu) to remove temporary files that might have accumulated during the installation process.
- Defragmentation (for HDDs): If you have a traditional Hard Disk Drive (HDD), Windows will typically schedule automatic defragmentation. You can manually check by searching for “Defragment and Optimize Drives.” For Solid State Drives (SSDs), defragmentation is not necessary and can actually reduce their lifespan; Windows optimizes SSDs differently.
- Review Startup Programs: Go to Task Manager (Ctrl+Shift+Esc) > Startup to disable unnecessary programs that launch automatically when your PC boots. This can significantly speed up boot times.
- Enable Core System Features: Ensure Windows Defender is active and configured. Review your Firewall settings.
Conclusion
A fresh install of Windows 10 is a powerful process that can breathe new life into your computer, resolving a multitude of issues and enhancing overall performance. By meticulously preparing, following the straightforward installation steps, and completing the essential post-installation tasks, you can enjoy a stable, secure, and responsive computing experience. This methodical approach, rooted in the Tech domain, demonstrates how understanding and managing your digital environment is crucial for productivity and efficiency, indirectly supporting your ventures in Brand building and Money management. Embrace the clean slate, and rediscover the joy of a fast and reliable PC.
aViewFromTheCave is a participant in the Amazon Services LLC Associates Program, an affiliate advertising program designed to provide a means for sites to earn advertising fees by advertising and linking to Amazon.com. Amazon, the Amazon logo, AmazonSupply, and the AmazonSupply logo are trademarks of Amazon.com, Inc. or its affiliates. As an Amazon Associate we earn affiliate commissions from qualifying purchases.