In the digital age, our computers are the epicenters of our productivity, creativity, and connection. They house our memories, power our work, and serve as gateways to information and entertainment. Yet, over time, even the most robust systems can become bogged down by accumulated digital debris: remnants of uninstalled software, driver conflicts, malware, and general system clutter. When your once-speedy Windows 10 machine starts to stutter, freeze, or take an eternity to boot up, a clean installation isn’t just an option—it’s often the most effective solution. This comprehensive guide will walk you through the entire process of performing a clean Windows 10 install, transforming your sluggish system into a lean, mean, productive machine.

A clean install means wiping your hard drive completely and installing a fresh copy of Windows 10. Think of it as hitting the reset button, not just on your operating system, but on your entire digital environment. This isn’t merely about troubleshooting; it’s about reclaiming peak performance, enhancing security, and extending the lifespan of your hardware. For professionals, freelancers, and businesses, a responsive and reliable system isn’t a luxury; it’s a fundamental pillar of productivity and, ultimately, profitability.
The Unbeatable Benefits of a Fresh Start
Before diving into the technicalities, it’s crucial to understand why a clean Windows 10 install is such a powerful remedy and why it aligns so well with the goals of modern tech users, brand builders, and financially savvy individuals.
Why Your System Needs a Reset
Over months or years of use, a Windows installation can accumulate a surprising amount of digital cruft. Every software installation, update, and driver change leaves its mark. Even after uninstalling programs, residual files, registry entries, and corrupted data can linger, contributing to system bloat. Common symptoms that signal a clean install might be necessary include:
- Persistent Sluggishness: Applications take forever to open, system responsiveness is poor, and boot times are excruciatingly long.
- Frequent Crashes and Freezes: Your system becomes unstable, leading to frustrating interruptions during work or leisure.
- Unknown Errors and Glitches: Mysterious error messages, driver conflicts, and software incompatibilities become a regular occurrence.
- Malware and Virus Infections: Despite your best antivirus efforts, stubborn infections can leave your system compromised and vulnerable. A clean install is often the only sure way to completely eradicate deep-seated malware.
- Preparing for Sale or Transfer: If you’re selling or giving away your PC, a clean install ensures that all your personal data is securely erased, protecting your privacy and digital identity.
Beyond simply fixing problems, a clean install offers a profound sense of renewal. It’s like moving into a freshly painted, decluttered house after years of living in one filled with accumulated junk. Your digital workspace becomes cleaner, more organized, and ready to tackle new challenges with optimal efficiency.
Beyond Performance: Security, Stability, and Longevity
While immediate performance gains are the most noticeable benefit, a clean install’s advantages extend far beyond speed.
From a Tech perspective, a fresh OS reduces the attack surface for malware. With fewer applications, services, and lingering files, there are fewer potential vulnerabilities for malicious actors to exploit. It also ensures you’re running on the most stable foundation possible, free from conflicting drivers or corrupted system files that can lead to unexpected crashes and data loss. This inherent stability translates directly into more reliable uptime, critical for anyone whose livelihood depends on their computer.
For Brand conscious individuals and businesses, a smooth-running system is a silent but powerful statement. Imagine a consultant struggling with a freezing laptop during a client presentation, or a content creator constantly battling system errors. Such issues not only disrupt workflow but also project an image of unprofessionalism and unreliability. A responsive and efficient PC, on the other hand, contributes to a seamless workflow, allowing you to focus on delivering high-quality work and maintaining a strong professional image. This extends to personal branding; a well-maintained digital environment reflects attention to detail and a commitment to efficiency.
From a Money standpoint, a clean install can be a surprisingly cost-effective strategy. By revitalizing an aging PC, you can extend its usable life significantly, delaying the need for an expensive hardware upgrade. A system that runs faster and more reliably means less wasted time waiting for applications to load or troubleshooting issues, directly boosting productivity. For freelancers and small business owners, “time is money,” and every hour saved from technical frustrations is an hour that can be spent on income-generating activities. Furthermore, avoiding data loss due to system corruption or malware can save considerable costs associated with data recovery or potential identity theft. In essence, a clean install is an investment in your digital infrastructure, yielding returns in performance, security, and financial prudence.
Essential Pre-Installation Preparations
A clean install is a destructive process—it will erase everything on your primary drive. Therefore, meticulous preparation is not just recommended; it’s absolutely mandatory. Skipping these steps can lead to irreversible data loss and significant headaches.
Safeguarding Your Digital Life: The Backup Imperative
This is the most critical step. Before you do anything else, back up all your important files. This includes documents, photos, videos, music, email archives, browser bookmarks, saved game data, and any other personal or professional files you cannot afford to lose.
Best Practices for Backup:
- External Hard Drive: The most common and reliable method. Simply copy and paste your crucial folders, or use Windows’ built-in File History feature or third-party backup software for a more comprehensive solution.
- Cloud Storage: Services like OneDrive, Google Drive, Dropbox, or iCloud offer convenient off-site backup. Ensure your most important files are synced.
- Network Attached Storage (NAS): For home users with multiple devices or small businesses, a NAS provides a robust central backup solution.
- Double-Check: After backing up, verify that your files are accessible and intact on your backup medium. Imagine the regret of formatting your drive only to find your backup is corrupted or incomplete.
Consider not just files, but also settings, application licenses, and configurations you might want to restore. Make a list of all your essential software so you don’t forget anything during reinstallation.
Locating Your Windows 10 Product Key
While Windows 10 often reactivates automatically if it was previously activated on the same hardware, it’s wise to have your product key handy as a contingency.
Where to Find Your Product Key:
- Microsoft Account: If you linked your digital license to your Microsoft account, activation usually happens automatically once you sign in.
- Original Packaging/Sticker: If you purchased a retail copy, the key will be on a sticker inside the box or on the DVD case. For pre-built PCs, it might be on a sticker on the case itself.
- BIOS/UEFI (for OEM systems): Many modern pre-built PCs have the product key embedded in the motherboard’s firmware. Windows setup will automatically detect it.
- Third-Party Tools: If you’re currently running Windows, tools like ProduKey can often extract the key from your active installation.
Crafting Your Installation Media: USB or DVD
You’ll need a bootable drive to install Windows 10. A USB flash drive (at least 8GB) is generally preferred due to speed and convenience over a DVD.
Using the Windows Media Creation Tool:
- Download: Go to the official Microsoft website and download the Windows 10 Media Creation Tool.
- Run: Execute the tool and accept the terms.
- Choose Option: Select “Create installation media (USB flash drive, DVD, or ISO file) for another PC.”
- Select Language, Edition, Architecture: Choose your desired settings (these usually default to your current system’s settings).
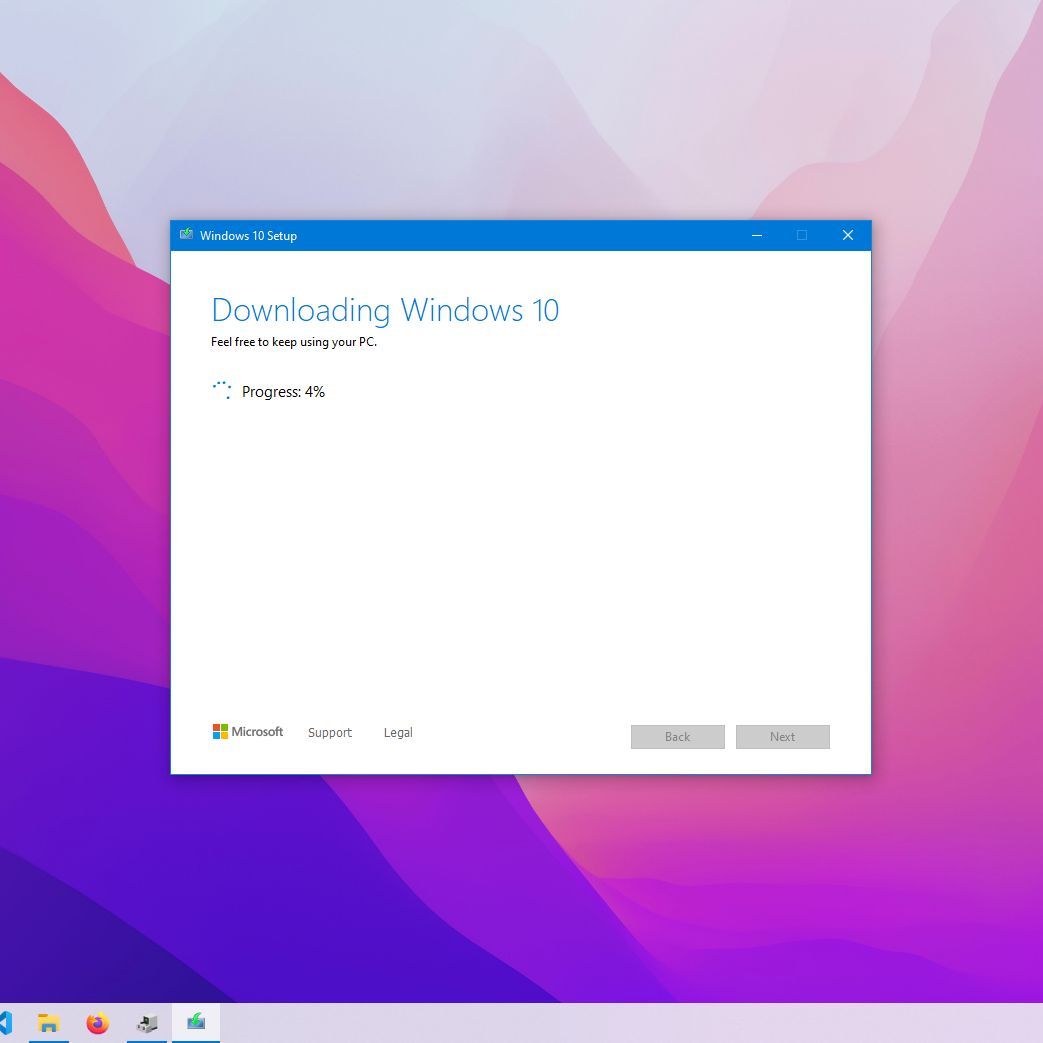
- Choose Media: Select “USB flash drive” and pick your connected drive from the list. The tool will then download the Windows 10 ISO and create the bootable drive. This process can take some time depending on your internet speed.
Gathering Critical Drivers and Applications
Before wiping your system, download essential drivers for your specific hardware. While Windows 10 has good driver support, having the latest official drivers for critical components ensures optimal performance and compatibility.
Key Drivers to Download:
- Network/Wi-Fi Adapter: Absolutely crucial! Without this, you won’t be able to connect to the internet to download other drivers or updates.
- Graphics Card (GPU): For optimal display performance, especially for gaming or design work.
- Chipset: From your motherboard manufacturer (e.g., Intel, AMD) to ensure proper communication between components.
- Audio Drivers: For sound functionality.
- Peripherals: Any specialized drivers for printers, scanners, or other devices.
Visit your PC manufacturer’s website (for pre-built PCs) or your motherboard and component manufacturers’ websites (for custom builds) to download the latest drivers for your Windows 10 version (e.g., 64-bit). Save these drivers to your backup drive or another separate USB stick. Also, compile a list of all the essential software you use daily, from web browsers to productivity suites, to make post-installation setup smoother.
The Clean Installation Process: A Step-by-Step Guide
With your backups secured and your installation media ready, you’re prepared for the main event. This process requires attention to detail but is straightforward if followed carefully.
Booting from Your Installation Media
The first step is to instruct your computer to start from the USB drive or DVD rather than its internal hard drive.
- Insert Media: Plug in your bootable USB drive or insert the DVD.
- Restart PC: Reboot your computer.
- Access Boot Menu/BIOS/UEFI: As the computer starts, you’ll need to press a specific key repeatedly to enter the boot menu or BIOS/UEFI settings. Common keys include
Del,F2,F10,F12, orEsc. The exact key varies by manufacturer (check your PC’s manual or the boot screen message).- Boot Menu: If you can access a temporary boot menu, select your USB drive or DVD drive from the list.
- BIOS/UEFI: If you enter the full BIOS/UEFI setup, navigate to the “Boot Order” or “Boot Priority” section and set your USB drive/DVD as the primary boot device. Save changes and exit.
- Start Setup: Your computer should now boot from the installation media and display the Windows Setup screen.
Navigating the Windows Setup Wizard
The initial setup screens are fairly intuitive:
- Language, Time, Keyboard: Select your preferred language, time and currency format, and keyboard layout. Click “Next.”
- Install Now: Click the “Install now” button.
- Product Key: If prompted, enter your Windows 10 product key. If you don’t have it or expect automatic activation, you can click “I don’t have a product key” and proceed. Windows will typically activate once you connect to the internet.
- Windows 10 Edition: Choose the edition of Windows 10 (Home, Pro, etc.) that corresponds to your license. Click “Next.”
- License Terms: Read and accept the Microsoft Software License Terms. Click “Next.”
Disk Partitioning and Formatting: A Crucial Decision
This is the most critical step where you’ll wipe your existing hard drive.
- Choose Installation Type: Select “Custom: Install Windows only (advanced).” Do NOT select “Upgrade” as this won’t perform a clean install.
- Delete Partitions: You’ll see a list of partitions on your hard drive (e.g., System Reserved, Primary, Recovery). To perform a truly clean install, you need to delete ALL of these partitions associated with your primary drive. Select each partition and click “Delete.” Confirm any warnings. This will leave you with a single “Unallocated Space.”
- Caution: Ensure you are deleting partitions on the correct drive if you have multiple drives installed. Deleting the wrong partition can lead to data loss on other drives.
- Create New Partition: Select the “Unallocated Space” and click “New.” You can choose to use the entire space for Windows (the default), or create smaller partitions if you wish (e.g., one for the OS and one for data). Click “Apply” and then “OK” if prompted to create additional system partitions.
- Format (Optional but Recommended): While Windows will automatically format the chosen partition during installation, you can explicitly select the newly created primary partition (usually “Drive 0 Partition X”) and click “Format” for good measure.
- Select and Proceed: Select the main partition where you want to install Windows (it will usually be labeled “Primary” and show the largest amount of free space) and click “Next.”
Completing the Installation
Windows will now begin the installation process. This involves copying files, installing features, and performing several reboots. This phase is largely automated, so you can step away for a while.
Once the main installation is complete, your computer will reboot into the Out-of-Box Experience (OOBE), where you’ll configure initial settings:
- Region and Keyboard Layout: Select your region and keyboard layout.
- Network Connection: Connect to your Wi-Fi or Ethernet network.
- Account Setup:
- Microsoft Account: Sign in with your Microsoft account. This will link your digital license and sync settings.
- Local Account (Optional): You can choose to create a local account instead if you prefer not to use a Microsoft account.
- Privacy Settings: Review and adjust privacy settings (location, speech recognition, diagnostic data, etc.).
- Cortana Setup: Decide whether to enable Cortana.
- PIN Creation: Set up a PIN for faster login if desired.
After these steps, you’ll finally be greeted by the fresh Windows 10 desktop!
Post-Installation: Optimizing Your New System
The clean install is complete, but your journey to a fully optimized system isn’t over. Several crucial steps remain to ensure stability, security, and functionality.
Installing Essential Drivers for Peak Performance
Even though Windows 10 includes many generic drivers, installing the official, latest drivers from your hardware manufacturers is paramount for stability, performance, and unlocking all features of your components.
- Start with Network: If you skipped downloading the network driver beforehand and don’t have internet access, install it now from your backup USB drive.
- Chipset and Graphics: Install your motherboard’s chipset drivers, followed by your dedicated graphics card drivers (NVIDIA, AMD). These are critical for overall system responsiveness and visual performance.
- Audio and Other Peripherals: Install drivers for your sound card, printer, scanner, and any other specialized hardware.
- Device Manager Check: After installing drivers, open Device Manager (right-click the Start button and select “Device Manager”) and check for any devices with yellow exclamation marks. These indicate missing or problematic drivers.
Windows Updates: Staying Secure and Current
After a fresh install, your Windows 10 copy might be several months or even years behind the latest security patches and feature updates.
- Run Windows Update: Go to
Settings > Update & Security > Windows Updateand click “Check for updates.” - Install All Updates: Allow Windows to download and install all pending updates. This might involve several rounds of updates and reboots. This ensures your system has the latest security fixes and performance enhancements, crucial for maintaining digital security.
Reinstalling Your Must-Have Applications
Now that your system is up-to-date and drivers are installed, it’s time to bring back your essential software.
- Antivirus/Security Software: This should be one of your first installations to protect your fresh system. While Windows Defender is robust, many users prefer a third-party solution.
- Web Browser: Install your preferred browser (Chrome, Firefox, Edge, etc.).
- Productivity Suite: Install Microsoft Office, LibreOffice, or other productivity tools.
- Creative Software: Photoshop, CAD software, video editors, etc.
- Utilities: Archivers (7-Zip, WinRAR), media players (VLC), etc.
- Gaming Platforms: Steam, Epic Games Launcher, etc.
Reinstalling applications from scratch ensures you’re getting the latest versions, free from any old configuration issues.
Restoring Your Data and Personal Settings
Finally, bring back your precious files.
- Copy Files Back: Connect your backup drive and copy your documents, photos, music, and other personal files back to their respective folders (Documents, Pictures, Music, Videos).
- Reconfigure Settings: Reapply any personalized desktop backgrounds, themes, power settings, and other system preferences.
- Browser Sync: If you use browser sync, signing into your browser account will restore your bookmarks, history, and extensions.
Maximizing Your Clean Install: Tips for Long-Term Health
A clean install provides a phenomenal foundation, but maintaining its pristine state requires ongoing effort. These tips will help you maximize the long-term benefits of your newly optimized system.
The Productivity and Financial Payoff of a Lean System
The immediate boost in performance after a clean install is exhilarating. Applications launch faster, multitasking is seamless, and system responsiveness returns to its original glory. This translates directly into enhanced productivity. Less time waiting for your computer means more time focusing on your work, creative projects, or learning. For professionals, this efficiency is invaluable, allowing you to meet deadlines, serve clients effectively, and maintain a competitive edge. The frustration of a slow system can drain mental energy and even impact the quality of your output. A smooth-running machine frees up cognitive resources, enabling better concentration and problem-solving.
From a money perspective, maintaining a lean system means your hardware can perform optimally for longer. This defers the need for costly hardware upgrades or replacements. By keeping your software environment tidy and free of unnecessary processes, you’re getting the most out of your existing investment. Furthermore, the increased reliability of a freshly installed and well-maintained system reduces the likelihood of costly downtime, repairs, or data recovery services. For small businesses and freelancers, these savings and efficiencies directly impact the bottom line. It’s about smart resource management and maximizing ROI on your technology assets.

Digital Security Best Practices from Day One
A clean install is an excellent opportunity to establish robust digital security habits from the outset.
- Strong Passwords: Implement strong, unique passwords for all your accounts, ideally using a password manager.
- Two-Factor Authentication (2FA): Enable 2FA wherever possible for an added layer of security.
- Regular Backups: Continue to back up your important data regularly. A clean install won’t protect against future hardware failures or accidental deletions.
- Mindful Downloads: Be cautious about what software you download and from where. Stick to official sources and reputable vendors. Avoid “cracked” software, which often bundles malware.
- Firewall and Antivirus: Ensure your Windows Firewall is active and your chosen antivirus software is up-to-date and running real-time protection.
- Stay Updated: Regularly check for Windows Updates and keep all your applications updated to patch known vulnerabilities.
- Minimalism: Only install software you genuinely need. Each additional program is a potential vector for security issues and system bloat.
By adopting these habits, you’re not just securing your data; you’re protecting your time, your productivity, and potentially your financial well-being. A compromised system can lead to identity theft, financial fraud, and significant disruption to your personal and professional life. Proactive security measures are an integral part of maintaining a healthy digital environment.
In conclusion, performing a clean Windows 10 install is more than just a technical fix; it’s a strategic move that revitalizes your entire computing experience. It’s an investment in the efficiency, security, and longevity of your digital tools, empowering you to work smarter, protect your data, and ultimately, achieve more in a world increasingly reliant on technology. Embrace the fresh start, and enjoy the unparalleled performance of a truly clean system.
aViewFromTheCave is a participant in the Amazon Services LLC Associates Program, an affiliate advertising program designed to provide a means for sites to earn advertising fees by advertising and linking to Amazon.com. Amazon, the Amazon logo, AmazonSupply, and the AmazonSupply logo are trademarks of Amazon.com, Inc. or its affiliates. As an Amazon Associate we earn affiliate commissions from qualifying purchases.