In the rapidly evolving landscape of personal computing, the graphics card, or GPU (Graphics Processing Unit), stands as the undisputed heart of visual performance. Whether you’re a hardcore gamer chasing the highest frame rates, a content creator rendering intricate 3D models, an AI enthusiast training complex neural networks, or simply seeking a smoother, more vibrant desktop experience, upgrading your graphics card is one of the most impactful enhancements you can make to your PC. This comprehensive guide, tailored for both novices and seasoned builders, will walk you through the entire process of installing a new graphics card, ensuring a seamless upgrade that unlocks your system’s true visual potential. From crucial pre-installation checks to driver installations and troubleshooting tips, we’ll cover everything you need to know to perform this vital PC upgrade like a seasoned professional.
The Essentials Before You Begin: Preparation is Key
Before you even think about opening your PC case, thorough preparation is paramount. A successful graphics card installation hinges on careful planning, compatibility checks, and gathering the right tools. Skipping these initial steps can lead to frustration, component damage, or an incompatible setup.
Compatibility Checks: The Foundation of a Smooth Upgrade
The most critical phase of preparation involves ensuring your new graphics card is compatible with your existing system. This isn’t just about whether it physically fits, but also about whether your PC can adequately power and communicate with it.
- PCIe Slots: Modern graphics cards utilize PCI Express (PCIe) slots, specifically the x16 variety. While newer cards might leverage PCIe 4.0 or even 5.0, they are generally backward compatible with older PCIe 3.0 slots. However, pairing a new-generation GPU with an older motherboard might lead to a slight bottleneck in performance due to reduced bandwidth. Always check your motherboard’s specifications to confirm it has an available PCIe x16 slot. Ensure it’s the primary slot, typically the one closest to the CPU, for optimal performance.
- Power Supply Unit (PSU) Requirements: This is a common oversight. Graphics cards are power-hungry components, and your existing PSU might not be up to the task. Every graphics card specifies a minimum recommended PSU wattage. Undershooting this can lead to system instability, crashes, or even failure to boot. Check your PSU’s current wattage and its available PCIe power connectors (6-pin, 8-pin, 12-pin, or 16-pin for newer cards). Most high-end cards require multiple 8-pin connectors. Ensure your PSU has the necessary connectors or that you have appropriate adapters (though direct connections are always preferred). If your PSU is insufficient, you’ll need to upgrade it alongside your graphics card.
- Case Size and Airflow: Physical dimensions matter. Graphics cards vary significantly in length, height, and thickness. A high-end GPU can be quite a behemoth, potentially obstructing drive bays, radiators, or other components. Measure the available space within your PC case, accounting for any front-mounted fans or liquid cooling radiators. Also, consider the thermal design power (TDP) of your new card. More powerful cards generate more heat, necessitating good case airflow to prevent thermal throttling and ensure longevity.
Gathering Your Arsenal: Tools and Precautions
Once compatibility is confirmed, it’s time to prepare your workspace and gather the necessary tools. Safety and organization are key here.
- Essential Tools: You’ll primarily need a Phillips-head screwdriver (magnetic tips are a bonus for tiny screws). A flashlight can be useful for illuminating dark corners of your case.
- Anti-static Precautions: Electrostatic discharge (ESD) is an invisible threat that can permanently damage sensitive electronic components. Always ground yourself before touching any internal PC parts. The safest method is an anti-static wrist strap connected to a metal, unpainted part of your PC chassis. Alternatively, frequently touch the metal frame of your case to discharge any static electricity. Work on a non-carpeted surface and avoid wearing wool sweaters or other static-generating clothing.
- Workspace: Choose a clean, well-lit, and spacious area. A large table is ideal. Lay down a non-conductive mat (like a rubber mat or cardboard) to protect your components.
- Cleaning Supplies (Optional but Recommended): A can of compressed air can be invaluable for blowing out dust from your case, especially around the PCIe slot and CPU cooler. A clean microfiber cloth can also be handy.
- Backup Your Data: While installing a graphics card is relatively safe, it’s always wise to back up any critical data before performing major hardware changes. Better safe than sorry.
The Physical Swap: A Step-by-Step Installation Guide
With your preparation complete, it’s time to dive into the physical installation. Take your time, follow each step carefully, and remember that patience is a virtue when working with delicate PC components.
Power Down and Open Up: Ensuring Safety
- Shut Down Your PC: Perform a complete shutdown from your operating system, then unplug the power cable directly from the wall socket or the back of your PSU. This is crucial for electrical safety.
- Disconnect Peripherals: Unplug all external peripherals, including your monitor, keyboard, mouse, and any USB devices.
- Position Your Case: Lay your PC case on its side on your prepared workspace, with the motherboard tray facing up.
- Open the Case: Remove the side panel(s) of your PC case. This usually involves unscrewing a few thumbscrews or standard screws at the back of the case and then sliding the panel off.
Removing the Old Guardian (If Applicable)
If you’re upgrading an existing graphics card, you’ll need to remove the old one first. If you’re installing a GPU in a brand-new build or a system without a dedicated GPU, skip to the next section.
- Unplug Power Cables: Disconnect any PCIe power cables running from your PSU to the old graphics card. These usually have a latch mechanism that needs to be squeezed before pulling.
- Unlock the Retention Clip: At the end of the PCIe x16 slot, there’s a small plastic or metal latch that secures the graphics card. Gently push or pull this latch to release the card. It might be stiff, so be firm but careful.
- Unscrew the Card: Graphics cards are typically secured to the case with one or two screws at the back, near the display output ports. Unscrew these.
- Gently Remove: With the power cables disconnected, the retention clip unlocked, and the card unscrewed, you can now carefully pull the old graphics card straight out of the PCIe slot. Place it in an anti-static bag (if you have one) for storage or resale.
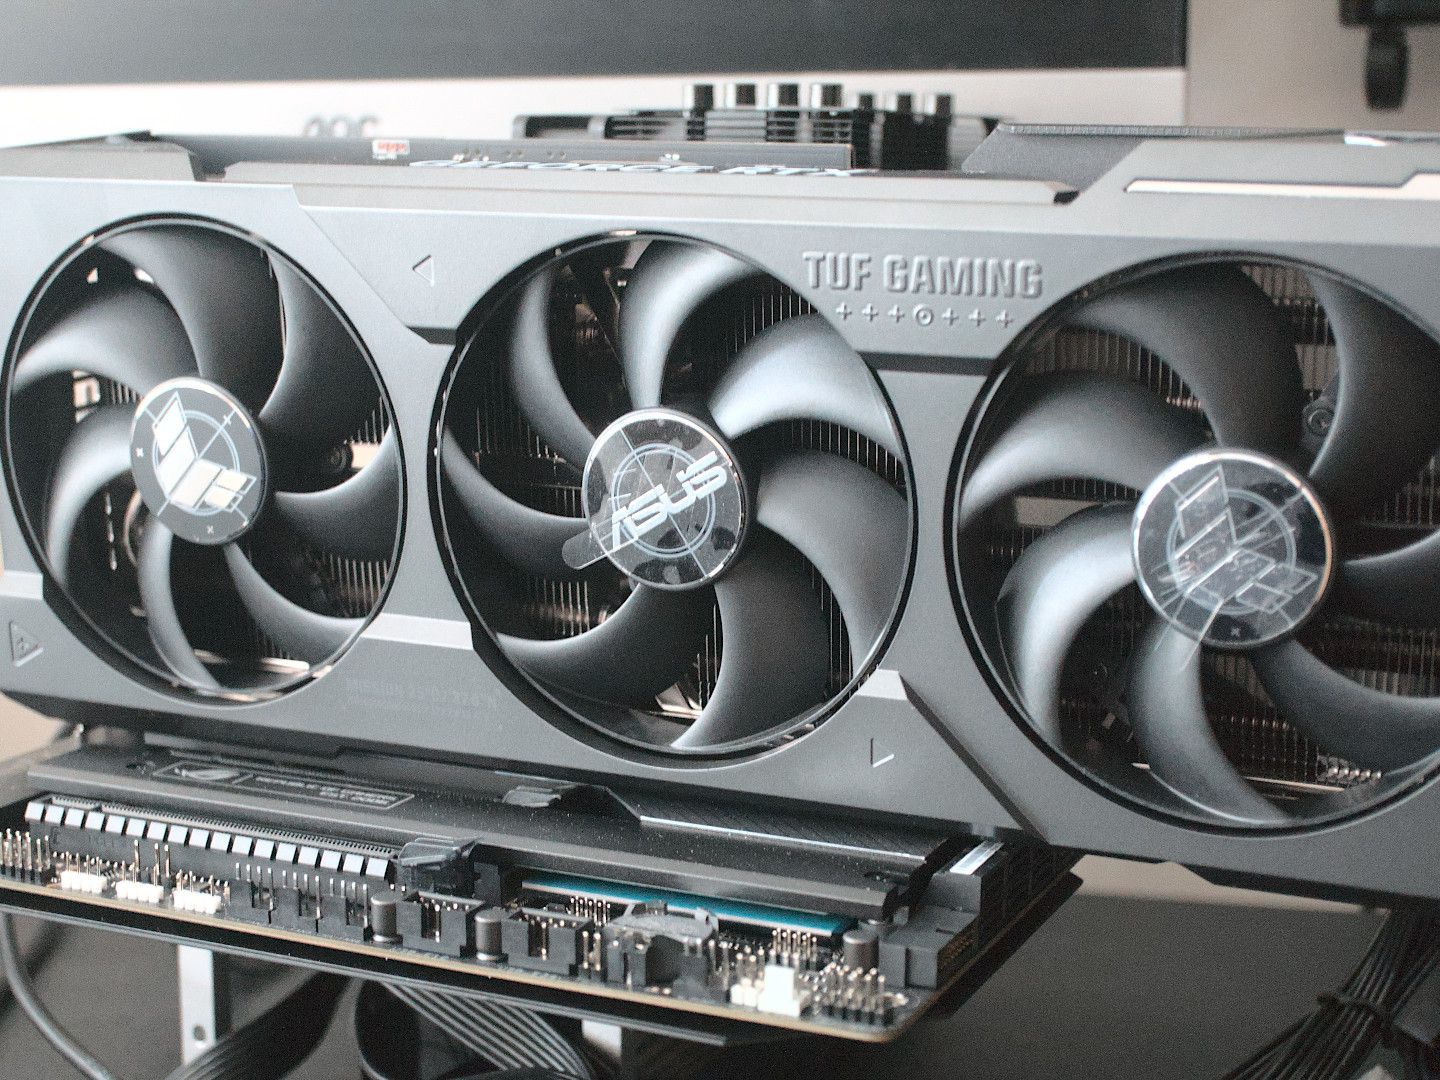
Welcoming the New Powerhouse: Inserting Your GPU
This is the moment of truth for your new graphics card.
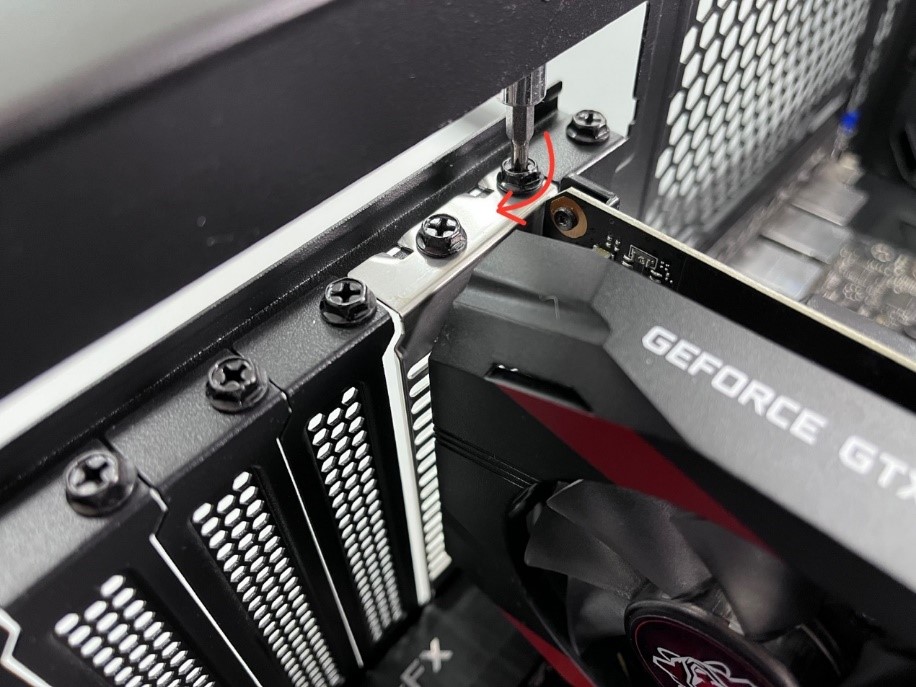
- Remove Slot Covers: If you’re installing a new card into an empty system, you’ll need to remove the metal slot covers from the back of your PC case that correspond to the size of your new GPU. Most modern GPUs take up two or three slots. Unscrew or snap off the appropriate covers.
- Align and Insert: Carefully align your new graphics card with the PCIe x16 slot on your motherboard. Ensure the gold pins on the card are directly above the slot. Apply gentle, even pressure to both ends of the card until it slides fully into the slot. You should hear a satisfying “click” as the retention clip at the end of the slot engages and locks the card in place. Do not force it. If it doesn’t go in easily, re-check the alignment and the retention clip.
- Secure the Card: Once the card is fully seated, secure it to the PC case using the screws you removed earlier (or new screws provided with your case/GPU). This prevents the card from sagging or wiggling loose over time.
Connecting the Lifeline: Powering Your Graphics Card
With the card physically in place, it needs power.
- Connect PCIe Power Cables: Locate the appropriate PCIe power cables from your PSU. These are typically labeled “PCIe” or “VGA.” Connect them firmly to the corresponding ports on your graphics card. Most modern GPUs require 6-pin, 8-pin, or 12/16-pin connectors. Ensure all required connectors are plugged in. Some cards require multiple connectors, so don’t leave any unplugged. Make sure the latches on the connectors click into place.
- Cable Management (Optional but Recommended): Route the power cables neatly to improve airflow and aesthetics inside your case.
Securing and Sealing: Final Physical Steps
- Close the Case: Once you’ve double-checked all connections and confirmed the card is securely fastened, reattach the side panel(s) of your PC case.
- Reconnect Peripherals: Plug your monitor cable (DisplayPort, HDMI, DVI) directly into the new graphics card’s output ports, not the motherboard’s integrated graphics ports. Reconnect your keyboard, mouse, and any other peripherals.
- Power Up: Finally, plug your PC’s power cable back into the wall socket and press the power button.
Bringing Your GPU to Life: Software and Testing
The physical installation is only half the battle. Your operating system needs to recognize and correctly utilize the new hardware, which requires proper driver installation and subsequent testing.
The Driver’s Seat: Installing Essential Software
When you first boot your PC with the new GPU, it might display a basic image using generic drivers. To unlock its full potential, you need the specific drivers from the manufacturer.
- Prepare for Driver Installation:
- Clean Installation: For the best results, especially when switching between AMD and NVIDIA cards, it’s highly recommended to perform a clean driver installation. Use a utility like Display Driver Uninstaller (DDU) in Windows Safe Mode to completely remove all traces of previous graphics drivers.
- Download Latest Drivers: Once your PC boots into Windows, open your web browser and navigate to the official website of your graphics card manufacturer (NVIDIA, AMD, or Intel). Go to their “Drivers” or “Support” section and download the very latest recommended drivers for your specific graphics card model and operating system. Avoid third-party driver sites, as they can host outdated or malicious software.
- Install Drivers: Run the downloaded driver installer. Follow the on-screen prompts. Typically, you’ll choose an “Express” or “Custom” installation. A custom installation often allows you to deselect optional software you don’t need. During the installation, your screen might flicker, go black, or change resolution several times – this is normal.
- Restart Your PC: After the driver installation is complete, the installer will usually prompt you to restart your computer. Do so to finalize the process.
Performance Check: Confirming a Successful Upgrade
Once your PC has rebooted with the new drivers, it’s time to confirm everything is working as expected and to gauge the performance gains.
- Device Manager: Open Windows Device Manager (right-click Start -> Device Manager) and expand “Display adapters.” Your new graphics card should be listed here without any warning signs (like a yellow exclamation mark).
- Manufacturer Software: Install the accompanying software from your GPU manufacturer (e.g., NVIDIA GeForce Experience, AMD Adrenalin Software). These tools allow you to optimize game settings, monitor performance, update drivers, and access various features.
- Monitoring Tools: Use tools like MSI Afterburner, HWMonitor, or the manufacturer’s software to monitor your GPU’s temperatures, clock speeds, and usage while under load.
- Benchmarks and Stress Testing: Run a few benchmarks (e.g., 3DMark, FurMark, Unigine Heaven/Superposition) to get an objective measure of your card’s performance and stability. Play a demanding game to see the real-world improvement in frame rates and visual quality. A stress test can help identify any instability issues.
- Troubleshooting (If Needed): If you encounter any issues during this phase, refer to the troubleshooting section below.
Troubleshooting Common Hurdles: When Things Don’t Go as Planned
Even with careful preparation, issues can arise. Don’t panic; most problems have straightforward solutions.
No Display Output: Diagnosing a Blank Screen
- Check Monitor Cable: Ensure your monitor cable is plugged into the graphics card and not the motherboard’s integrated graphics port.
- Power Cables: Double-check that all PCIe power cables are fully seated in the graphics card and the PSU.
- Card Seating: Power down, unplug, and re-seat the graphics card firmly in the PCIe slot. Ensure the retention clip is engaged.
- BIOS/UEFI Settings: Some motherboards may require you to manually set the primary display output to “PCIe” in the BIOS/UEFI settings, especially if it was previously set to “integrated graphics.”
- Clear CMOS: If all else fails, try clearing your motherboard’s CMOS (Complementary Metal-Oxide-Semiconductor) settings. Refer to your motherboard manual for instructions; it usually involves removing a small battery or shorting specific pins.
Artifacts and Crashes: Signs of Instability
- Driver Issues: This is the most common cause. Perform a clean driver installation using DDU. Try an older, stable driver version if the latest one is problematic.
- Overheating: Monitor your GPU temperatures using software. If temperatures are consistently high (e.g., above 85-90°C under load), your case airflow might be insufficient, or the card’s cooler isn’t working properly.
- Insufficient Power: If your PSU is barely meeting the minimum requirements, it might lead to instability under load. Consider upgrading your PSU.
- Faulty Card: In rare cases, the graphics card itself might be faulty. If you’ve exhausted all other options, consider an RMA (Return Merchandise Authorization) with the retailer or manufacturer.
Power-Related Woes: Understanding Wattage and Connections
- PSU Wattage: If your system randomly shuts down or experiences power cycles under load, your PSU might be inadequate. A higher wattage PSU is the solution.
- Cable Connections: Ensure individual PCIe power cables are used, rather than daisy-chained connectors if your PSU has them. Daisy-chaining too much power through a single cable can lead to voltage drops and instability.
Why Upgrade Your Graphics Card? Elevating Your Digital Experience
Beyond the technical steps, it’s worth reflecting on why a graphics card upgrade is such a pivotal investment in your PC’s capabilities, especially within the context of modern “Tech” trends.
Beyond Gaming: Creative Workflows and AI Acceleration
While gaming remains a primary driver for GPU upgrades, the utility of a powerful graphics card extends far beyond.
- Content Creation: Video editors, graphic designers, and 3D artists rely heavily on GPU acceleration to speed up rendering times, manipulate complex assets in real-time, and enhance workflow efficiency. Software like Adobe Premiere Pro, Blender, and DaVinci Resolve see massive performance gains from modern GPUs.
- AI and Machine Learning: The parallel processing architecture of GPUs makes them ideal for training AI models and performing complex data calculations. From deep learning research to developing AI-powered applications, a robust GPU is an essential tool for anyone working with artificial intelligence.
- Productivity and Professional Applications: Even non-creative professionals can benefit. Certain scientific simulations, data analytics, and CAD (Computer-Aided Design) software leverage GPU power to accelerate tasks, making your professional life more productive.

Future-Proofing and Performance Gains
A new graphics card not only boosts current performance but also helps future-proof your system against increasingly demanding software and games. You’ll gain:
- Higher Frame Rates: Experience smoother gameplay with less stutter, especially at higher resolutions (1440p, 4K) and refresh rates (144Hz+).
- Enhanced Visual Fidelity: Play games with higher texture quality, more realistic lighting (ray tracing), and advanced effects without compromising performance.
- Support for New Technologies: Access features like NVIDIA DLSS, AMD FSR, or Intel XeSS, which use AI-upscaling to deliver near-native image quality at significantly higher frame rates.
- Longevity: A modern GPU extends the lifespan of your PC as a capable platform for years to come, delaying the need for an entirely new system build.
In conclusion, installing a graphics card might seem intimidating, but by following these detailed steps and paying attention to compatibility and safety, you can successfully perform this upgrade yourself. The reward is a dramatically enhanced visual experience, whether you’re exploring virtual worlds, bringing creative visions to life, or pushing the boundaries of artificial intelligence. Empower your PC, unleash its visual fidelity, and step into a new realm of digital performance.
aViewFromTheCave is a participant in the Amazon Services LLC Associates Program, an affiliate advertising program designed to provide a means for sites to earn advertising fees by advertising and linking to Amazon.com. Amazon, the Amazon logo, AmazonSupply, and the AmazonSupply logo are trademarks of Amazon.com, Inc. or its affiliates. As an Amazon Associate we earn affiliate commissions from qualifying purchases.