In the dynamic world of technology, where software distribution and operating system installations are routine, understanding how to handle various file formats is crucial. Among these, the ISO file stands out as a fundamental component, a digital blueprint that encapsulates the entire contents of an optical disc—be it a CD, DVD, or Blu-ray. From installing a fresh operating system to deploying complex software suites or creating recovery media, knowing how to properly “install” or utilize an ISO file is an invaluable skill for any tech enthusiast, IT professional, or even the average user looking to take more control over their digital environment.
This comprehensive guide will demystify the process of working with ISO files, providing detailed, step-by-step instructions across various platforms and scenarios. Whether you’re looking to mount an ISO to access its contents, create a bootable USB drive for a clean OS installation, or deploy a virtual machine environment, we’ve got you covered. Dive in as we explore the different facets of ISO file management, ensuring you’re equipped with the knowledge to handle these versatile digital disc images efficiently and securely.
Understanding the ISO File: Your Digital Disc Image
Before we delve into the mechanics of installation, it’s essential to grasp what an ISO file is and why it’s so widely used. An ISO file, often referred to as an ISO image, is an archive file that contains an identical copy (or image) of data from an optical disc, sector by sector. This includes the file system, directory structure, and all other metadata, making it a perfect replica of the original disc. The name “ISO” is derived from the ISO 9660 file system, which is commonly used with CD-ROM media.
What is an ISO File?
Think of an ISO file as a complete snapshot of a CD, DVD, or Blu-ray disc saved as a single file. Instead of physically inserting a disc into a drive, you can use the ISO file to access all the contents of that disc digitally. This is incredibly convenient in an era where physical optical drives are becoming less common in modern computers. An ISO file can contain anything from operating systems (like Windows, macOS, or various Linux distributions) and software applications to video games, bootable utilities, and data backups.
Why Install or Use an ISO? Common Use Cases
The versatility of ISO files makes them indispensable for several key purposes:
- Operating System Installation: This is perhaps the most common use case. When you download Windows 11, Ubuntu Linux, or an older version of macOS, you typically receive it as an ISO file. This file can then be used to install the OS on a new computer, reinstall it on an existing one, or even set up a dual-boot system.
- Software Distribution: Large software packages, especially those requiring specific boot environments or containing multiple components, are often distributed as ISOs. This ensures that all necessary files and the correct directory structure are preserved.
- Creating Bootable Media: ISOs are the foundation for creating bootable USB drives or DVDs. These are essential for installing operating systems, performing system recovery, running diagnostic tools, or using “live” operating systems that run directly from the USB without installation.
- Virtual Machine Deployment: When setting up a virtual machine using software like VirtualBox or VMware, you’ll typically “mount” an ISO file as a virtual CD/DVD drive to install an operating system or software within the virtual environment.
- Data Backup and Archiving: ISOs can be used to create exact copies of discs for backup purposes, preserving their content and structure for future use, even if the physical disc is lost or damaged.
- Testing and Development: Developers and IT professionals frequently use ISOs to test software or operating systems in isolated environments without affecting their main system.
Understanding these applications underscores the importance of mastering the various methods of “installing” or utilizing an ISO file, which typically involves either mounting it as a virtual drive or burning it to physical media.
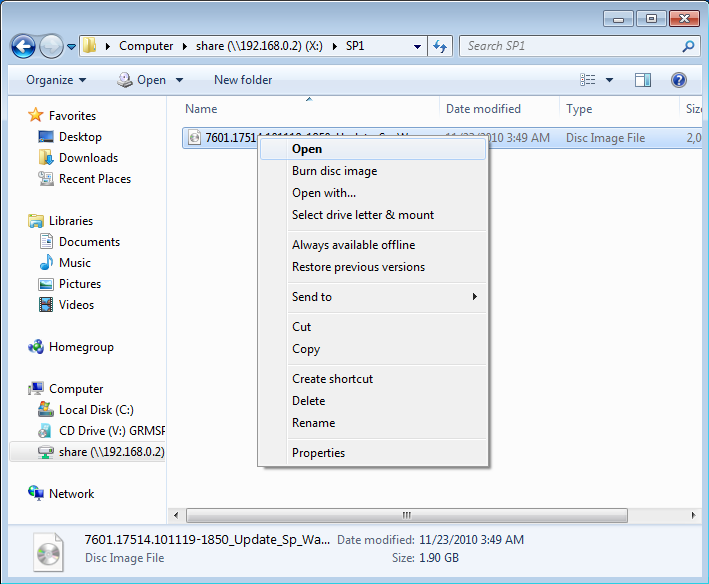
Method 1: Mounting an ISO File Directly
Mounting an ISO file is like inserting a physical disc into a CD/DVD drive, but entirely in software. Your operating system creates a virtual drive, allowing you to browse the ISO’s contents, run setup files, or copy data as if it were a physical disc. This method is ideal when you need to access the contents of an ISO without burning it to external media.
Mounting on Windows
Modern versions of Windows have built-in capabilities to handle ISO files, making the process incredibly straightforward.
Using File Explorer (Windows 8, 10, and 11)
For users running Windows 8, 10, or 11, mounting an ISO file is as simple as a few clicks:
- Locate the ISO File: Navigate to the folder where your ISO file is stored using File Explorer.
- Mount the ISO:
- Option A (Right-Click): Right-click on the ISO file. From the context menu, select “Mount.”
- Option B (Double-Click): Simply double-click the ISO file. Windows will automatically mount it.
- Option C (Ribbon Menu): Select the ISO file, then go to the “Disk Image Tools” tab in the File Explorer ribbon and click “Mount.”
- Access Contents: Once mounted, Windows will create a new virtual CD/DVD drive under “This PC” (or “My Computer” in older terminology). You can access this drive like any other physical drive to browse its contents, run an installer (often an
autorun.exeorsetup.exefile), or copy files. - Unmount the ISO: When you’re finished, right-click on the virtual drive in “This PC” and select “Eject” to unmount the ISO. This removes the virtual drive from your system.
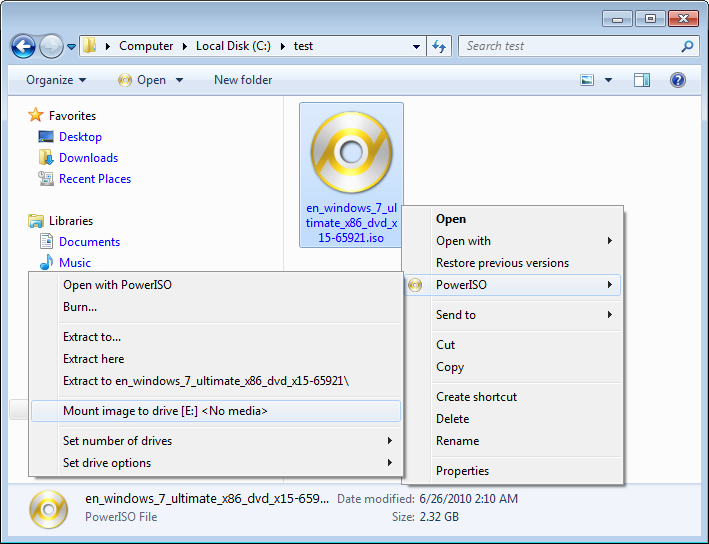
For Older Windows Versions (e.g., Windows 7, Vista, XP)
Older versions of Windows do not have native ISO mounting capabilities. For these systems, you’ll need third-party software:
- Daemon Tools Lite: This has been a popular choice for years, offering robust virtual drive emulation. The free “Lite” version usually suffices for basic mounting needs.
- WinCDEmu: An open-source, lightweight alternative that allows you to mount ISO, CUE, NRG, MDS/MDF, CCD, IMG, and RAW images with ease.
- Virtual CloneDrive: Another free and simple tool from Elaborate Bytes that allows mounting of ISO, CCD, DVD, IMG, UDF, and BIN files.
Installation and usage of these tools typically involve installing the software, then right-clicking the ISO file and selecting the mount option provided by the installed utility.
Mounting on macOS
macOS has robust built-in support for disc images, making ISO mounting a seamless experience.
- Locate the ISO File: Find your ISO file in Finder.
- Mount the ISO: Simply double-click the ISO file. macOS’s Disk Image Mounter will automatically mount the image.
- Access Contents: A new virtual drive icon will appear on your desktop (if enabled in Finder preferences) and in the Finder sidebar under “Locations.” Click on it to browse its contents.
- Unmount the ISO: Drag the virtual drive icon to the Trash (which will change to an eject symbol), or right-click the icon and choose “Eject.” You can also click the eject button next to the drive in the Finder sidebar.
Mounting on Linux
Linux distributions offer both command-line and GUI methods for mounting ISO files, providing flexibility for different user preferences.
Using the mount Command (Terminal)
This method is universal across all Linux distributions:
- Create a Mount Point: You need a directory where the ISO’s contents will be accessible. Open a terminal (Ctrl+Alt+T) and create one:
bash

sudo mkdir /mnt/iso
- Mount the ISO: Use the
mountcommand. Replace/path/to/your/image.isowith the actual path to your ISO file.
bash

sudo mount -o loop /path/to/your/image.iso /mnt/iso
The-o loopoption is crucial as it tells the kernel to loop the file back onto itself, treating the ISO file as a block device. - Access Contents: The contents of the ISO file will now be available in the
/mnt/isodirectory. You can navigate it using the terminal or your file manager. - Unmount the ISO: When you’re done, unmount the ISO to safely release the mount point:
bash

sudo umount /mnt/iso
It’s good practice to remove the mount point if you don’t need it anymore:
bash

sudo rmdir /mnt/iso
Using GUI Tools (e.g., GNOME Disks, KDE Partition Manager)
Many desktop environments in Linux provide graphical tools for managing disks and images:
- GNOME Disks (or Disks Utility): Often pre-installed in GNOME-based distributions (like Ubuntu, Fedora). Open “Disks,” select “Mount Disk Image” from the menu, and choose your ISO file.
- KDE Partition Manager: Similar functionality for KDE Plasma environments.
- File Manager (e.g., Nautilus, Dolphin): In some distributions, you can simply right-click an ISO file in your file manager and select “Open with Archive Mounter” or a similar option to mount it.
Method 2: Creating a Bootable USB Drive from an ISO
While mounting an ISO is great for accessing its contents, it’s not enough for installing an operating system onto a physical computer. For that, you need a bootable medium, and a USB drive is by far the most common and convenient choice today. Creating a bootable USB drive involves writing the ISO image to the USB in a specific way that allows your computer to boot from it.
Why Create a Bootable USB?
- OS Installation: The primary reason is to install a new operating system (Windows, Linux, etc.) onto a computer.
- System Recovery: Many recovery tools and environments are distributed as bootable ISOs.
- Live Environments: Running a “live” version of an operating system (like Linux distributions) directly from the USB without installing it on the hard drive, useful for testing or troubleshooting.
- Portability: USB drives are small, durable, and universally compatible.
Tools for Bootable USB Creation

Several excellent tools simplify the process of turning an ISO into a bootable USB.
Rufus (Windows Only)
Rufus is a free, open-source utility for Windows that is renowned for its speed, reliability, and powerful features, making it a go-to choice for creating bootable USB drives.
- Download Rufus: Go to the official Rufus website (
rufus.ie) and download the latest portable version (no installation required). - Insert USB Drive: Plug a USB flash drive into your computer. Warning: All data on the USB drive will be erased during this process, so back up any important files beforehand. A drive of 8GB or more is usually sufficient for most OS ISOs.
- Launch Rufus: Run the downloaded Rufus executable.
- Configure Settings:
- Device: Select your USB drive from the “Device” dropdown. Double-check that you’ve selected the correct one to avoid data loss on other drives.
- Boot selection: Click “SELECT” and browse to your ISO file.
- Image Option: Rufus will usually auto-detect the correct option (e.g., “Standard Windows installation” or “Disk or ISO image”).
- Partition scheme and Target system: Rufus will often suggest the correct settings (e.g., “GPT” for UEFI or “MBR” for BIOS) based on your ISO. If you know your target system’s firmware, you can adjust these. For modern systems, GPT/UEFI is standard.
- Volume label: You can change this if you wish (e.g., “Windows 11 Installer”).
- Leave other options at their defaults unless you have specific needs.
- Start the Process: Click the “START” button. Rufus will warn you that all data on the USB will be destroyed. Confirm to proceed.
- Wait for Completion: Rufus will write the ISO image to the USB drive. This can take several minutes depending on the ISO size and USB speed.
- Close Rufus: Once “READY” appears, you can close Rufus and safely remove your bootable USB drive.
Etcher (Balena Etcher) (Windows, macOS, Linux)
Etcher is another popular and user-friendly tool, known for its clean interface and cross-platform compatibility. It’s a great choice for beginners.
- Download Etcher: Go to the official Balena Etcher website (
balena.io/etcher) and download the version for your operating system. Install it if necessary. - Insert USB Drive: Plug in your USB flash drive.
- Launch Etcher: Open the Etcher application.
- Select Image: Click “Flash from file” and select your ISO file.
- Select Target: Click “Select target” and choose your USB drive. Etcher does a good job of preventing you from accidentally selecting system drives.
- Flash Image: Click the “Flash!” button. You might be prompted for administrator credentials.
- Wait for Completion: Etcher will flash the image and then validate it. This process can take a few minutes.
- Safely Remove: Once “Flash Complete!” is displayed, you can safely remove your USB drive.
Ventoy (Advanced: Multiple ISOs on One Drive)
For advanced users, Ventoy allows you to create a bootable USB drive where you can simply copy multiple ISO files directly onto it. When you boot from the Ventoy drive, it presents a menu allowing you to choose which ISO to boot from. This is incredibly useful for IT professionals who carry multiple OS installers or utility ISOs.
The Boot Process: Accessing BIOS/UEFI
Once you have a bootable USB drive, you need to tell your computer to boot from it instead of its internal hard drive. This involves accessing your computer’s BIOS (Basic Input/Output System) or UEFI (Unified Extensible Firmware Interface) settings.
- Connect Bootable USB: Ensure your bootable USB drive is plugged into the computer.
- Restart Computer: Restart your computer.
- Enter BIOS/UEFI Setup: As soon as the computer starts, repeatedly press the designated key to enter BIOS/UEFI setup. Common keys include
Del,F2,F10,F12, orEsc. The exact key often flashes on the screen during startup. - Change Boot Order:
- BIOS: Look for a “Boot” or “Boot Order” tab. You’ll need to move your USB drive (often listed by its brand or as “USB HDD”) to the top of the boot priority list.
- UEFI: In UEFI, you might have a graphical interface. Navigate to “Boot Options” or “Boot Manager” and prioritize the USB drive. Some UEFI systems also offer a “Boot Override” option on startup, letting you select the USB drive for a single boot without changing permanent settings.
- Save and Exit: Save your changes (usually by pressing
F10) and exit BIOS/UEFI. The computer will restart and should now boot from your USB drive, starting the OS installation or live environment.
Method 3: Utilizing ISO Files with Virtual Machines
Virtual machines (VMs) offer a powerful way to run multiple operating systems on a single physical computer, isolated from each other. ISO files are the cornerstone of installing operating systems within these virtual environments, acting as the virtual optical discs for your virtual machine. This method is crucial for developers, testers, and anyone wishing to experiment with different OSes without affecting their primary system.
Introduction to Virtualization
Virtualization software, such as Oracle VirtualBox (free and open-source) or VMware Workstation Player (free for personal use) / Fusion (for macOS), creates a “virtual computer” within your existing operating system. This virtual machine has its own virtual CPU, RAM, hard drive, and other hardware components, allowing it to run a complete operating system just like a physical machine. The ISO file serves as the installation media for this guest operating system.
Installing an OS from ISO in VirtualBox
VirtualBox is a widely popular, free, and robust virtualization solution.
- Install VirtualBox: Download and install Oracle VirtualBox from its official website (
virtualbox.org). - Create a New Virtual Machine:
- Open VirtualBox and click “New” to start the “Create Virtual Machine” wizard.
- Name and Operating System: Give your VM a descriptive name (e.g., “Ubuntu Test VM”). VirtualBox will often automatically detect the OS type and version based on the name.
- Memory Size: Allocate a suitable amount of RAM to your VM. This should be enough for the guest OS to run smoothly but leave enough for your host OS. (e.g., 2GB for lightweight Linux, 4GB+ for Windows).
- Hard Disk: Select “Create a virtual hard disk now” and click “Create.” Choose “VDI (VirtualBox Disk Image)” as the file type, “Dynamically allocated” (which only uses space on your physical drive as the VM fills it up), and then specify a suitable size for the virtual disk (e.g., 20-50GB for most OSes). Click “Create.”
- Configure Storage (Mount the ISO):
- Once the VM is created, select it in the VirtualBox Manager and click “Settings.”
- Go to the “Storage” section. Under “Controller: IDE,” select the empty CD icon.
- On the right-hand side, click the small CD icon next to “Optical Drive” and select “Choose a disk file…”
- Browse to and select your ISO file (e.g., your Windows or Ubuntu ISO). This virtually “inserts” the ISO into the VM’s optical drive.
- Click “OK” to save the settings.
- Start the Virtual Machine:
- Back in the VirtualBox Manager, select your VM and click “Start.”
- The VM will boot, recognizing the ISO as an inserted disc, and the operating system installation process will begin, just as if you were installing it on a physical computer.
- Follow OS Installation Steps: Proceed with the on-screen instructions for installing your chosen operating system within the virtual machine window.
- Eject the ISO: After the OS is installed and the VM reboots for the first time, it’s good practice to “eject” the ISO to prevent the VM from trying to boot from it again. Go back to the VM’s “Settings” > “Storage,” select the virtual CD/DVD drive, and click the CD icon on the right, choosing “Remove Disk from Virtual Drive.”
Installing an OS from ISO in VMware Workstation Player/Fusion
The process in VMware products is very similar to VirtualBox.
- Install VMware Product: Download and install VMware Workstation Player (Windows/Linux) or VMware Fusion (macOS).
- Create a New Virtual Machine:
- Open VMware and choose “Create a New Virtual Machine.”
- Installer disc image file (iso): Select this option and browse to your ISO file. VMware often intelligently pre-fills the OS type based on the ISO.
- Guest Operating System: Confirm the OS type and version.
- Virtual Machine Name and Location: Give it a name and choose where to save its files.
- Disk Size: Specify the virtual disk size and whether to store it as a single file or split into multiple files.
- Customize Hardware (Optional): You can adjust RAM, CPU cores, network settings, etc., before finishing.
- Finish and Start: Click “Finish,” and VMware will create the VM and automatically start it, booting from the ISO to begin the installation.
- Follow OS Installation Steps: Proceed with the operating system installation within the VM window.
- Eject the ISO: After installation, you can usually “eject” the virtual disc from the VM’s settings or by right-clicking the virtual drive icon within the VMware interface.
Best Practices and Troubleshooting
While installing ISO files is generally straightforward, following best practices and being aware of common issues can save you a lot of time and frustration.
Verifying ISO Integrity (Checksums)
A corrupted ISO file can lead to installation errors, system instability, or even security vulnerabilities. It’s always a good idea to verify the integrity of an ISO file after downloading it, especially for operating systems.
- Checksums: Reputable sources usually provide a checksum (like MD5, SHA-1, or SHA-256) for their ISO files.
- How to Verify:
- Windows: Use PowerShell:
Get-FileHash -Algorithm SHA256 C:pathtoyourimage.iso - macOS/Linux: Use the terminal:
shasum -a 256 /path/to/your/image.iso(for SHA-256).
- Windows: Use PowerShell:
- Compare the generated hash with the one provided by the download source. If they don’t match, your ISO is corrupted, and you should re-download it.
Ensuring Sufficient Storage
Whether mounting or burning an ISO, ensure you have enough free space:
- Host Drive: The drive where the ISO file itself is stored needs enough space.
- USB Drive: When creating a bootable USB, ensure the USB drive is large enough to accommodate the entire ISO image (typically 8GB or 16GB for modern OSes).
- Virtual Machine: Allocate enough virtual disk space for the guest OS to install and operate comfortably.
Common Installation Errors and Solutions
- “Operating System Not Found” / “No Boot Device”: This usually means your computer isn’t booting from the USB drive. Double-check your BIOS/UEFI boot order (as explained in Method 2). Ensure the USB drive was created correctly.
- Installation Fails Mid-Way: Could be a corrupted ISO (verify checksum!), a faulty USB drive, or insufficient RAM/CPU allocated to a VM. Try remaking the bootable USB or re-downloading the ISO.
- Slow Installation: USB 2.0 drives are significantly slower than USB 3.0. Use a faster USB drive and port if possible. In VMs, ensure you’ve allocated sufficient CPU cores and RAM.
- Driver Issues After Installation: This isn’t directly ISO-related but often arises after an OS installation. Ensure you download and install all necessary drivers (chipset, graphics, network) for your hardware from the manufacturer’s website. For VMs, install “Guest Additions” (VirtualBox) or “VMware Tools” for optimal performance.
Security Considerations: Downloading ISOs from Trusted Sources
Always download ISO files, especially operating systems, from official and reputable sources. Downloading from unofficial or torrent sites can expose you to:
- Malware: Modified ISOs might contain viruses, ransomware, or spyware.
- Security Vulnerabilities: ISOs with outdated components or backdoors.
- Illegal Software: Pirated copies that might lack legitimate licensing or updates.
Stick to official websites for Windows (Microsoft), Linux distributions (Ubuntu, Fedora, Debian), and reputable software vendors. This aligns with good digital security practices, which are paramount in today’s tech landscape.
Conclusion
Mastering the art of handling ISO files is an essential skill in the digital age. From the simplest act of mounting a virtual disc to the critical task of creating bootable installation media, ISOs are central to managing operating systems and software. We’ve explored the diverse methods available—from native mounting capabilities in Windows, macOS, and Linux to powerful third-party tools like Rufus and Etcher, and the seamless integration within virtual machine environments like VirtualBox and VMware.
By understanding the nature of an ISO file, familiarizing yourself with these practical techniques, and adhering to best practices such as verifying integrity and sourcing files responsibly, you empower yourself with greater control over your technology. Whether you’re a casual user troubleshooting a system, a developer testing new software, or an IT professional deploying solutions, the knowledge shared here will undoubtedly streamline your workflow and enhance your digital productivity. Embrace these tools, and transform the way you interact with software and operating systems, making your tech journey smoother and more secure.
aViewFromTheCave is a participant in the Amazon Services LLC Associates Program, an affiliate advertising program designed to provide a means for sites to earn advertising fees by advertising and linking to Amazon.com. Amazon, the Amazon logo, AmazonSupply, and the AmazonSupply logo are trademarks of Amazon.com, Inc. or its affiliates. As an Amazon Associate we earn affiliate commissions from qualifying purchases.