In today’s interconnected world, a reliable network connection is more than just a convenience; it’s a fundamental necessity for work, entertainment, and communication. Whether you’re a remote worker needing stable Wi-Fi for video conferences, a gamer demanding low latency for online battles, or simply someone who wants to browse the web without frustrating buffering, a functional network adapter is the gateway to the digital realm. But what happens when your existing adapter falters, or you need to add networking capabilities to a new build or an older machine? This is where understanding how to install a network adapter becomes crucial. This comprehensive guide will walk you through the process, covering everything from identifying the type of adapter you need to the final steps of ensuring it’s working optimally, all within the broader context of leveraging technology for efficiency and productivity.
Understanding Your Network Adapter Needs
Before diving into the installation process, it’s essential to understand the different types of network adapters available and determine which best suits your requirements. The evolution of technology has brought forth a variety of solutions, each with its own strengths and applications.
Internal vs. External Network Adapters
Network adapters, also known as Network Interface Cards (NICs) or network interface controllers, come in two primary forms: internal and external. The choice between them often depends on the type of computer you have and your specific needs.
Internal Network Adapters: The Integrated Solution
Internal network adapters are typically integrated directly onto the motherboard of most modern computers. This means that out of the box, your desktop or laptop likely already has a built-in way to connect to a network. However, if you’re building a custom PC, or if your motherboard’s integrated adapter is outdated or malfunctioning, you might need to install a new internal one.
- PCIe Network Cards: For desktop computers, the most common type of internal network adapter is a PCIe (Peripheral Component Interconnect Express) card. These cards slot directly into an available PCIe slot on your motherboard. They come in various configurations, offering both wired Ethernet and wireless Wi-Fi capabilities, and often boast higher performance and more advanced features than integrated solutions, such as faster Ethernet speeds (2.5GbE, 5GbE, 10GbE) or the latest Wi-Fi standards (Wi-Fi 6/6E/7).
- M.2 Network Modules: In some smaller form factor PCs and laptops, especially those with M.2 slots, you might find M.2 network modules. These are compact cards that plug into a dedicated M.2 slot, typically reserved for Wi-Fi and Bluetooth.
External Network Adapters: Flexibility and Portability
External network adapters offer a convenient way to add or upgrade networking capabilities without needing to open your computer case. They are particularly useful for laptops, all-in-one PCs, or older computers that might not have accessible internal expansion slots.
- USB Network Adapters: The most common type of external adapter connects via a USB port. These are incredibly versatile and come in a vast range of specifications. You can find simple USB Wi-Fi dongles for basic internet access, more powerful USB Wi-Fi adapters with external antennas for improved signal reception, and USB Ethernet adapters for adding a wired connection to devices that lack an Ethernet port. The speed and capabilities of USB adapters are often dictated by the USB standard they utilize (USB 2.0, 3.0, 3.1, 3.2, or USB4).
- Thunderbolt Network Adapters: For users who require the highest bandwidth and performance, Thunderbolt network adapters are an option. These leverage the high speed of Thunderbolt ports to provide extremely fast wired Ethernet connections, often supporting 10GbE or even faster speeds, making them ideal for demanding professional workloads.
Wired vs. Wireless Connectivity
Beyond the physical form factor, the fundamental distinction lies in how you connect to your network: wired or wireless.
Wired (Ethernet) Connectivity: Stability and Speed
Wired connections, using Ethernet cables, are renowned for their stability, speed, and low latency. They are less susceptible to interference from other devices and offer a consistent performance. This makes them the preferred choice for applications where a reliable connection is paramount, such as online gaming, high-definition video streaming, and large file transfers.
- Benefits: Consistent speed, reduced latency, increased security (harder to intercept traffic), and often higher bandwidth potential compared to older wireless standards.
- Considerations: Requires physical cabling, which can be restrictive in terms of placement and can sometimes be an aesthetic concern.
Wireless (Wi-Fi) Connectivity: Freedom and Mobility
Wireless connections, using Wi-Fi, offer unparalleled freedom and mobility. They allow devices to connect to a network without physical cables, making them ideal for laptops, smartphones, and other portable devices. The latest Wi-Fi standards continue to push the boundaries of speed and range, making wireless a viable and often preferred option for many users.
- Benefits: Mobility, flexibility, ease of setup (no cables to run), and ability to connect multiple devices simultaneously.
- Considerations: Susceptible to interference, signal strength can degrade with distance and obstacles, and potential security risks if not properly secured.
By understanding these distinctions, you can confidently choose the network adapter that best aligns with your hardware, your environment, and your digital activities. This thoughtful selection forms the bedrock of a successful and efficient technology setup, contributing to your overall productivity and seamless digital experience.
Installing an Internal Network Adapter (PCIe Card)
Installing an internal network adapter, specifically a PCIe card, is a common upgrade for desktop computers. This process involves physically opening your computer and inserting the card into an available slot. While it might seem daunting, with careful attention to detail and a few basic tools, it’s a manageable task.
Prerequisites and Safety Precautions
Before you begin, gather the necessary tools and take crucial safety measures to protect yourself and your computer’s components.
-
Tools You’ll Need:
- Phillips Head Screwdriver: Most computer cases use Phillips head screws. A magnetic tip can be helpful for holding screws.
- Anti-Static Wrist Strap: This is highly recommended to prevent electrostatic discharge (ESD), which can damage sensitive electronic components.
- Your New Network Adapter: Ensure it’s compatible with your motherboard’s PCIe slots.
- User Manual for Your Motherboard and Network Adapter: These will provide specific details relevant to your hardware.
-
Safety Precautions:
- Power Off and Unplug: Always shut down your computer completely and unplug the power cord from the wall socket.
- Ground Yourself: Before touching any internal components, wear your anti-static wrist strap and connect it to an unpainted metal part of your computer case. If you don’t have a wrist strap, periodically touch an unpainted metal surface of the case to discharge static electricity.
- Work in a Clean, Well-Lit Area: Avoid working on carpet, as it can generate static electricity. Ensure you have adequate lighting to see what you’re doing.
- Handle Components Gently: Avoid touching the gold connectors or the circuit board of the network adapter.
Step-by-Step Installation Process
With your tools ready and safety precautions in place, you can proceed with the physical installation.
- Open Your Computer Case:
- Most desktop cases have side panels that are secured by screws at the rear of the case. Remove these screws and slide the panel off. Refer to your case’s manual if you’re unsure.
- Locate an Available PCIe Slot:
- Examine your motherboard for PCIe slots. They are typically long slots, often color-coded. PCIe x16 slots are the longest, used for graphics cards, while PCIe x1 slots are shorter and ideal for most network cards. Ensure you choose a slot that the network adapter card will fit into and that isn’t blocked by other components.
- Remove the Expansion Slot Cover:
- At the back of your computer case, corresponding to the chosen PCIe slot, you’ll find a metal expansion slot cover. This cover needs to be removed to allow the network adapter’s ports to be accessible from the outside. Unscrew or unclip this cover. Some cases have tool-less designs, while others require a screw.
- Install the Network Adapter:
- Align the network adapter’s connector with the chosen PCIe slot on the motherboard.
- Gently but firmly press the card straight down into the slot until it is fully seated. You should feel a slight click or resistance as it locks into place.
- Ensure the bracket on the network adapter aligns with the opening where you removed the expansion slot cover.
- Secure the Network Adapter:
- Once the card is seated, secure its bracket to the computer case using the screw you removed earlier or a new screw if provided. This prevents the card from shifting.
- Close the Computer Case:
- Carefully slide the side panel back into place and secure it with its screws.

This physical installation is the first major step. The next crucial phase involves ensuring the operating system recognizes and can utilize your new hardware, which is where software configuration comes into play.
Installing an External Network Adapter (USB)
External network adapters, particularly USB adapters, offer a user-friendly and accessible way to add or upgrade networking capabilities to almost any computer. This method bypasses the need to open your computer’s chassis, making it ideal for those who are less comfortable with internal hardware or for laptops that lack dedicated expansion slots.
Connecting the USB Network Adapter
The physical connection process for a USB network adapter is straightforward, akin to plugging in any other USB device.
- Identify an Available USB Port:
- Locate an available USB port on your computer. For optimal performance, especially with newer, faster adapters, it’s recommended to use a USB 3.0 or higher port (often identified by a blue color inside the port).
- Plug in the USB Adapter:
- Gently insert the USB network adapter into the chosen USB port. It should fit snugly and not require excessive force.
- Power On Your Computer:
- Once the adapter is plugged in, power on your computer as you normally would.
The operating system will then typically detect the new hardware. This leads to the next critical step: driver installation.
Installing the Necessary Drivers
Even though the adapter is physically connected, your computer needs specific software, known as drivers, to communicate with and control the network adapter. Without the correct drivers, the adapter will not function.
Automatic Driver Installation
Modern operating systems, such as Windows and macOS, have a vast library of built-in drivers. In many cases, when you plug in a new USB network adapter, the operating system will automatically detect it and attempt to install the appropriate driver from its database.
- What to Look For: You might see a notification on your screen indicating that “New hardware is being installed” or that “Drivers are being installed.” This process can take a few moments.
- If Successful: If the automatic installation is successful, you may see a notification that the device is ready to use. You can then proceed to test your network connection.
Manual Driver Installation (When Automatic Fails)
Sometimes, the operating system may not have the correct driver readily available, or you might have a more specialized or brand-new adapter. In such scenarios, you’ll need to install the drivers manually.
- Check the Adapter’s Packaging or Manufacturer’s Website:
- Your network adapter should have come with a driver CD or instructions on where to download the latest drivers. The manufacturer’s website is the most reliable source for the most up-to-date and compatible drivers.
- Look for a “Support,” “Downloads,” or “Drivers” section on the manufacturer’s website. You’ll typically need to select your product model and operating system.
- Download the Driver Software:
- Download the driver file to a location you can easily find on your computer, such as your Desktop or Downloads folder.
- Run the Driver Installer:
- Locate the downloaded driver file (it’s often an executable file, like a
.exeon Windows). - Double-click the file to launch the installer.
- Follow the on-screen prompts. The installer will guide you through the process, which usually involves accepting license agreements and choosing installation locations.
- Important Note: Some installers may instruct you to plug in the USB adapter after the software installation has begun or is complete. Pay close attention to the installer’s instructions.
- Locate the downloaded driver file (it’s often an executable file, like a
- Restart Your Computer:
- After the driver installation is complete, it’s often recommended to restart your computer. This ensures that all changes are properly applied.
Verifying the Installation and Connecting to Your Network
Once the drivers are installed, you need to confirm that the adapter is recognized and then connect to your network.
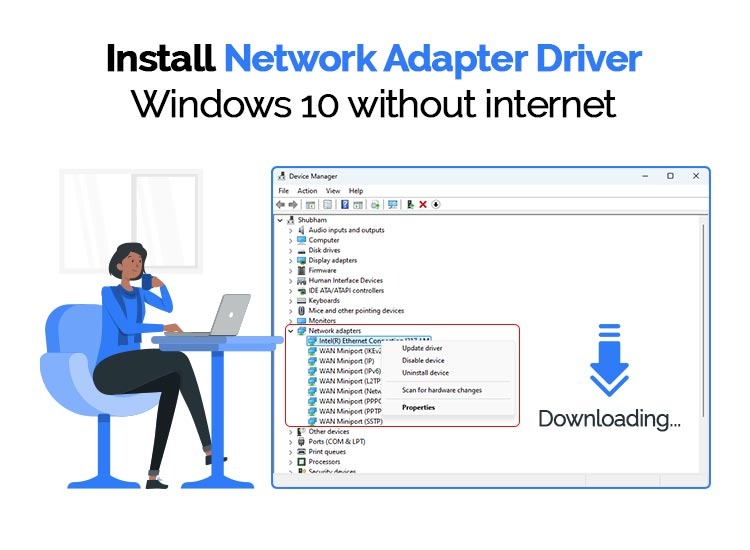
- Check Device Manager (Windows):
- Right-click on the Start button and select “Device Manager.”
- Expand the “Network adapters” category. You should see your newly installed network adapter listed here, ideally without any yellow exclamation marks or error symbols, which would indicate a problem.
- Check System Preferences (macOS):
- Go to “Apple menu” > “System Settings” (or “System Preferences”).
- Look for “Network” settings. Your new adapter should appear in the list of network interfaces.
- Connect to Your Wi-Fi Network (if applicable):
- Click on the Wi-Fi icon in your system tray (Windows) or menu bar (macOS).
- A list of available Wi-Fi networks will appear. Select your network name (SSID).
- Enter your Wi-Fi password when prompted.
- If it’s an Ethernet adapter, ensure the Ethernet cable is connected to both your computer and your router or modem. Your computer should automatically obtain an IP address and connect.
If you encounter issues, double-checking the driver installation and consulting the adapter’s manual or manufacturer’s support resources are the next logical steps. Successfully installing an external adapter brings immediate connectivity benefits, enhancing your device’s utility and your overall digital experience.
Troubleshooting Common Network Adapter Issues
Even with successful installation, you might occasionally encounter problems with your network adapter. Understanding how to troubleshoot these issues can save you time and frustration, ensuring your connection remains stable and reliable. These solutions often tie into the broader themes of digital security and productivity, as an unstable connection can hinder both.
No Internet Connection After Installation
This is a frequent concern after installing a new adapter. Several factors could be at play, from simple configuration errors to more complex hardware conflicts.
- Check Physical Connections:
- Wired: Ensure the Ethernet cable is securely plugged into both the computer and the router/modem. Try a different Ethernet cable if possible.
- Wireless: Verify that you are within range of your Wi-Fi signal and that the adapter is properly seated in its port (if internal) or USB port (if external).
- Verify Driver Installation:
- Revisit Device Manager (Windows) or System Preferences (macOS). Ensure the network adapter is recognized and has no error symbols. If there are errors, try uninstalling and reinstalling the drivers.
- Restart Network Devices:
- Power cycle your modem and router. Turn them off, wait about 30 seconds, and then turn them back on. This can resolve many temporary network glitches.
- IP Address Configuration:
- In most home networks, your router assigns IP addresses automatically via DHCP. Ensure your adapter is set to obtain an IP address automatically.
- Windows: Go to Network Connections, right-click your adapter, select Properties, then Internet Protocol Version 4 (TCP/IPv4), click Properties, and ensure “Obtain an IP address automatically” and “Obtain DNS server address automatically” are selected.
- Firewall and Antivirus Software:
- Sometimes, security software can mistakenly block network connections. Temporarily disable your firewall or antivirus software to see if that resolves the issue. If it does, you’ll need to configure your security software to allow the network adapter to function properly. This is a critical aspect of digital security – balancing protection with functionality.
- Network Troubleshooter (Windows):
- Windows has a built-in network troubleshooter that can often diagnose and fix common connectivity problems. Right-click the network icon in the system tray and select “Troubleshoot problems.”
Slow Internet Speeds
If you’re connected but experiencing sluggish performance, the issue might not be a complete outage but rather a reduction in speed.
- Check Your Internet Plan:
- Ensure your internet service provider (ISP) plan actually supports the speeds you are expecting.
- Test with a Different Device:
- Connect another device (laptop, smartphone) to the same network. If that device also experiences slow speeds, the problem likely lies with your router, modem, or ISP.
- Wi-Fi Interference:
- For wireless connections, interference from other electronic devices (microwaves, cordless phones, Bluetooth devices) or even neighboring Wi-Fi networks can significantly impact speed. Try moving closer to the router or changing the Wi-Fi channel in your router’s settings.
- Driver Updates:
- Outdated or corrupted drivers can sometimes lead to performance issues. Ensure you have the latest drivers from the manufacturer’s website.
- Adapter Capabilities:
- Confirm that your network adapter’s specifications (e.g., Wi-Fi standard, Ethernet speed) are not a bottleneck. An older Wi-Fi adapter might not be able to take full advantage of a faster internet plan.
- Ethernet Cable Quality (for Wired):
- Damaged or low-quality Ethernet cables (e.g., Cat 5 instead of Cat 5e, Cat 6, or higher for faster speeds) can limit your connection speed.

Adapter Not Recognized by the System
If your computer simply doesn’t see the network adapter at all, even after installation.
- Reseat the Adapter:
- For internal PCIe cards, power off the PC, unplug it, ground yourself, and carefully remove and reinsert the card into the slot. Ensure it’s fully seated.
- For USB adapters, try unplugging it and plugging it into a different USB port.
- Check BIOS/UEFI Settings (for internal adapters):
- On rare occasions, the integrated network adapter on your motherboard might be disabled in the BIOS/UEFI settings. You’ll need to enter your computer’s BIOS/UEFI during boot (usually by pressing Delete, F2, or F12) and check for settings related to onboard devices.
- Hardware Failure:
- If all troubleshooting steps fail, it’s possible the network adapter itself is faulty. If it’s a new adapter, contact the manufacturer for a replacement.
By systematically working through these troubleshooting steps, you can effectively diagnose and resolve most common network adapter issues, ensuring a smooth and efficient digital experience that supports your productivity and connectivity needs.
aViewFromTheCave is a participant in the Amazon Services LLC Associates Program, an affiliate advertising program designed to provide a means for sites to earn advertising fees by advertising and linking to Amazon.com. Amazon, the Amazon logo, AmazonSupply, and the AmazonSupply logo are trademarks of Amazon.com, Inc. or its affiliates. As an Amazon Associate we earn affiliate commissions from qualifying purchases.