Windows 11 represents a significant leap forward in Microsoft’s operating system evolution, offering a modernized interface, enhanced productivity features, and a more integrated ecosystem. Whether you’re a seasoned tech enthusiast looking to embrace the latest advancements or a casual user eager to refresh your computing experience, understanding how to install Windows 11 is crucial. This comprehensive guide will walk you through the entire process, from checking compatibility to the final setup, ensuring a smooth and successful installation.
The allure of Windows 11 lies in its sleek design, centered Start menu, rounded corners, and a host of new functionalities designed to streamline your workflow and boost your digital security. From its intuitive Snap Layouts and Snap Groups that revolutionize multitasking to the integrated Microsoft Teams chat and the revamped Microsoft Store, Windows 11 aims to be your ultimate productivity hub. However, before you embark on the installation journey, it’s essential to understand the prerequisites and choose the installation method that best suits your needs.
Understanding Windows 11 System Requirements and Compatibility
Before diving into the installation process, the most critical first step is to determine if your current computer meets the minimum system requirements for Windows 11. Microsoft has introduced stricter hardware requirements compared to previous Windows versions, primarily for security and performance reasons. Failing to meet these requirements could result in an unsuccessful installation or a suboptimal user experience.
Checking Your PC’s Compatibility with Windows 11
Microsoft provides a user-friendly tool called PC Health Check to help you assess your computer’s compatibility. This application scans your system and provides a clear report on whether it meets the necessary specifications.
Here’s how to use PC Health Check:
- Download PC Health Check: Visit the official Microsoft Windows 11 download page and find the link to download the PC Health Check application.
- Run the Application: Once downloaded, run the installer and follow the on-screen instructions.
- Perform the Check: Open the PC Health Check app and click on the “Check now” button under the “Introducing Windows 11” section.
- Review the Results: The app will display a summary of your system’s compatibility. If your PC is compatible, it will state that “This PC meets Windows 11 system requirements.” If not, it will clearly outline the reasons why, usually related to the TPM (Trusted Platform Module) version, Secure Boot, processor, or RAM.
Key System Requirements to Keep in Mind:
- Processor: 1 gigahertz (GHz) or faster with 2 or more cores on a compatible 64-bit processor or System on a Chip (SoC).
- RAM: 4 gigabytes (GB) or more.
- Storage: 64 GB or larger storage device.
- System Firmware: UEFI, Secure Boot capable.
- TPM: Trusted Platform Module (TPM) version 2.0. This is a crucial security feature that is often the primary reason for incompatibility on older machines.
- Graphics Card: Compatible with DirectX 12 or later with WDDM 2.0 driver.
- Display: High definition (720p) display that is greater than 9” diagonally, 8 bits per color channel.
- Internet Connection and Microsoft Account: Windows 11 Home edition requires internet connectivity and a Microsoft account to complete device setup on first use.
What if My PC Isn’t Compatible?
If PC Health Check indicates your PC is not compatible, don’t despair. While direct installation might not be officially supported, there are advanced methods that some users explore, though these come with caveats and are not recommended for the average user due to potential stability and security issues. For most users, the best course of action is to consider upgrading your hardware or purchasing a new PC that is Windows 11 ready. Investing in compatible hardware ensures you can fully leverage the security features and performance benefits of Windows 11.
Choosing Your Installation Method: Clean Install vs. Upgrade
Once you’ve confirmed your system’s compatibility, the next decision is how you want to install Windows 11. The two primary methods are a clean install and an in-place upgrade. Each has its advantages and disadvantages, and the best choice depends on your current situation and preferences.
In-Place Upgrade: The Seamless Transition
An in-place upgrade is the most straightforward method for most users. It involves installing Windows 11 directly over your existing Windows 10 installation without erasing your personal files, applications, or settings. This method aims to preserve your current setup, making the transition as seamless as possible.
When to choose an in-place upgrade:
- You want to keep all your existing files, programs, and settings.
- You are currently running a stable version of Windows 10.
- You prefer a quick and easy installation process.
Potential downsides of an in-place upgrade:
- If your current Windows installation has underlying issues, these can sometimes be carried over to the new Windows 11 installation.
- It might not always free up as much disk space as a clean install.
Clean Install: A Fresh Start
A clean install, also known as a custom installation, involves wiping your hard drive and installing Windows 11 from scratch. This method starts with a completely fresh operating system, free from any old configurations or potential conflicts.
When to choose a clean install:
- You want to ensure a completely fresh and stable operating system.
- You are experiencing persistent issues with your current Windows installation.
- You are upgrading from an older version of Windows (e.g., Windows 7 or 8) and want a clean slate.
- You have important data that you can back up and restore later.
Potential downsides of a clean install:
- You will lose all data, installed applications, and settings on the drive where Windows is installed. It is absolutely crucial to back up all your important data before proceeding with a clean install.
- It requires more time and effort as you’ll need to reinstall all your applications and reconfigure your settings.
Step-by-Step Installation: From Download to Desktop
Regardless of whether you choose an in-place upgrade or a clean install, the core installation process involves obtaining the Windows 11 installation media and running the setup. Here are the primary methods to achieve this.
Method 1: Using the Windows 11 Installation Assistant (for Upgrades)
The Windows 11 Installation Assistant is the easiest way to upgrade from Windows 10 to Windows 11 if your PC meets the requirements. It automates the download and installation process.
- Download the Assistant: Go to the official Microsoft Windows 11 download page and find the “Windows 11 Installation Assistant.” Download and run it.
- Accept Terms and Conditions: Read and accept the license terms.
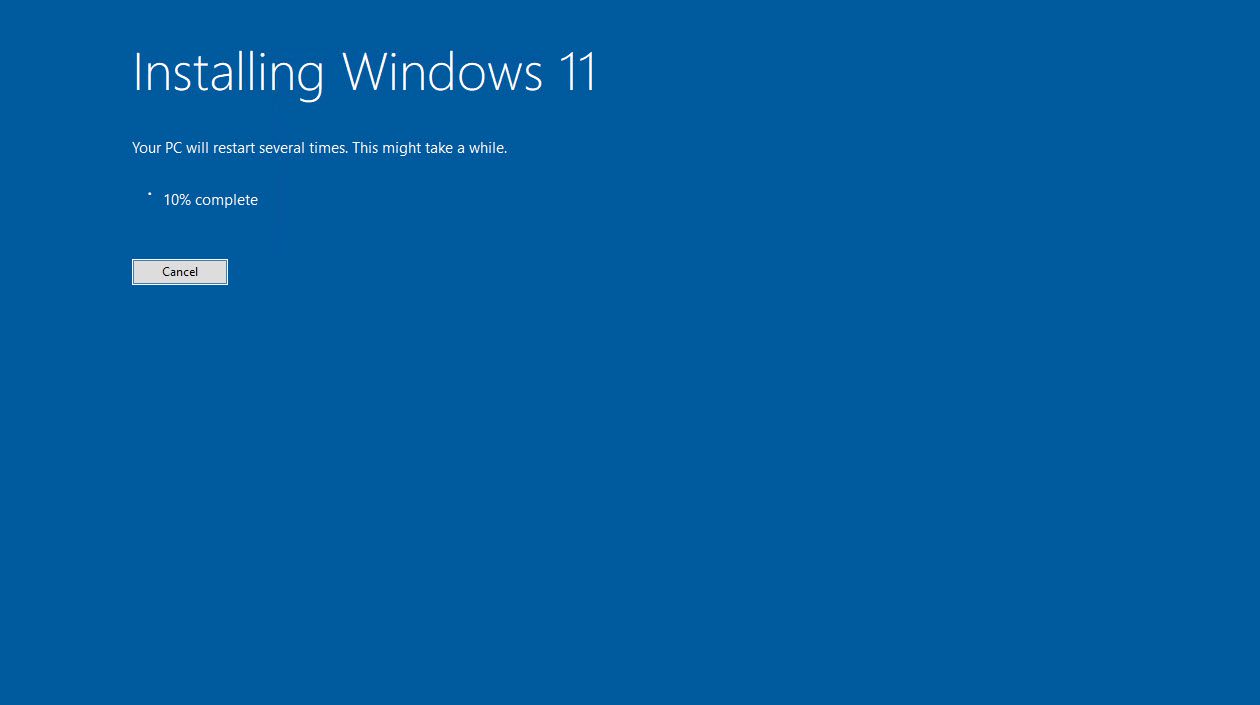
- Download and Install: The assistant will download Windows 11 and then begin the installation. Your PC will restart multiple times during this process.
- Complete Setup: Once the installation is complete, you’ll be guided through the initial Windows 11 setup, including signing in with your Microsoft account and configuring privacy settings.
Method 2: Creating Windows 11 Installation Media (USB Drive or DVD)
This method offers more flexibility and is essential for clean installs or if you prefer to manually control the installation process. It allows you to install Windows 11 on a new PC or perform a clean install on an existing one.
- Download the Media Creation Tool: Visit the Microsoft Windows 11 download page and download the “Create Windows 11 Installation Media” tool.
- Run the Tool: Execute the downloaded tool. Accept the license terms.
- Select Language and Edition: Choose the correct language, edition (Windows 11), and architecture (64-bit). It’s generally recommended to use the “Recommended options for this PC” unless you have a specific reason not to.
- Choose Media Type: Select “USB flash drive” and ensure you have a USB drive with at least 8GB of free space. Alternatively, you can choose “ISO file” to create a DVD later.
- Create the Media: The tool will download the Windows 11 files and create a bootable USB drive. This process can take some time depending on your internet speed.
- Boot from the USB Drive:
- Insert the USB drive into your computer.
- Restart your PC and enter your BIOS/UEFI settings (usually by pressing F2, F10, F12, or DEL during boot-up – consult your motherboard or PC manufacturer’s documentation).
- Change the boot order to prioritize booting from the USB drive.
- Save the changes and exit the BIOS/UEFI. Your PC will now boot from the USB drive.
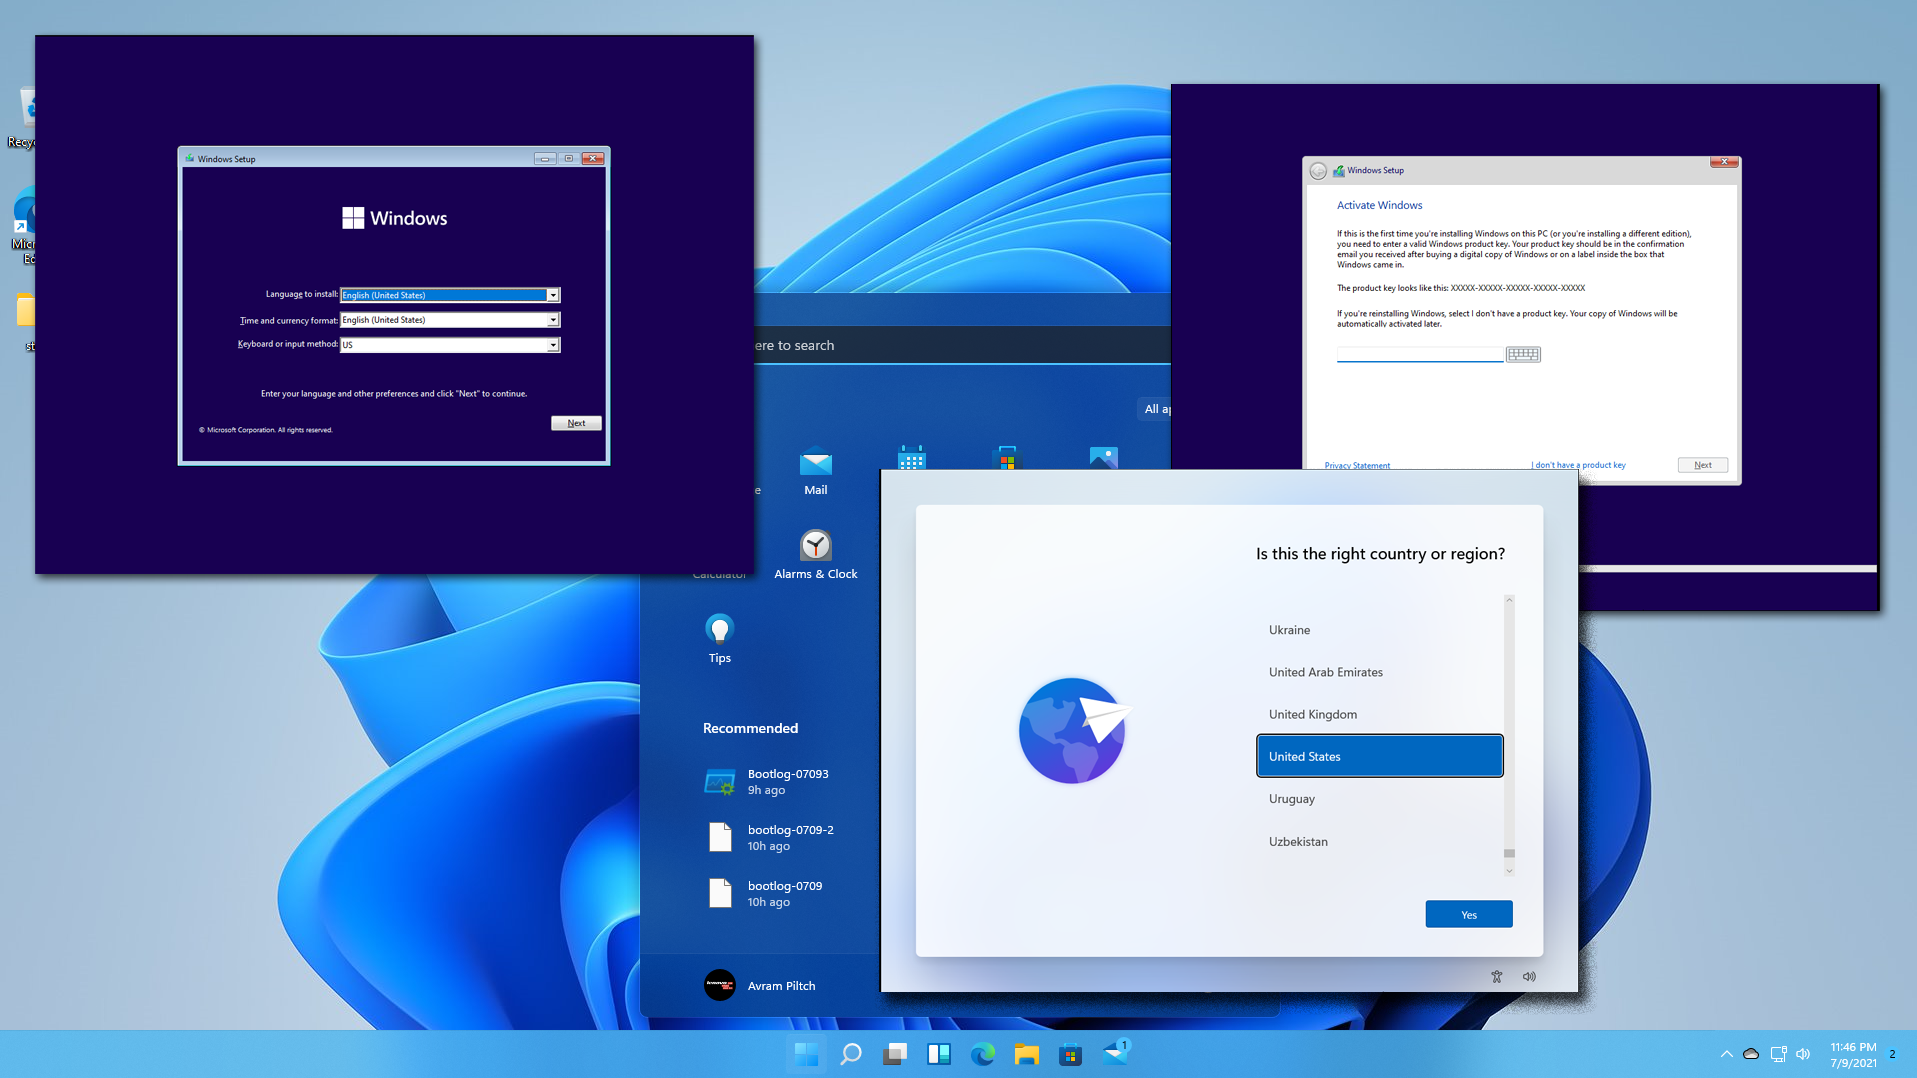
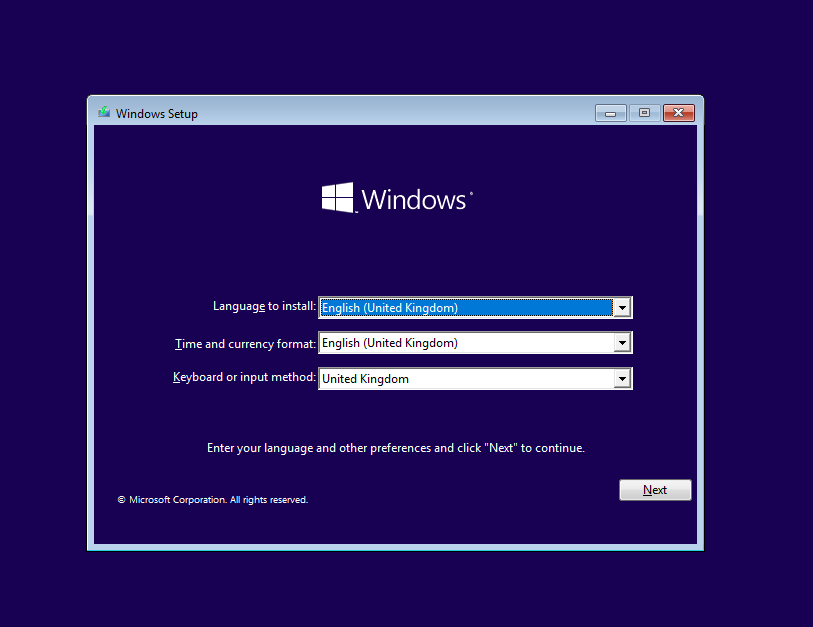
- Windows Setup:
- The Windows Setup screen will appear. Select your language, time and currency format, and keyboard layout, then click “Next.”
- Click “Install now.”
- If prompted for a product key, you can click “I don’t have a product key” if you’re reinstalling on a PC that was previously activated with Windows 10/11, as it will activate automatically.
- Select the edition of Windows 11 you want to install (e.g., Windows 11 Home or Pro).
- Accept the license terms and click “Next.”
- Crucial Step: Choose Installation Type:
- For an in-place upgrade (if you booted from the USB and are within Windows 10), you’ll see an option to “Upgrade: Install Windows and keep files, settings, and applications.”
- For a clean install, select “Custom: Install Windows only (advanced).” This will allow you to choose the drive and partitions where you want to install Windows. Be extremely careful here, as selecting the wrong drive or partition can lead to data loss. You may need to delete existing partitions and create new ones.
- Follow the on-screen instructions to complete the installation. This will involve partitioning your drive (if necessary), copying files, and setting up your preferences.
- Post-Installation Setup: After the installation, your PC will restart, and you’ll be guided through the initial Windows 11 setup process. This includes selecting your region, keyboard layout, connecting to a network, signing in with your Microsoft account, setting up a PIN, configuring privacy settings, and choosing your user experience preferences.
Method 3: Windows Update (for Compatible PCs)
If your PC is already running Windows 10 and meets the Windows 11 system requirements, the easiest way to upgrade is directly through Windows Update.
- Open Settings: Go to Settings > Update & Security > Windows Update.
- Check for Updates: Click “Check for updates.”
- Feature Update: If your PC is compatible, you should see an option for “Feature update to Windows 11.” Click “Download and install.”
- Follow Prompts: Windows will download the update in the background. Once downloaded, it will prompt you to restart your computer to begin the installation. This process is similar to an in-place upgrade and preserves your files and applications.
Post-Installation: Optimizing Your Windows 11 Experience
Once Windows 11 is successfully installed, there are several steps you can take to ensure your system is running optimally and to personalize your experience.
Essential Post-Installation Tasks
- Run Windows Update: Even after installation, it’s crucial to run Windows Update again to ensure you have the latest security patches and driver updates. Go to Settings > Windows Update and click “Check for updates.”
- Install Drivers: While Windows 11 usually installs most necessary drivers automatically, it’s a good idea to check your computer manufacturer’s website for the latest drivers for your specific hardware (graphics card, network adapter, audio, etc.). You can also use Device Manager to check for any devices with warning icons.
- Reinstall Applications: If you performed a clean install, you’ll need to reinstall all your favorite applications. Download them from their official sources to ensure you get the latest and most secure versions.
- Restore Your Data: If you backed up your personal files, now is the time to restore them to their appropriate locations.
- Configure Settings: Take some time to explore the Windows 11 Settings app. Customize your Start menu, taskbar, desktop background, and privacy settings to your liking.
- Explore New Features: Familiarize yourself with the new features like Snap Layouts, Widgets, Microsoft Teams integration, and the updated Microsoft Store.
By following these steps, you can ensure a smooth and successful installation of Windows 11, unlocking a modern, secure, and productive computing experience. Whether you’re looking to enhance your personal branding with new digital tools or boost your productivity, Windows 11 provides a robust platform to achieve your goals.
aViewFromTheCave is a participant in the Amazon Services LLC Associates Program, an affiliate advertising program designed to provide a means for sites to earn advertising fees by advertising and linking to Amazon.com. Amazon, the Amazon logo, AmazonSupply, and the AmazonSupply logo are trademarks of Amazon.com, Inc. or its affiliates. As an Amazon Associate we earn affiliate commissions from qualifying purchases.