A fresh installation of Windows 10 is a powerful way to revitalize your computer, resolving software glitches, removing accumulated clutter, and ensuring a clean slate for optimal performance. Whether you’re experiencing slowdowns, persistent errors, or simply want to start anew, this comprehensive guide will walk you through the entire process. We’ll cover everything from preparing your system and backing up your data to creating installation media and completing the setup, ensuring a smooth and successful transition.
Understanding the Benefits of a Fresh Windows 10 Install
Before diving into the technicalities, it’s crucial to understand why a fresh install is often the best solution for a sluggish or problematic Windows experience. Unlike an upgrade, which overwrites your existing installation while attempting to preserve your files and applications, a fresh install wipes your drive clean and installs Windows 10 from scratch. This approach offers several significant advantages:
- Resolving Software Glitches and Performance Issues: Over time, Windows installations can become bogged down by fragmented files, leftover registry entries from uninstalled programs, and corrupted system files. A fresh install eliminates all of this, effectively giving your computer a clean bill of health and restoring its original speed and responsiveness.
- Eliminating Malware and Viruses: While antivirus software is essential, some deeply embedded malware can be difficult to remove completely. A fresh installation effectively eradicates any malicious software that may have infected your system, providing a secure starting point.
- Starting with a Clean Slate: For users who frequently experiment with software, drivers, or system settings, a fresh install allows you to rebuild your system exactly how you want it. You can choose which applications to reinstall, avoid bringing over problematic software, and optimize your setup from the ground up.
- Potentially Improving Hardware Compatibility: In rare cases, driver conflicts or outdated system files can lead to issues with newer hardware. A clean install ensures you’re using the latest compatible drivers and system files, which can resolve these compatibility problems.
- Preparing for a New Computer: If you’re planning to sell or give away your old computer, a fresh install is the best way to ensure all your personal data is securely wiped from the drive, protecting your privacy.
However, it’s vital to acknowledge the primary drawback: data loss. A fresh install will erase everything on your primary drive (usually the C: drive). Therefore, meticulous preparation and data backup are paramount.
Preparing for a Successful Windows 10 Fresh Install
Success hinges on thorough preparation. Rushing this stage can lead to lost data or a failed installation.
1. Back Up Your Essential Data
This is the most critical step. Before you even think about creating installation media, ensure you have copies of all your important files.
- Documents, Photos, and Videos: These are typically found in folders like “Documents,” “Pictures,” “Videos,” and “Desktop.”
- Personal Settings and Configurations: If you have specific application settings or custom configurations you rely on, identify how to export or back them up within those applications.
- Browser Bookmarks and Saved Passwords: Most web browsers offer options to sync your data across devices or export bookmarks. Consider this for your saved passwords as well, though be mindful of security implications.
- Game Saves: Many modern games store save data in cloud services, but older or offline games might store them locally. Research where your favorite games store their progress.
- Important Software Licenses and Keys: If you have purchased software with perpetual licenses, ensure you have the license keys readily available. Many applications will require reactivation after a fresh install.
Where to Back Up:
- External Hard Drive or SSD: This is the most recommended method for large amounts of data. Connect an external drive, copy your files, and then safely eject it.
- Cloud Storage Services: Services like OneDrive, Google Drive, Dropbox, or iCloud are excellent for smaller, frequently accessed files. Sync your important folders to these services.
- USB Flash Drives: Suitable for smaller sets of critical files.
Tip: Organize your backup into logical folders on your chosen storage medium. Clearly label it as “Windows 10 Install Backup” to avoid confusion.
2. Gather Your Software and License Keys
While a fresh install removes all applications, you’ll want to reinstall your essential software afterward. Having your license keys and installation files ready will save you considerable time.
- Reinstall Your Operating System: This guide focuses on installing Windows 10 itself.
- Productivity Software: Microsoft Office, Adobe Creative Suite, and other professional applications.
- Web Browsers: Chrome, Firefox, Edge (though Edge is now built into Windows).
- Antivirus and Security Software: Consider using Windows Defender initially, or have your preferred third-party solution ready.
- Communication Tools: Zoom, Slack, Skype.
- Gaming Platforms: Steam, Epic Games Store, Battle.net.
- Drivers: While Windows 10 is excellent at automatically detecting and installing drivers, it’s wise to visit your computer manufacturer’s website (e.g., Dell, HP, Lenovo) or your motherboard manufacturer’s website (e.g., ASUS, Gigabyte, MSI) to download the latest drivers for your specific model, especially for graphics cards, network adapters, and chipsets.
Tip: Create a text file or spreadsheet listing the software you want to reinstall and any associated license keys. Keep this file in a safe place, accessible from your backup or a cloud service.
3. Check Your Windows 10 License
A fresh installation of Windows 10 requires a valid product key or a digital license to activate.
- Digital License: If you previously upgraded to Windows 10 from a licensed Windows 7 or 8.1, or if you purchased Windows 10 from the Microsoft Store, you likely have a digital license linked to your Microsoft account. In this case, upon reinstallation and connecting to the internet, Windows 10 should automatically activate.
- Product Key: If you purchased a retail copy of Windows 10 or received a product key from another source, ensure you have this key readily available. You’ll be prompted to enter it during the installation process.
Tip: You can check if your device has a digital license by going to Settings > Update & Security > Activation.
4. Ensure Your Computer Meets Windows 10 System Requirements
While most modern computers will easily meet these, it’s good practice to confirm. The minimum system requirements for Windows 10 are:
- Processor: 1 gigahertz (GHz) or faster processor or System on a Chip (SoC)
- RAM: 1 gigabyte (GB) for 32-bit or 2 GB for 64-bit
- Hard disk space: 16 GB for 32-bit OS or 20 GB for 64-bit OS
- Graphics card: DirectX 9 or later with WDDM 1.0 driver
- Display: 800×600
Creating Windows 10 Installation Media
To perform a fresh install, you’ll need bootable installation media. The easiest and most recommended method is using the Media Creation Tool from Microsoft.
Using the Media Creation Tool
- Download the Tool: Go to the official Microsoft website and search for “Download Windows 10.” You’ll find the Media Creation Tool. Download and run it.
- Accept License Terms: Read and accept the license terms.
- Choose “Create installation media (USB flash drive, DVD, or ISO file) for another PC”: This option allows you to create a bootable drive.
- Select Language, Edition, and Architecture: The tool will usually recommend options based on your current PC. You can uncheck “Use the recommended options for this PC” if you need to create media for a different computer or a specific version of Windows 10 (e.g., Home vs. Pro).
- Language: English (or your preferred language).
- Edition: Windows 10 (this includes both Home and Pro, and you’ll choose which to install during setup).
- Architecture: 64-bit is standard for most modern computers. If you have a very old PC, you might need 32-bit.
- Choose Media Type:
- USB flash drive: This is the most common and recommended option. You’ll need a USB drive with at least 8GB of free space. All data on the USB drive will be erased.
- ISO file: This creates an ISO image file that you can later burn to a DVD or mount as a virtual drive.
- Create the Media: Follow the on-screen prompts. The tool will download the Windows 10 files and create your bootable USB drive or ISO file. This process can take some time depending on your internet speed.
Alternative: Using an ISO File and Rufus

If you prefer to download an ISO file directly and create the bootable media yourself, you can use a third-party tool like Rufus.
- Download the Windows 10 ISO: You can often download ISOs directly from Microsoft’s website (sometimes requiring a bit of searching or a specific URL).
- Download Rufus: Rufus is a free, lightweight utility.
- Run Rufus:
- Insert your USB flash drive (at least 8GB).
- Open Rufus and select your USB drive from the “Device” dropdown.
- Click “SELECT” and navigate to your downloaded Windows 10 ISO file.
- Partition scheme: Usually GPT for modern UEFI systems. MBR for older BIOS systems.
- Target system: UEFI (non-CSM) for modern systems. BIOS (or UEFI-CSM) for older systems.
- Leave other settings as default unless you have specific needs.
- Click “START.” Rufus will format the USB drive and copy the Windows files to make it bootable. Again, all data on the USB drive will be erased.
Performing the Fresh Windows 10 Installation
With your bootable media ready and your data backed up, it’s time for the installation.
1. Booting from the Installation Media
- Insert the USB drive into the computer you want to install Windows 10 on.
- Restart your computer.
- Enter your BIOS/UEFI settings: As your computer starts up, you’ll need to press a specific key to enter the BIOS or UEFI setup. This key varies by manufacturer but is commonly F2, F10, F12, DEL, or ESC. Look for a message on the screen during startup that says “Press [key] to enter Setup” or similar.
- Change the Boot Order: Within the BIOS/UEFI settings, navigate to the “Boot” or “Boot Order” section. You need to set your USB drive (or DVD if you’re using one) as the first boot device. This tells your computer to load from the installation media instead of your hard drive.
- Save Changes and Exit: Once you’ve changed the boot order, save your changes and exit the BIOS/UEFI. Your computer will restart again.
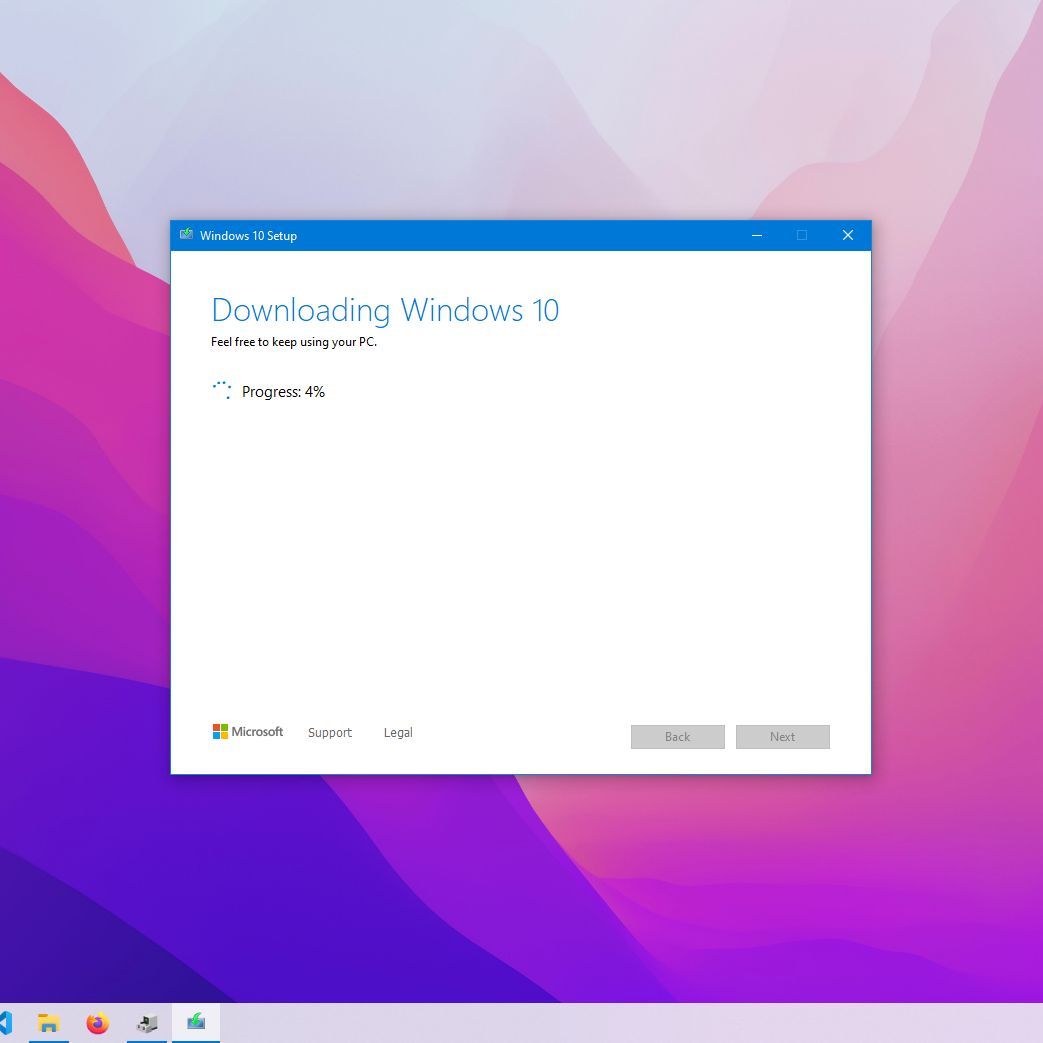
2. The Windows 10 Setup Process
Your computer should now boot from the USB drive, and you’ll see the Windows 10 setup screen.
-
Language, Time, and Keyboard Input: Select your preferred language, time and currency format, and keyboard layout. Click “Next.”
-
Install Now: Click the prominent “Install now” button.
-
Product Key (Optional): If you have your product key, enter it now. If you don’t have it or want to activate later, click “I don’t have a product key.” Windows 10 will likely activate automatically if you have a digital license.
-
Select Operating System Version: If you clicked “I don’t have a product key,” you’ll be prompted to choose the edition of Windows 10 you want to install (e.g., Windows 10 Home, Windows 10 Pro). Ensure this matches your license.
-
Accept License Terms: Read and accept the Microsoft software license terms. Click “Next.”
-
Choose Installation Type: This is the crucial step for a fresh install. Select “Custom: Install Windows only (advanced).”
-
Drive Selection and Formatting: You will now see a list of drives and partitions on your computer.
- Identify your primary drive: This is usually the largest drive, labeled as “Drive 0” or similar, and will contain your current Windows installation.
- Delete Existing Partitions: To perform a true fresh install, you need to delete all partitions associated with your old Windows installation on the target drive. Select each partition on that drive and click “Delete.” This will erase all data on those partitions. You will be left with “Unallocated Space” on that drive.
- Select Unallocated Space: Click on the “Unallocated Space” where you want to install Windows.
- Create a New Partition (Optional but recommended): Click “New” to create a new partition. You can usually accept the default size to use all the unallocated space for a single partition. Windows will automatically create additional small system partitions (like Recovery and EFI) if needed.
- Install Windows: Select the newly created partition (or the unallocated space if you skipped creating a new one) and click “Next.”
-
Windows Installation: Windows will now begin copying files and installing. Your computer will restart several times during this process. Do not remove the USB drive until instructed or after the initial setup screens begin, and make sure your boot order is set back to your hard drive after the first restart to avoid booting back into the installer.
3. Initial Windows 10 Setup (Out-of-Box Experience – OOBE)
After the main installation is complete and your computer has restarted, you’ll be guided through the initial setup.
- Region and Keyboard Layout: Confirm your region and keyboard layout.
- Connect to a Network: Connect to your Wi-Fi network or a wired Ethernet connection. This is important for activation and updates.
- Account Setup:
- Microsoft Account: You’ll be prompted to sign in with your Microsoft account. This is highly recommended as it syncs settings, provides access to the Microsoft Store, and is often tied to your digital license.
- Local Account: If you prefer not to use a Microsoft account, you can choose to create a local account. Look for an option like “Offline account” or “Skip for now” (though the wording might change).
- Create a PIN: For quicker logins, you’ll be asked to create a PIN.
- Privacy Settings: Review and adjust your privacy settings. Consider what information you’re comfortable sharing with Microsoft.
- Cortana (Optional): You can choose to set up Cortana or skip it.
- Finalizing: Windows will finalize your settings. This can take a few minutes.
Post-Installation Tasks: Restoring Your System
Congratulations, you’ve successfully performed a fresh install of Windows 10! Now it’s time to get your system back to a usable and secure state.
1. Install Drivers
While Windows 10 installs many generic drivers automatically, it’s best to install the specific drivers for your hardware.
- Device Manager: Open Device Manager by searching for it in the Start menu. Look for any devices with a yellow exclamation mark, indicating a missing or problematic driver.
- Manufacturer Websites: Visit the support section of your computer manufacturer’s website (Dell, HP, Lenovo, etc.) or your motherboard manufacturer’s website. Download and install the latest drivers for your specific model, paying close attention to:
- Chipset drivers
- Graphics drivers (NVIDIA, AMD, Intel)
- Audio drivers
- Network adapter drivers (Wi-Fi and Ethernet)
- Other hardware-specific drivers.
2. Run Windows Update
This is critical for security and stability.
- Go to Settings > Update & Security > Windows Update.
- Click “Check for updates.”
- Install all available updates, including optional ones. You may need to restart your computer multiple times for all updates to be applied.
3. Reinstall Your Applications
Now is the time to reinstall the software you backed up or noted down.
- Install your essential applications: web browsers, productivity suites, communication tools, gaming platforms, etc.
- Use the license keys you saved to activate any paid software.
4. Restore Your Data
Carefully copy your backed-up files from your external drive, cloud storage, or USB drives back to their appropriate locations on your computer.
5. Configure Your Settings
- Personalize your desktop: Set your wallpaper, theme, and taskbar preferences.
- Adjust power settings: Optimize for performance or battery life as needed.
- Review security settings: Ensure your firewall is active and consider enabling features like Windows Hello if available.

6. Clean Up and Optimize
- Disk Cleanup: Search for “Disk Cleanup” in the Start menu. This utility can remove temporary files and other unnecessary data.
- Startup Programs: Open Task Manager (Ctrl+Shift+Esc), go to the “Startup” tab, and disable any non-essential programs that launch automatically when Windows starts.
By following these steps, you’ll have a clean, optimized, and secure Windows 10 installation, ready for whatever you throw at it. A fresh install is a significant undertaking, but the rewards in terms of performance and system stability are well worth the effort.
aViewFromTheCave is a participant in the Amazon Services LLC Associates Program, an affiliate advertising program designed to provide a means for sites to earn advertising fees by advertising and linking to Amazon.com. Amazon, the Amazon logo, AmazonSupply, and the AmazonSupply logo are trademarks of Amazon.com, Inc. or its affiliates. As an Amazon Associate we earn affiliate commissions from qualifying purchases.