
Raze, Valorant’s explosive duelist, thrives on maps that allow her to leverage her potent utility for aggressive site takes, area denial, and swift rotations. Her kit, replete with damage-dealing grenades, a scouting bot, and unparalleled movement abilities, makes her a force to be reckoned with when deployed on canvases that complement her destructive playstyle. Identifying these optimal battlegrounds is crucial for maximizing her impact and securing victories. This guide delves into the characteristics that make a map ideal for Raze and highlights specific locations where she truly shines.
Understanding Raze’s Core Kit and Playstyle
Before pinpointing Raze’s best maps, a foundational understanding of her abilities and how they dictate her strategic approach is essential. Her playstyle is characterized by high aggression, quick entries, and the ability to clear tight spaces.

Boombot: The Scouting and Clearing Tool
Raze’s Boombot acts as a forward scout, clearing angles and forcing enemies out of hiding. Its ability to detect opponents and explode upon contact makes it invaluable for gaining information, initiating pushes, or checking common corners before an entry. Maps with narrow corridors and predictable hiding spots are goldmines for the Boombot.
Paint Shells: Area Denial and Lethal Damage
The Paint Shells are Raze’s signature cluster grenade, capable of dislodging entrenched defenders or denying specific areas. Its initial explosion followed by multiple mini-grenades makes it devastating in close quarters or when used to flush out enemies behind cover. Chokepoints and bomb sites with limited escape routes amplify its effectiveness.
Blast Packs: Mobility and Utility
Perhaps Raze’s most versatile ability, Blast Packs provide both vertical and horizontal mobility, allowing for rapid repositioning, aggressive peeks, and unprecedented entry angles. They can also be used offensively to deal damage or defensively to create distance. Mastering the double satchel jump is paramount for advanced Raze plays, enabling her to reach high ground or clear vast distances in an instant. Maps with vertical elements or long distances to cover benefit immensely from these packs.
Showstopper: The Game-Changing Ultimate
Raze’s ultimate, the Showstopper rocket launcher, is a high-impact, single-shot weapon capable of instantly eliminating enemies caught in its blast radius. It’s perfect for breaking through fortified defenses, securing multi-kills on grouped enemies, or clearing a bomb site during an execute. Open bomb sites and situations where enemies are forced into predictable positions allow for optimal Showstopper usage.
Map Elements Favorable to Raze
Certain map design principles inherently favor Raze’s explosive kit. Recognizing these elements helps identify potential Raze strongholds.
Chokepoints and Narrow Corridors
Raze excels in environments where her utility can funnel enemies or trap them. Chokepoints are ideal for her Paint Shells, forcing opponents to either take damage or retreat. Boombot also thrives here, as enemies have limited options to evade it.
Verticality and Flank Routes
Maps with multiple levels or accessible high ground are perfect for Raze’s Blast Packs. She can quickly ascend to elevated positions for unexpected angles, or use the packs to cover flank routes rapidly. This vertical advantage allows her to bypass common defensive setups.
Open Bomb Sites for Ultimate Plays
While Raze generally prefers tighter spaces for her regular abilities, her Showstopper thrives on bomb sites with fewer obstructions. An open site allows for a clearer shot and increases the likelihood of catching multiple enemies in its wide blast radius during an execute or retake scenario.
Top Maps for Raze Dominance
Considering her abilities and preferred map elements, several maps stand out as prime territory for Raze players to dominate.
Bind: Teleporters and Tight Spaces
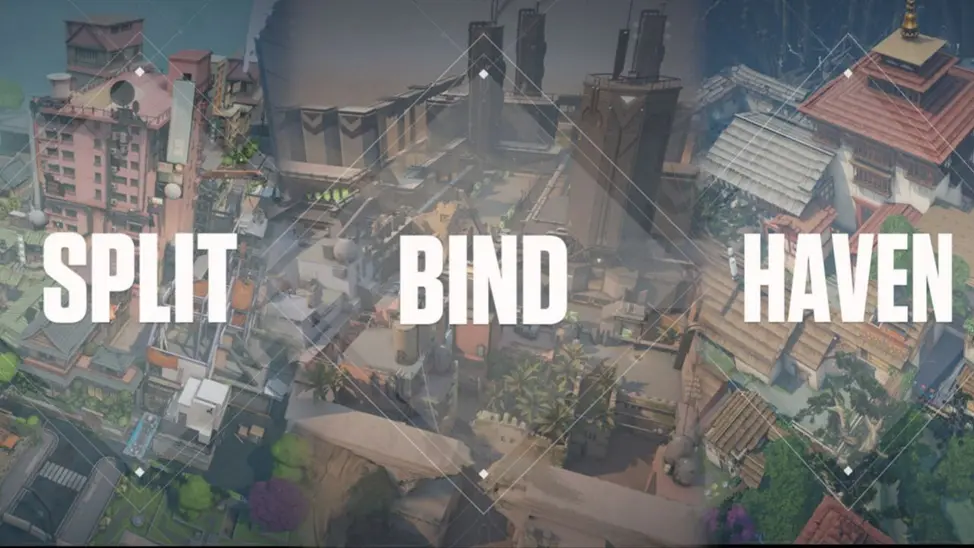
Bind is arguably Raze’s playground. Its numerous chokepoints, predictable teleporter exits, and often congested bomb sites create perfect scenarios for her kit.
Boombot and Paint Shells Synergy
On Bind, the Boombot is exceptional for clearing A Short, B Long, or checking inside the teleporter exit. Following up a Boombot push with Paint Shells can clear out any remaining defenders or deny a common holding angle. Pushing through Hookah (B Long) or attacking A Site’s Cubby are classic Raze maneuvers, utilizing grenades to flush out defenders.
Blast Pack Superiority
The teleporters are Raze’s personal express lanes. Using a Blast Pack jump into a teleporter for a quick rotation, or blasting out of one for a surprise entry onto a site, creates unpredictable aggression. The high ground near A Lamps or B Long’s cubby can also be accessed with well-placed satchels for unexpected peeks.
Showstopper Opportunities
Bind’s relatively compact sites often mean defenders are grouped. A well-timed Showstopper on A Site during an execute, especially towards default plant spots or behind the truck, can net multiple kills. Similarly, clearing B Site from Hookah or after breaking through double doors can be devastating.
Ascent: Mid Control and Site Entries
Ascent’s distinct mid-section, multiple entry points, and breakable doors offer Raze ample opportunities to exert pressure and facilitate entries.

Mid Control Dominance
Raze’s Boombot and Paint Shells are phenomenal for asserting mid-control on Ascent. Sending a Boombot up Mid to gain information or flushing out enemies from Catwalk with Paint Shells can quickly open up pathways to either A or B. Aggressive Blast Pack peeks over Mid Cubby can catch defenders off guard.
Site Execute Potential
Both A and B sites on Ascent are well-suited for Raze’s utility. On A, Paint Shells can clear Generator or Wine. Blast Packs enable quick entries onto site from A Main, often combined with a double satchel over the Generator wall. On B, clearing Market or B Main with utility is straightforward.
Showstopper on Open Sites
Ascent’s A and B sites provide good sightlines for Showstopper. A rocket fired onto A Site, targeting default plant positions or areas behind Generator, can be highly effective. B Site offers similar opportunities, especially if enemies are pushed into the corner near the boat house or behind the default plant box.
Split: Verticality and Tight Angles
Split is a map defined by its verticality, tight chokepoints, and numerous corners, making it a dream for a Raze player who masters her mobility.
Vertical Exploitation with Blast Packs
Raze’s Blast Packs are crucial on Split. Gaining access to A Rafters, Mid Vent, or B Heaven quickly can provide crucial advantages. Aggressive pushes through A Main or B Main can involve blasting onto site over common defensive positions, surprising defenders.
Corner Clearing and Area Denial
The numerous corners and tight angles on Split are perfect for Boombot and Paint Shells. Clearing A Main with a Boombot, denying pushes through Mid with Paint Shells, or flushing out defenders from B Main are highly effective strategies. The ability to clear default plant spots with Paint Shells from relative safety is invaluable.
Showstopper in Close Quarters
While Split’s sites aren’t as open as Ascent, the chokepoints leading into them often group enemies, making Showstopper potent. A well-placed rocket entering A Site from A Main or clearing B Site from B Main can secure multi-kills. Post-plant scenarios where defenders are forced to push through narrow pathways also create prime Showstopper opportunities.
Lotus: Rotational Prowess and Site Overruns
Lotus, with its three distinct sites and rotating doorways, rewards agents capable of fast rotations and clearing tight spaces. Raze excels here due to her speed and area-clearing abilities.
Dynamic Entry and Rotation
The rotating doors on Lotus become Raze’s personal highways. Using Blast Packs to rapidly traverse through opened doors, especially during mid-round rotations or executes, can overwhelm defenders. Boombot can be used to scout through doors or into sites before committing.
Paint Shells for Site Takes
Each site on Lotus has multiple corners and choke points that are ideal for Raze’s Paint Shells. Clearing C Bend, A Stairs, or the various cubbies within each site can soften defenses and facilitate entry. The ability to deny retake paths with well-placed grenades is also critical.
Showstopper on Congested Sites
Lotus’s sites, while offering different geometries, often force defenders into predictable positions, particularly during retakes or initial pushes. A Showstopper can be devastating on A Site’s default plant area, B Site’s cubbies, or C Site as defenders funnel in.
Maps Where Raze Requires Nuance
While Raze can be viable on any map with the right strategy, some maps require a more thoughtful approach due to their unique layouts or larger open spaces.
Haven: Three Sites, Spaced Out
Haven’s three distinct bomb sites mean defenders are often spread thin, and engagements can be more drawn out. Raze’s utility is still effective in clearing specific sites, but her ability to quickly rotate between sites is paramount. Good use of Blast Packs for fast pushes onto A, C, or through Garage to B is key. Her ultimate excels when used to break through a fortified push on one of the smaller sites.
Breeze: Open Spaces and Long Sightlines
Breeze’s expansive open spaces and long sightlines might seem counter-intuitive for Raze, who thrives in close quarters. However, her Blast Packs become crucial for closing distances quickly, getting to cover, or aggressively peeking angles. Her Boombot and Paint Shells are excellent for clearing smaller areas like B Tunnel, Mid Stack, or the various cubbies on sites. A well-timed Showstopper on the wide-open sites can be devastating if enemies are caught out of position or forced into predictable lines by other utility.
Strategic Tips for Raze Players
Regardless of the map, certain overarching strategies elevate a Raze player’s performance.
Mastering the Double Blast Pack
The ability to use two Blast Packs consecutively for a massive jump is fundamental. This technique allows Raze to cross large gaps, reach elevated positions quickly, or aggressively enter a site, catching enemies off guard. Practice in custom games to perfect this essential movement mechanic.
Synergizing with Initiators
Raze’s aggressive nature is amplified when paired with initiators like Sova, Fade, or Breach. An initiator’s recon or stun can set up Raze’s Paint Shells for guaranteed damage or create openings for her to use Blast Packs for a swift entry. Communication is key to combining utilities effectively.
Post-Plant Aggression
After securing a bomb plant, Raze can become an excellent post-plant deterrent. Using Paint Shells to deny defuses, Boombot to gather information on pushing enemies, and Blast Packs to reposition for advantageous angles can secure rounds even when outnumbered. Her Showstopper is the ultimate ace in the hole for a late-round retake denial.
In conclusion, Raze’s explosive kit finds its true potential on maps like Bind, Ascent, Split, and Lotus, which feature a combination of tight spaces, verticality, and predictable chokepoints. By understanding her abilities and adapting to the unique characteristics of each map, Raze players can consistently top the scoreboard and lead their teams to victory.
aViewFromTheCave is a participant in the Amazon Services LLC Associates Program, an affiliate advertising program designed to provide a means for sites to earn advertising fees by advertising and linking to Amazon.com. Amazon, the Amazon logo, AmazonSupply, and the AmazonSupply logo are trademarks of Amazon.com, Inc. or its affiliates. As an Amazon Associate we earn affiliate commissions from qualifying purchases.