In the rapidly evolving world of technology, maintaining the aesthetics and functionality of our devices is paramount. From the sleek finish of a new smartphone to the tactile satisfaction of a clean keyboard, the small details contribute significantly to the overall user experience. One common, yet often frustrating, adversary in this quest for digital perfection is residual tape adhesive. Whether it’s from temporary protective films, stubborn cable management solutions, or old identification labels, sticky residue can detract from your gadget’s appeal and, in some cases, even impact its performance by attracting dust or obstructing sensors. This guide delves into effective, safe methods for eradicating tape adhesive, ensuring your tech remains in showroom condition.

The Ubiquitous Adhesive Challenge in the Digital Realm
Tape adhesive might seem like a minor annoyance, but its presence on our beloved tech gadgets can be more problematic than it initially appears. Understanding the common sources and potential pitfalls of improper removal is the first step toward a clean, residue-free device.
Common Culprits: Why Tape Adhesive is a Tech Nuisance
Modern electronics often come with various temporary adhesives designed for protection or identification. These include:
- Screen Protectors and Films: While essential for safeguarding displays during shipping, the adhesive on these can sometimes leave a gummy film, especially if left on for extended periods or exposed to heat.
- Temporary Labels and Stickers: From serial number decals on laptop bases to promotional stickers on accessory packaging, these often use strong adhesives that bond firmly with plastic, metal, or glass surfaces.
- Cable Management Solutions: Tapes, clips, and ties designed to organize cables can leave behind sticky trails on desks, power bricks, or even the cables themselves when removed.
- Protective Tapes on Ports and Cameras: Small pieces of tape used to cover ports or camera lenses on new devices sometimes leave micro-residue that can attract lint or dust, affecting functionality.
- DIY Repairs and Modifications: Enthusiasts performing their own upgrades or repairs might use adhesive tapes, which, upon subsequent removal, could leave unwanted marks.
The Risks of Improper Removal
Attempting to remove tape adhesive without the right approach can lead to more significant damage than the residue itself. Common risks include:
- Scratches and Abrasions: Aggressive scrubbing with harsh materials (e.g., abrasive cloths, fingernails, metal tools) can permanently mar delicate screens, coatings, and device casings.
- Residue Spread: Instead of removing the adhesive, incorrect methods can merely spread it around, creating a larger, stickier mess that attracts even more dust and grime.
- Damage to Oleophobic Coatings: Many modern screens feature oleophobic (oil-repellent) coatings. Harsh chemical solvents or abrasive cleaning can strip these layers, making the screen more prone to fingerprints and harder to clean in the future.
- Chemical Discoloration or Etching: Certain plastics and finishes are sensitive to strong solvents. Using the wrong cleaner can lead to discoloration, clouding, or even etching of the material.
- Port Obstruction or Electrical Damage: Liquid solvents, if applied excessively, can seep into ports, buttons, or internal components, potentially causing electrical shorts or corrosion.
Essential Tools and Safe Solvents for Tech Surfaces
Successfully tackling tape adhesive on electronics requires a combination of the right tools and carefully selected solvents. Precision and caution are your best allies here.
Gentle Mechanical Methods
Before resorting to solvents, consider these mechanical approaches for lighter residue:
- Microfiber Cloths: High-quality, lint-free microfiber cloths are indispensable. They are soft enough not to scratch surfaces but effective at gently rubbing away fresh or minor adhesive residue without spreading it.
- Plastic Spatulas or Pry Tools: For thicker, more stubborn adhesive clumps, a plastic spudger or a guitar pick can be used to carefully scrape away the bulk of the residue. Always ensure the tool is soft plastic to avoid scratching.
- Erasers: A clean, white vinyl eraser can sometimes lift adhesive residue from hard, non-porous surfaces like plastic casings or glass screens, but use gently to avoid scratching.
- Other Tape: A surprising trick is to use another piece of tape (e.g., painter’s tape or masking tape with moderate adhesion) to dab and lift residual stickiness from the surface.
Solvent Solutions for Different Surfaces
When mechanical methods aren’t enough, specific solvents can dissolve adhesive without harming your tech. Always apply solvents to a cloth, never directly to the device.
- Isopropyl Alcohol (IPA): For general electronics cleaning, 70% to 90%+ isopropyl alcohol is a widely recommended choice. It evaporates quickly, leaves no residue, and is effective on many types of adhesive. It’s safe for most plastics, metals, and glass. Use sparingly on screens with oleophobic coatings.
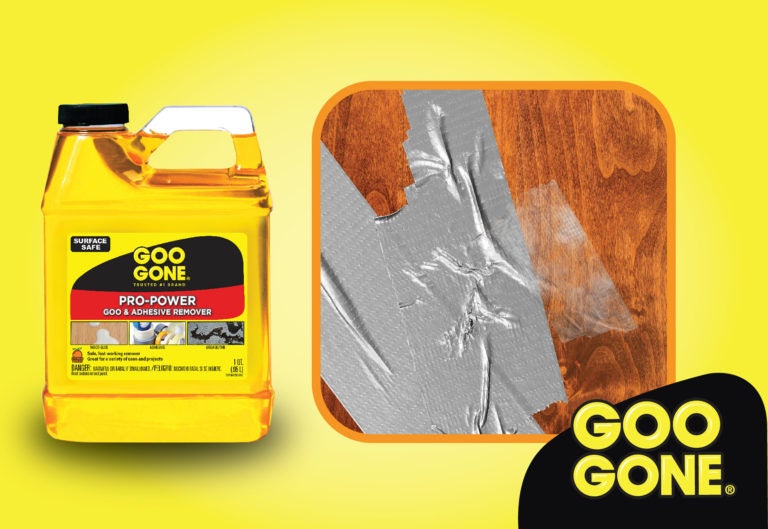
- Citrus-Based Removers (e.g., Goo Gone Original): These products are excellent for breaking down sticky residues. However, they must be used with extreme caution on electronics. They are generally safe for sturdy plastics and metals (like external casings or power bricks), but never on screens, soft plastics, rubberized finishes, or near sensitive openings, as they can be oily and difficult to remove fully, potentially causing discoloration or damage. Always test in an inconspicuous area first. Look for “electronics-safe” versions if available.
- Rubbing Alcohol Wipes (pre-packaged): Convenient for quick clean-ups, these are typically pre-saturated with IPA and are great for small areas or moderate residue.
- Distilled Water (for water-soluble adhesives): Some adhesives are water-soluble. A damp microfiber cloth with distilled water can be surprisingly effective for lighter, fresher residues and is the safest option for almost any surface.
The Importance of Non-Abrasive Materials
Beyond solvents, the material you use to apply them and wipe surfaces is critical.
- Microfiber Cloths: As mentioned, these are essential for their softness and ability to trap dirt and residue without scratching.
- Cotton Swabs (Q-tips): Perfect for precision cleaning in tight spaces, around buttons, or along seams, allowing targeted application of solvents.
- Lens Cleaning Tissues: For extremely delicate screens, specialized lens cleaning tissues, combined with screen-specific cleaners or very diluted IPA, offer a safe approach.
Step-by-Step Guide for Various Tech Items
Different tech gadgets require tailored approaches due to varying materials and sensitivities. Always power off and unplug devices before cleaning.
Smartphone and Tablet Screens
These are the most delicate surfaces due to their oleophobic coatings.
- Preparation: Power off the device. If the adhesive is thick, gently scrape off the bulk with a plastic spudger.
- Application: Lightly dampen a corner of a clean microfiber cloth with 70% IPA or a specialized screen cleaner. Never spray directly onto the screen.
- Cleaning: Gently wipe the affected area in small circular motions. Apply minimal pressure.
- Finish: Immediately wipe the area with a dry, clean section of the microfiber cloth to remove any remaining moisture or dissolved residue. Avoid excessive rubbing.
Laptop Casings and Keyboards
Most laptop plastics and metals are more robust than screens.
- Preparation: Power off and unplug the laptop. Disconnect any peripherals.
- Application: Dampen a microfiber cloth with 70-90% IPA. For very stubborn spots on the casing (not near vents or ports), a tiny amount of citrus-based remover on a cotton swab can be tested on an inconspicuous area first.
- Cleaning: Wipe the adhesive residue from the casing. For keyboard keys, use a cotton swab dampened with IPA to target residue between keys or on keycaps. Be careful not to let liquid drip into key mechanisms.
- Finish: Wipe down with a dry microfiber cloth. Allow to air dry completely before powering on.
Gaming Consoles and Peripherals
These often have textured plastics, vents, and many crevices.
- Preparation: Unplug the console/peripherals.
- Application: Use a microfiber cloth or cotton swab dampened with 70-90% IPA. For very robust plastic casings (e.g., controllers or the main console body, away from vents), a small amount of citrus cleaner can be used very carefully if IPA fails, but always test first.
- Cleaning: Gently rub the adhesive. For textured surfaces, use a gentle brushing motion with a dampened cotton swab to lift residue from grooves.
- Finish: Wipe thoroughly with a dry microfiber cloth. Ensure no liquid remains in vents or ports.
Cables and Chargers
Cables and power bricks are generally less sensitive but can be tricky due to their flexibility or rubberized coatings.
- Preparation: Unplug the cable/charger from all power sources and devices.
- Application: Dampen a microfiber cloth with 70-90% IPA. For thick, gummy residue on robust plastic insulation, a tiny amount of citrus cleaner can be more effective but must be thoroughly removed afterward.
- Cleaning: Wrap the dampened cloth around the cable and pull it along the length of the residue. For power bricks, wipe the affected area.
- Finish: Ensure all cleaner is removed, especially if using an oily citrus product, by wiping with a fresh, damp cloth (with just water) and then drying thoroughly.
Best Practices and Pro Tips for Longevity
Adhering to a few key principles will not only make adhesive removal easier but also contribute to the long-term health and appearance of your electronic devices.
Always Test in an Inconspicuous Area
Before applying any solvent or cleaner to a prominent surface, always test it on a hidden spot. This could be the underside of a laptop, a small corner of a plastic casing, or a part of a peripheral that isn’t regularly visible. This precaution helps you confirm that the cleaner won’t cause discoloration, etching, or damage to the finish.
Work in a Well-Ventilated Space
Many solvents, including IPA and citrus-based cleaners, produce fumes. Ensuring adequate ventilation by working near an open window or in a well-circulated room protects your respiratory health and helps the solvents evaporate more quickly, reducing the risk of residue.
Avoid Direct Spraying on Electronics
Never spray liquid cleaners directly onto electronic devices. Direct spraying increases the risk of liquid seeping into internal components, ports, or gaps, which can lead to electrical damage, corrosion, or short circuits. Always apply the cleaner to a cloth or cotton swab first, then use that to wipe the surface.
Post-Cleaning Care
Once the adhesive is gone, a final clean-up can ensure your device looks its best.
- Wipe Down: Give the entire device a final wipe with a clean, dry microfiber cloth to remove any lingering dust or streaks.
- Screen Protection: For screens, consider reapplying a high-quality screen protector to prevent future scratches and make subsequent cleaning easier.
- Surface Polish: For hard plastic or metal casings (not screens), a non-abrasive electronics polish designed for plastics can help restore shine and provide a minor protective layer.
By following these guidelines, you can confidently remove tape adhesive from your tech gadgets, preserving their pristine condition and ensuring they continue to perform as beautifully as they look. A clean device is not just aesthetically pleasing; it’s a testament to responsible tech ownership.
aViewFromTheCave is a participant in the Amazon Services LLC Associates Program, an affiliate advertising program designed to provide a means for sites to earn advertising fees by advertising and linking to Amazon.com. Amazon, the Amazon logo, AmazonSupply, and the AmazonSupply logo are trademarks of Amazon.com, Inc. or its affiliates. As an Amazon Associate we earn affiliate commissions from qualifying purchases.