
Audio clipping is a phenomenon that haunts recording engineers, podcasters, and casual listeners alike. It is the most common form of waveform distortion, occurring when an amplifier—whether digital or analog—is pushed beyond its maximum capacity. When an audio signal exceeds the limits of the system processing it, the peaks of the waveform are abruptly “clipped” off, resulting in harsh, brittle, and distorted sound that can turn a professional production into an unlistenable mess. Understanding the mechanics of clipping is essential for anyone involved in digital audio production, as it is a problem that is significantly easier to prevent than it is to fix.
The Mechanics of Waveform Distortion
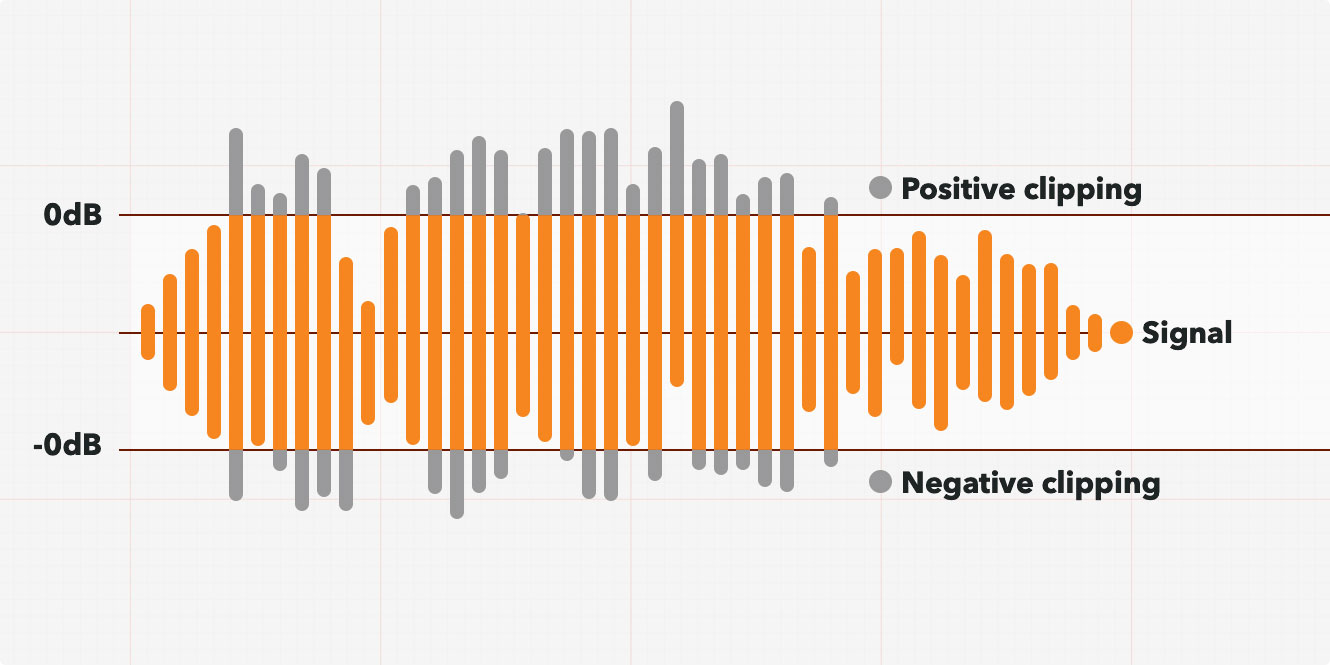
At its core, audio is a representation of air pressure variations over time. In a digital environment, these variations are captured as binary data. To understand clipping, one must first visualize the waveform. Sound travels as a wave; when recorded, these waves have peaks (the highest points) and troughs (the lowest points).
How Digital Clipping Occurs
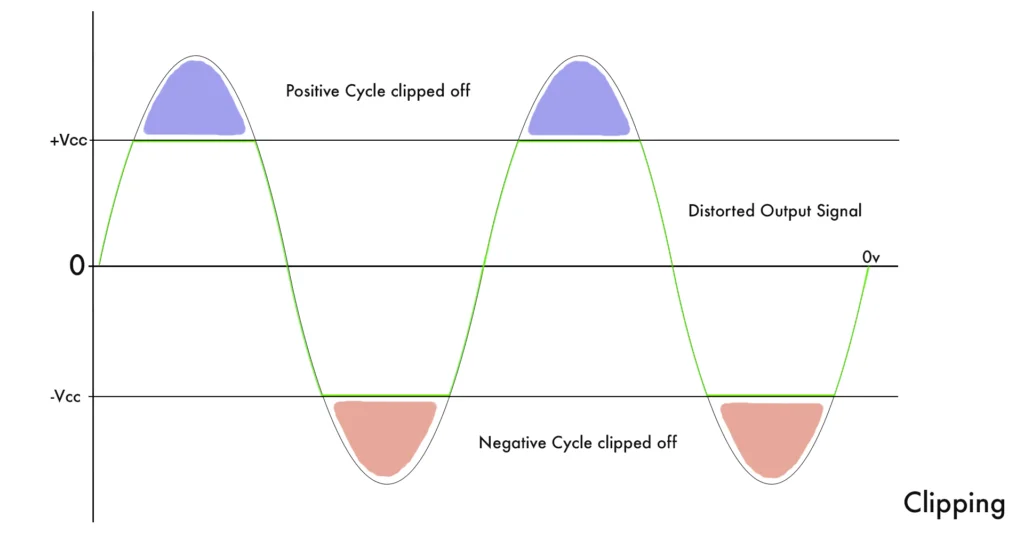
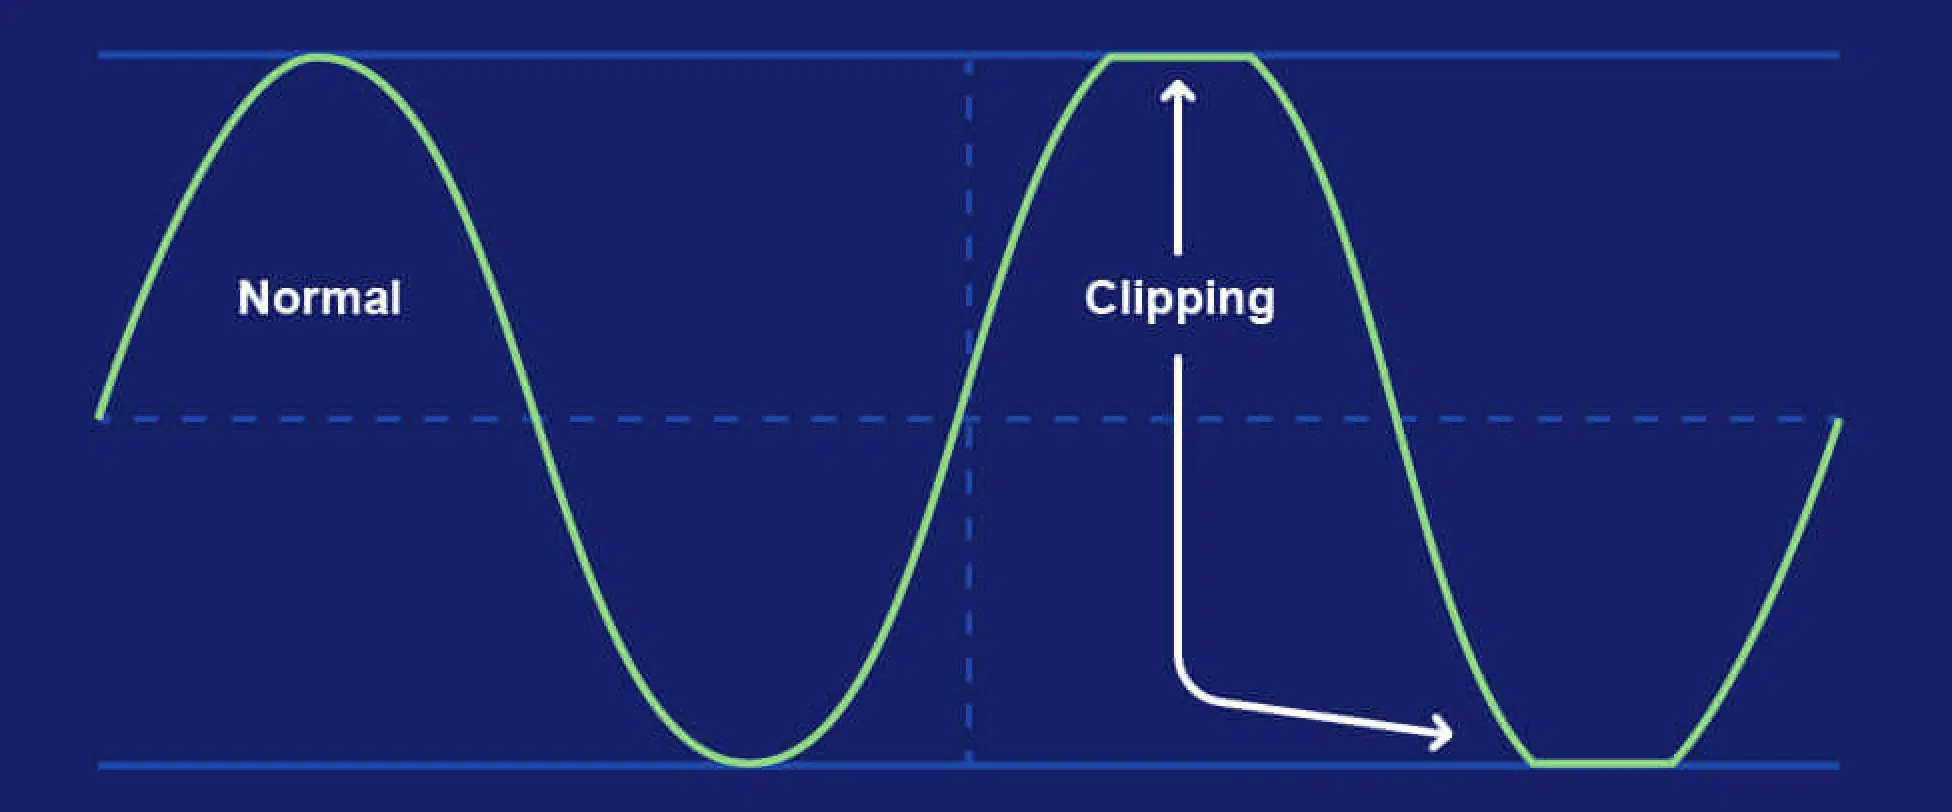
In a digital system, there is a hard ceiling known as “0 dBFS” (Decibels relative to Full Scale). This is the absolute maximum level that a digital audio file can represent. Because digital audio relies on a fixed number of bits to represent amplitude, there is no value higher than 0 dBFS. When a signal attempts to go above this limit, the system cannot represent the extra energy. Consequently, it abruptly truncates the top and bottom of the waveform. Instead of a smooth, rounded peak, the waveform becomes a flat line at the maximum value. This squaring off of the wave introduces odd-order harmonics that the human ear perceives as harsh distortion.
Analog vs. Digital Clipping
While the end result—distortion—is similar, the behavior of analog clipping differs significantly from digital. Analog gear, such as vacuum tube amplifiers or magnetic tape, tends to “soft clip.” As the signal approaches the maximum threshold, these devices introduce a gradual saturation, compressing the signal and adding musical, even-order harmonics. This is often referred to as “warmth.” In contrast, digital clipping is unforgiving. It does not compress; it simply destroys the data at the peak. There is no musical warmth in digital clipping, only digital artifacts that sound like crackling or static.
Why Clipping Ruins Audio Quality
The primary reason clipping is avoided in professional environments is the irreversible damage it causes to the signal. Once a recording has clipped at the input stage, the information describing the peak of the wave is permanently lost.
Harmonic Distortion and Listener Fatigue
When a waveform is squared off, the rapid transitions between the signal and the ceiling create high-frequency content that wasn’t present in the original performance. This is known as harmonic distortion. While some genres of music, such as heavy metal or industrial electronic, may use distortion as an aesthetic choice, unintentional clipping is almost universally detrimental. It makes the audio sound “thin,” “brittle,” or “harsh.” For the listener, this translates to high levels of ear fatigue, as the brain struggles to process the artificial, aggressive frequencies introduced by the truncated waves.
The Problem with Recovery
In the modern era of audio restoration software, many creators assume that “fixing it in post” is a viable strategy. However, once digital clipping has occurred, the waveform is permanently altered. While advanced algorithms and AI-driven spectral repair tools can approximate what the peak should have looked like by interpolating data from the surrounding samples, they can never perfectly reconstruct the original signal. The result is often an audio track that sounds “dull” or “underwater” where the clipping once existed. Prevention is the only true solution.
How to Prevent Clipping in Your Workflow
Preventing audio clipping requires a disciplined approach to gain staging and signal flow management. By maintaining consistent levels throughout your digital audio workstation (DAW) or hardware chain, you ensure that the signal remains within the “sweet spot” of your equipment.
Understanding Gain Staging
Gain staging is the practice of managing the levels of an audio signal at every stage of the process to prevent unwanted distortion or noise. It starts at the source. If you are recording a microphone, ensure your preamp gain is set so that the loudest parts of the performance peak around -12 dBFS to -6 dBFS. This provides a “headroom”—a buffer zone that allows for unexpected volume spikes without hitting the 0 dBFS ceiling.
The Role of Peak Meters
Visual monitoring is your first line of defense. Every DAW provides metering tools that show you the peak level of your tracks. It is important to remember that most meters show the highest peak, but some may not account for “intersample peaks.” These are peaks that occur in the reconstruction process between samples. To be safe, aim for a peak level that never exceeds -3 dBFS during the recording and mixing phases. This leaves enough room for mastering processes, which often involve limiting that would otherwise push your signal into the danger zone.
Using Limiters Effectively
A limiter is a specialized type of compressor with a very high ratio, designed specifically to prevent signals from exceeding a set threshold. By placing a “brick-wall” limiter on your master bus, you can effectively cap your output level to prevent it from ever reaching 0 dBFS. However, reliance on limiters should not replace good gain staging. If you push too much gain into a limiter, the limiter itself will start to clip the signal, or it will introduce its own form of distortion as it tries to keep the volume down. Use limiters as a safety net, not as a volume boost tool.
Mastering and the Loudness War
The modern obsession with “loudness” has made clipping a significant concern in the music industry. During the late 1990s and 2000s, the “Loudness War” pushed engineers to make songs as loud as possible to catch the attention of listeners. This involved heavy use of dynamic range compression and hard-clipping the signal to maximize the perceived volume.
Modern Streaming Standards
Today, the industry is shifting away from this practice. Major streaming platforms like Spotify, Apple Music, and YouTube employ “Loudness Normalization.” These platforms automatically adjust the volume of tracks to a standardized level (usually around -14 LUFS). If you submit a master that is crushed, clipped, and distorted to achieve high volume, the streaming service will simply turn it down, and you will be left with a recording that sounds harsh and lacks dynamic impact.
Embracing Dynamic Range
The professional approach in the modern digital landscape is to embrace dynamic range. By keeping your peaks away from 0 dBFS and allowing the music to breathe, you ensure that your audio translates well across all playback devices—from high-end studio monitors to smartphone speakers. Avoiding clipping is not just about technical accuracy; it is about preserving the emotion and clarity of the performance. When a recording is clean and free of digital artifacts, the listener can engage more deeply with the content, resulting in a more satisfying and professional end product. By prioritizing gain staging and understanding the limits of your digital environment, you can master the art of clean, high-fidelity audio production.
aViewFromTheCave is a participant in the Amazon Services LLC Associates Program, an affiliate advertising program designed to provide a means for sites to earn advertising fees by advertising and linking to Amazon.com. Amazon, the Amazon logo, AmazonSupply, and the AmazonSupply logo are trademarks of Amazon.com, Inc. or its affiliates. As an Amazon Associate we earn affiliate commissions from qualifying purchases.