
For the home baker or the budding artisanal entrepreneur, yeast is the silent engine of the kitchen. It is a living organism—a single-celled fungus that converts sugars into carbon dioxide and ethanol. In the context of small-scale business operations, such as a micro-bakery or a culinary side hustle, understanding the state of your yeast is not merely a cooking preference; it is a matter of quality control, consistency, and cost-efficiency. If your yeast isn’t ready, your product isn’t ready. When scaling your production, knowing exactly what active, viable yeast looks like is the difference between a successful batch and a costly waste of ingredients.
The Visual Indicators of Yeast Activation
To determine if your yeast is ready for incorporation into a dough, you must observe its biological transition from dormancy to peak activity. Whether you are using active dry yeast, instant yeast, or a sourdough starter, the visual cues serve as your primary diagnostic tool.
The Foam Factor
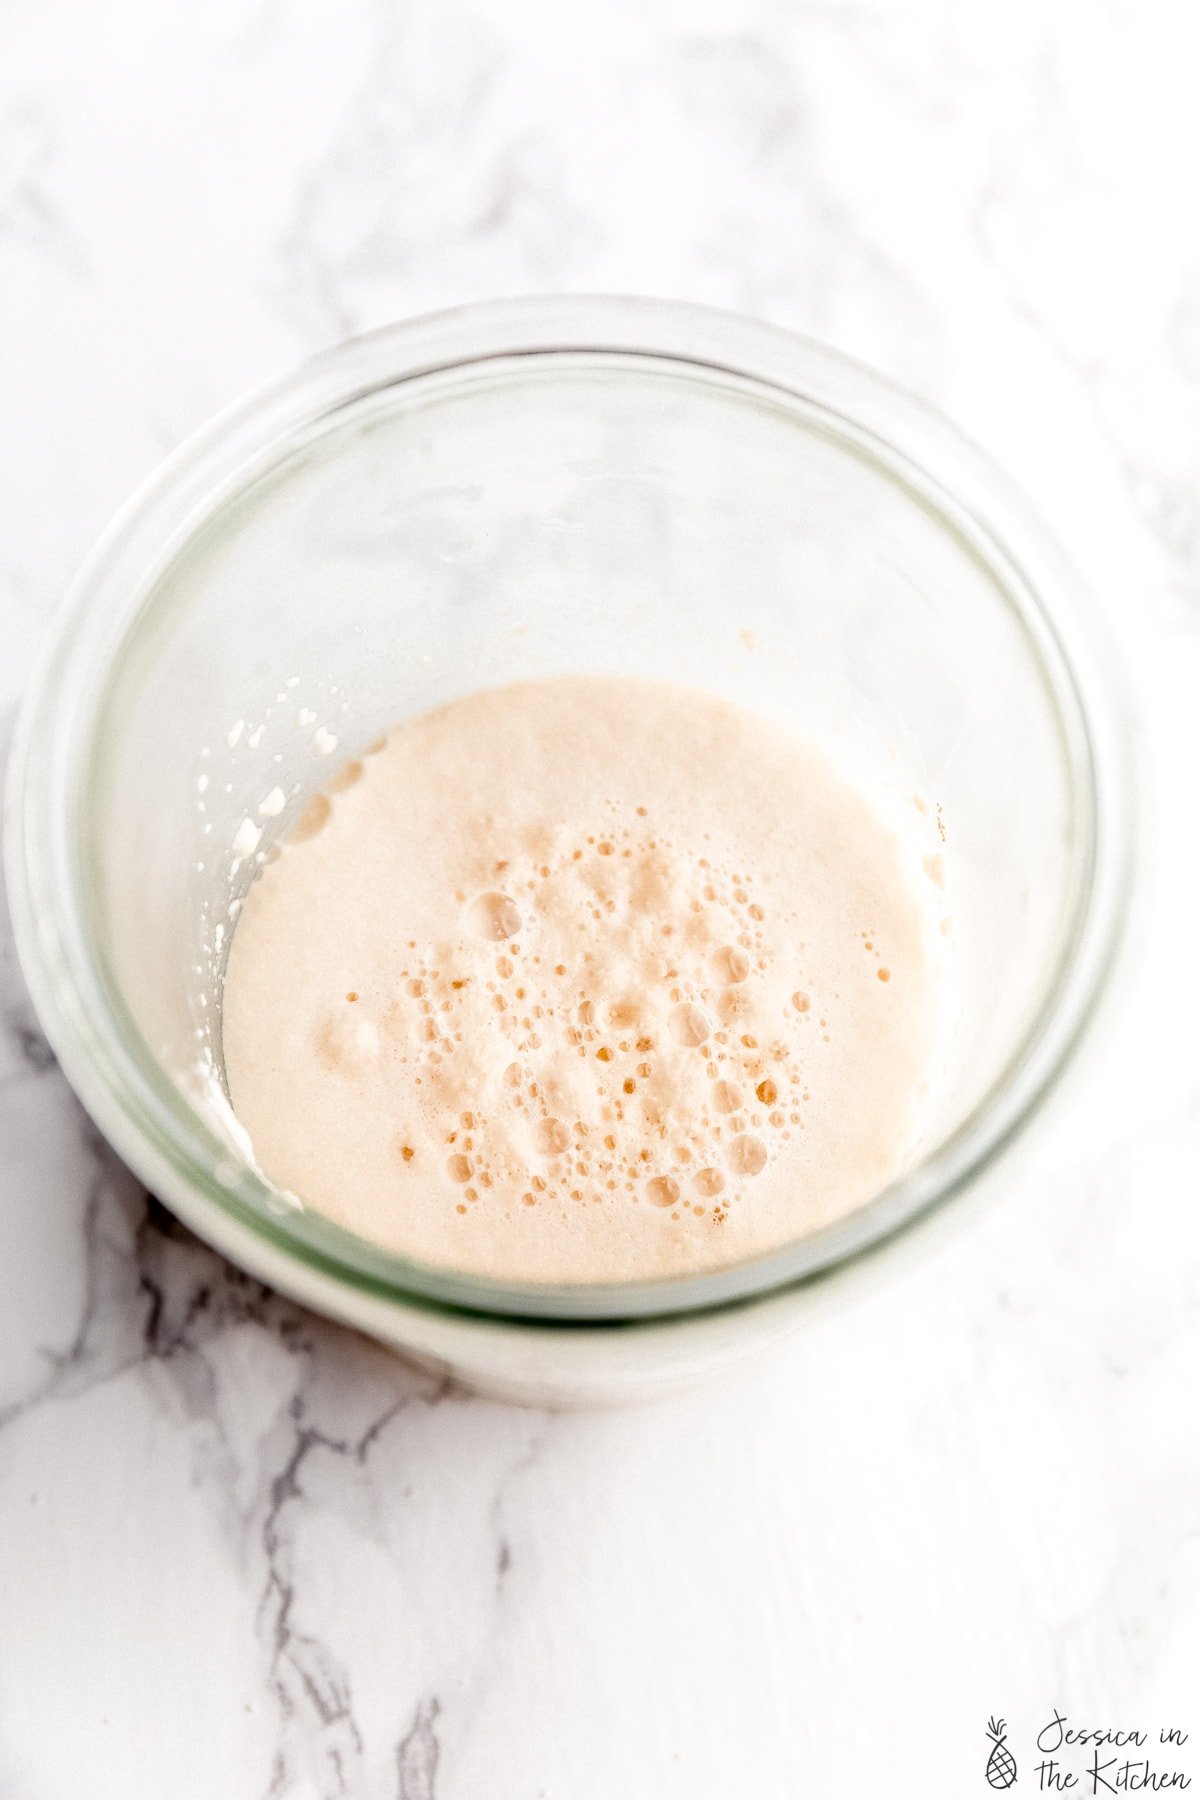
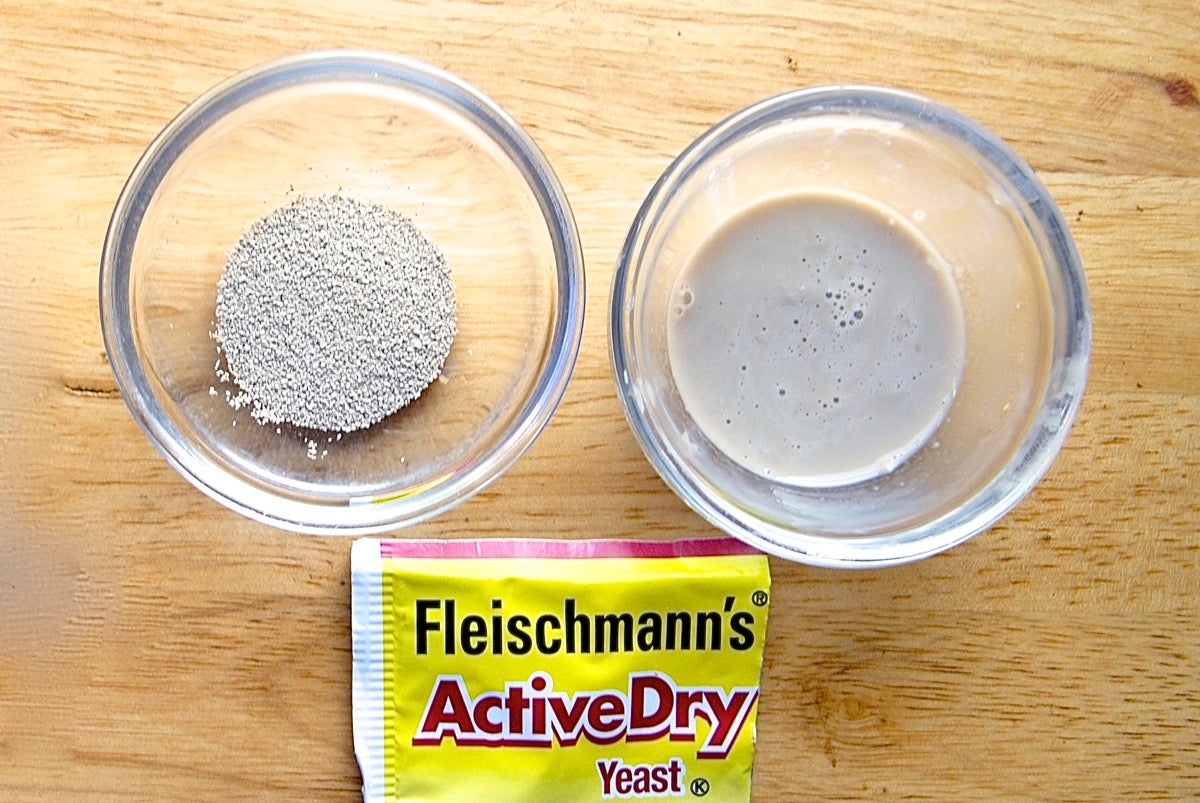
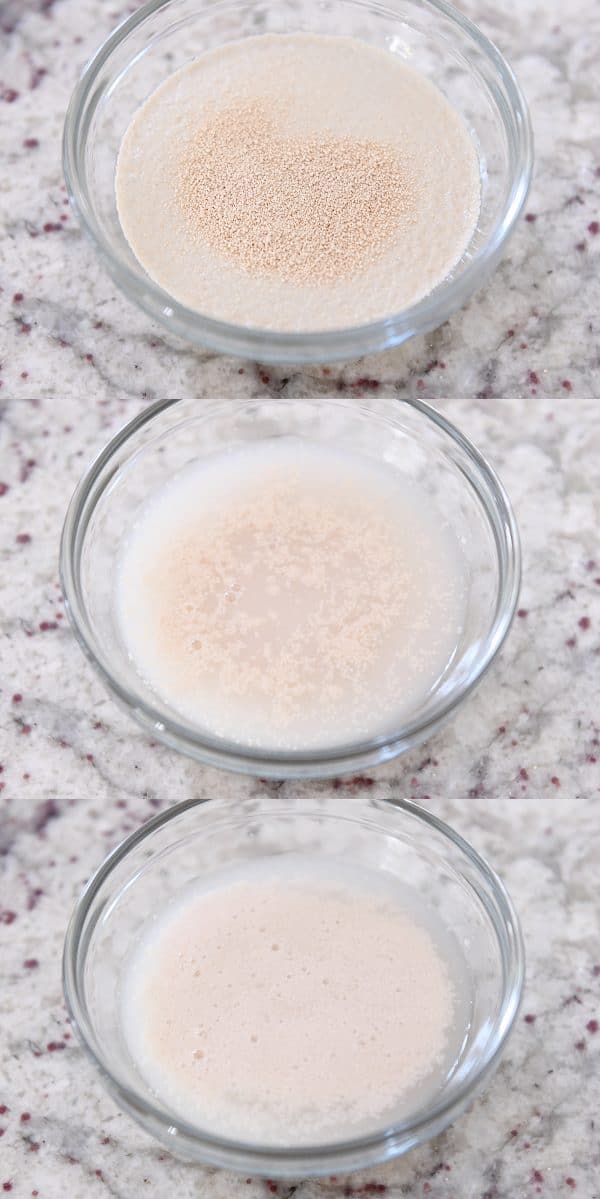
When hydrating active dry yeast, the most immediate sign of readiness is the development of a “bloom.” Within five to ten minutes of being introduced to warm water (ideally between 105°F and 110°F) and a small amount of sugar or flour, you should witness the surface of the liquid transforming. The mixture should develop a thick, frothy, tan-colored foam. This foam is the visual representation of gas bubbles trapped by the proteins in the yeast mixture. If you see a layer of bubbles that looks similar to a head of foam on a freshly poured beer, your yeast is active and healthy.
The Texture of the Suspension
Beyond the foam, consider the texture of the liquid itself. Healthy, ready-to-use yeast will create a cloudy, opaque suspension. The yeast cells should be evenly dispersed throughout the liquid. If the yeast remains as distinct, granular specks at the bottom of the vessel without producing any effervescence or cloudiness, it is a sign of dormancy or expiration. In a professional setting, relying on “dead” yeast is a liability that can lead to flattened products and wasted labor.
Managing Fermentation Readiness in Commercial Baking
Transitioning from home baking to a business model requires a move from “guessing” to “standardizing.” In a business environment, consistency is the bedrock of your brand reputation. If your fermentation process is inconsistent, your end product will fluctuate in texture, flavor profile, and crumb structure, which can erode customer trust.
Monitoring the “Proofing” Phase
Once the yeast is incorporated into the dough, the visual indicators shift. Readiness is no longer about foam; it is about volume and elasticity. For a dough to be “ready,” it should ideally double in size. However, the visual check goes deeper than just height. Look for a surface that appears smooth and slightly domed, with a distinct “springiness.” If you press your finger lightly into the dough, it should slowly bounce back. If the indentation remains, it is likely over-proofed; if it snaps back instantly, it requires more time.
The Temperature-Time Correlation
As a business owner, you must account for ambient kitchen temperature. Yeast is highly sensitive to thermal environments. In a professional workspace, yeast will become “ready” much faster in a warm, humid environment than in a cold one. Utilizing a proofing box or a controlled-temperature station ensures that your yeast behaves predictably every single day. If your dough is reaching its peak visual readiness in half the time expected, it is an indicator that your environment is too warm, which can lead to a sour, over-fermented flavor that may be undesirable for certain product lines.
Troubleshooting: When Yeast Fails to Look “Ready”
In the context of scaling a bakery business, equipment failure or ingredient quality issues can occur. Identifying why your yeast isn’t exhibiting the signs of readiness is essential for troubleshooting your production workflow.
Identifying Expired Cultures
Yeast has a shelf life. Even if stored in a cool, dark place, its viability will eventually decline. If you observe no foam, no bubbles, and no change in the texture of your water-yeast mixture after fifteen minutes, it is time to discard that batch. Attempting to force the fermentation process with expired yeast is a futile endeavor that will inevitably result in dense, unrisen products. When running a business, the cost of a few packets of yeast is negligible compared to the cost of throwing away an entire batch of dough, energy, and labor hours.
The Impact of Water Chemistry
Sometimes, the yeast isn’t the problem—the water is. If your water contains high levels of chlorine or other disinfectants, it can inhibit yeast activity. In a professional kitchen, it is standard practice to use filtered water. If your yeast consistently fails to show signs of readiness despite being within its expiry date, test your water source. Temperature, too, plays a role; if your water is above 120°F, you risk killing the yeast entirely. Water that is too cold, conversely, will send the yeast into a state of deep dormancy, requiring much longer proofing times that can disrupt your production schedule.
Standardizing Your Process for Repeatable Quality
For those using fermentation as a central part of their business model, creating a “Standard Operating Procedure” (SOP) for yeast handling is highly recommended. This allows you to delegate tasks to staff while maintaining the integrity of the product.
Documentation and Metrics
Start by logging the temperature of your water, the ambient room temperature, and the specific time it takes for your yeast to bloom. By creating a log, you can identify patterns. If you find that your yeast reaches its peak appearance at exactly 8 minutes on average, you can optimize your prep schedule around this metric. This level of granular control is what separates hobbyist bakers from professional operations.
The Role of Sensory Evaluation
Ultimately, the visual appearance of yeast is a sensory skill. You will begin to notice the specific “smell” of active yeast—a fresh, slightly earthy, and pungent aroma—that accompanies the visual foam. By training your staff or yourself to recognize both the sight and the smell of active yeast, you create a fail-safe system. When the yeast looks like a thick, bubbly, tan foam and smells clean, it is the green light for production.
Understanding the biological life cycle of yeast is not just about bread; it is about managing the core asset of your baking business. By treating your yeast with the same level of care and systematic observation that you would apply to your financial spreadsheets or inventory management, you ensure that every product leaving your kitchen meets the highest standards of quality. Readiness is the first step in the journey of your product, and it is a step that requires your full, undivided attention.
aViewFromTheCave is a participant in the Amazon Services LLC Associates Program, an affiliate advertising program designed to provide a means for sites to earn advertising fees by advertising and linking to Amazon.com. Amazon, the Amazon logo, AmazonSupply, and the AmazonSupply logo are trademarks of Amazon.com, Inc. or its affiliates. As an Amazon Associate we earn affiliate commissions from qualifying purchases.