
In an increasingly digital world, the convenience of carrying our entire financial lives in our pockets has moved from a futuristic concept to an everyday reality. Google Wallet stands as a testament to this evolution, transforming your Android device into a secure and versatile digital wallet. No longer confined to a bulky collection of cards, receipts, and tickets, your Android phone, powered by Google Wallet, becomes your central hub for payments, passes, and more. This guide will walk you through the intricacies of setting up, using, and mastering Google Wallet, ensuring you harness its full potential for a seamless and secure experience.
The Evolution of Digital Wallets and Google Wallet’s Role
The journey from physical cash and cards to digital transactions has been swift and transformative. Understanding where Google Wallet fits into this landscape is crucial for appreciating its capabilities.
From Physical Cards to Contactless Convenience
For decades, the standard method of payment involved physical cards – credit, debit, loyalty, and gift cards. While convenient in their time, they were susceptible to loss, theft, and the cumulative bulk they added to our wallets. The advent of Near Field Communication (NFC) technology paved the way for contactless payments, allowing users to simply tap their card or device at a compatible terminal. This innovation was a game-changer, promising faster transactions, enhanced security through tokenization, and a cleaner user experience.
Google recognized the immense potential of this shift early on. Its initial forays into digital wallets, like Google Wallet (the original version) and later Google Pay, aimed to consolidate these functionalities. The goal was clear: to create a unified platform that not only facilitated payments but also managed an array of digital items, from boarding passes to loyalty cards. This vision led to the eventual re-branding and enhancement of Google Wallet as we know it today, a comprehensive ecosystem built directly into the Android experience.
Google Pay vs. Google Wallet: Understanding the Shift
The history of Google’s payment platforms can be a bit confusing, with various names and functionalities over the years. Initially, “Google Wallet” primarily focused on peer-to-peer (P2P) payments and storing digital items, while “Android Pay” handled contactless payments. These were eventually merged under the “Google Pay” brand, which then became an umbrella term for payments across Google products, in apps, on websites, and in stores.
The current iteration sees a renewed emphasis on “Google Wallet” as the primary application on Android devices for storing payment cards, passes, keys, and IDs. Think of it as your physical wallet, but entirely digitized and secured by Google’s robust infrastructure. Google Pay, in this context, now primarily refers to the underlying payment technology and a suite of services (like sending money to friends in some regions, or payment processing for businesses) that often integrate with or power the functionalities within the Google Wallet app. Essentially, Google Wallet is the user-facing app where you manage your digital items, and Google Pay is often the service that facilitates the actual transaction when you tap your phone. This distinction is subtle but important: Google Wallet is your secure container for digital assets, enabling you to use them via Google Pay’s payment rails.
Getting Started: Setting Up Google Wallet on Your Android Device
Activating Google Wallet on your Android device is a straightforward process, designed to integrate seamlessly with your existing Google account and phone’s security features.
Downloading and Initial Setup
Most modern Android devices come with the Google Wallet app pre-installed or easily accessible via the Google Play Store. To begin:
- Check for the App: Search for “Wallet” or “Google Wallet” on your device. If it’s not pre-installed, open the Google Play Store, search for “Google Wallet,” and download it.
- Open the App: Launch Google Wallet. You’ll typically be greeted by an introductory screen outlining its capabilities.
- Sign In: Ensure you’re signed into the correct Google account you wish to associate with your Wallet. This is crucial as all your payment methods, passes, and personal data will be linked to this account. If you have multiple Google accounts on your phone, you might be prompted to select one.
- Security Confirmation: Google Wallet will often ask for a screen lock (PIN, pattern, fingerprint, or face unlock) to be set up on your device if you haven’t already. This is a fundamental security requirement, as it ensures only you can authorize transactions or access sensitive information stored in your Wallet.
Adding Payment Methods: Cards and Beyond
The core utility of Google Wallet lies in its ability to store your payment cards securely.
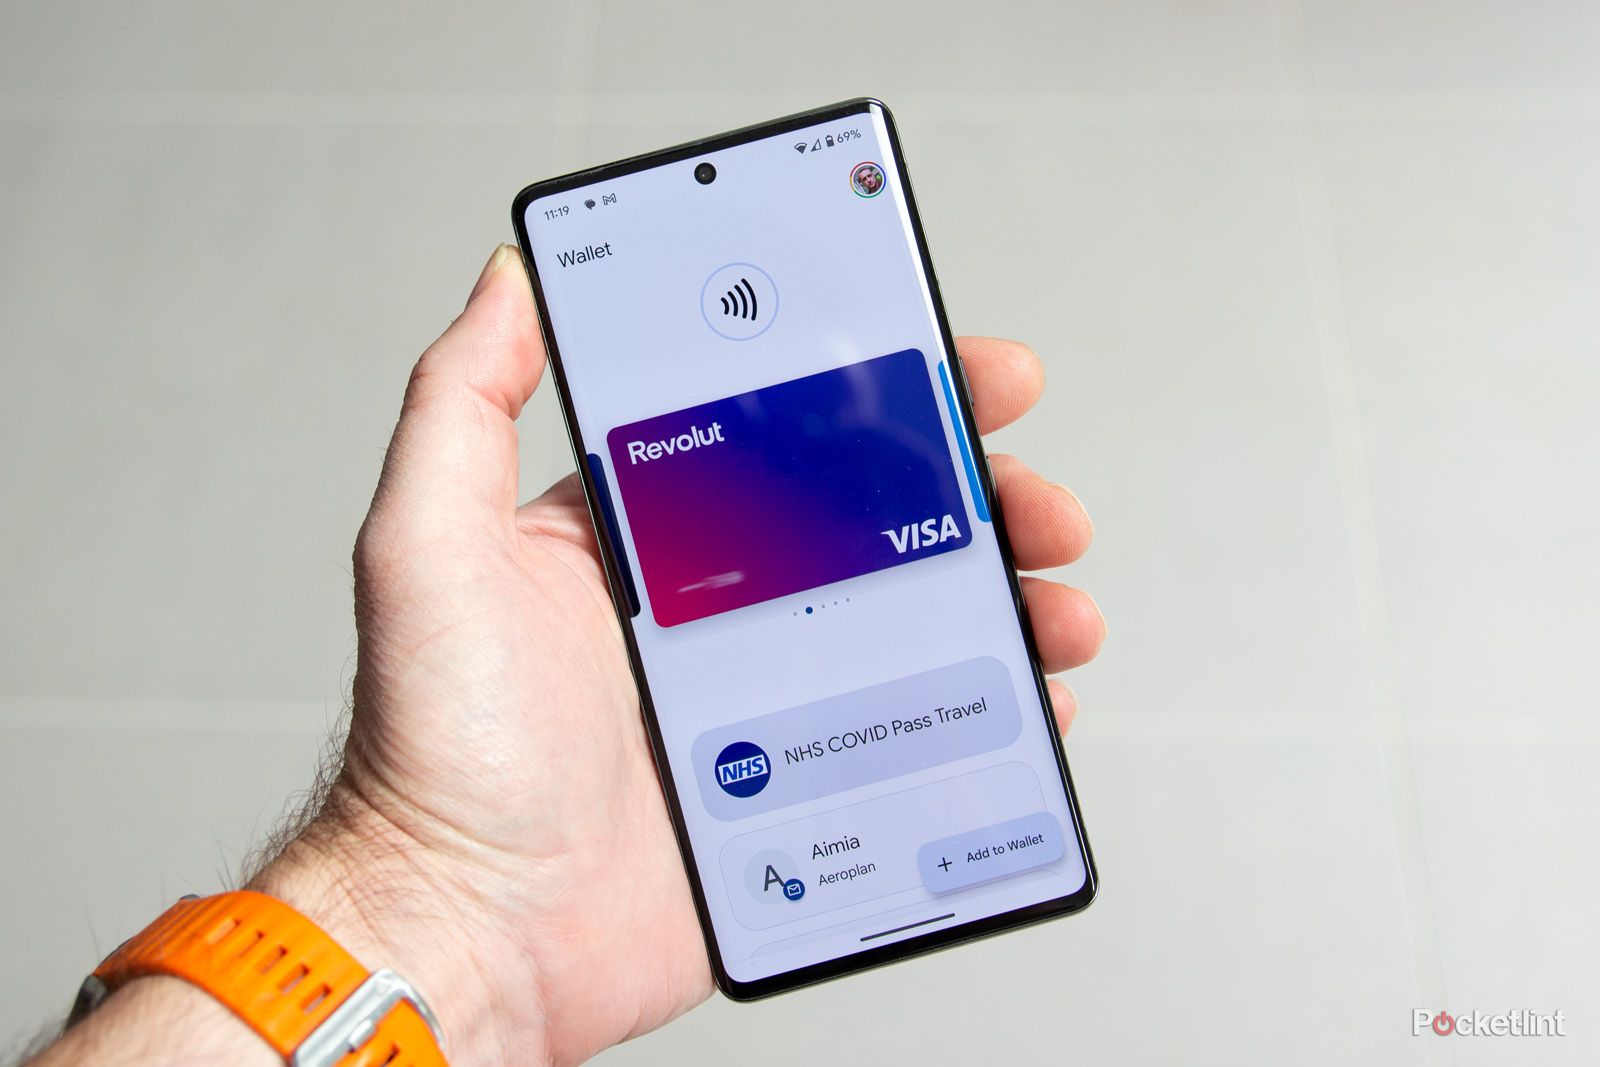
- Add a Card: On the main Wallet screen, look for a “+” button or an “Add to Wallet” option. Tap it.
- Select Card Type: Choose “Payment card.” You’ll then have two primary options:
- Scan Your Card: Position your physical card within the frame on your screen. The app will automatically detect the card number and expiry date. This is the fastest method.
- Enter Details Manually: If scanning isn’t convenient or doesn’t work, you can type in your card number, expiry date, CVC, and cardholder name manually.
- Bank Verification: Your bank will need to verify the card. This usually involves receiving a one-time code via SMS, email, or a phone call, which you’ll enter into the Wallet app. This step is a critical security measure to ensure you are the legitimate cardholder.
- Terms and Conditions: Accept your bank’s terms and conditions for using the card with Google Wallet.
- Card Provisioning: Once verified, your bank will provision a unique, encrypted “virtual account number” or token for your card within Google Wallet. This token is what’s actually transmitted during a transaction, never your real card number, significantly enhancing security.
- Add Other Items: Beyond payment cards, you can add a variety of digital items:
- Loyalty Cards: Scan barcodes or manually enter details for your store loyalty programs.
- Boarding Passes: Often, airlines or event organizers provide an “Add to Google Wallet” button after a booking.
- Event Tickets: Similar to boarding passes, digital tickets can be stored here.
- Digital Keys & IDs: In some regions and with supported partners, you can add car keys, student IDs, or even government-issued IDs. These features are expanding rapidly.
Configuring Default Cards and Preferences
Once you have multiple cards added, you can customize your experience:
- Set Default Card: In the Google Wallet app, navigate to your list of cards. You can usually long-press or tap on a card and select “Set as default” for tap-to-pay transactions. This ensures that when you tap your phone, your preferred card is used automatically.
- Reorder Cards: You can often drag and drop cards to reorder them, making it easier to swipe through and select a different card if needed during a purchase.
- Manage Notifications: Within the app settings or your Android system settings for Wallet, you can control notifications related to transactions, new features, or expiring passes.
Mastering Google Wallet: Everyday Usage and Advanced Features
With Google Wallet set up, you’re ready to explore its full range of capabilities, from quick payments to organizing your digital life.
Making Contactless Payments (NFC)
The most common and celebrated use of Google Wallet is for contactless payments.
- Check for NFC: Ensure Near Field Communication (NFC) is enabled on your Android device. You can usually find this in your phone’s settings under “Connected devices” or “Bluetooth & device connection.”
- Unlock Your Phone: For security, you typically need to unlock your phone using your PIN, pattern, fingerprint, or face unlock. For smaller transactions below a certain limit (which varies by region and bank), you might only need to wake your screen.
- Tap to Pay: Hold the back of your Android phone near the contactless payment terminal (look for the contactless symbol, often four curved lines).
- Confirmation: You’ll usually see a checkmark on your phone’s screen and hear a sound or feel a vibration confirming the payment was successful. The terminal will also indicate approval.
- Selecting a Different Card: If your default card isn’t the one you want to use, open the Google Wallet app before tapping, select the desired card, then proceed to tap.
Managing Passes: Boarding Passes, Event Tickets, and Loyalty Cards

Google Wallet isn’t just for money; it’s a powerful tool for organizing all your digital passes.
- Accessing Passes: Within the Google Wallet app, you’ll see a section dedicated to “Passes” or “Other items.” Tap on it to view your stored boarding passes, loyalty cards, event tickets, and more.
- Using Loyalty Cards: When shopping, simply open Google Wallet, select the loyalty card, and present the barcode or number to the cashier to be scanned. Some terminals might allow tapping for loyalty points if they’re integrated.
- Boarding Flights/Entering Events: For boarding passes or event tickets, open the relevant pass in Wallet. The barcode or QR code can then be scanned at the gate or entrance. This eliminates the need for printing or fumbling through emails.
- Updates and Notifications: Many passes in Google Wallet dynamically update. For instance, a boarding pass might show gate changes or delays, or an event ticket might update with venue information. You may receive notifications for these changes.
Integrating with Public Transport
A growing feature of Google Wallet is its integration with public transportation systems in many major cities worldwide.
- Supported Systems: Check if your local transit authority supports Google Wallet. This is often advertised at ticket machines or on their website.
- Using Tap-to-Ride: For supported systems, you can simply tap your Android phone (with Google Wallet activated) on the turnstile or bus reader, similar to making a payment. The system automatically charges the correct fare or validates your pass.
- Adding Transit Cards: Some systems allow you to add virtual transit cards directly to Google Wallet, topping them up within the app or through the transit provider’s platform. This streamlines your commute, eliminating the need for physical transit cards.
Security and Privacy: Safeguarding Your Digital Assets
The primary concern with any digital wallet is security. Google Wallet is built with multiple layers of protection to ensure your financial data and personal information remain safe.
Built-in Android Security Features
Google Wallet leverages the inherent security features of the Android operating system and your device hardware.
- Screen Lock Requirement: As mentioned, a robust screen lock (PIN, pattern, fingerprint, or face unlock) is mandatory. This is the first line of defense, preventing unauthorized access if your phone falls into the wrong hands.
- Secure Element: Many modern Android phones include a hardware-based “Secure Element” (SE) or “Trusted Execution Environment” (TEE). This isolated, tamper-resistant chip stores your encrypted payment credentials, separate from the main operating system, making it extremely difficult for malware or hackers to access them.
- App Sandboxing: Android’s app sandboxing architecture ensures that Google Wallet operates in its own isolated environment, preventing other apps from accessing its data without explicit permission.
Tokenization and Encryption
These are the fundamental technologies that make contactless payments secure.
- Tokenization: When you add a card to Google Wallet, your actual card number is not stored on your device or transmitted during a transaction. Instead, Google Wallet creates a unique, encrypted “token” (a virtual account number) for each card. This token is useless if intercepted, as it cannot be used to recreate your actual card number or conduct fraudulent transactions outside of your specific Google Wallet.
- End-to-End Encryption: All data exchanged between your phone, Google’s servers, and the payment network is encrypted. This prevents eavesdropping and ensures the integrity of your payment information during transit.
- No Card Details Shared: Merchants receive only the token and a transaction authorization from your bank; they never see your actual card number or CVC, further protecting your privacy and reducing the risk of data breaches at merchant terminals.
What to Do if Your Device is Lost or Stolen
Even with robust security, losing your phone can be distressing. Google provides tools to protect your Wallet in such scenarios.
- Find My Device: Google’s “Find My Device” service allows you to remotely locate, lock, or even erase your Android phone. If your device is locked, Google Wallet cannot be used for payments. If you fear it’s permanently lost, erasing it remotely will wipe all your data, including Wallet information.
- Contact Your Bank: While Google Wallet is secure, it’s always a good practice to inform your bank(s) about the loss of your device. They can monitor your accounts for suspicious activity.
- Google Account Security: You can review and manage your connected devices and payment methods directly from your Google Account security settings, allowing you to remove access if necessary.
Troubleshooting and Best Practices for a Seamless Experience
While Google Wallet is designed for ease of use, occasional issues can arise. Knowing how to troubleshoot and following best practices will ensure a consistently smooth experience.
Common Issues and Solutions
- “Hold device closer to reader” / “Try again”:
- Solution: Ensure your phone’s NFC is enabled. Hold the back of your phone directly over the center of the contactless terminal. Sometimes tilting the phone slightly can help. Make sure your phone is unlocked (or screen awake for small transactions).
- “Payment not completed” / “Card declined”:
- Solution: This usually isn’t a Google Wallet issue but a problem with the card itself. Check if your physical card is working, contact your bank to ensure there are no blocks or insufficient funds, or try using a different card in Google Wallet.
- NFC Not Working:
- Solution: Go to your Android settings, search for “NFC,” and ensure it’s toggled on. If it’s on but still not working, try restarting your phone.
- Issues Adding a Card:
- Solution: Double-check all card details. Ensure you have a stable internet connection for bank verification. If verification fails, contact your bank directly; they might have security measures preventing the digital addition of your card.
Optimizing Your Device for Google Wallet
A few simple steps can enhance your Google Wallet experience.
- Keep Your Software Updated: Ensure your Android operating system and the Google Wallet app itself are always up to date. Updates often include security patches, bug fixes, and new features that improve performance and reliability.
- Maintain a Strong Screen Lock: A complex PIN, a unique pattern, or reliable biometric authentication (fingerprint/face) makes your Wallet more secure and faster to access than a simple swipe.
- Check Battery Life: While Google Wallet generally uses minimal battery, very low battery levels can sometimes impact NFC performance or app responsiveness.
- Remove Bulky Cases: Some phone cases, especially thick metallic ones, can interfere with NFC signals. If you’re consistently having issues, try removing your case temporarily to see if it resolves the problem.
Future of Google Wallet: Emerging Technologies and Integrations
Google Wallet is not a static product; it’s continuously evolving. Keep an eye out for:
- Expanded Digital ID Support: More countries and states are beginning to support digital driver’s licenses and national IDs within Google Wallet, reducing the need for physical documents.
- Digital Car Keys: Integration with smart car systems allows your phone to act as a digital key, offering remote locking, unlocking, and even starting your vehicle.
- Health and Wellness Passes: While sensitive, there’s potential for vaccination records or other health passes to be securely stored.
- Cryptocurrency Integration: While not directly supported for transactions via tap-to-pay, the digital wallet ecosystem is slowly exploring ways to display or interact with cryptocurrency holdings.
By understanding how to effectively set up, use, and secure Google Wallet on your Android device, you unlock a world of convenience and efficiency. This powerful app empowers you to streamline your daily transactions and organize your digital life, firmly placing the future of your wallet in the palm of your hand. Embrace the digital shift and make your Android device the ultimate financial companion.
aViewFromTheCave is a participant in the Amazon Services LLC Associates Program, an affiliate advertising program designed to provide a means for sites to earn advertising fees by advertising and linking to Amazon.com. Amazon, the Amazon logo, AmazonSupply, and the AmazonSupply logo are trademarks of Amazon.com, Inc. or its affiliates. As an Amazon Associate we earn affiliate commissions from qualifying purchases.