
In the realm of high-performance computing, especially for gaming, professional content creation, and AI workloads, NVIDIA graphics processing units (GPUs) are ubiquitous. However, the raw power of these sophisticated pieces of hardware cannot be fully unleashed without the correct software: the NVIDIA driver. A driver acts as a crucial intermediary, translating commands from your operating system and applications into instructions your GPU understands. Installing and maintaining the correct driver is not merely a technicality; it’s fundamental to achieving optimal performance, system stability, and access to the latest features. This guide delves deep into the process of installing an NVIDIA driver, offering a professional, insightful, and engaging roadmap for users of all experience levels.
Understanding NVIDIA Drivers and Their Importance
Before diving into the installation process, it’s essential to grasp what a graphics driver is and why its proper management is paramount for any system featuring an NVIDIA GPU. This foundational knowledge empowers users to make informed decisions throughout the installation and maintenance cycle.
What is a Graphics Driver?
At its core, a graphics driver is a specific piece of software that facilitates communication between your computer’s operating system (Windows, Linux, macOS) and your NVIDIA graphics card. Without a driver, your operating system would have no idea how to interact with the GPU, leading to generic display outputs, poor resolution, and the complete inability to run graphics-intensive applications. The driver essentially provides the instruction set, enabling the GPU to render graphics, process visual data, and execute complex calculations as intended by software developers. It’s the critical bridge connecting hardware and software, ensuring smooth and efficient operation.
Why Keeping Your Driver Updated Matters
The significance of an up-to-date NVIDIA driver extends far beyond basic functionality. Regularly updating your driver brings a host of benefits that directly impact your computing experience. Foremost among these are performance improvements; new drivers often include optimizations that can significantly boost frame rates in the latest games or accelerate rendering times in professional applications. Furthermore, updates frequently introduce crucial bug fixes, addressing stability issues, visual glitches, and compatibility problems that might have plagued previous versions. NVIDIA also uses driver updates to roll out support for new game titles, cutting-edge display technologies (like G-Sync or HDR), and important security patches, protecting your system from potential vulnerabilities. Neglecting driver updates can result in suboptimal performance, instability, and an inability to fully leverage your GPU’s capabilities.
Identifying Your NVIDIA GPU Model
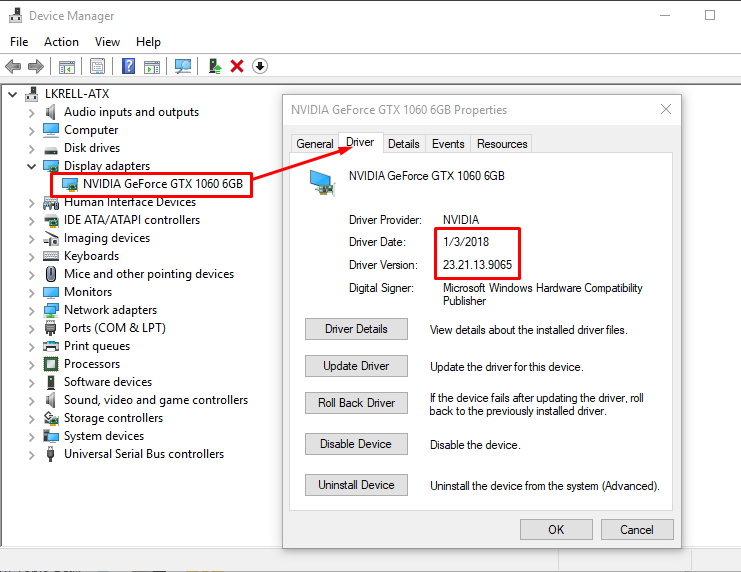
The very first step in installing an NVIDIA driver is accurately identifying your specific NVIDIA GPU model. This information is critical because drivers are tailored to particular GPU architectures and series. Attempting to install an incorrect driver can lead to errors, system instability, or simply a failed installation. For Windows users, the easiest method is to use the Device Manager: press Win + X, select “Device Manager,” then expand “Display adapters.” Your NVIDIA card will be listed there (e.g., NVIDIA GeForce RTX 3070). Alternatively, the NVIDIA Control Panel (if already installed) provides detailed system information. For Linux users, commands like lspci | grep -i nvidia in the terminal can reveal the GPU model. Knowing your exact GPU model ensures you download the correct, compatible driver from NVIDIA’s website.
Preparing for Installation: Essential Pre-Installation Steps
A successful driver installation often hinges on thorough preparation. Taking a few precautionary steps before initiating the setup process can prevent potential headaches and ensure a smooth, worry-free update. These preliminary actions lay the groundwork for a stable and efficient driver environment.
Backing Up Your System (Optional but Recommended)
While driver installations are generally straightforward, unexpected issues can occasionally arise. To safeguard against potential system instability, creating a system restore point or a full disk image backup is a highly recommended, albeit optional, pre-installation step. A system restore point allows you to revert your computer to a previous working state if the new driver causes unforeseen problems. For more critical situations, a full disk image provides a complete snapshot of your operating system and all your data, offering a robust recovery option. This foresight acts as an invaluable safety net, providing peace of mind and an easy rollback path should the new driver not perform as expected.
Deciding Between Clean vs. Standard Installation
When installing an NVIDIA driver, you’ll often encounter options for a “Standard” or “Custom” installation, with the latter usually offering a “Perform a clean installation” checkbox. Understanding the difference is crucial. A “Standard” or “Express” installation typically overwrites existing driver files and installs new ones, preserving your NVIDIA Control Panel settings and preferences. This is suitable for routine updates when you’ve had no prior issues. A “Clean” installation, however, completely removes all previous NVIDIA driver components, settings, and registry entries before installing the new driver from scratch. This approach is highly recommended when troubleshooting driver-related issues, upgrading to a significantly newer GPU, or encountering persistent problems after a standard update. It ensures no old, potentially corrupt files interfere with the new installation, providing the freshest possible driver environment.
Choosing the Right Driver: Official Sources and Versions
The official NVIDIA website (nvidia.com/drivers) is your primary and most reliable source for downloading drivers. Avoid third-party websites, as they may offer outdated, modified, or even malicious driver packages. Once on the NVIDIA site, use their driver finder tool by selecting your product type (e.g., GeForce), product series (e.g., RTX 30 Series), product (e.g., RTX 3070), operating system, and preferred download type. NVIDIA offers two main driver types: “Game Ready Drivers” (GRD) are optimized for performance in the latest games, often released in sync with major game launches. “Studio Drivers” (SD) are designed for stability and performance in creative applications like Adobe Premiere Pro, Blender, or Autodesk products. Choose the driver type that best suits your primary use case. While beta drivers might offer early access to new features, they are generally less stable and best avoided unless you have a specific reason to use them.
Downloading the Driver Package
After accurately identifying your GPU model and selecting the appropriate driver version, proceed to download the driver package from the NVIDIA website. The download process is straightforward: click the “Search” button, then “Download” on the results page. The driver package is typically a large executable file (several hundred megabytes). Once the download is complete, it’s good practice to temporarily pause or disable any antivirus software that might interfere with the installation process, though this is less common with official NVIDIA packages. Ensure you save the file to a location you can easily access, such as your Downloads folder or desktop. Having the installer readily available is the final step before initiating the installation.
The Installation Process: Step-by-Step Guide
With your preparations complete, you are now ready to commence the actual installation of your NVIDIA driver. This section outlines the process in detail, highlighting critical choices and best practices to ensure a successful update.
Uninstalling Previous Drivers (Clean Installation Path)
If you’ve opted for a clean installation, a thorough uninstallation of previous drivers is crucial. While Windows’ built-in “Apps & features” can remove NVIDIA drivers, a more comprehensive tool like Display Driver Uninstaller (DDU) is often recommended. DDU effectively scrubs all remnants of old driver files, registry keys, and folders. To use DDU safely:
- Download DDU from its official source (Wagnardsoft).
- Boot into Windows Safe Mode. This prevents Windows from loading any graphics drivers, allowing DDU to perform a deeper clean. (To enter Safe Mode, press
Win + R, typemsconfig, go to the “Boot” tab, check “Safe boot,” apply, and restart. Remember to uncheck it after installation.) - Run DDU and select “Clean and restart (Highly Recommended).”
- Your system will restart, ready for the new driver installation without any legacy conflicts.
Running the NVIDIA Driver Installer
Once your system is prepped (either after a DDU clean or if you’re doing a standard update), locate and double-click the downloaded NVIDIA driver executable file.
- Extraction: The installer will first prompt you to choose an extraction path for the driver files. The default location is usually fine.
- System Check: After extraction, the installer will perform a quick system compatibility check.
- License Agreement: Review and accept the NVIDIA software license agreement to proceed.
- Installation Options: This is a critical juncture.
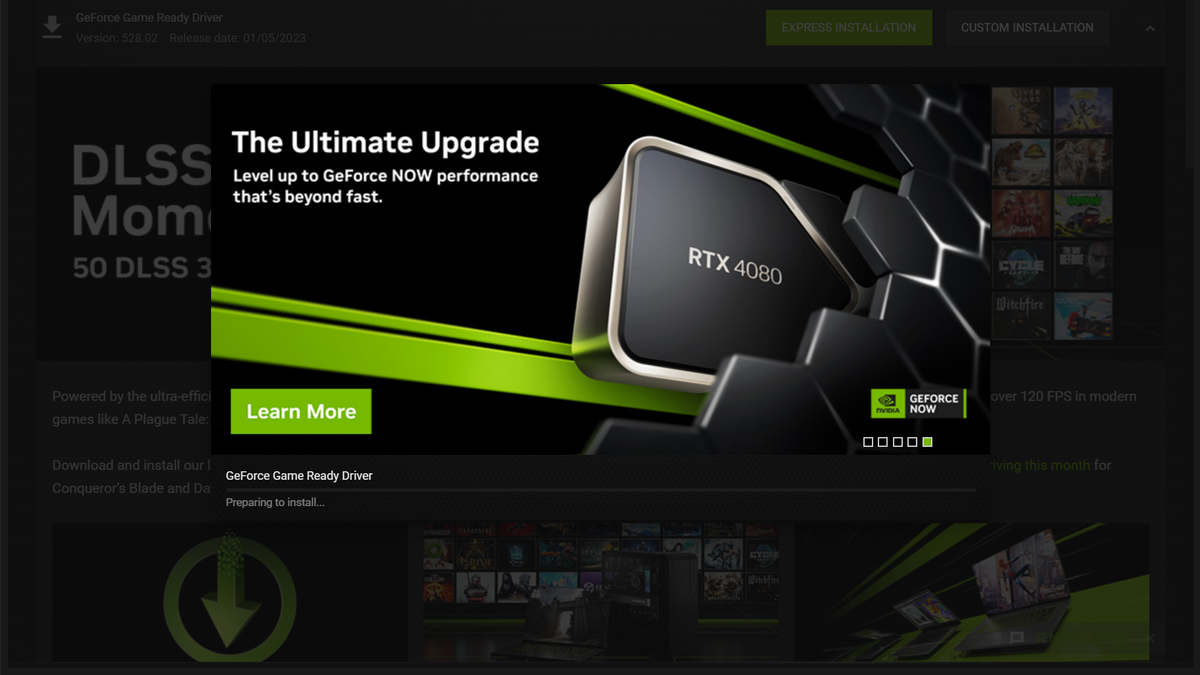
- Express Installation (Recommended): This is the quickest option, installing the driver and GeForce Experience (if not already present) with default settings, typically overwriting existing files. Choose this for routine updates without issues.
- Custom (Advanced) Installation: This option allows you to select specific components to install (e.g., driver, GeForce Experience, PhysX, HD Audio Driver) and crucially, provides the “Perform a clean installation” checkbox. If you didn’t use DDU, checking this box here will perform a basic clean installation, resetting NVIDIA settings to default. This is often preferred for more robust updates, even without DDU.
- Installation Progress: The installer will proceed to install the selected components. Your screen may flicker or temporarily go black during this phase as the new display driver initializes. This is normal.
Post-Installation Reboot and Verification
After the installation completes, the NVIDIA installer will typically prompt you to restart your computer. While sometimes optional, a reboot is highly recommended to ensure all new driver components are fully integrated into the operating system and running correctly. Once your system has restarted:
- Verify in Device Manager: Go back to Device Manager (
Win + X> “Device Manager” > “Display adapters”) and confirm that your NVIDIA GPU is listed without any error icons (like a yellow exclamation mark) and that its driver version corresponds to the one you just installed. - NVIDIA Control Panel: Right-click on your desktop; you should see “NVIDIA Control Panel” or “NVIDIA Display Settings.” Opening this confirms the driver is installed and functional. You can explore its settings to configure display options, 3D settings, and more.
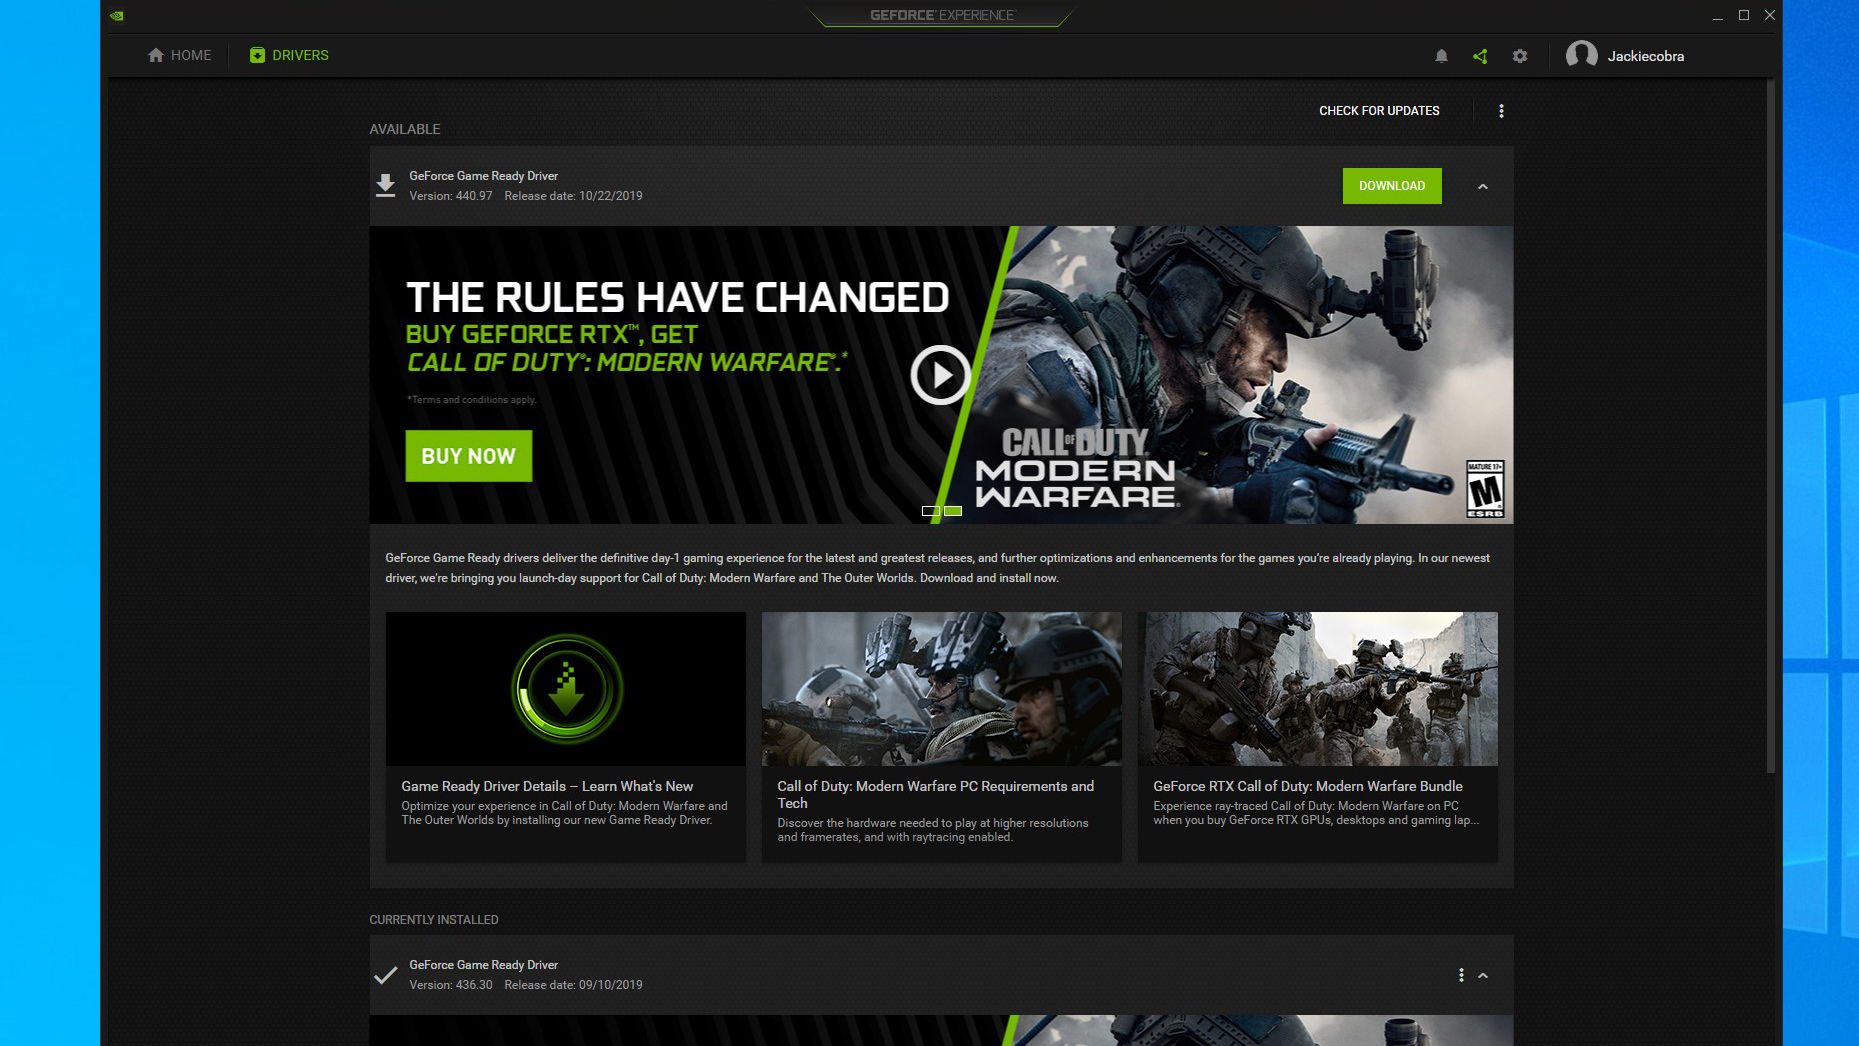
- GeForce Experience (if installed): Launch GeForce Experience. It should recognize your installed driver version and offer options for game optimization and further updates.
These verification steps ensure that your new NVIDIA driver is correctly installed and ready to deliver optimal performance.
Advanced Considerations and Troubleshooting
While the standard installation process covers most scenarios, some users may encounter specific situations or issues that require advanced knowledge or troubleshooting. Understanding these can prevent minor inconveniences from becoming major roadblocks.
Using NVIDIA GeForce Experience for Driver Management
NVIDIA GeForce Experience (GFE) is an optional companion application that streamlines driver management and enhances the gaming experience. If installed, GFE can automatically check for new drivers, notify you of their availability, and facilitate one-click installation directly from within the application. It also offers features like optimal game settings, ShadowPlay for recording gameplay, and Freestyle for applying post-processing filters. For casual users and gamers, GFE offers significant convenience, simplifying the update process and ensuring games are always optimized. However, some advanced users might prefer to manage drivers manually, viewing GFE as unnecessary “bloatware” that consumes system resources. The choice to use GFE depends on individual preference for convenience versus system lean-ness.
Installing Drivers on Linux Systems
Installing NVIDIA drivers on Linux can be more complex than on Windows due to the diverse nature of Linux distributions and display server configurations.
- Distribution-Specific Methods: Many distributions, like Ubuntu, offer an “Additional Drivers” utility or package manager integration (
ubuntu-drivers autoinstall) that simplifies installation. This is generally the safest and easiest method. - Proprietary PPA: Some community-maintained PPAs (Personal Package Archives) offer more up-to-date drivers for specific distributions, like the “Graphics Drivers” PPA for Ubuntu.
- Manual Installation: For experienced users, drivers can be downloaded directly from NVIDIA’s website as a
.runfile. This usually requires disabling the open-source Nouveau driver, dropping to a terminal (TTY), and executing the installer with root privileges. This method offers the most control but carries a higher risk of system instability if not done correctly, particularly with kernel updates requiringdkms. Always consult your distribution’s documentation for specific instructions.
Common Installation Issues and Solutions
Even with careful preparation, problems can arise. Here are some common issues and their resolutions:
- “Driver install failed” error: This can be caused by corrupted download files (re-download), conflicting software (temporarily disable antivirus/firewall), or remnants of old drivers. A DDU clean installation in Safe Mode usually resolves this.
- Black screen or display issues: If your screen goes black permanently after installation, reboot into Safe Mode. From there, you can either run DDU again to completely remove the problematic driver or try to roll back to a previous driver version via Device Manager. Ensure your monitor cables are securely connected.
- Performance regressions: If a new driver actually decreases performance, it might be a bug. Check NVIDIA’s release notes for known issues. Your best bet is to perform a clean installation of the previous stable driver version that worked well for you.
- Compatibility problems: Ensure your GPU is genuinely supported by the driver version you’re trying to install. Very old GPUs might not be supported by the latest drivers.
Maintaining Your NVIDIA Drivers for Optimal Performance
Installing the driver is a significant step, but effective driver management is an ongoing process. Regular maintenance ensures your system continues to perform optimally, adapting to new software releases and hardware demands.
Establishing a Regular Update Schedule
While it’s tempting to install every new driver release immediately, a more measured approach is often advisable. Establish a regular schedule, perhaps checking for updates once a month or whenever a major new game or application is released that you plan to use. Before updating, always read the driver release notes. These notes detail bug fixes, performance improvements, and any known issues, helping you decide if an update is beneficial for your specific setup. Prioritizing stability over always having the absolute latest version can prevent unnecessary troubleshooting. However, don’t neglect updates for too long, as you’ll miss out on crucial performance gains and security patches.
Monitoring Driver Performance and Stability
After installing a new driver, pay attention to your system’s behavior. Monitor game frame rates using in-game benchmarks or overlay tools like MSI Afterburner or GFE’s FPS counter. Check for any unexpected crashes, freezes, or visual artifacts in applications you frequently use. System monitoring tools can provide insights into GPU temperature, clock speeds, and memory usage, helping you identify if the new driver is affecting your hardware adversely. If you notice any significant drop in performance or an increase in instability that wasn’t present with the previous driver, it’s a strong indicator that the new driver might be causing issues.
When to Downgrade a Driver
Sometimes, a new driver version might introduce unforeseen bugs or performance issues that negatively impact your specific hardware or software configuration. In such cases, downgrading to a previous, known-stable driver version is a perfectly valid and often necessary solution. NVIDIA typically archives older driver versions on its website, making them accessible for download. To downgrade, you’ll perform a clean installation, similar to a regular update, but using the older driver package. This involves using DDU in Safe Mode to remove the problematic driver, then installing the older version. Do not hesitate to revert if a new driver compromises your system’s stability or performance, as it ensures your computing experience remains consistent and reliable.
By following this comprehensive guide, users can confidently navigate the process of installing and managing their NVIDIA drivers. From initial identification to advanced troubleshooting and ongoing maintenance, understanding these steps ensures your powerful NVIDIA GPU consistently delivers its full potential, providing a smooth, high-performance computing experience.
aViewFromTheCave is a participant in the Amazon Services LLC Associates Program, an affiliate advertising program designed to provide a means for sites to earn advertising fees by advertising and linking to Amazon.com. Amazon, the Amazon logo, AmazonSupply, and the AmazonSupply logo are trademarks of Amazon.com, Inc. or its affiliates. As an Amazon Associate we earn affiliate commissions from qualifying purchases.