
In the intricate ecosystem of modern computing, every component plays a pivotal role in delivering a seamless and high-performance user experience. Among these, the graphics processing unit (GPU) stands out as the powerhouse for visual rendering, driving everything from desktop interfaces to demanding video games and professional design applications. If you’re a PC user, especially one involved in gaming, content creation, or computationally intensive tasks, chances are you’re familiar with NVIDIA, a leading manufacturer of GPUs. But merely owning a powerful NVIDIA graphics card isn’t enough; to unlock its full potential, maintain system stability, and access the latest features, you must regularly update its drivers.
This guide delves into the essential process of updating your NVIDIA drivers, explaining not just how to do it, but why it’s critical, and what considerations you should keep in mind to ensure a smooth, problem-free upgrade. We’ll explore the various methods available, offer step-by-step instructions, and provide insights into troubleshooting common issues, ensuring your NVIDIA GPU always performs at its peak.
The Indispensable Role of NVIDIA Drivers
Drivers are essentially software programs that allow your operating system (like Windows) to communicate with your hardware components (like your NVIDIA graphics card). Think of them as translators; without them, your computer wouldn’t understand how to make the GPU display graphics, run games, or accelerate tasks. For a component as complex and crucial as a modern graphics card, these drivers are constantly evolving, bringing significant improvements and fixes.
Why Keeping Your Drivers Current Matters
Neglecting driver updates can lead to a host of problems, from minor annoyances to major performance bottlenecks. Conversely, keeping your drivers up-to-date offers a wealth of benefits:
- Performance Boosts: This is perhaps the most immediate and noticeable benefit for gamers. New drivers often include optimizations for the latest game titles, translating into higher frame rates, smoother gameplay, and reduced stuttering. Professional applications like video editors, 3D rendering software, and CAD programs also frequently see performance improvements with updated drivers, leveraging new GPU capabilities.
- Stability & Bug Fixes: Outdated drivers are a common culprit for system crashes, freezing, graphical glitches, and display errors. NVIDIA continuously releases driver updates to fix bugs, address compatibility issues with new software and operating systems, and improve overall system stability. If you’re experiencing unusual graphical artifacts or application crashes, an outdated driver is often the first thing to check.
- New Features & Optimizations: Modern GPUs are incredibly sophisticated, and their capabilities expand over time through software updates. Drivers introduce support for new technologies like NVIDIA’s DLSS (Deep Learning Super Sampling) for AI-powered performance boosts, Ray Tracing for hyper-realistic lighting, or Reflex for reduced system latency. Without the latest drivers, you’d miss out on these cutting-edge enhancements.
- Security Patches: While less frequent than performance or stability updates, drivers can sometimes contain security vulnerabilities. NVIDIA, like any software provider, issues patches to address these weaknesses, protecting your system from potential exploits. Keeping your drivers current is a critical part of maintaining a secure computing environment.
- Compatibility: As new operating system versions, games, and applications are released, their demands on hardware and software change. Updated drivers ensure your graphics card remains compatible with the latest software ecosystem, preventing issues where new programs might refuse to run or display incorrectly.
Understanding NVIDIA’s Driver Types
NVIDIA generally offers two primary types of drivers for their consumer-grade GPUs, tailored for different user needs:
- Game Ready Drivers (GRD): These are the most common drivers for gamers. They are specifically optimized and extensively tested for new game launches, ensuring the best possible performance and stability right out of the gate. NVIDIA typically releases a new GRD shortly before or on the day of major game releases.
- Studio Drivers (SD): Targeted at content creators, developers, and professionals, Studio Drivers are designed for stability and performance in creative applications. They undergo rigorous testing with top creative software suites like Adobe Creative Cloud, DaVinci Resolve, Blender, and Autodesk products. If your primary use case involves professional creative work, Studio Drivers might be a better choice for you.
You typically only need one type installed at a time. Most users will stick with Game Ready Drivers. If you’re a professional who occasionally games, you can try both and see which offers the best overall experience for your specific workflow.
Preparing for Your NVIDIA Driver Update
Before you dive into the update process, a little preparation can save you a lot of potential headaches. This involves identifying your current hardware, understanding your options, and taking precautionary steps.
Essential Pre-Update Checks
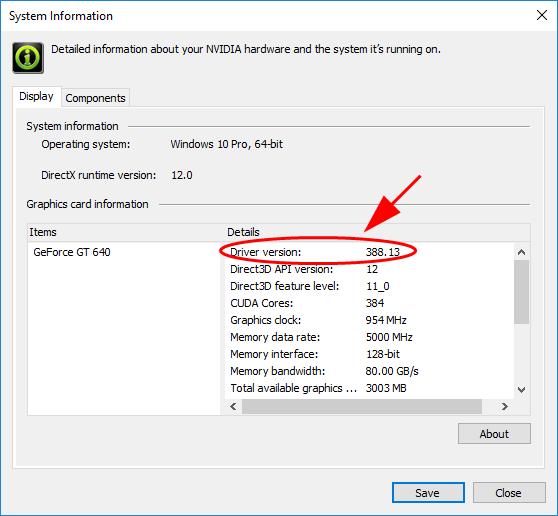
- Identify Your Graphics Card: Knowing your specific GPU model (e.g., GeForce RTX 3070, GTX 1660 Super) is crucial for downloading the correct driver. You can find this information in a few ways:
- Device Manager: Press
Win + X, then select “Device Manager.” Expand “Display adapters” to see your GPU. - NVIDIA Control Panel: Right-click on your desktop and select “NVIDIA Control Panel.” Click “System Information” in the bottom-left corner.
- GeForce Experience: If installed, open GeForce Experience, go to the “Drivers” tab, and your GPU model will be displayed.
- Device Manager: Press
- Check Current Driver Version: While not strictly necessary for an update, knowing your current driver version (found in Device Manager or NVIDIA Control Panel under “Driver Version”) can be helpful for troubleshooting or verifying a successful update.
- Stable Internet Connection: Ensure you have a reliable internet connection to download the potentially large driver files.
- Backup Your System (Optional but Recommended): While driver updates are generally safe, creating a system restore point or a full system backup before a major update is a good practice. This allows you to easily revert your system to a previous state if anything goes wrong. To create a system restore point in Windows: Search for “Create a restore point,” select a drive, click “Configure,” ensure system protection is on, then click “Create.”
Deciding on an Update Method
NVIDIA offers a couple of primary ways to update your drivers:
- NVIDIA GeForce Experience: This is the most user-friendly and recommended method for most users. GeForce Experience is a companion application that comes with NVIDIA graphics cards, providing game optimization, ShadowPlay recording, and, crucially, automatic driver updates.
- NVIDIA Website (Manual Download): For those who prefer more control, or if GeForce Experience isn’t installed, you can manually download drivers directly from NVIDIA’s official website.
- Windows Update: While Windows Update might occasionally provide NVIDIA drivers, they are often not the very latest versions and are typically generic releases. It’s generally not the preferred method for getting cutting-edge performance or features.
Step-by-Step Guide: Updating NVIDIA Drivers
Now, let’s walk through the most common and effective methods for updating your NVIDIA drivers.
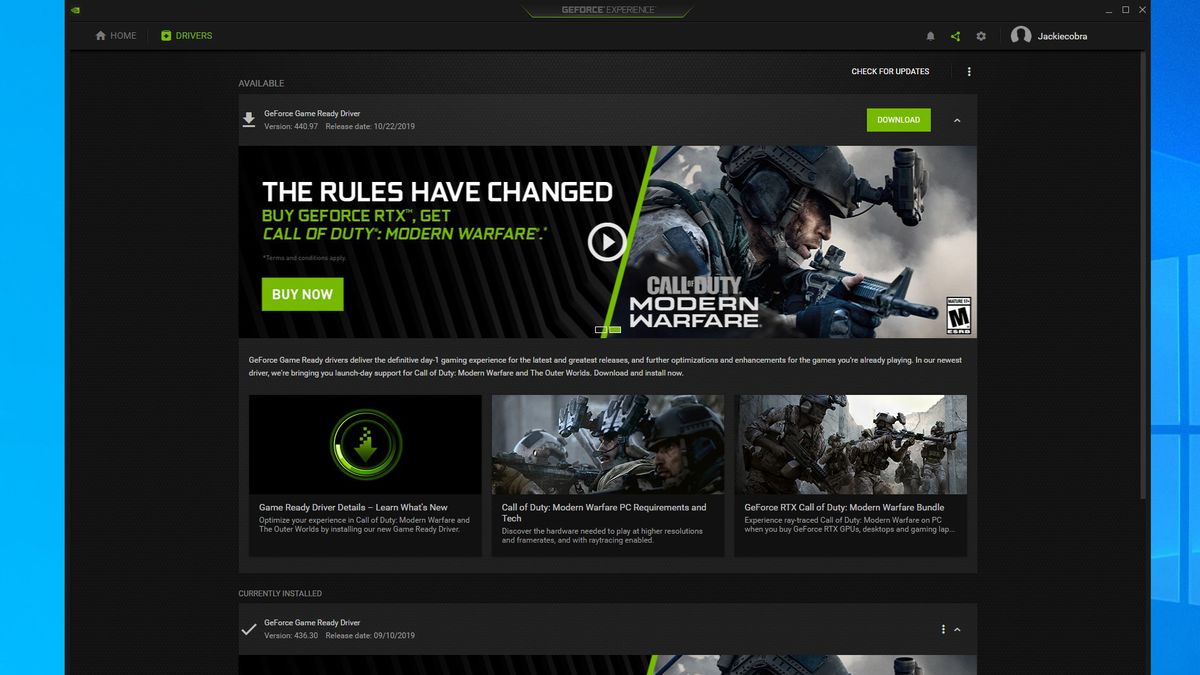
Method 1: Using NVIDIA GeForce Experience (Recommended)
This is the easiest and most convenient way to keep your drivers up-to-date.
- Open GeForce Experience: Launch the NVIDIA GeForce Experience application. If you don’t have it, you can download it from NVIDIA’s website. You might need to log in or create an NVIDIA account.
- Navigate to the Drivers Tab: Once open, click on the “Drivers” tab located in the top-left menu.
- Check for Updates: GeForce Experience automatically checks for new drivers. If an update is available, you’ll see a notification and the option to “Download” the new driver.
- Download the Driver: Click “Download.” The application will download the necessary files.
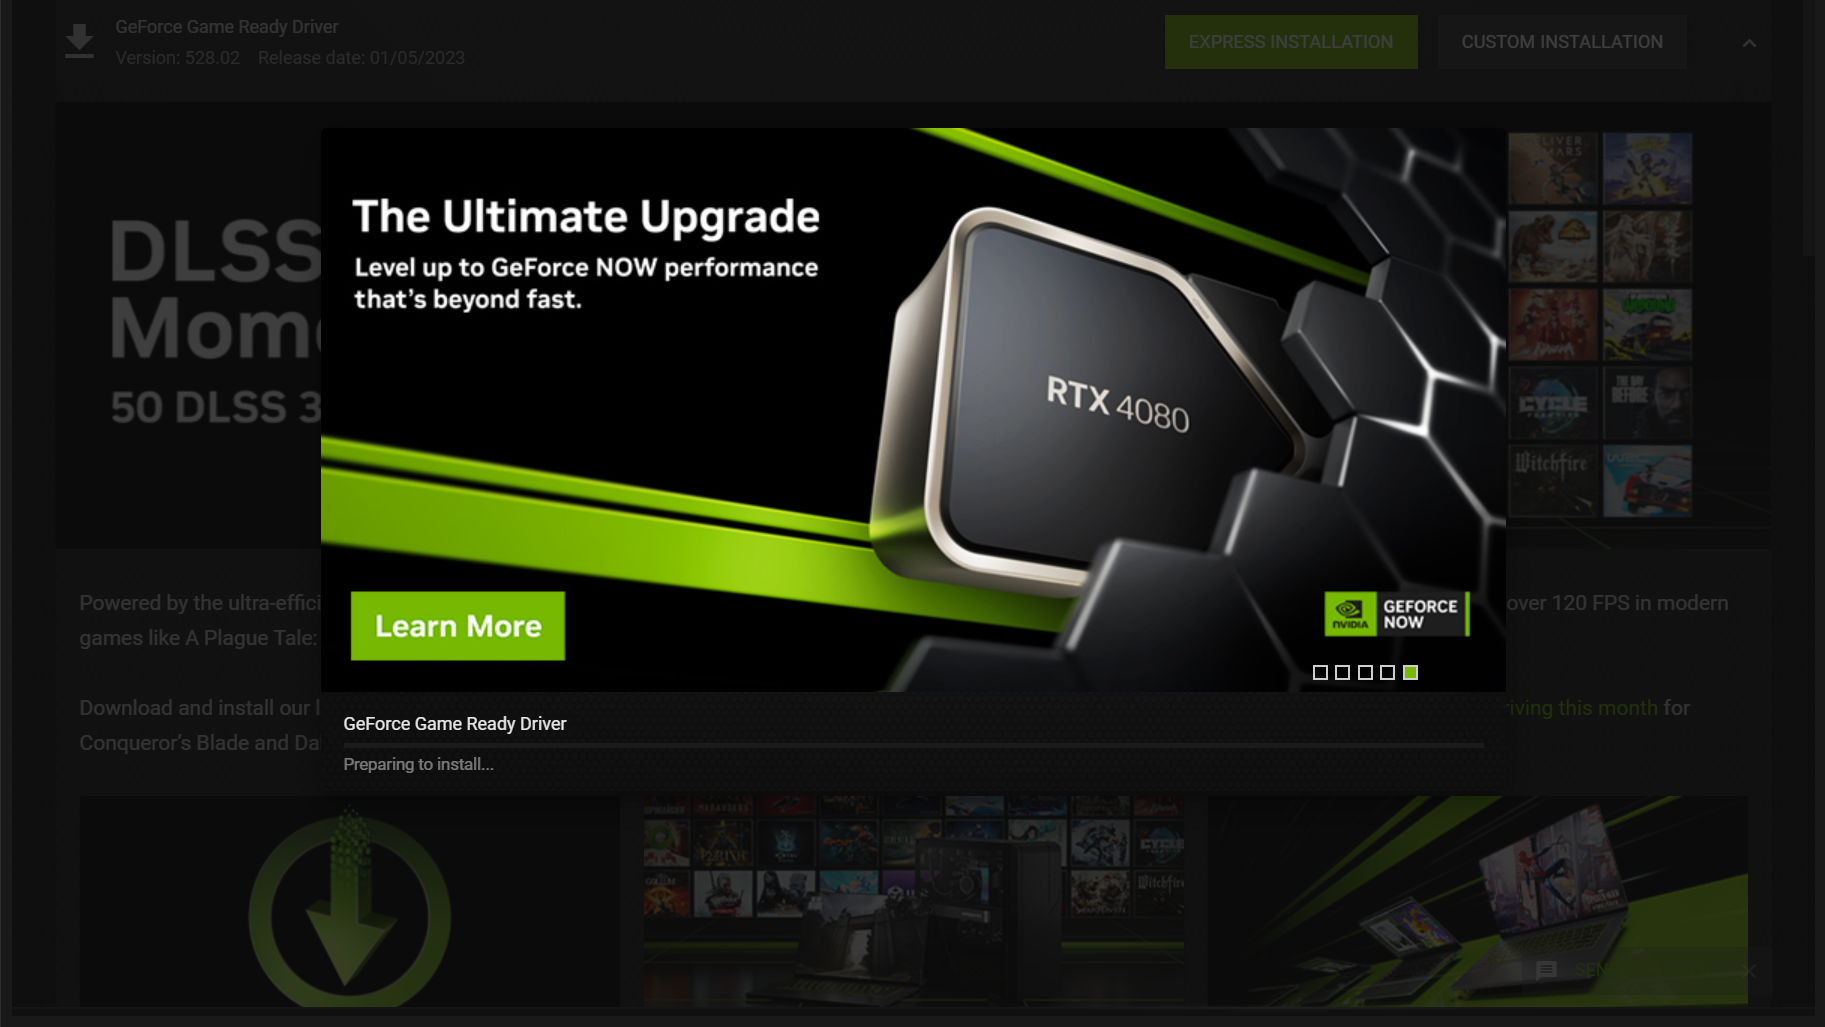
- Choose Installation Method: Once the download is complete, you’ll be presented with two installation options:
- Express Installation: This is the quickest option. It automatically installs all components without user interaction and is suitable for most users.
- Custom Installation: This option allows you to select which components to install (e.g., only the graphics driver, without GeForce Experience or the audio driver). Crucially, it also offers a “Perform a clean installation” checkbox, which we’ll discuss below.
- For a straightforward update, “Express Installation” is usually fine. If you encounter issues or want to ensure maximum cleanliness, opt for “Custom” and check “Perform a clean installation.”
- Follow On-Screen Prompts: The installer will proceed with the installation. Your screen might flicker or go black momentarily during the process – this is normal as the display driver is being updated.
- Restart Your PC: After the installation is complete, it’s highly recommended to restart your computer to ensure all changes are fully applied.
Method 2: Manual Download from NVIDIA Website
This method gives you direct control over which driver version you install.
- Visit the NVIDIA Driver Download Page: Open your web browser and go to the official NVIDIA driver download page:
www.nvidia.com/drivers. - Identify Your Product: Use the drop-down menus to accurately select your graphics card details:
- Product Type: (e.g., GeForce, NVIDIA RTX, Quadro)
- Product Series: (e.g., GeForce RTX 30 Series, GeForce GTX 16 Series)
- Product: (e.g., GeForce RTX 3070, GeForce GTX 1660 SUPER)
- Operating System: (e.g., Windows 11, Windows 10 64-bit)
- Driver Type: Choose between “Game Ready Driver (GRD)” or “Studio Driver (SD)” based on your needs.
- Language: Select your preferred language.
- Search and Download: Click the “Search” button. The website will display the latest recommended driver. Review the details (version, release date, supported products) and click “Download.”
- Run the Installer: Once the
.exefile is downloaded, double-click it to start the installation process. - Agree to License: Accept the NVIDIA Software License Agreement.
- Choose Installation Method: Similar to GeForce Experience, you’ll have the choice between “Express” and “Custom” installation. Again, “Custom” with the “Perform a clean installation” option is often preferred for preventing conflicts.
- Follow On-Screen Prompts: The installer will proceed. Your screen will likely flicker or go black.
- Restart Your PC: Once the installation finishes, restart your computer to finalize the update.
Understanding Custom vs. Express Installation (and Clean Install)
When updating drivers, especially manually, understanding the difference between “Express” and “Custom” is important:
- Express Installation: This is the default and simplest option. It automatically installs all driver components (graphics driver, GeForce Experience, PhysX, HD Audio driver, etc.) and updates your existing driver configuration. It’s generally fine for most users and quick.
- Custom Installation: This allows you to select which components you want to install. Its most valuable feature is the “Perform a clean installation” checkbox.
- Perform a Clean Installation: When checked, this option instructs the installer to completely remove all previous NVIDIA driver files and settings before installing the new ones. This is highly recommended if you:
- Are upgrading from a very old driver version.
- Are experiencing graphical issues, instability, or performance problems.
- Have previously installed drivers incorrectly or had conflicts.
- Want to ensure a fresh, uncorrupted driver installation.
A clean installation helps prevent residual files or corrupted settings from previous drivers from interfering with the new ones.
- Perform a Clean Installation: When checked, this option instructs the installer to completely remove all previous NVIDIA driver files and settings before installing the new ones. This is highly recommended if you:
Post-Update Verification and Troubleshooting
After updating your drivers, it’s always a good idea to confirm everything is working as expected. If not, knowing how to troubleshoot can save you a lot of frustration.
Confirming a Successful Update
- Check Driver Version:
- NVIDIA Control Panel: Right-click on your desktop, select “NVIDIA Control Panel,” then “System Information.” Look for the “Driver Version.”
- Device Manager: Press
Win + X, select “Device Manager,” expand “Display adapters,” right-click your NVIDIA card, choose “Properties,” and then the “Driver” tab. Compare this version to the one you just installed.
- Test Functionality: Launch a demanding game, a video editing application, or any software that heavily relies on your GPU. Ensure it runs smoothly, without artifacts, crashes, or performance degradation.
Common Issues and Solutions
While driver updates are usually straightforward, sometimes things don’t go as planned.
- Installation Failure:
- Solution: Re-download the driver file; it might have been corrupted. Disable any antivirus software temporarily during installation. Ensure you’re running the installer as an administrator (right-click, “Run as administrator”).
- Display Issues (Black Screen, Flickering, Low Resolution):
- Solution: This often happens if the new driver is incompatible or corrupted. Try booting into Windows Safe Mode (search online for how to do this for your Windows version), then use Device Manager to roll back the driver or perform a clean uninstall (using a tool like Display Driver Uninstaller – DDU) and reinstall the previous working driver or try the update again.
- Performance Degradation or Crashes After Update:
- Solution: This can sometimes happen if the new driver has a specific bug or if the update wasn’t “clean.” Try performing a “Custom Installation” with the “Perform a clean installation” option checked. Ensure your GPU isn’t overheating; check temperatures with monitoring software.
- Driver Not Installing / “Driver Not Compatible”:
- Solution: Double-check that you selected the correct GPU model, operating system (32-bit vs. 64-bit), and driver type (Game Ready vs. Studio) when downloading the driver. Ensure your Windows version is fully up-to-date.
Rolling Back Drivers
If a new driver causes significant problems, you can revert to your previous working driver:
- Open Device Manager: Press
Win + Xand select “Device Manager.” - Locate Display Adapters: Expand “Display adapters.”
- Access Driver Properties: Right-click on your NVIDIA graphics card and select “Properties.”
- Roll Back Driver: Go to the “Driver” tab and click “Roll Back Driver.” Follow the on-screen prompts. If this option is grayed out, it means Windows doesn’t have a previous driver package to revert to, in which case you’d need to manually uninstall the current driver and install an older version from NVIDIA’s website.
Conclusion
Keeping your NVIDIA drivers updated is not just a recommendation; it’s a fundamental aspect of PC maintenance that directly impacts performance, stability, and your access to the latest technological advancements. Whether you’re a hardcore gamer chasing every last frame, a creative professional demanding rock-solid stability, or simply a user seeking a smooth computing experience, regular driver updates are your ally. By following the methods outlined in this guide and understanding the nuances of the installation process, you can ensure your NVIDIA graphics card continues to deliver optimal performance, future-proofing your system against evolving software demands and unlocking its full, incredible potential. Make driver updates a routine part of your digital life, and enjoy the benefits of a finely tuned machine.
aViewFromTheCave is a participant in the Amazon Services LLC Associates Program, an affiliate advertising program designed to provide a means for sites to earn advertising fees by advertising and linking to Amazon.com. Amazon, the Amazon logo, AmazonSupply, and the AmazonSupply logo are trademarks of Amazon.com, Inc. or its affiliates. As an Amazon Associate we earn affiliate commissions from qualifying purchases.