In the ever-evolving landscape of technology, our computers are our gateways to productivity, creativity, and entertainment. As we push the boundaries of what our machines can handle – from complex video editing and immersive gaming to running multiple demanding applications simultaneously – the need for enhanced performance becomes increasingly apparent. One of the most impactful and accessible upgrades you can make to breathe new life into your existing computer is by installing new RAM (Random Access Memory). This guide will walk you through the entire process, demystifying what RAM is, why it matters, and precisely how to upgrade it yourself. Whether you’re a seasoned tech tinkerer or a complete beginner, by the end of this article, you’ll have the confidence and knowledge to successfully install new RAM and experience a noticeable performance boost.
Understanding the Role of RAM in Your System
Before we dive into the physical installation, it’s crucial to understand what RAM is and why it plays such a pivotal role in your computer’s performance. Think of RAM as your computer’s short-term memory or its workbench. When you open an application, the data it needs to run is loaded from your hard drive (long-term storage) into RAM. The more RAM your computer has, the larger and more extensive this workbench can be.
Why More RAM Means Better Performance
Imagine you’re a chef working in a kitchen. Your countertop space represents your RAM. If you have a small countertop, you can only have a few ingredients and tools out at once. This means you’ll constantly be reaching back into the pantry (your hard drive) to grab what you need, slowing down your cooking process. With a larger countertop, you can spread out all your ingredients, utensils, and recipes, allowing you to work much more efficiently and quickly.
In computer terms, this translates to:
- Faster Application Loading: Programs will launch more quickly as they have more space in RAM to be loaded into.
- Smoother Multitasking: You can run more applications simultaneously without your computer slowing down. Switching between tabs in your web browser, working on a document, and listening to music all become seamless experiences.
- Improved Gaming Performance: Games, especially modern titles, are incredibly demanding. More RAM can reduce stuttering, improve frame rates, and allow for higher graphical settings.
- Enhanced Productivity: For creative professionals working with large files (e.g., video editing, graphic design, 3D modeling), sufficient RAM is not just beneficial; it’s often essential for a smooth workflow.
- Faster System Responsiveness: Your entire operating system will feel snappier, with less lag when performing everyday tasks.
Planning Your RAM Upgrade: Compatibility and Capacity
The allure of a faster computer is undeniable, but before you rush out and buy the first RAM module you see, a bit of planning is essential. Installing incompatible RAM is a common pitfall that can lead to your system not booting or, worse, potential hardware damage.
Identifying Your Current RAM and System Specifications
The first step is to understand what RAM your computer currently has and what it can support. This information is critical for ensuring compatibility.
How to Check Your Current RAM:
- Windows:
- Task Manager: Press
Ctrl + Shift + Escto open Task Manager. Go to the “Performance” tab, then select “Memory.” You’ll see the total amount of RAM, its speed (MHz), and the number of slots used. To see more detailed information like RAM type (DDR3, DDR4, DDR5), you might need to check your system information. - System Information: Type “System Information” into the Windows search bar and open the app. Navigate to “System Summary” and look for “Installed Physical Memory (RAM).” For more detailed RAM specifications, expand “Components” and select “Memory.”
- Task Manager: Press
- macOS:
- Click the Apple menu in the top-left corner of your screen.
- Select “About This Mac.”
- Click the “Memory” tab. This will display the amount of RAM, its speed, and the number of slots.
Determining RAM Compatibility:
- RAM Type (DDR Generation): RAM comes in different generations, such as DDR3, DDR4, and DDR5. These are not backward or forward compatible. A motherboard designed for DDR4 will not accept DDR3 or DDR5 RAM. The physical notch on the RAM module is different for each generation, preventing incorrect installation.
- Speed (MHz): RAM speed is measured in megahertz (MHz). While you can often mix RAM modules of different speeds, your system will only run all RAM at the speed of the slowest installed module. It’s generally best to match speeds for optimal performance.
- Form Factor: Most desktop computers use DIMM (Dual In-line Memory Module) RAM, while laptops typically use SO-DIMM (Small Outline DIMM). They are physically different in size.
- Motherboard Support: Your motherboard has a maximum RAM capacity and a maximum speed it can support. Exceeding these limits will result in the RAM not being recognized or the system being unstable. You can usually find this information in your motherboard’s manual or by searching for its model number on the manufacturer’s website.
Determining the Right Amount of RAM for Your Needs
The “ideal” amount of RAM is subjective and depends heavily on how you use your computer.
- 4GB: This is the bare minimum for modern operating systems and light use (web browsing, email, basic document editing). You will likely experience slowdowns with multitasking or more demanding applications.
- 8GB: This is a good starting point for general use and moderate multitasking. It’s suitable for most home and student users.
- 16GB: This is the sweet spot for many users, offering excellent performance for gaming, most creative work, and heavy multitasking. If you’re unsure, 16GB is often a safe and highly beneficial upgrade.
- 32GB and Beyond: This is typically for power users, professionals working with very large datasets, high-end gaming, virtual machines, or intensive video editing and 3D rendering.
When purchasing new RAM, it’s often recommended to buy kits of two or four modules (depending on your motherboard’s slots) to take advantage of dual-channel or quad-channel memory configurations, which can further boost performance. Always try to match the specifications of your existing RAM if you are not replacing all of it.
The Installation Process: Step-by-Step
With your compatible RAM in hand and your system specifications understood, it’s time for the hands-on part. This process is generally straightforward, but it requires care and attention.
Step 1: Preparation and Safety Precautions
Before you open your computer, a few preparatory steps will ensure a smooth and safe installation.
Essential Preparations:
- Backup Your Data: While unlikely, it’s always a good practice to back up your important files before performing any hardware changes.
- Gather Your Tools: You’ll primarily need a Phillips head screwdriver. Some computer cases have thumbscrews that don’t require tools. You might also find an anti-static wrist strap helpful, though it’s not strictly necessary if you take static precautions.
- Find a Clean, Well-Lit Workspace: A clutter-free environment is essential. Avoid working on carpet, as it can generate static electricity.
- Power Down and Unplug: Shut down your computer completely. Then, unplug the power cord from the wall outlet and disconnect any other peripherals (monitor, keyboard, mouse, etc.).
Static Electricity Precautions:
Static discharge can damage sensitive electronic components.
- Ground Yourself: Before touching any internal components, touch a metal part of the computer case that is connected to the unplugged power supply. If you have an anti-static wrist strap, wear it and clip it to a bare metal part of the computer case.
- Work on a Hard Surface: Avoid carpet.
- Handle Components by the Edges: Avoid touching the gold contacts or the chips on the RAM modules.
Step 2: Opening Your Computer Case
The method for opening your computer case varies depending on whether you have a desktop or a laptop, and the specific model.
Desktop Computer:
- Locate the Side Panel: Most desktop cases have a side panel that needs to be removed to access the motherboard. This panel is usually secured by two or more thumbscrews at the back of the case, or sometimes standard Phillips head screws.
- Remove the Screws: Unscrew the securing screws.
- Slide or Lift the Panel: Once the screws are removed, the side panel will typically slide back and then lift off, or it may swing open like a door. Gently set it aside.
Laptop Computer:
- Consult Your Manual: Laptops are more varied in their design. Often, you’ll need to remove a panel on the bottom of the laptop specifically designed for RAM access. In some cases, you might need to remove the entire bottom cover, which can involve numerous small screws. Always refer to your laptop’s service manual or a reliable online guide for your specific model.
- Keep Track of Screws: If you’re removing multiple screws, it’s a good idea to use a tray or draw a diagram to keep track of which screw goes where, as they can vary in length.
Step 3: Locating and Removing Old RAM (If Applicable)
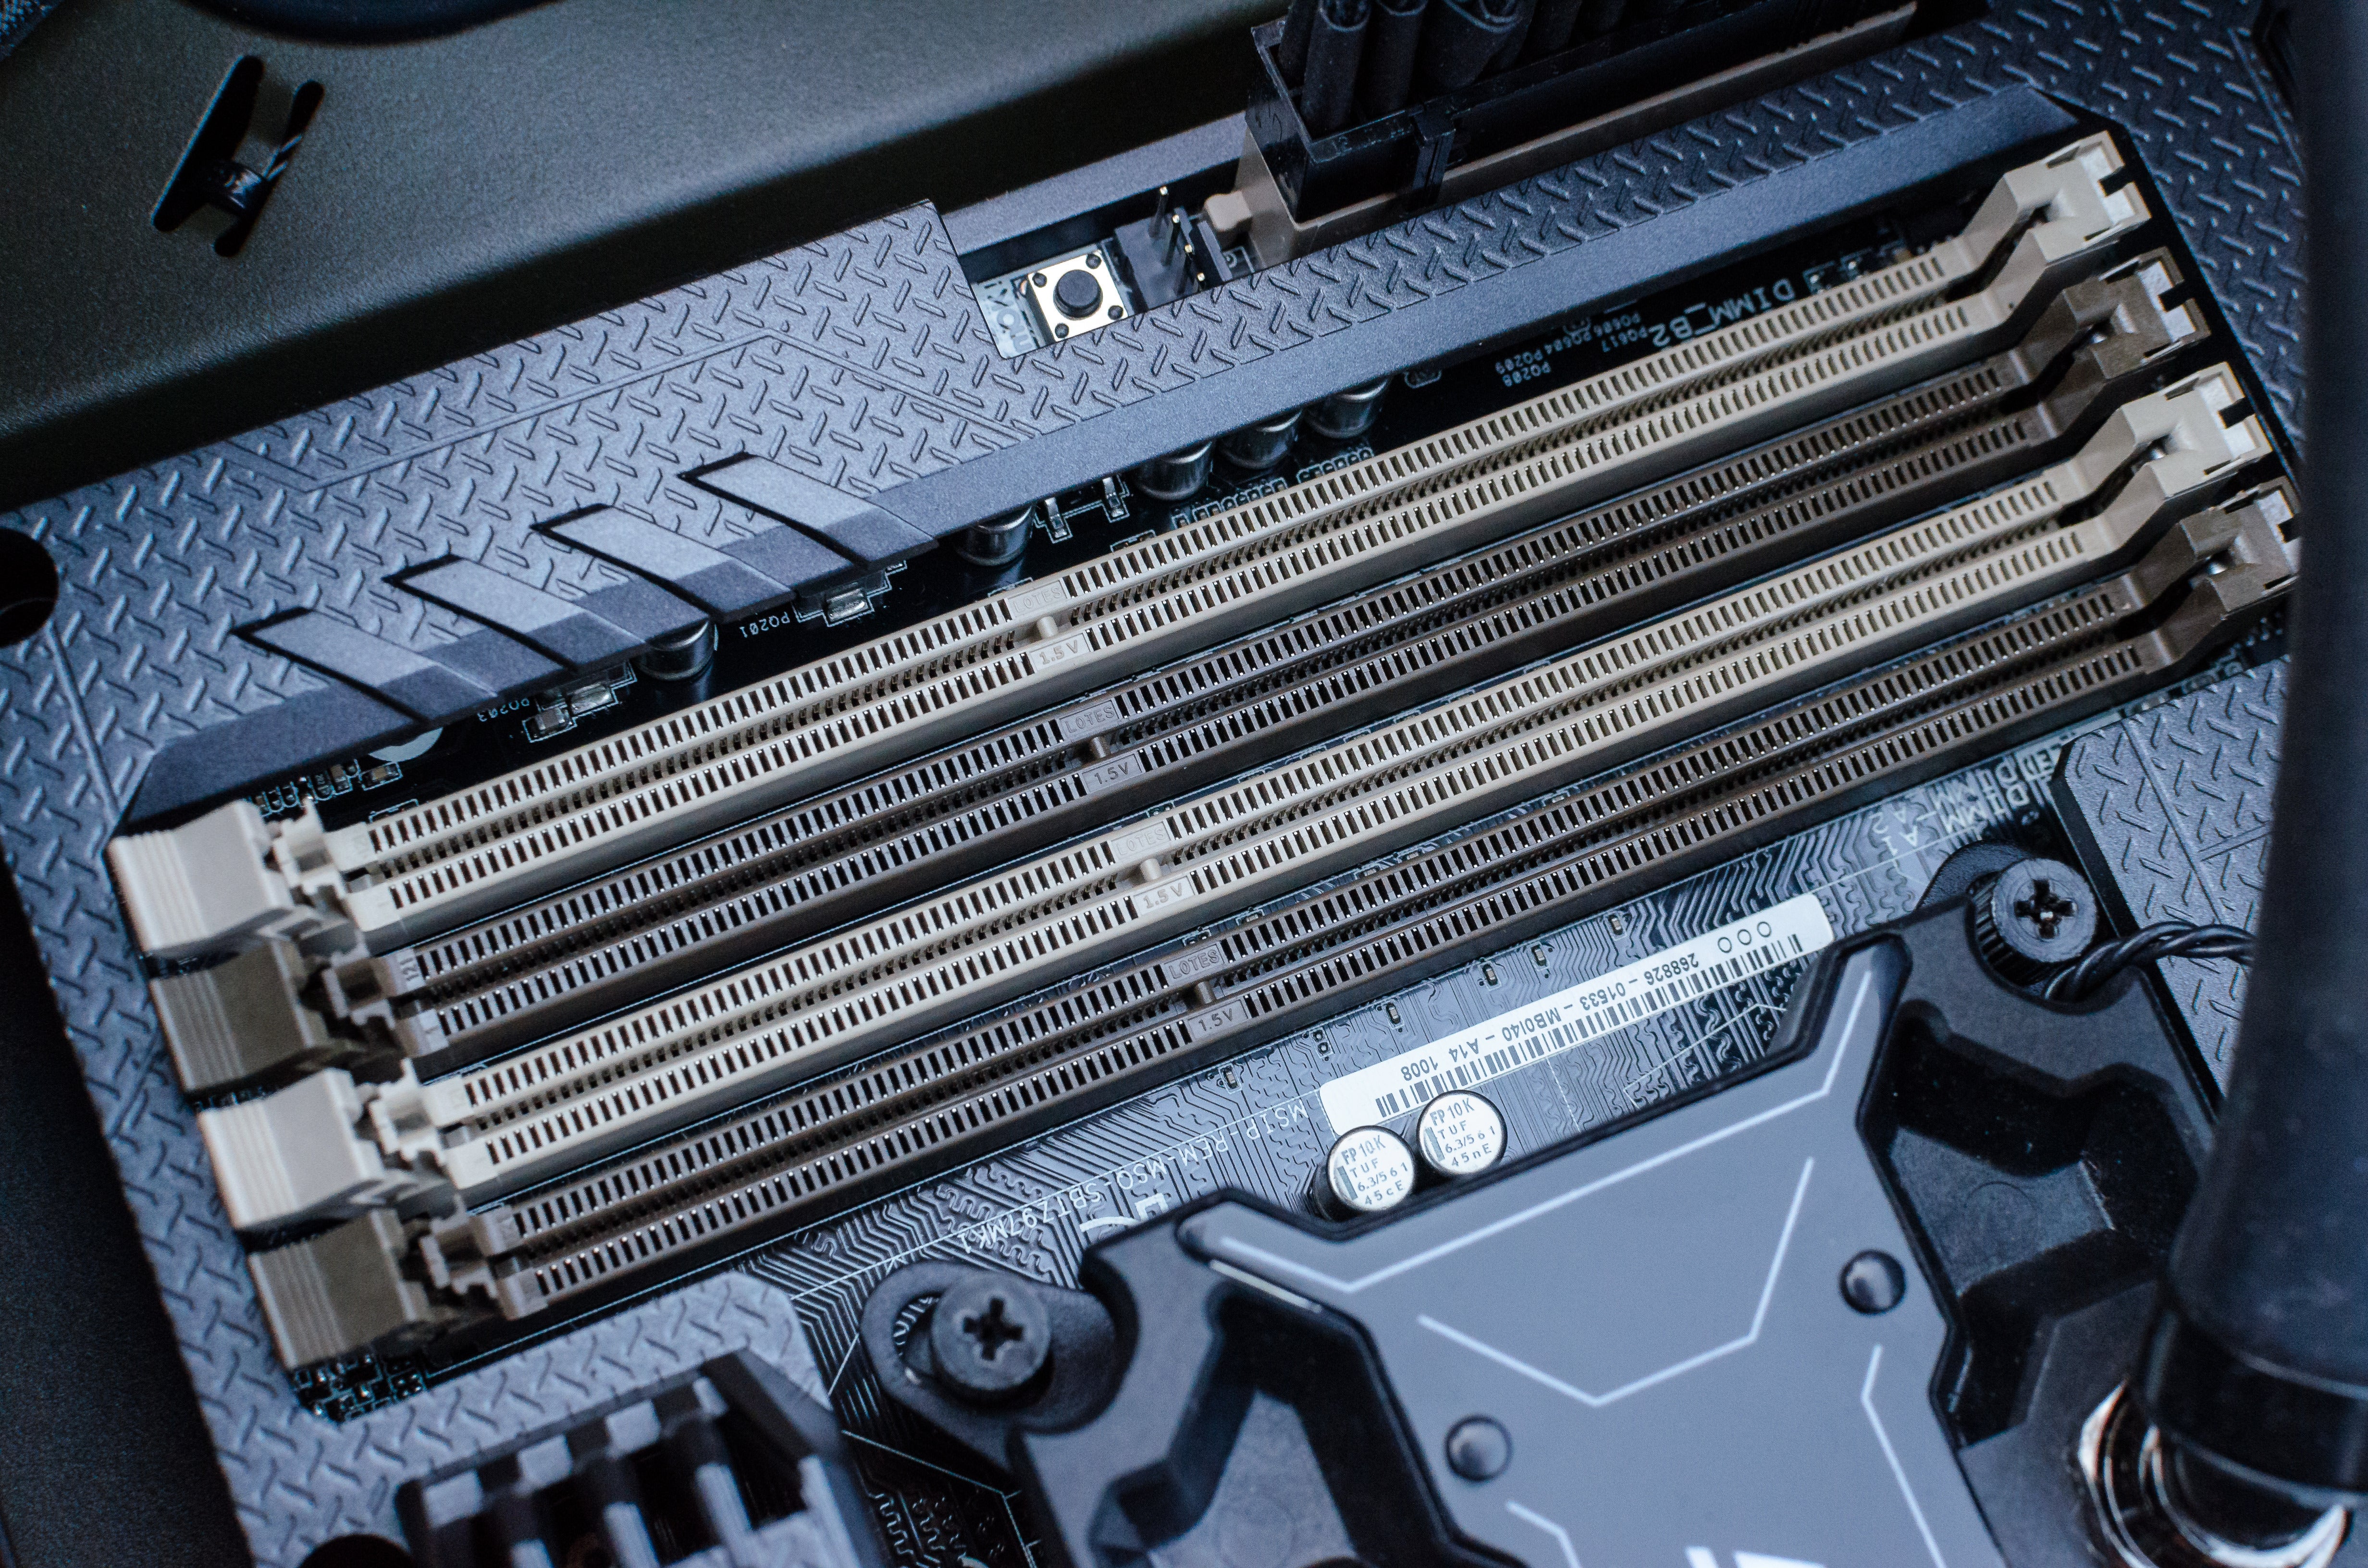
Once the case is open, you’ll need to locate the RAM slots on the motherboard. They are usually long, slender slots found near the CPU.
Desktop Motherboard:
- Identify RAM Slots: You’ll see several slots, often colored, with small clips on either end.
- Release the Clips: To remove existing RAM, gently push down on the clips at both ends of the RAM module. The module should pop up slightly, allowing you to grasp it by the edges and pull it straight out.
Laptop Motherboard:
- Locate the RAM Bay: In laptops, RAM is often held in place by metal clips on either side.
- Release the Clips: Gently push the metal clips outwards. The RAM module should then pop up at an angle. You can then grasp it by the edges and pull it out of the slot.
Step 4: Installing the New RAM
This is the core of the process. Handle your new RAM modules with care.
Installing RAM:
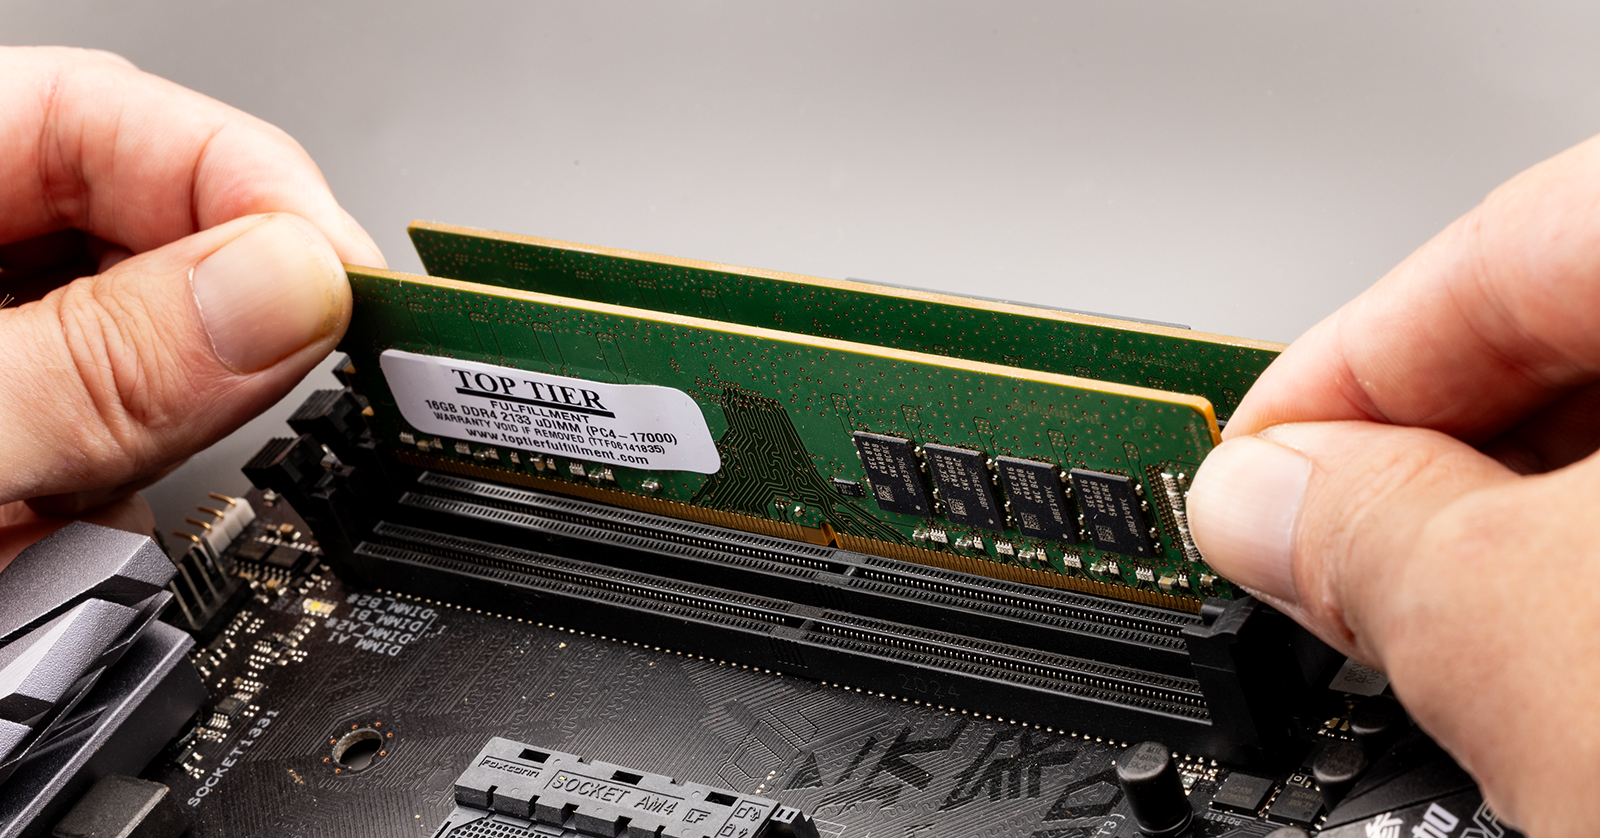
- Align the Notch: Each RAM module has a notch along its bottom edge. This notch is not centered and corresponds to a raised key in the RAM slot on the motherboard. This ensures that the RAM can only be inserted in one orientation, preventing incorrect installation. Carefully align the notch on the new RAM module with the key in the slot.
- Insert the RAM: Gently place the RAM module into the slot at approximately a 30-45 degree angle (for laptops) or push it straight down (for desktops).
- Apply Firm, Even Pressure: Once aligned, press down firmly and evenly on both ends of the RAM module. You should hear a distinct “click” as the clips on the sides of the slot engage and secure the module. The module should sit flush in the slot.
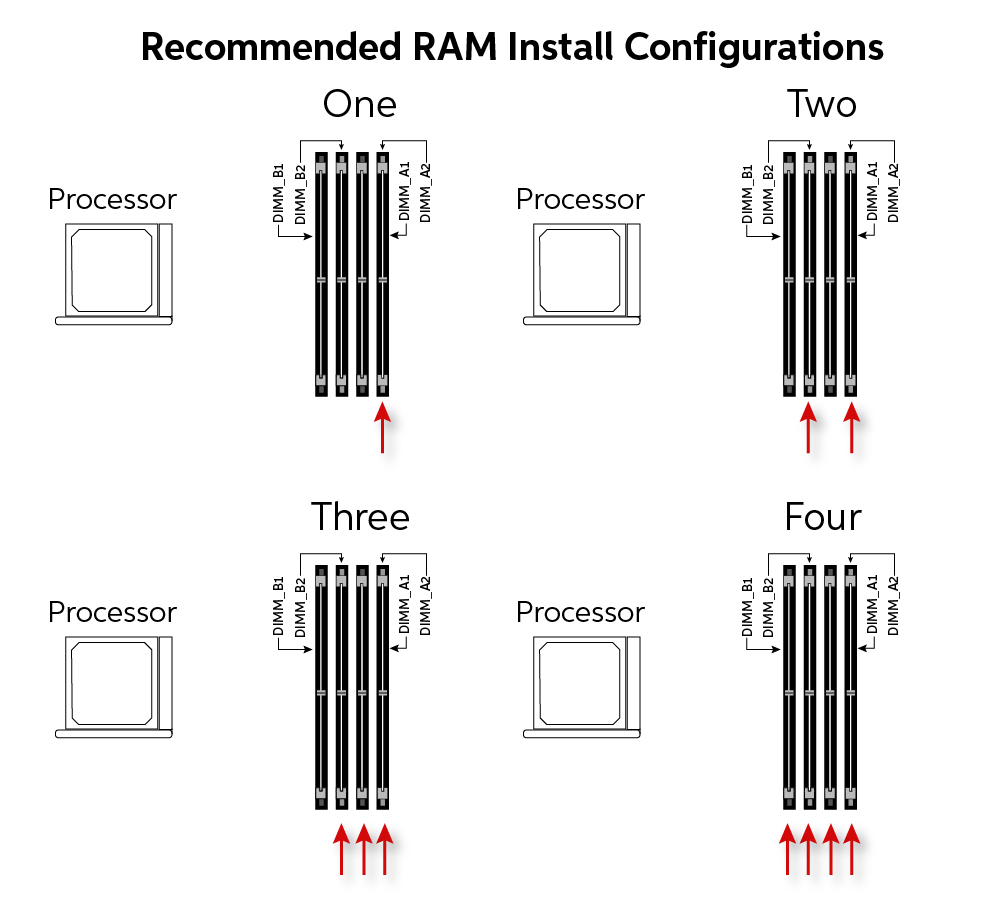
- Repeat for Additional Modules: If you are installing more than one RAM module, repeat the process for each slot. Refer to your motherboard’s manual for the recommended slot order for dual-channel or quad-channel configurations.
Step 5: Reassembling and Testing
With the new RAM installed, it’s time to close up your computer and power it on to confirm the upgrade was successful.
Reassembly:
- Replace the Case Panel: Carefully reattach the side panel of your desktop case or the bottom cover of your laptop. Ensure all screws are reinserted correctly.
- Reconnect Peripherals: Plug in your monitor, keyboard, mouse, and power cord.
Testing the Installation:
- Power On Your Computer: Press the power button.
- Check for Boot-Up: Your computer should boot up normally. You might notice a slightly longer initial boot time as the system recognizes the new hardware.
- Verify RAM in System Settings: Once your operating system has loaded, check your system information (as described in Step 1) to confirm that the total amount of RAM is now recognized. For example, if you had 8GB and installed another 8GB module, your system should now report 16GB of RAM.
If your computer doesn’t boot, or if the full amount of RAM isn’t recognized, power down and unplug the computer. Re-open the case and carefully re-seat each RAM module, ensuring they are fully clicked into place and properly aligned. Double-check your RAM compatibility and motherboard specifications.
Troubleshooting Common Issues and Next Steps
While RAM installation is generally straightforward, occasional hiccups can occur. Knowing how to troubleshoot common problems can save you time and frustration.
Addressing Potential Problems:
- Computer Won’t Boot (No POST, Beeping Errors): This is the most common issue.
- Reseat RAM: The most frequent cause is RAM modules not being fully seated. Power off, unplug, and reseat all RAM modules, ensuring the clips engage fully.
- Check Orientation: Ensure the RAM notch is correctly aligned with the slot key.
- Test One Module at a Time: If you installed multiple modules, try booting with just one. Then swap it with another to see if a specific module is faulty or a particular slot is problematic.
- Verify Compatibility: Double-check that the RAM type (DDR3, DDR4, DDR5), speed, and form factor are correct for your motherboard.
- BIOS Update: In rare cases, older motherboards might require a BIOS update to recognize newer RAM speeds or capacities. Consult your motherboard manual for this.
- RAM Not Fully Recognized: If your system boots but shows less RAM than installed.
- Reseat RAM: Again, ensure all modules are fully seated.
- Check Slot Configuration: Refer to your motherboard manual for the correct slot population order for dual or quad-channel memory.
- Operating System Limit: 32-bit versions of Windows have a RAM limitation (typically around 3.5GB). Ensure you are running a 64-bit OS if you have more than 4GB of RAM.
- System Instability (Crashing, Blue Screens):
- Check RAM Speeds: If you mixed RAM of different speeds, your system may be unstable. Try setting RAM speeds manually in the BIOS to match the slowest module, or ensure they are set to auto.
- Run Memory Diagnostics: Windows has a built-in Memory Diagnostic tool. Search for “Windows Memory Diagnostic” in the Start menu. This can help identify faulty RAM modules.
- Overheating: Ensure your computer has adequate cooling. Overheating can sometimes manifest as system instability.
Maximizing Your New RAM’s Potential:
Once your RAM is successfully installed and recognized, you’ll likely notice an immediate improvement. To further optimize your system:
- Enable XMP/DOCP Profiles (Advanced Users): In your computer’s BIOS/UEFI settings, you can often enable XMP (Extreme Memory Profile) for Intel systems or DOCP (Direct Overclock Profile) for AMD systems. These profiles allow your RAM to run at its advertised speed and timings, which might be slower by default for stability reasons. Consult your motherboard manual for instructions on accessing and configuring BIOS settings.
- Keep Your Operating System Updated: Ensure you have the latest updates for your operating system, as these often include performance optimizations.
- Monitor System Performance: Use Task Manager or other system monitoring tools to observe how your RAM usage has changed and how it impacts your daily tasks.
Conclusion
Upgrading your computer’s RAM is a rewarding and empowering experience. By understanding the fundamental role of RAM, carefully planning your upgrade for compatibility, and following a methodical installation process, you can significantly enhance your computer’s performance and longevity. This upgrade not only boosts your system’s speed and responsiveness but also extends its useful life, allowing you to tackle more demanding tasks and enjoy a smoother computing experience. With the knowledge gained from this guide, you are now equipped to confidently install new RAM and unlock the full potential of your machine.
aViewFromTheCave is a participant in the Amazon Services LLC Associates Program, an affiliate advertising program designed to provide a means for sites to earn advertising fees by advertising and linking to Amazon.com. Amazon, the Amazon logo, AmazonSupply, and the AmazonSupply logo are trademarks of Amazon.com, Inc. or its affiliates. As an Amazon Associate we earn affiliate commissions from qualifying purchases.