
In today’s data-driven world, storage is king. Whether you’re a gamer needing more space for your expansive library, a creative professional working with massive video files, or simply looking to boost your computer’s performance, installing a new hard drive can be a game-changer. It’s a relatively straightforward process that can significantly enhance your digital life. This guide will walk you through everything you need to know, from understanding your options to the physical installation and initial setup.
The allure of more storage is undeniable. Beyond sheer capacity, upgrading your hard drive, especially to a Solid State Drive (SSD), can dramatically reduce boot times, application loading speeds, and file transfer rates. This translates into a snappier, more responsive computing experience that can reignite your passion for your existing machine. For those venturing into building their own PC, or those looking to breathe new life into an older desktop or laptop, a hard drive installation is a foundational skill.
This article aims to demystify the process, catering to a wide audience, from the beginner who might be hesitant to open their computer case to the more tech-savvy individual looking for a refresher or specific tips. We’ll cover the different types of drives available, the tools you’ll need, the physical installation steps for both desktops and laptops, and the crucial post-installation software configuration.
Understanding Your Storage Options: HDD vs. SSD and Beyond
Before you can install a hard drive, you need to understand what you’re installing. The landscape of computer storage has evolved significantly, moving beyond the traditional Hard Disk Drive (HDD) to the speed-champion Solid State Drive (SSD), and even more specialized solutions.
The Evolution of Storage: HDDs and SSDs
Hard Disk Drives (HDDs) have been the workhorse of computer storage for decades. They rely on spinning magnetic platters and a read/write head to store and retrieve data.
-
Pros:
- Cost-effective per gigabyte: For mass storage needs, HDDs offer the most bang for your buck. You can acquire terabytes of storage at a fraction of the cost of an equivalent SSD.
- High capacities: HDDs are readily available in capacities of 10TB, 15TB, and even higher, making them ideal for archiving large media libraries, backups, or extensive game collections.
- Mature technology: Their reliability is well-established, and they have a long track record.
-
Cons:
- Slower performance: The mechanical nature of HDDs means they are significantly slower than SSDs. This impacts boot times, application loading, and file transfers.
- Vulnerable to physical shock: The moving parts make them more susceptible to damage from drops or vibrations.
- Higher power consumption and noise: Spinning platters require more power and generate audible noise.
Solid State Drives (SSDs) represent a significant leap forward. They use flash memory chips, similar to those found in USB drives and smartphones, to store data. There are no moving parts.
-
Pros:
- Blazing-fast performance: This is the primary advantage. SSDs offer dramatically faster read and write speeds, leading to near-instantaneous boot times, lightning-quick application launches, and rapid file transfers.
- Durability: With no moving parts, SSDs are far more resistant to physical shock and vibration.
- Silent operation and lower power consumption: They operate silently and consume less power, which can be beneficial for laptop battery life.
- Compact form factors: SSDs come in various sizes, including the incredibly small M.2 form factor, which can be crucial for space-constrained devices.
-
Cons:
- Higher cost per gigabyte: While prices have come down considerably, SSDs are still more expensive than HDDs for the same storage capacity.
- Finite write cycles: Flash memory has a limited number of write cycles, although for typical consumer use, this is rarely a concern. Modern SSDs have advanced wear-leveling technologies to maximize lifespan.
Form Factors and Interfaces: What to Look For
When choosing a new drive, you’ll encounter different form factors and connection types:
-
2.5-inch SSD: The most common form factor for SSDs, designed to fit into the same bays as laptop HDDs. They connect via a SATA interface.
-
3.5-inch HDD: The standard size for desktop HDDs. They also typically connect via a SATA interface.
-
M.2 SSD: A small, gumstick-like form factor that plugs directly into a dedicated M.2 slot on the motherboard. M.2 drives can utilize different interfaces:
- SATA M.2: Uses the SATA protocol, offering SSD performance but limited by SATA speeds.
- NVMe M.2: Utilizes the NVMe (Non-Volatile Memory Express) protocol, which is designed specifically for SSDs and connects directly to the CPU via PCIe lanes. This offers significantly higher speeds than SATA.
-
SATA (Serial ATA): The most common interface for connecting 2.5-inch and 3.5-inch drives, as well as some M.2 drives. It’s a reliable standard but has speed limitations.
-
NVMe (Non-Volatile Memory Express): A protocol designed for high-speed SSDs that connects via PCIe. This is the interface to look for if you want the absolute fastest storage performance.
The Decision: For most users looking to upgrade their primary drive (where the operating system and frequently used applications are installed), an SSD is highly recommended. For mass storage of less frequently accessed files, backups, or extensive media libraries, an HDD remains a cost-effective solution. Many systems can accommodate both, allowing you to leverage the speed of an SSD for your OS and programs while using an HDD for bulk storage.
Preparing for the Installation: Tools and Safety Precautions
Before you even think about opening your computer, a little preparation goes a long way. This ensures a smooth and safe installation process.
Essential Tools for the Job
Fortunately, installing a hard drive doesn’t require a complex toolkit. You’ll likely have most of these items already.
- Phillips Head Screwdriver: This is the most crucial tool. Most computer components are secured with Phillips head screws. It’s advisable to have a set with various sizes, as screw sizes can differ. Magnetic tips are a huge help for preventing dropped screws.
- Anti-Static Wrist Strap: This is highly recommended for protecting your computer’s sensitive components from electrostatic discharge (ESD). Static electricity can build up on your body and, if discharged into a component, can damage or destroy it. Always attach the strap to a grounded metal object (like the unpainted metal chassis of your computer case) and to your wrist.
- Zip Ties or Velcro Straps: For cable management. Tidy cables not only make your build look cleaner but also improve airflow within the case, which can help keep components cooler.
- Small Container or Magnetic Tray: To hold screws. It’s incredibly easy to misplace small screws during disassembly and reassembly. A dedicated tray or even a clean plastic food container can prevent frustrating searches.
- Flashlight or Headlamp: For better visibility inside the computer case, especially in dimly lit areas.
- Your New Hard Drive: Obviously! Ensure you have the correct type and form factor for your system.
- Your Computer’s Manual or Online Documentation: This can be invaluable for identifying specific ports, screw locations, and any unique quirks of your particular motherboard or laptop model.
Safety First: ESD and Handling Components
Working inside a computer involves dealing with delicate electronics. Taking proper precautions is paramount.
- Power Down Completely: Turn off your computer and unplug it from the wall socket. For laptops, remove the battery if it’s easily accessible.
- Ground Yourself: Before touching any internal components, discharge any static electricity from your body. The best way is to use an anti-static wrist strap connected to a grounded metal surface. If you don’t have one, frequently touch a grounded metal object (like the metal frame of your PC case) before touching any components.
- Work on a Non-Conductive Surface: Avoid working on carpet, as it’s a prime generator of static electricity. A wooden table or desk is ideal.
- Handle Components Carefully: Hold drives and other components by their edges. Avoid touching the circuit boards, connectors, or any exposed electronic parts.
- Organize Screws: As mentioned, use a tray or container to keep track of screws. It’s good practice to reassemble using the same screws in the same locations they were removed from.
- Don’t Force Anything: If a component doesn’t seem to fit or a screw won’t go in, stop and re-evaluate. Forcing things can lead to damage.
Installing the Drive: A Step-by-Step Process
The physical installation process varies slightly between desktop computers and laptops, but the core principles remain the same.
Desktop Installation: Accessing the Drive Bays
Desktop computers generally offer more space and easier access for installing new drives.
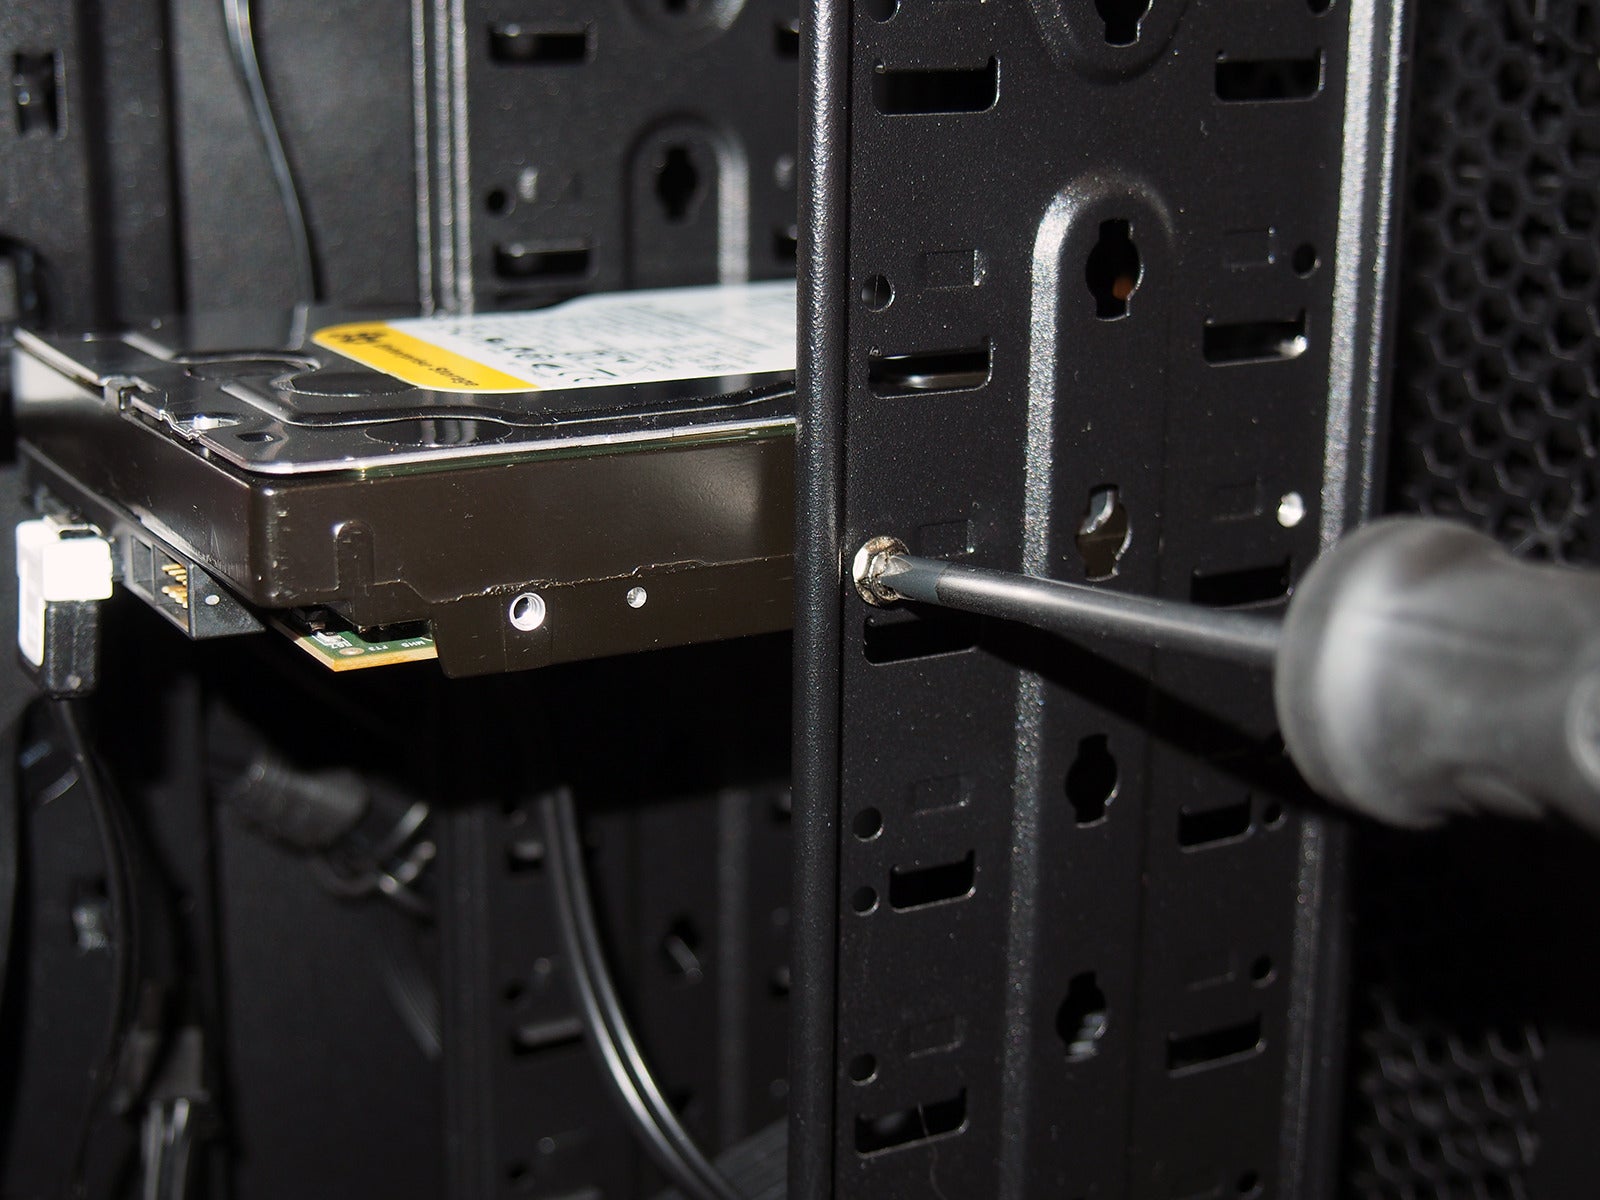
- Open the Case: Most desktop cases have side panels that can be removed by unscrewing a few screws at the rear of the case. Slide or lift the panel off.
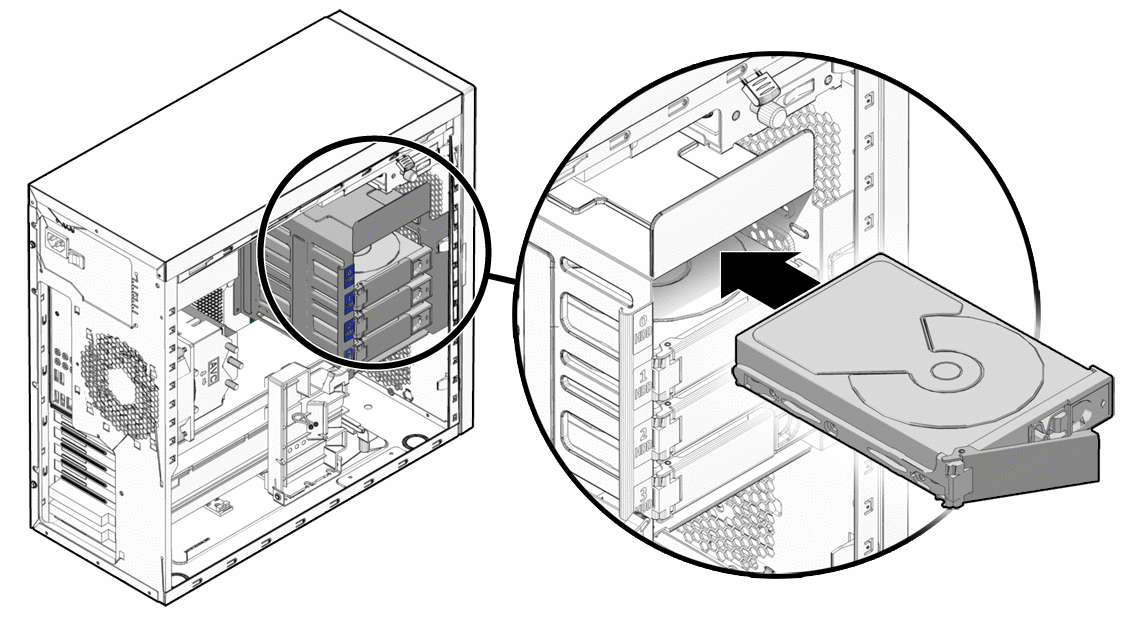
- Locate Drive Bays: Look for empty drive bays. These are typically metal cages or brackets designed to hold 3.5-inch and/or 2.5-inch drives. For M.2 SSDs, you’ll need to locate a dedicated M.2 slot on the motherboard.
- Mount the Drive:
- 2.5-inch and 3.5-inch Drives: If your case has tool-less drive bays, you might be able to slide the drive in and secure it with a latch. Otherwise, you’ll need to screw the drive into the bay or a mounting bracket using screws. For 2.5-inch drives in a 3.5-inch bay, you might need a bracket or adapter.
- M.2 SSDs: Locate the M.2 slot on your motherboard. It’s usually a small horizontal slot. Remove the small screw that holds the M.2 drive in place. Gently insert the M.2 drive into the slot at an angle, then press it down and secure it with the screw.
- Connect Data and Power Cables:
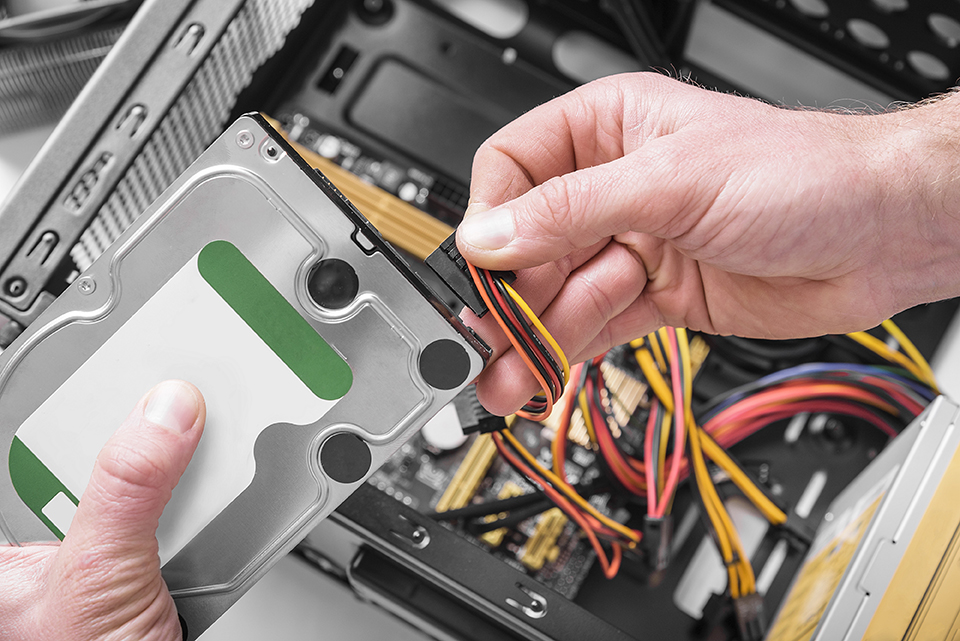
- SATA Drives: Connect one end of a SATA data cable to the back of the drive and the other end to a SATA port on your motherboard. Connect a SATA power cable (a wider, flat connector) from your power supply unit (PSU) to the corresponding port on the back of the drive.
- NVMe M.2 Drives: These drives connect directly to the M.2 slot and do not require separate data or power cables.
- Cable Management: Tidy up the cables using zip ties or Velcro straps to ensure they don’t interfere with fans or airflow.
- Close the Case: Reattach the side panel and secure it with the screws.
Laptop Installation: A More Delicate Operation
Laptop installations can be more complex due to limited space and the need to disassemble more components. It’s crucial to consult your laptop’s manual or look for specific guides for your model.
- Power Down and Unplug: As always, ensure the laptop is completely off and unplugged. Remove the battery if possible.
- Locate the Access Panel: Many laptops have a dedicated panel on the bottom for accessing storage drives and RAM. If not, you may need to remove the entire bottom cover.
- Disassemble Carefully: Proceed with caution, noting the location and type of screws you remove. Some screws might be hidden under rubber feet.
- Identify the Existing Drive: You’ll typically find a 2.5-inch drive (either HDD or SSD) or an M.2 SSD.
- Remove the Old Drive:
- 2.5-inch Drives: These are usually held in place by screws and a mounting bracket. Carefully unscrew and slide the drive out.
- M.2 SSDs: Similar to desktops, M.2 drives in laptops are secured by a single screw. Remove the screw and the drive will pop up at an angle, allowing you to pull it out.
- Install the New Drive:
- 2.5-inch Drives: Transfer the mounting bracket from the old drive to the new one. Slide the new drive into place and secure it with screws.
- M.2 SSDs: Insert the new M.2 drive into the slot at an angle, press it down, and secure it with the screw.
- Reconnect: Ensure any necessary cables are properly connected.
- Reassemble: Carefully reattach the access panel or bottom cover, making sure all screws are in their correct locations. Reinsert the battery.
Post-Installation: Formatting and Initialization
Once the physical installation is complete, your new drive needs to be recognized and prepared by your operating system.
Initializing and Formatting a New Drive
When you boot up your computer, Windows or macOS will likely detect the new hardware, but the drive won’t be usable until it’s initialized and formatted.
-
For Windows:
- Disk Management: Right-click on the Start button and select “Disk Management.”
- Initialize Disk: If the drive is brand new and unformatted, Disk Management will likely prompt you to initialize it. Choose GPT (GUID Partition Table) for modern systems (UEFI BIOS) or MBR (Master Boot Record) for older systems. GPT is generally recommended.
- Create a New Simple Volume: Once initialized, right-click on the unallocated space of your new drive and select “New Simple Volume.”
- Follow the Wizard: This wizard will guide you through assigning a drive letter, choosing a file system (NTFS is standard for Windows), and performing a quick format. A quick format is usually sufficient.
-
For macOS:
- Disk Utility: Open “Applications” > “Utilities” > “Disk Utility.”
- Select Your Drive: In the left sidebar, select your new hard drive. It might appear as “External” or under the brand name.
- Erase: Click the “Erase” button.
- Configure Options: Choose a name for your drive, select a format (APFS is recommended for newer Macs, Mac OS Extended (Journaled) for older ones), and choose a scheme (GUID Partition Map).
- Erase: Click “Erase” to format the drive.
Setting the New Drive as the Boot Drive (Optional but Recommended for SSDs)
If you’ve installed a new SSD as your primary drive, you’ll want to install your operating system on it for maximum speed benefits.
- Clean Installation: The most straightforward way is to perform a clean installation of your operating system (Windows, macOS, Linux) onto the new SSD. This involves booting from installation media (a USB drive or DVD) and selecting the SSD as the installation target.
- Cloning/Migration: If you have an existing operating system on another drive and want to transfer it to the new SSD without reinstalling everything, you can use cloning software. Many SSD manufacturers provide free migration tools (e.g., Samsung Data Migration, Acronis True Image for Crucial). This process copies your entire existing drive to the new one. After cloning, you’ll need to ensure your BIOS/UEFI is set to boot from the new SSD.
By following these steps, you’ll have successfully installed and configured your new hard drive, unlocking more storage capacity and potentially a significant performance boost for your computer. Enjoy your enhanced digital experience!
aViewFromTheCave is a participant in the Amazon Services LLC Associates Program, an affiliate advertising program designed to provide a means for sites to earn advertising fees by advertising and linking to Amazon.com. Amazon, the Amazon logo, AmazonSupply, and the AmazonSupply logo are trademarks of Amazon.com, Inc. or its affiliates. As an Amazon Associate we earn affiliate commissions from qualifying purchases.