Upgrading your car’s audio system can be a deeply satisfying endeavor, transforming mundane commutes into immersive sonic experiences. Whether you’re a seasoned DIY enthusiast or a complete novice, the prospect of installing a new car stereo might seem daunting. However, with the right guidance and a bit of patience, it’s a project that’s well within your reach. This guide will walk you through the process, blending essential technical know-how with considerations for your budget and the long-term value of your investment.
Understanding Your Car Stereo Installation Project
Before diving into the nitty-gritty of wiring and mounting, it’s crucial to understand the scope of your project and the decisions you need to make. This initial phase is about research, planning, and ensuring you have the right components.

Assessing Your Current System and Future Desires
The first step in any upgrade is to take stock of what you have and what you want.
What’s Under the Dash Now?
Your existing car stereo, often referred to as the head unit, is the central control for your car’s audio. It dictates the type of media you can play (CDs, radio, aux input, USB, Bluetooth), the quality of the audio output, and the features available, such as navigation or smartphone integration.
Single-DIN vs. Double-DIN: Car stereos come in two standard sizes. Single-DIN units are taller and narrower, while Double-DIN units are roughly twice the height, offering larger screens for features like touchscreens, navigation, and rearview camera displays. Most cars are designed to accommodate one or the other, and sometimes both with an adapter.
Factory vs. Aftermarket: A factory-installed stereo is integrated with your car’s original design. Aftermarket stereos are units manufactured by companies other than your car’s maker, offering a wider range of features and customization options.
What Are Your Audio Goals?
What kind of experience are you looking for? Are you content with basic Bluetooth connectivity and improved sound quality, or are you aiming for a full-blown audiophile setup with advanced equalization and multi-channel audio?
Sound Quality: Do you want crisper highs, deeper bass, and a more balanced soundstage? This might involve upgrading not just the head unit but also your speakers.
Connectivity: Modern cars are expected to seamlessly integrate with smartphones. Bluetooth for hands-free calling and audio streaming, USB ports for charging and media playback, and Apple CarPlay/Android Auto compatibility are becoming standard.
Features: Beyond audio, do you want a head unit with a built-in navigation system, a rearview camera display, or even the ability to connect multiple amplifiers for a more powerful system?
Budgeting for Your Upgrade: The Money Aspect
Installing a new car stereo isn’t just a technical task; it’s also a financial one. Understanding the costs involved will help you make informed decisions.
The Head Unit: This is typically the most significant cost. Prices for single-DIN units can range from under $100 for basic models to several hundred dollars for feature-rich options. Double-DIN units generally start higher, often in the $200-$300 range for decent quality and can go upwards of $1000 for premium brands with advanced features.
Installation Accessories: Don’t forget the crucial, often overlooked, accessories. These can add up, but they are essential for a clean and professional installation.
- Dash Kit: This adapter fascia fills the gaps around your new head unit to make it fit seamlessly into your car’s dashboard. These are vehicle-specific and can cost anywhere from $15 to $75.
- Wiring Harness Adapter: This adapter allows you to connect your new stereo’s wiring to your car’s factory wiring harness without cutting or splicing. This is a huge time-saver and ensures a reliable connection. These typically range from $10 to $40.
- Antenna Adapter: If your new stereo uses a different antenna connector than your car, you’ll need an adapter. These are usually inexpensive, around $5-$15.
- Steering Wheel Control Interface (Optional): If you want to retain the functionality of your steering wheel audio controls, you’ll need a specific interface module. These can cost $50 to $150 or more, depending on the complexity.
Installation Labor (If Not DIY): If you decide not to tackle the installation yourself, professional installation can add $100 to $300 or more to the total cost, depending on the complexity of the job and the installer’s rates.
Tools: While many people have basic tools, specific automotive installation tools might be necessary. These could include a trim removal tool set (crucial for avoiding damage), screwdriver sets (Phillips and flathead), and possibly a wire stripper and crimper if you opt for a more manual wiring approach (though harness adapters mitigate this). Many of these are one-time purchases that can be used for future projects.
Compatibility is Key: Ensuring a Perfect Fit
This is where the “Tech” aspect of your project really shines. Ensuring your new stereo is compatible with your car is paramount to a successful installation.
Vehicle-Specific Information: Websites of major car stereo manufacturers and online retailers often have “vehicle fit guides.” You enter your car’s make, model, and year, and they’ll show you what stereos and installation accessories are compatible. This is the most important step to avoid buying something that won’t fit or work.
Wiring Diagrams and Adapters: Understanding your car’s factory wiring is essential, especially if you’re not using a pre-made wiring harness adapter. Online forums and specialized automotive electrical sites can provide wiring diagrams for your specific vehicle. However, the simplest and most reliable route for most DIYers is to invest in the correct wiring harness adapter.
Antenna Type: Be aware of different antenna types. Many modern cars have integrated antennas (e.g., in the windshield) that require specific adapters.
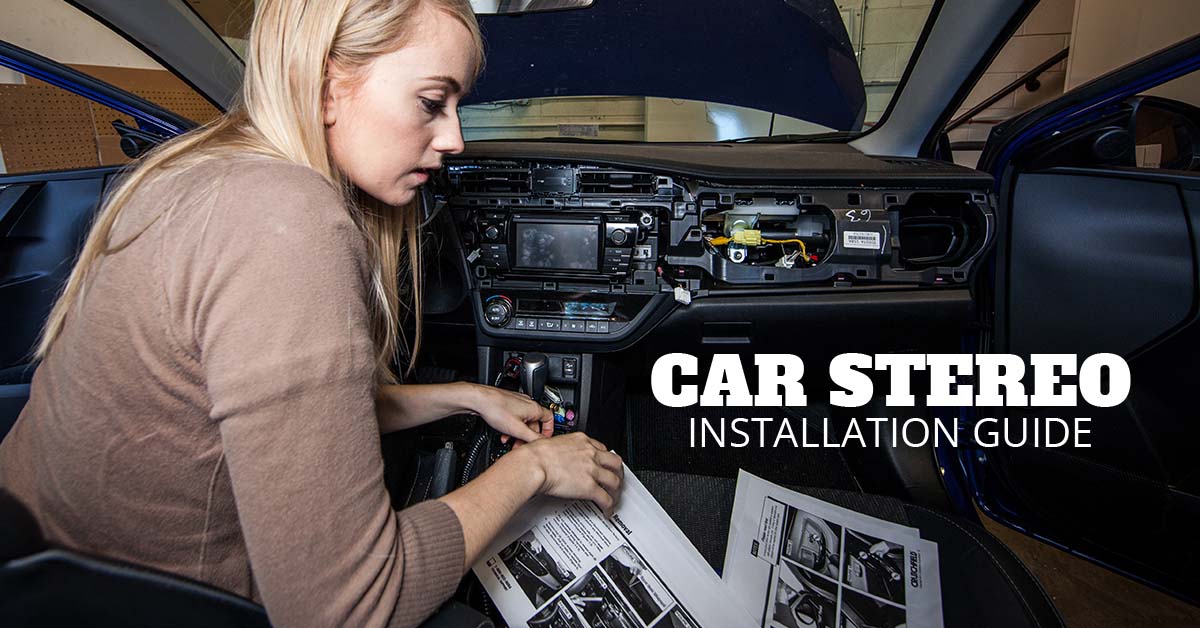
The Installation Process: Step-by-Step
Once you’ve gathered your components and ensured compatibility, you’re ready to embark on the physical installation. This section focuses on the practical “how-to” aspects.
Preparing Your Workspace and Tools
A well-prepared workspace makes the job significantly easier and less prone to errors.
Gathering Your Essential Toolkit
For a typical car stereo installation, you’ll want the following:
- Trim Removal Tools: These plastic tools are designed to pry away dashboard panels without scratching or damaging them. This is indispensable.
- Screwdriver Set: A set of Phillips and flathead screwdrivers in various sizes will be necessary for removing screws that hold panels and the factory stereo in place.
- Socket Set or Nut Drivers: Some dashboard components might be held in place with nuts.
- Wire Strippers and Crimpers (Optional but Recommended): If you’re not using a plug-and-play wiring harness, you’ll need these to connect wires securely.
- Electrical Tape or Heat Shrink Tubing: For insulating wire connections.
- Wire Connectors (e.g., Butt Connectors, Wago Connectors): For joining wires securely.
- A Test Light or Multimeter: Useful for identifying specific wires if a wiring diagram isn’t perfectly clear or if you’re troubleshooting.
- Owner’s Manual for Your Car: This can sometimes show you how to access certain panels or where screws are located.
- Owner’s Manual for Your New Stereo: This will detail the wiring connections for your new unit.
Safety First: Disconnecting Power
This is the single most important safety step. Before you touch any wiring, you must disconnect the car’s battery to prevent short circuits, damage to your car’s electronics, and potential personal injury.
- Locate your car battery: It’s usually under the hood.
- Identify the negative terminal: It’s marked with a “-” symbol.
- Loosen the nut on the negative terminal clamp using a wrench.
- Gently pull the clamp off the battery post.
- Secure the disconnected cable away from the battery post so it can’t accidentally reconnect.
Important Note: Some modern vehicles have sophisticated electronic systems that might reset or require re-authorization after the battery is disconnected. Consult your car’s owner’s manual for specific procedures regarding battery disconnection and re-connection.
Removing the Factory Head Unit
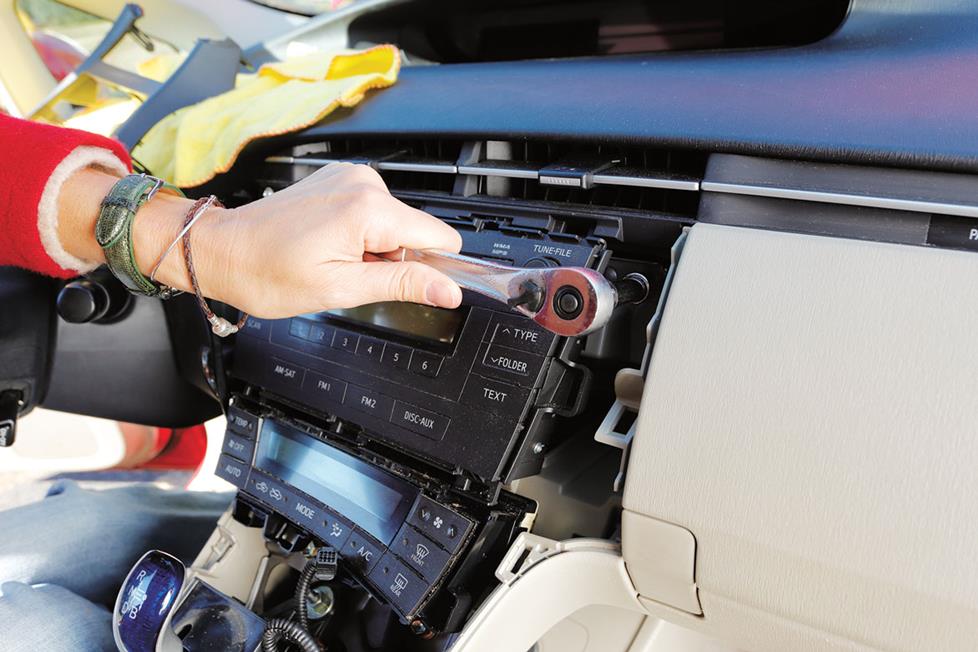
This is where the physical work begins. Patience is key here, as you’ll be dealing with plastic panels and potentially stubborn clips.
Carefully Dismantling the Dashboard
- Identify the fascia panel: This is the plastic trim surrounding your existing stereo. In some cars, it’s a single large piece; in others, it’s integrated into the center console.
- Use trim removal tools: Gently insert your trim removal tools around the edges of the fascia panel to release the clips holding it in place. Work your way around the panel, applying steady, even pressure. Avoid forcing anything, as this can break clips or damage the dashboard.
- Expose the factory stereo: Once the fascia is loose, you should be able to pull it away, revealing the screws or mounting brackets holding the factory stereo.
- Remove mounting screws: Unscrew any screws that secure the factory stereo to the dashboard. Keep these screws in a safe place.
- Gently pull out the stereo: Carefully slide the factory stereo out of the dash cavity. It may still be connected by wiring harnesses and an antenna cable.
- Disconnect wiring and antenna: Locate the main wiring harness connector and the antenna cable connected to the back of the factory stereo. Press the release tabs on the connectors and pull them free.
Wiring and Connecting Your New Stereo
This is the core of the technical installation. Using wiring harness adapters simplifies this significantly, turning a complex electrical task into a straightforward plug-and-play process.
Leveraging Wiring Harness Adapters for Seamless Connectivity
- Identify your harness adapters: You should have a car-side harness adapter (plugs into your car’s factory harness) and a stereo-side harness adapter (plugs into your new stereo’s harness).
- Match the wires: The brilliance of these adapters is that they are color-coded to match standard aftermarket stereo wiring conventions.
- Power Wires: Yellow (constant 12V+), Red (switched 12V+), Black (Ground).
- Speaker Wires: Typically come in pairs of colors (e.g., white/white-black for front left, gray/gray-black for front right, etc.).
- Illumination/Dimmer: Usually orange or orange/white.
- Antenna Control/Power Antenna: Blue or blue/white.
- Connect the wires:
- Using Crimp Connectors: If using crimp connectors, strip a small amount of insulation from the end of each wire on both adapters. Insert the stripped ends into a butt connector and crimp them firmly. Repeat for all corresponding wires.
- Using Wago Connectors: Wago connectors are a quick and reliable tool. Simply strip the wire and insert it into the corresponding port on the Wago connector.
- Using the Stereo’s Harness: Your new stereo will have its own harness with wires. You’ll connect these wires to the corresponding wires on the car-side harness adapter you’ve just wired.
- Insulate connections: After crimping or connecting, wrap each connection with electrical tape or use heat shrink tubing for a more professional and secure finish.
- Connect the antenna: Plug the antenna adapter into your car’s antenna cable and then into the back of your new stereo.
Connecting Speakers and Other Components
- Speaker Wires: Connect the speaker wires from your new stereo’s harness to the corresponding wires on the car-side harness adapter. Ensure you maintain the correct polarity (+/-) for each speaker. Incorrect polarity can result in poor sound quality.
- Other Connections: If your stereo has pre-amp outputs for amplifiers, or connections for a backup camera, follow your stereo’s manual to connect these.
Mounting the New Head Unit
Once all wiring is connected, it’s time to secure your new stereo in its place.
Using the Dash Kit and Mounting Brackets
- Assemble the dash kit: Many dash kits require some assembly to create a secure frame for your new stereo. Follow the instructions provided with your dash kit.
- Mount the stereo to the dash kit: Slide your new head unit into the assembled dash kit. Some kits have side brackets that screw into the stereo’s chassis.
- Install the dash kit into the dashboard: Carefully slide the assembled dash kit (with the stereo mounted) into the opening in your dashboard.
- Secure the dash kit: In most cases, the dash kit will have tabs or clips that snap into place. Some may require small screws. Ensure it’s firmly seated and flush with the surrounding dashboard.
Testing and Final Touches
Before you reassemble everything, it’s crucial to test your new stereo.
Powering Up and Testing Functionality
- Reconnect the battery: Carefully reattach the negative battery terminal clamp and tighten the nut.
- Turn on the ignition: Turn your car’s key to the accessory (ACC) or ignition (ON) position.
- Check for power: Your new stereo should power on.
- Test all functions:
- Radio: Scan for stations.
- Bluetooth: Pair your phone and test calls and audio streaming.
- USB/Aux: Connect a device and test playback.
- Speakers: Play music at a moderate volume and check if all speakers are working and sound is clear.
- Steering Wheel Controls (if applicable): Test each button.
- Backup Camera (if applicable): Engage reverse gear to see if the camera displays.
Reassembling the Dashboard
Once you’ve confirmed everything is working correctly, you can reassemble the dashboard panels.
- Reverse the removal process: Carefully align the fascia panel and gently press it back into place until the clips snap in.
- Reinstall any screws: If you removed any screws that secured the fascia panel, reinstall them.
Beyond the Basics: Enhancing Your Car Audio Experience
Installing a new head unit is often just the beginning of a journey into better car audio. Considering additional upgrades can elevate your sound system significantly.
The Importance of Speakers and Amplifiers
A great head unit can only do so much if the speakers can’t reproduce the sound accurately.
Upgrading Your Speakers for Clearer Sound
Factory speakers are often made with less durable materials and are designed for basic functionality rather than high fidelity.
- Component vs. Coaxial Speakers: Coaxial speakers have the tweeter mounted in front of the woofer, making them a direct replacement for factory speakers. Component speakers have separate woofers and tweeters, allowing for more precise placement and a better soundstage, but also a more complex installation.
- Speaker Size and Fitment: Ensure you choose speakers that match the size of your car’s speaker openings. Many car audio retailers have databases to help you find the correct sizes.
Adding an Amplifier for More Power and Clarity
If you’re serious about sound quality and volume, an amplifier is a must.
- What an Amplifier Does: An amplifier takes the low-level audio signal from your head unit and boosts it to a higher level, allowing your speakers to produce more volume and cleaner sound, especially at higher listening levels.
- Types of Amplifiers: They come in various configurations (e.g., 2-channel, 4-channel, monoblock) and power outputs. Choosing the right amplifier depends on your speaker setup and desired volume.
- Installation Considerations: Amplifier installation is more involved than just a head unit. It requires running power wires from the battery, ground wires, and RCA cables for audio signals, along with speaker wires. This is where professional installation might be a worthwhile consideration.
The Tech and Money Connection: Long-Term Value and Smart Investing
When you invest in car audio, you’re not just spending money; you’re enhancing the value and enjoyment of your vehicle.
Smart Choices for Long-Term Enjoyment and Resale Value
- Choosing Reputable Brands: Stick with well-known brands in the car audio industry. They generally offer better sound quality, reliability, and customer support. While they might be more expensive upfront, they often last longer and perform better, representing a better “Money” investment in the long run.
- Considering Future Upgrades: If you plan on a multi-stage upgrade (e.g., starting with a head unit, then speakers, then an amplifier), choose components that will work well together and won’t need to be replaced as you add more.
- The DIY Advantage: Doing the installation yourself, as outlined in this guide, significantly saves on labor costs. This can free up more of your “Money” budget to invest in higher-quality components.
Digital Security and Connectivity: The Modern Car Stereo
Modern car stereos are essentially car-integrated computers. This brings both convenience and considerations.
- Software Updates: Just like your smartphone, car stereos can receive software updates to improve performance, add features, and patch security vulnerabilities. Ensure your chosen stereo supports these updates.
- Data Privacy: Be mindful of the data your car stereo collects, especially if it connects to your smartphone. Understand the privacy policies of the stereo manufacturer and any associated apps.
- Integration with Digital Ecosystems: Apple CarPlay and Android Auto are prime examples of how car stereos integrate with your digital life, offering a familiar and secure interface for navigation, music, and communication.
Conclusion: Your Road to Enhanced Audio
Installing a car stereo is a rewarding DIY project that combines practical skills with an understanding of technology and budgeting. By carefully planning, gathering the right tools and components, and following these steps, you can transform your car’s auditory experience. Remember, a well-chosen and properly installed car stereo not only enhances your daily drives but can also add value to your vehicle, making it a smart investment in both technology and personal enjoyment.
aViewFromTheCave is a participant in the Amazon Services LLC Associates Program, an affiliate advertising program designed to provide a means for sites to earn advertising fees by advertising and linking to Amazon.com. Amazon, the Amazon logo, AmazonSupply, and the AmazonSupply logo are trademarks of Amazon.com, Inc. or its affiliates. As an Amazon Associate we earn affiliate commissions from qualifying purchases.