
Keeping your graphics card drivers current is a foundational aspect of maintaining optimal PC performance, ensuring compatibility with the latest software and games, and addressing potential security vulnerabilities. Graphics Processing Units (GPUs) are the powerhouse behind rendering everything you see on your screen, from high-fidelity gaming environments to intricate video editing projects and even your desktop interface. Outdated drivers can lead to performance drops, crashes, graphical glitches, and a host of frustrating issues. This comprehensive guide will walk you through the essential steps and considerations for updating your graphics card.
The Critical Role of Graphics Card Updates
Before diving into the “how-to,” understanding the “why” behind regular graphics driver updates is paramount. Drivers are essentially software bridges that allow your operating system and applications to communicate effectively with your hardware. For graphics cards, these updates bring a multitude of benefits:
Enhanced Performance and Stability
Graphics card manufacturers, primarily NVIDIA, AMD, and Intel, continuously refine their drivers. These updates often include optimizations that can significantly boost performance in new game titles or demanding professional applications. Benchmarks frequently show measurable frame rate improvements with each new driver release. Beyond raw speed, stability enhancements reduce crashes, freezes, and visual artifacts, leading to a smoother, more reliable user experience.
Bug Fixes and Compatibility
Just like any other software, drivers can contain bugs. Manufacturers frequently release updates to patch these issues, which might range from minor graphical anomalies to critical system instabilities. Furthermore, new games and software often rely on specific driver features or optimizations. An outdated driver might prevent a new title from running at all, or cause it to perform poorly due to missing support for modern APIs like DirectX 12 Ultimate or Vulkan. Regular updates ensure your system remains compatible with the ever-evolving software landscape.
New Features and Security Patches
Driver updates aren’t just about fixes and performance; they can also introduce new features. These might include advanced rendering techniques, improved streaming capabilities, new monitoring tools, or enhanced settings for specific applications. Moreover, as with all software, security vulnerabilities can be discovered in graphics drivers. Manufacturers are diligent in releasing patches to close these loopholes, safeguarding your system from potential exploits. Neglecting updates can leave your system exposed to security risks.
Identifying Your Graphics Card and Current Driver Version
The first crucial step in updating your graphics card is to know exactly what hardware you have and what driver version it’s currently running. This information will guide you to the correct downloads.
Using Windows Device Manager
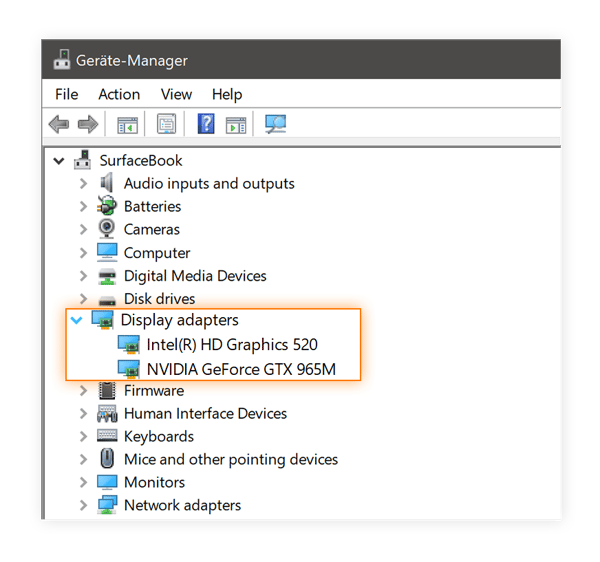
The easiest way to identify your graphics card in Windows is through the Device Manager:
- Right-click the Start button and select “Device Manager.”
- Expand the “Display adapters” section.
- You will see your graphics card listed (e.g., NVIDIA GeForce RTX 3070, AMD Radeon RX 6700 XT, Intel Iris Xe Graphics). If you have both integrated graphics (from your CPU) and a dedicated graphics card, both may be listed. Focus on the dedicated card if you have one, or the primary one you use for demanding tasks.
- Right-click on your graphics card and select “Properties.”
- Go to the “Driver” tab. Here, you’ll find details like the “Driver Provider,” “Driver Date,” and “Driver Version.” Note these down.
Utilizing Third-Party Information Tools
For more detailed information, tools like GPU-Z are excellent. They provide a comprehensive overview of your GPU’s specifications, including core clock, memory type, temperature, and crucially, the driver version. This can be particularly useful for ensuring you have the correct model identified, especially for older or less common cards.
The Step-by-Step Graphics Driver Update Process
Once you know your graphics card model, you can proceed with downloading and installing the latest drivers. It is always recommended to download drivers directly from the official manufacturer’s website to ensure authenticity and avoid malicious software.
NVIDIA Graphics Card Updates
- Visit the Official NVIDIA Driver Download Page: Navigate to
www.nvidia.com/drivers. - Select Your Product: Use the dropdown menus to select your “Product Type” (e.g., GeForce), “Product Series” (e.g., GeForce RTX 30 Series), and “Product” (your specific card, e.g., GeForce RTX 3070). Choose your operating system (e.g., Windows 10 64-bit).
- Search and Download: Click “Search” and then “Download” for the latest recommended driver.
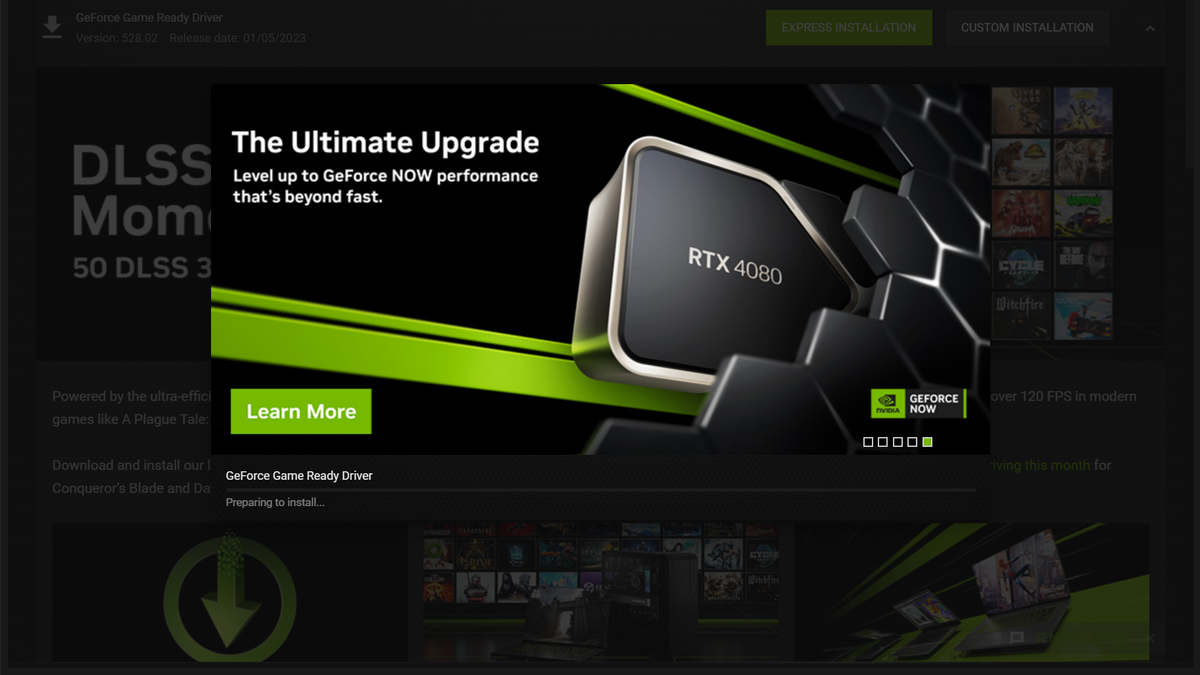
- Run the Installer: Once the download is complete, run the
.exefile. - Extraction and Agreement: The installer will first extract files, then ask you to agree to the NVIDIA Software License Agreement.
- Installation Options: You’ll typically be given two options:
- Express Installation: This is the default and generally recommended for most users. It installs all necessary components without user intervention.
- Custom (Advanced) Installation: This allows you to choose specific components to install (e.g., you might deselect GeForce Experience if you don’t use it) and perform a “Clean Installation.”
- Clean Installation (Recommended): If you choose “Custom,” ensure you check the “Perform a clean installation” box. This option uninstalls previous driver components and settings before installing new ones, preventing potential conflicts and ensuring a fresh start. This is particularly recommended when upgrading to a significantly newer driver version or troubleshooting issues.
- Complete Installation and Restart: Follow the on-screen prompts to complete the installation. Your screen may flicker or go black momentarily during the process – this is normal. Once finished, restart your PC even if not explicitly prompted, to ensure all changes take effect.
AMD Graphics Card Updates
- Visit the Official AMD Driver Download Page: Go to
www.amd.com/en/support. - Auto-Detect or Manual Select:
- Auto-Detect and Install Radeon™ Graphics Drivers for Windows®: AMD offers an auto-detect tool that can scan your system and recommend the correct driver. This is often the easiest method.
- Manual Select Your Driver: If you prefer manual selection, choose “Graphics” from the list, then navigate through your “AMD Radeon™ Graphics” series (e.g., Radeon RX 6000 Series) and then your specific card (e.g., Radeon RX 6700 XT). Select your operating system.
- Download the Driver: Click “Submit” for manual selection, then download the recommended driver.
- Run the Installer: Execute the downloaded
.exefile. - Installation Options: AMD’s installer (Radeon Software Adrenalin Edition) will guide you through the process. You’ll typically see options for “Express Install” or “Custom Install.”
- Factory Reset (Recommended): Similar to NVIDIA’s “Clean Installation,” AMD offers a “Factory Reset” option during custom installations. Selecting this will remove previous driver profiles and settings, providing a clean slate. It’s highly recommended for major driver updates or troubleshooting.
- Complete Installation and Restart: Follow the on-screen instructions. Your display may flicker. Restart your computer after the installation is complete.
Intel Integrated Graphics Updates
- Visit the Official Intel Driver & Support Assistant Page: Go to
www.intel.com/content/www/us/en/support/detect.html. - Use Intel Driver & Support Assistant (Recommended): Intel provides a convenient tool called the Intel Driver & Support Assistant (Intel DSA). Download and install this utility. It will automatically scan your system for Intel hardware, identify outdated drivers (including graphics drivers), and provide direct download links. This is generally the most straightforward method for Intel GPUs.
- Manual Download (Alternative): If you prefer manual, navigate Intel’s download center, select “Graphics,” and then find your specific processor generation and graphics model.
- Run the Installer: Once downloaded (either manually or via DSA), run the
.exefile. - Installation: Intel’s installer is typically straightforward. Follow the prompts.
- Restart: After the installation, restart your PC.
Post-Update Verification and Troubleshooting
After updating your drivers and restarting your system, it’s good practice to verify that the update was successful. Re-check Device Manager or GPU-Z to confirm the “Driver Version” now matches the one you just installed. Then, test your system by launching a demanding application or game to ensure stable performance.
Common Troubleshooting Steps
- Performance Issues After Update: If you experience new issues or performance degradation, try a “Clean Installation” or “Factory Reset” again, ensuring all old driver remnants are removed.
- Reverting to an Older Driver: If the new driver causes significant problems, you can roll back to a previous version. In Device Manager, go to your graphics card’s “Properties,” then the “Driver” tab, and click “Roll Back Driver.” Alternatively, you can download an older, stable driver version directly from the manufacturer’s website and install it using the clean installation method.
- Display Driver Uninstaller (DDU): For persistent issues or when switching between different GPU manufacturers (e.g., from NVIDIA to AMD), a tool called Display Driver Uninstaller (DDU) is invaluable. DDU performs a thorough cleanup of all graphics driver files from your system in Safe Mode, ensuring no conflicts. Use DDU before performing a clean installation of new drivers.
- System Requirements: Always double-check that your graphics card and operating system meet the minimum requirements for the applications or games you are trying to run.

When a Driver Update Isn’t Enough: Considering a Hardware Upgrade
While driver updates are crucial for software optimization, there comes a point where the underlying hardware simply cannot keep up with modern demands. If you’ve diligently updated your drivers and still face issues like consistently low frame rates in current games, inability to run certain applications, or poor performance in creative tasks, it might be time to consider a graphics card hardware upgrade.
Signs you might need a new graphics card:
- Aging Architecture: Your GPU is several generations old (e.g., 5+ years).
- Inadequate VRAM: Modern games and high-resolution textures require significant video memory. If your card has limited VRAM (e.g., 2GB or 4GB for demanding tasks), it will struggle.
- Performance Bottlenecks: Even with the best drivers, an older card may simply not have the processing power to meet current graphical demands.
- Lack of Feature Support: Newer technologies like real-time ray tracing or DLSS/FSR upscaling require specific hardware capabilities not found in older GPUs.
Upgrading your graphics card is a more involved process, requiring physical installation and potentially a more powerful power supply unit, but it’s the ultimate solution when software optimizations have reached their limit.
Regularly updating your graphics card drivers is a simple yet effective maintenance task that yields significant returns in performance, stability, and compatibility. By following the steps outlined above, you can ensure your system remains finely tuned to deliver the best possible visual experience.
aViewFromTheCave is a participant in the Amazon Services LLC Associates Program, an affiliate advertising program designed to provide a means for sites to earn advertising fees by advertising and linking to Amazon.com. Amazon, the Amazon logo, AmazonSupply, and the AmazonSupply logo are trademarks of Amazon.com, Inc. or its affiliates. As an Amazon Associate we earn affiliate commissions from qualifying purchases.