
Updating your graphics card is a crucial process for maintaining optimal system performance, especially for gaming, content creation, and even general productivity. This can involve two distinct approaches: updating the software drivers for your existing card, or physically replacing the graphics card with a newer, more powerful model. Both methods contribute significantly to the longevity and capability of your computing experience, ensuring you can leverage the latest technological advancements and keep pace with demanding applications.
Understanding Graphics Card Updates
Before diving into the specifics, it’s essential to differentiate between the two primary forms of “updating” a graphics card and understand why these processes are so vital.
Why Update Your Graphics Card?
The reasons for keeping your graphics card current, whether via software or hardware, are multifaceted:
- Enhanced Performance: New driver versions often include optimizations that boost frame rates, reduce latency, and improve overall graphical fidelity in games and professional applications. A hardware upgrade, naturally, provides a monumental leap in processing power.
- Bug Fixes and Stability: Drivers frequently address bugs, glitches, and stability issues that can lead to crashes, freezes, or visual artifacts. Hardware upgrades inherently eliminate issues related to aging or faulty components.
- New Feature Support: Graphics card manufacturers regularly introduce new technologies, such as ray tracing, DLSS (NVIDIA), FSR (AMD), or specific rendering optimizations. Updated drivers unlock these features for compatible cards, while new hardware brings these capabilities to the forefront.
- Compatibility: Many new games and software versions require recent drivers or specific hardware capabilities to run correctly, or even at all. Staying updated ensures broad compatibility.
- Security Patches: While less common than general software, graphics drivers can occasionally receive security updates to patch vulnerabilities.
Driver vs. Hardware Updates
It’s critical to distinguish between these two fundamental types of updates:
- Driver Updates (Software): This involves installing the latest software package provided by your graphics card manufacturer (NVIDIA, AMD, Intel). These drivers act as an interface, allowing your operating system and applications to communicate effectively with the graphics processing unit (GPU). Driver updates are free, relatively quick, and do not require any physical changes to your computer. They primarily optimize the performance of your existing hardware.
- Hardware Upgrades (Physical Replacement): This refers to the process of physically removing your old graphics card from your computer’s motherboard and installing a new, often more powerful, graphics card. This is a significant investment and change, resulting in a substantial boost in graphical processing power. It’s typically done when your current card can no longer meet performance demands, is aging, or has failed.
Key Players in GPU Manufacturing
The graphics card market is primarily dominated by three major players:
- NVIDIA: Known for its GeForce series, offering high-performance GPUs popular among gamers and professionals.
- AMD: With its Radeon series, providing competitive performance and often value-oriented options.
- Intel: Historically focused on integrated graphics (GPUs built directly into the CPU), Intel has recently re-entered the dedicated graphics card market with its Arc series.
Identifying your card’s manufacturer is the first step in driver updates, as each provides its own proprietary software and update mechanisms.
Updating Graphics Card Drivers (Software Update)
Updating your graphics drivers is a straightforward process that can yield noticeable performance improvements and resolve common issues.
Identifying Your Current Graphics Card
Before you can update, you need to know what graphics card you have.
- Windows Device Manager: The simplest method. Right-click the Start button, select “Device Manager.” Expand “Display adapters” to see your GPU(s). Note down the manufacturer (NVIDIA, AMD, Intel) and the specific model name.
- Third-Party Tools: Utilities like GPU-Z provide detailed information about your graphics card, including model, driver version, clock speeds, and temperatures. This can be particularly useful for verifying the update later.
- Manufacturer Software: If you already have NVIDIA GeForce Experience or AMD Adrenalin Software installed, it will display your card information prominently.
Locating the Correct Drivers
Once you know your card, head to the official manufacturer’s website. Avoid third-party driver sites, as they may offer outdated or malicious software.
- NVIDIA: Visit the NVIDIA Drivers page. You can either manually select your product type, series, product, and operating system, or use GeForce Experience, which automatically detects your GPU and suggests the latest drivers.
- AMD: Go to the AMD Drivers & Support page. Similar to NVIDIA, you can use their auto-detect tool (AMD Adrenalin Software) or manually select your chipset, series, and model.
- Intel: For Intel integrated or dedicated graphics, visit the Intel Driver & Support Assistant page. This tool will scan your system and recommend the correct drivers.
Always download the latest recommended stable version. Beta drivers might offer new features but can be less stable.
The Driver Installation Process
A clean installation is often recommended to prevent conflicts with previous driver versions.
- Download the Driver: Save the downloaded driver executable file to a memorable location on your computer (e.g., your Downloads folder or Desktop).
- Optional: Uninstall Old Drivers (Clean Installation):
- For a truly clean slate, consider using Display Driver Uninstaller (DDU). This free utility removes all remnants of old drivers. Boot into Windows Safe Mode before running DDU, select your GPU manufacturer, and choose “Clean and restart.” This step is crucial if you’re switching between NVIDIA and AMD cards, or troubleshooting persistent issues.
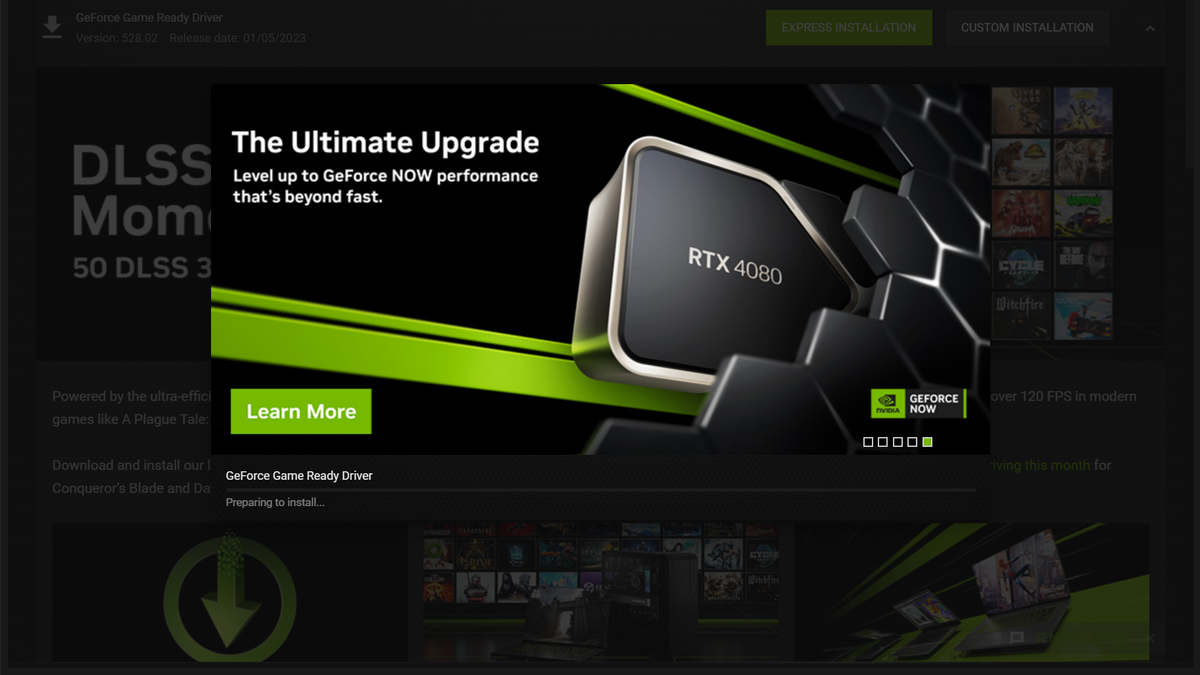
- Alternatively, most manufacturer installers (GeForce Experience, AMD Adrenalin) offer a “Custom” or “Express” installation option. Choosing “Custom” often presents a checkbox for “Perform a clean installation” or “Factory Reset” – always select this if available.
- Run the Installer: Double-click the downloaded driver executable file.
- Follow On-Screen Prompts:
- Agree to the license terms.
- Select “Custom” or “Advanced” installation.
- Ensure “Perform clean installation” or “Factory Reset” is checked if it’s not handled by DDU.
- Deselect any unnecessary software bundles (e.g., specific utilities you don’t use, unless it’s the core software like GeForce Experience or Adrenalin, which are useful).
- The screen may flicker, go black, or change resolution several times during the installation. This is normal.
- Restart Your Computer: Once the installation is complete, a restart is usually required.
Verifying the Update
After restarting, confirm the new drivers are active.
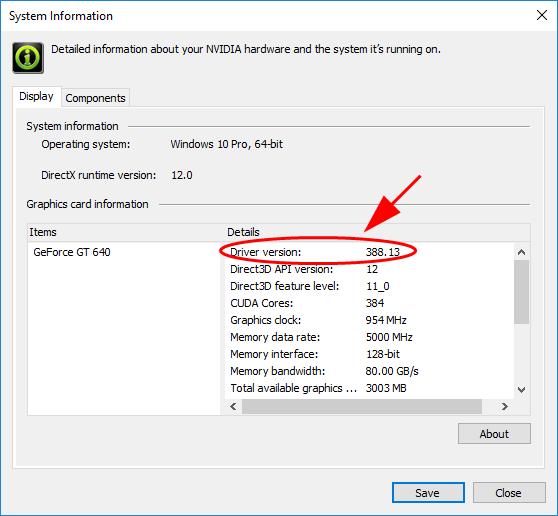
- Device Manager: Open Device Manager, expand “Display adapters,” right-click your GPU, select “Properties,” then navigate to the “Driver” tab. Check the “Driver Version” and “Driver Date.”
- Manufacturer Software: Open GeForce Experience, AMD Adrenalin Software, or Intel Graphics Command Center. They will display the current driver version.
- Third-Party Tools: Use GPU-Z to verify the driver version and other GPU details.
Troubleshooting Common Driver Issues
Occasionally, driver updates can cause problems:
- Black Screen/No Display: If the screen goes black permanently, try booting into Safe Mode (repeatedly press F8 or Shift+Restart during boot-up) and uninstalling the problematic driver using DDU. Then, try installing an older, known-stable driver version.
- Performance Drops/Crashes: Revert to a previous stable driver version. Sometimes, the absolute latest driver isn’t always the best for every system configuration.
- Installation Failure: Ensure you have enough disk space, temporarily disable antivirus software, and ensure you’re logged in as an administrator.
Upgrading Your Graphics Card (Hardware Replacement)
When driver updates no longer suffice, a hardware upgrade is the next step to significantly boost your system’s graphical prowess.
When is a Hardware Upgrade Necessary?
Consider a hardware upgrade if:
- Your Current Card is Old: Older GPUs simply lack the processing power, memory, and architectural features of modern cards.
- Demanding New Applications/Games: If you want to play the latest AAA games at higher resolutions or frame rates, or use professional design/rendering software efficiently, a new card is often mandatory.
- Insufficient Performance: Even with the latest drivers, if your existing card consistently struggles to maintain acceptable performance, it’s time for an upgrade.
- Hardware Failure: If your current card exhibits constant artifacts, overheating, or simply stops working, a replacement is unavoidable.
Compatibility Considerations
Upgrading your graphics card isn’t as simple as plug-and-play. Several factors determine compatibility:
Power Supply Unit (PSU)
Graphics cards are the most power-hungry components in a PC. Check the recommended PSU wattage for your desired new GPU (found on the manufacturer’s product page) and compare it to your existing PSU’s capacity. Ensure your PSU also has the necessary PCIe power connectors (e.g., 6-pin, 8-pin, 12-pin). An underpowered PSU can lead to system instability or prevent the card from working altogether.
Motherboard Slot
Virtually all modern dedicated graphics cards use a PCIe x16 slot. Most motherboards from the last decade will have at least one. While newer cards use PCIe 4.0 or 5.0, they are backward compatible with older PCIe 3.0 slots, though performance might be slightly limited in some scenarios.
Case Dimensions
Physical size is a major concern. Graphics cards can be very long and thick. Measure the available space inside your PC case (length from the PCIe slot to the front panel/drive cages, and height/width relative to the side panel and other components) and compare it to the dimensions of the new card.
CPU Bottlenecking
A very powerful new GPU paired with an old or slow CPU can lead to a “CPU bottleneck,” where the CPU cannot feed data to the GPU fast enough, preventing the GPU from reaching its full potential. Aim for a balanced system where your CPU and GPU are reasonably matched in performance tier.
The Upgrade Process
Hardware upgrades require careful handling of components. If you’re uncomfortable, consider professional installation.
- Preparation:
- Backup Data: Always a good practice before any hardware changes.
- Gather Tools: You’ll typically need a Phillips head screwdriver. An anti-static wrist strap is highly recommended to prevent electrostatic discharge (ESD) damage.
- Download New Drivers: Download the drivers for your new graphics card beforehand and save them to a USB drive or easily accessible location.
- Power Down and Disconnect:
- Shut down your computer completely.
- Unplug the power cable from the wall socket and the back of your PSU.
- Press the power button a few times to drain any residual power.
- Open the PC Case: Remove the side panel(s) to access the motherboard.
- Remove Old Graphics Card:
- Locate the PCIe power cables connected to your old GPU and disconnect them.
- Unscrew any retaining screws holding the card to the case at the rear.
- Press the small release clip at the end of the PCIe slot (usually plastic) to unlock the card.
- Carefully pull the old card straight out of the slot.
- Install New Graphics Card:
- Align the new graphics card with the PCIe x16 slot.
- Press firmly and evenly until it clicks securely into place. You should hear the PCIe slot’s retention clip snap back into position.
- Secure the card to the case with screws.
- Connect the necessary PCIe power cables from your PSU to the new graphics card.
- Close Case and Reconnect:
- Replace the side panel(s).
- Reconnect all peripherals (monitor, keyboard, mouse) and the power cable.
- Post-Installation Steps:
- Power On: Boot up your computer. It might initially use generic display drivers.
- Install New Drivers: Install the drivers you downloaded earlier for your new card. Perform a clean installation as described in the driver update section.
- Test and Benchmark: Run some demanding applications or games to ensure everything is working correctly and to verify performance gains. Monitoring temperatures is also advised.
Maintenance and Best Practices
Maintaining your graphics card and overall system health is key to maximizing performance and lifespan.
Regular Driver Checks
Even if you don’t experience issues, make it a habit to check for new drivers every few months. Most manufacturer software (GeForce Experience, AMD Adrenalin) can notify you when new drivers are available and automate the update process.
Temperature Monitoring
High temperatures are detrimental to electronics. Use software like HWMonitor, MSI Afterburner, or GPU-Z to keep an eye on your GPU temperatures, especially during intensive tasks. Ensure your case has adequate airflow and that your GPU fans are clean and functioning correctly. Periodically cleaning dust from your case and GPU heatsink can dramatically improve cooling.
Power Supply Health
Ensure your PSU is providing stable and sufficient power. An aging or low-quality PSU can cause instability or reduce the lifespan of your components. If you’ve significantly upgraded your GPU, reassess if your PSU is still up to the task.

Optimizing In-Game Settings
Even with a powerful card, understanding and adjusting in-game graphics settings can make a huge difference. Prioritize settings that impact performance most (e.g., anti-aliasing, shadow quality, global illumination) and adjust them to achieve your desired balance between visual quality and frame rate. Modern driver software often includes optimization tools that can suggest settings for you.
aViewFromTheCave is a participant in the Amazon Services LLC Associates Program, an affiliate advertising program designed to provide a means for sites to earn advertising fees by advertising and linking to Amazon.com. Amazon, the Amazon logo, AmazonSupply, and the AmazonSupply logo are trademarks of Amazon.com, Inc. or its affiliates. As an Amazon Associate we earn affiliate commissions from qualifying purchases.