A clean installation of Windows 10 is akin to giving your computer a fresh start. It involves completely erasing your existing operating system, applications, and personal files to begin anew. This process can revitalize a sluggish system, resolve persistent software issues, and ensure you’re running the latest, most secure version of Windows. Whether your PC is bogged down by years of accumulated software, plagued by viruses, or you’re simply looking to optimize performance, a clean install is a powerful solution.
This comprehensive guide will walk you through every step of performing a clean install of Windows 10. We’ll cover everything from preparing your system and backing up your data to the actual installation process and post-installation essentials. By following these instructions, you can confidently tackle this process and enjoy a smoother, more responsive computing experience.

Understanding the Benefits of a Clean Install
Before diving into the technicalities, it’s crucial to understand why a clean install is often recommended and what advantages it offers. While it might seem like a drastic measure, the benefits can be significant for your computer’s long-term health and performance.
Revitalizing System Performance
Over time, operating systems can become cluttered. Temporary files, remnants of uninstalled programs, registry errors, and fragmented data can accumulate, slowing down your computer’s boot-up times, application loading speeds, and overall responsiveness. A clean install effectively wipes the slate clean, removing all this digital detritus. It’s like decluttering your physical workspace – with less clutter, you can work more efficiently. This fresh start allows Windows to run with its intended efficiency, potentially bringing back the speed and responsiveness you enjoyed when your computer was new.
Resolving Persistent Software Issues
Are you experiencing recurring errors, application crashes, or strange behaviors that you can’t seem to fix with standard troubleshooting? A clean install can be a powerful remedy for software-related problems. Many issues stem from corrupted system files, conflicting software, or deep-seated malware that even antivirus programs can’t fully eradicate. By starting with a pristine operating system, you eliminate these potential culprits, effectively solving problems that have been plaguing your system.
Enhancing Digital Security
A clean install is an excellent opportunity to bolster your digital security. By removing all existing data, you eliminate any potential malware, viruses, or spyware that may have infected your system. You can then ensure that you are installing the latest version of Windows 10 with all current security updates and patches. This proactive approach significantly reduces your vulnerability to online threats. Furthermore, it allows you to be deliberate about the software you reinstall, ensuring you’re only adding trusted applications to your fresh system.
Preparing for New Hardware or Software
If you’re upgrading to new hardware, such as a new hard drive or motherboard, a clean install is often the best way to ensure compatibility and optimal performance. It prevents potential driver conflicts or lingering issues from the previous installation. Similarly, if you plan to install a major new piece of software that has specific system requirements or is known to interact with the OS in particular ways, starting with a clean Windows installation can prevent unforeseen complications.
Preparing for Your Windows 10 Clean Install
A successful clean install requires careful preparation. Rushing this phase can lead to data loss or an incomplete setup. Dedicate sufficient time to these crucial preliminary steps.
Backing Up Your Essential Data
This is arguably the most critical step. A clean install will erase everything on your primary drive. Before you proceed, you must back up all your important files, documents, photos, videos, and any other data you cannot afford to lose.
- External Hard Drives: The most common and reliable method is to copy your data to an external hard drive. Ensure the drive has enough capacity to hold all your important files.
- Cloud Storage Services: Services like OneDrive, Google Drive, Dropbox, or iCloud offer convenient ways to back up selected files or entire folders. If you use these services regularly, ensure everything is synced before starting.
- Network Attached Storage (NAS): For a more robust home solution, a NAS device can provide ample storage for backups.
- USB Flash Drives: Suitable for smaller amounts of data or specific important documents.
What to Back Up:
- Personal Documents: Word files, spreadsheets, PDFs, presentations, etc.
- Photos and Videos: Your cherished memories.
- Music and Other Media: Any personal media libraries.
- Application Data: Some applications store user profiles or settings that can be backed up. Research specific applications for their backup procedures.
- Browser Bookmarks and Passwords: Most browsers offer ways to sync or export these.
- Game Saves: If you’re a gamer, ensure you back up your game save files, as these are often stored locally.
Important Note on Software: A clean install will also remove all your installed applications. You will need to reinstall them after the process. Keep a list of your essential software and have their installation media (download links, product keys) ready.
Gathering Necessary Information
Before you start the installation, collect all the information you’ll need.
- Windows 10 Product Key: While Windows 10 often activates automatically if it was previously activated on the same hardware, it’s wise to have your product key handy. You can often find it on a sticker on your computer, in your purchase email, or by using a product key finder tool (use reputable ones).
- Driver Information: While Windows 10 is good at automatically detecting hardware, having your motherboard, graphics card, and network adapter drivers readily available can save you a lot of hassle, especially if Windows doesn’t find suitable generic drivers immediately. You can usually download these from the manufacturer’s website.
Creating Windows 10 Installation Media
To perform a clean install, you’ll need bootable installation media. Microsoft provides a free tool for this purpose: the Media Creation Tool.
Using the Media Creation Tool
- Download the Tool: Go to the official Microsoft Windows 10 download page and download the “Media Creation Tool.”
- Run the Tool: Execute the downloaded file. Accept the license terms.
- Choose “Create installation media (USB flash drive, DVD, or ISO file) for another PC”: Select this option and click “Next.”
- Select Language, Edition, and Architecture: The tool will suggest options based on your current PC, but you can uncheck “Use the recommended options for this PC” if you need to choose a different language, edition (e.g., Home, Pro), or architecture (32-bit or 64-bit). For most modern PCs, 64-bit is recommended.
- Choose Media Type:
- USB flash drive: This is the most convenient method. You’ll need a USB drive with at least 8GB of space. The tool will format the drive and copy the necessary files.
- ISO file: You can choose to download an ISO file, which you can then burn to a DVD later or use with a virtual machine.
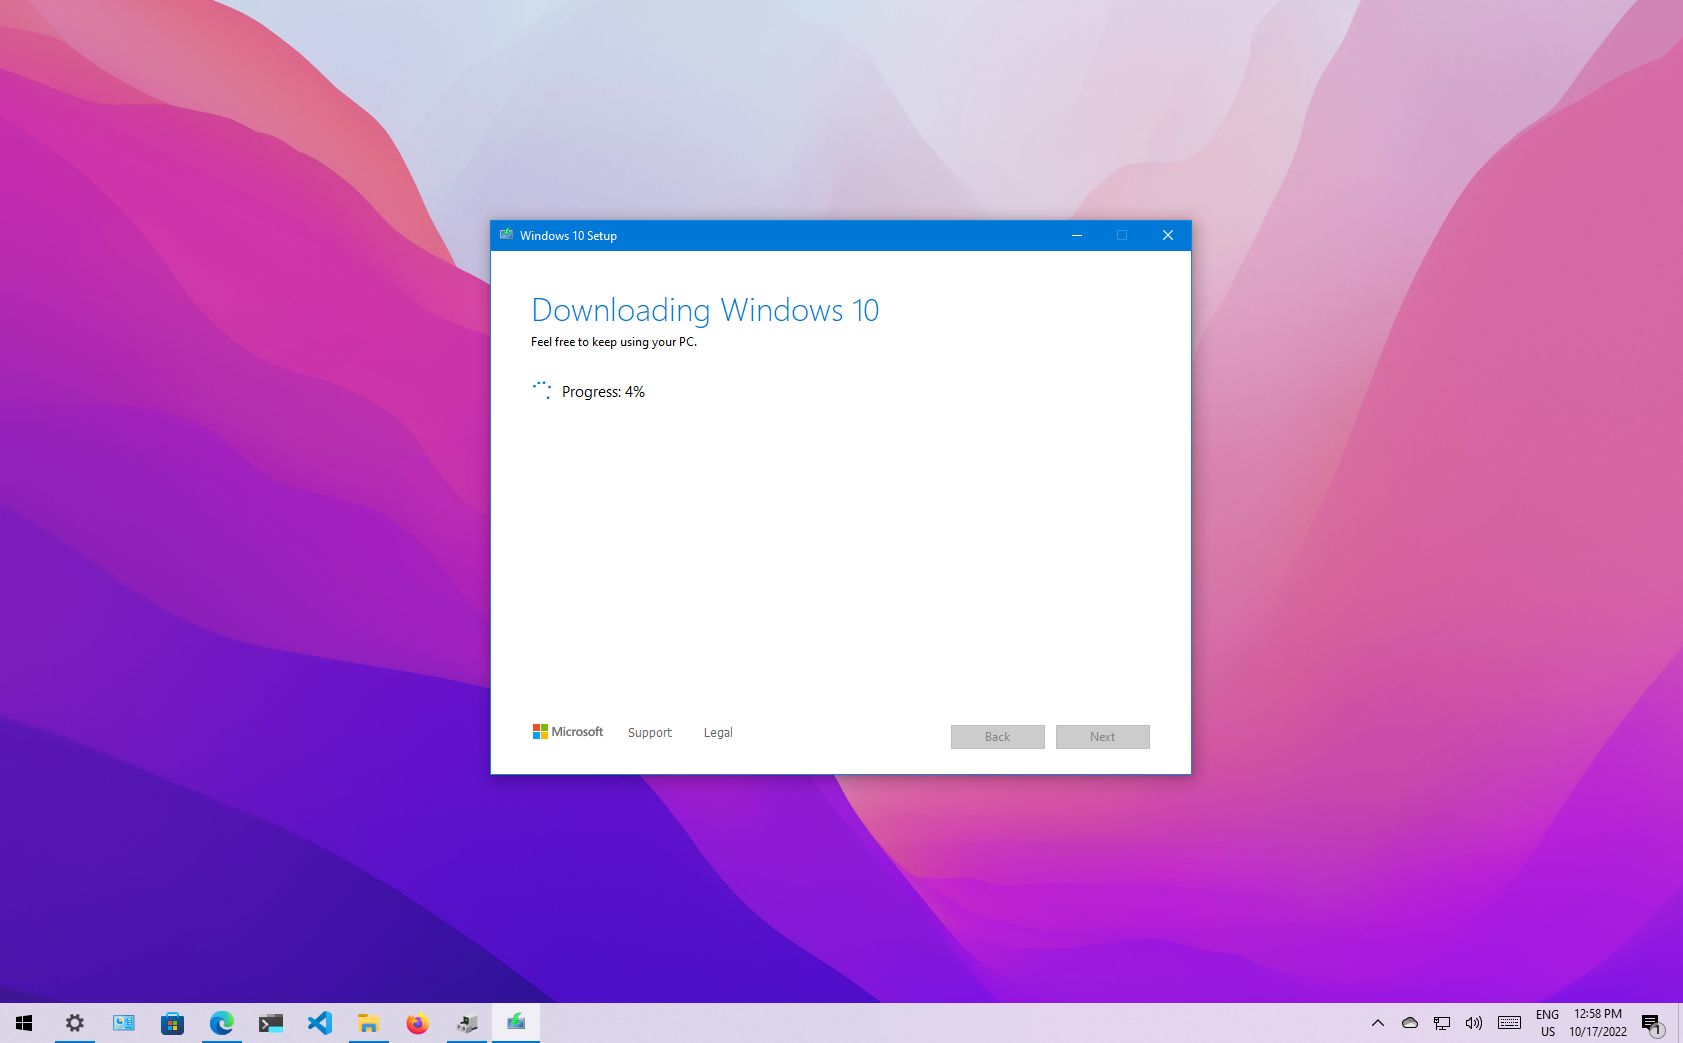
- Wait for Completion: The tool will download the Windows 10 files and create your bootable media. This can take some time depending on your internet speed.
Preparing Your Computer for Booting from USB/DVD
Once your installation media is ready, you need to configure your computer to boot from it. This involves accessing your system’s BIOS or UEFI settings.
- Restart Your Computer:
- Access BIOS/UEFI: As your computer starts up, look for a prompt on the screen that tells you which key to press to enter Setup, BIOS, or UEFI. Common keys include
Del,F2,F10,F12, orEsc. You may need to press it repeatedly as the computer boots. - Navigate to Boot Settings: Once in the BIOS/UEFI, find the “Boot” or “Boot Order” section. The exact wording varies by manufacturer.
- Change Boot Priority: Set your USB drive or DVD drive as the first boot device. Ensure it appears before your hard drive.
- Save and Exit: Save your changes (usually by pressing
F10) and exit the BIOS/UEFI. Your computer will restart.

If you’ve correctly configured the boot order, your computer will now attempt to boot from the USB drive or DVD you created.
The Clean Installation Process
With your preparation complete and your computer set to boot from the installation media, you’re ready to begin the actual Windows 10 installation. This process is guided by on-screen prompts.
Booting from Installation Media and Initial Setup
- Insert Media and Boot: Ensure your bootable USB drive or DVD is inserted into your computer and that you’ve configured your BIOS/UEFI correctly. Restart your computer.
- “Press any key to boot from CD or DVD…”: You might see a prompt like this. If so, press any key quickly to initiate the boot process from your installation media.
- Windows Setup Loads: You’ll see the Windows logo, and then the Windows Setup screen will appear.
- Language, Time, and Keyboard Settings: Select your preferred language, time and currency format, and keyboard or input method. Click “Next.”
- “Install Now” Button: Click the prominent “Install now” button.
Product Key and Installation Type
- Enter Product Key (or Skip): If prompted for your product key, enter it now. If you don’t have it or plan to activate later, click “I don’t have a product key.” Windows 10 will likely activate automatically if it was previously activated on this hardware.
- Select Operating System Edition: If you clicked “I don’t have a product key,” you’ll be asked to choose the edition of Windows 10 you want to install (e.g., Windows 10 Home, Windows 10 Pro). Ensure this matches the edition your license is for. Click “Next.”
- Accept License Terms: Read the Microsoft Software License Terms. If you agree, check the box and click “Next.”
- Choose Installation Type: This is a crucial step. You will be presented with two options:
- Upgrade: This option attempts to keep your files, settings, and applications. This is NOT what you want for a clean install.
- Custom: Install Windows only (advanced): Select this option for a clean install.
Drive Partitioning and Installation
This is where the actual formatting and installation occur. Be very careful in this step, as selecting the wrong drive can lead to data loss on other partitions.
- Select Installation Drive: You’ll see a list of drives and partitions on your computer. Identify the drive where you want to install Windows 10. This is typically your primary system drive (often labeled “Drive 0”).
- Delete Existing Partitions (for a full clean): To ensure a completely clean slate, it’s best to delete all existing partitions on the drive where Windows will be installed.
- Select a partition.
- Click “Delete.”
- You will be warned that this will erase all data on the partition. Confirm the deletion.
- Repeat this for all partitions on your intended Windows drive until you are left with “Unallocated Space” on that drive.
- WARNING: Double-check that you are deleting partitions on the correct drive. If you have multiple physical drives, ensure you are not deleting partitions from a drive that contains data you wish to keep.
- Create New Partition (Optional but Recommended): Select the “Unallocated Space” on your desired drive and click “New.” You can then specify the size of the partition for Windows. If you leave it at the maximum size, Windows will create a primary partition and any necessary system partitions (like Recovery, EFI System Partition).
- Install Windows: Select the newly created primary partition (it should say “Primary” under Type) and click “Next.”
Windows will now begin the installation process. It will copy files, install features, and install updates. Your computer will restart several times during this process.
Do not remove the installation media during the initial restarts. If you are prompted again to “Press any key to boot,” simply do not press anything, and your computer should continue booting from the hard drive.
Post-Installation Configuration and Updates
Once Windows 10 has finished installing, you’ll go through the initial setup process to configure your user account and basic settings. After that, the focus shifts to ensuring your system is up-to-date and running optimally.
Initial Windows 10 Setup (Out-of-Box Experience – OOBE)
You’ll be guided through a series of screens to personalize your Windows experience:
- Region and Keyboard Layout: Confirm your region and keyboard layout.
- Network Connection: Connect to your Wi-Fi network or plug in an Ethernet cable. This is important for Windows updates.
- Account Setup:
- Microsoft Account: You can sign in with an existing Microsoft account or create a new one. This syncs settings, provides access to the Microsoft Store, and offers features like OneDrive integration.
- Offline Account (Local Account): If you prefer not to use a Microsoft account, look for an option like “Offline account” or “Skip for now” (the wording can vary). This creates a traditional local user account.
- Create a PIN: For faster sign-in, you’ll be prompted to create a PIN.
- Privacy Settings: Review and adjust your privacy settings for location, diagnostics, inking and typing, advertising ID, and more. It’s recommended to disable most of these unless you have a specific reason to enable them.
- Cortana: You’ll be asked if you want to set up Cortana. You can choose to enable or disable it.
- Personalization: Windows might offer some personalization options.
Installing Drivers
While Windows 10 automatically installs many drivers, it’s crucial to ensure you have the correct, up-to-date drivers for all your hardware for optimal performance and stability.
- Windows Update: The first and easiest step is to run Windows Update.
- Go to
Settings>Update & Security>Windows Update. - Click “Check for updates.”
- Windows Update will often find and install drivers for your components.
- Go to
- Device Manager: If you encounter any devices with exclamation marks in Device Manager (
Right-click Start menu>Device Manager), Windows couldn’t find a suitable driver. - Manufacturer Websites: The most reliable way to get drivers is directly from the manufacturers of your computer or its components:
- Laptop/Pre-built PC: Visit the support section of your laptop or PC manufacturer’s website (e.g., Dell, HP, Lenovo, Asus) and download drivers specific to your model.
- Motherboard: If you built your PC, go to your motherboard manufacturer’s website (e.g., ASUS, Gigabyte, MSI) and download drivers for your motherboard chipset, audio, network, etc.
- Graphics Card: Download the latest drivers from NVIDIA, AMD, or Intel’s website, depending on your graphics processor.
- Other Peripherals: For printers, scanners, or other devices, visit their respective manufacturer’s websites.
Install drivers in a logical order, typically starting with chipset drivers, then graphics, audio, network, and finally other peripherals.
Running Windows Updates
After driver installation, it’s imperative to ensure Windows itself is fully updated.
- Check for Updates Regularly: Go to
Settings>Update & Security>Windows Update. - Install All Available Updates: Click “Check for updates” and install all pending updates, including optional updates that might contain driver improvements or important security patches.
- Restart When Prompted: Some updates require a restart to take effect.
Reinstalling Your Applications and Restoring Data
Now that your Windows 10 system is clean, updated, and has its drivers installed, it’s time to bring back your digital life.
- Reinstall Applications: Install your essential software one by one. It’s a good practice to download the latest versions from the official websites. Avoid using old installers if possible.
- Web Browsers (Chrome, Firefox, Edge)
- Office Suites (Microsoft Office, LibreOffice)
- Productivity Apps (Adobe Creative Suite, photo editors, video editors)
- Communication Tools (Skype, Zoom, Discord)
- Antivirus/Security Software (if not using Windows Defender)
- Media Players
- Restore Your Data: Copy your backed-up personal files from your external drive or cloud storage back to their appropriate locations on your computer.
Final System Checks and Optimization
Before you consider the clean install complete, perform a few final checks:
- System Stability: Use your computer normally for a few days. Open applications, browse the web, and run your typical tasks to ensure everything is stable.
- Disk Cleanup: While a clean install is already optimized, you can run Disk Cleanup to remove any temporary files that might have accumulated during the setup and reinstallation process.
- System File Checker (SFC): To verify the integrity of your Windows system files, open Command Prompt as an administrator and type
sfc /scannow. - Review Startup Programs: Go to
Task Manager(Ctrl+Shift+Esc) >Startuptab to disable unnecessary programs that launch automatically when you boot your computer, further improving boot times.
Performing a clean install of Windows 10 is a rewarding process that can significantly enhance your computer’s performance and stability. By following these detailed steps, you can confidently give your PC a fresh start and enjoy a cleaner, faster, and more secure computing experience.
aViewFromTheCave is a participant in the Amazon Services LLC Associates Program, an affiliate advertising program designed to provide a means for sites to earn advertising fees by advertising and linking to Amazon.com. Amazon, the Amazon logo, AmazonSupply, and the AmazonSupply logo are trademarks of Amazon.com, Inc. or its affiliates. As an Amazon Associate we earn affiliate commissions from qualifying purchases.