
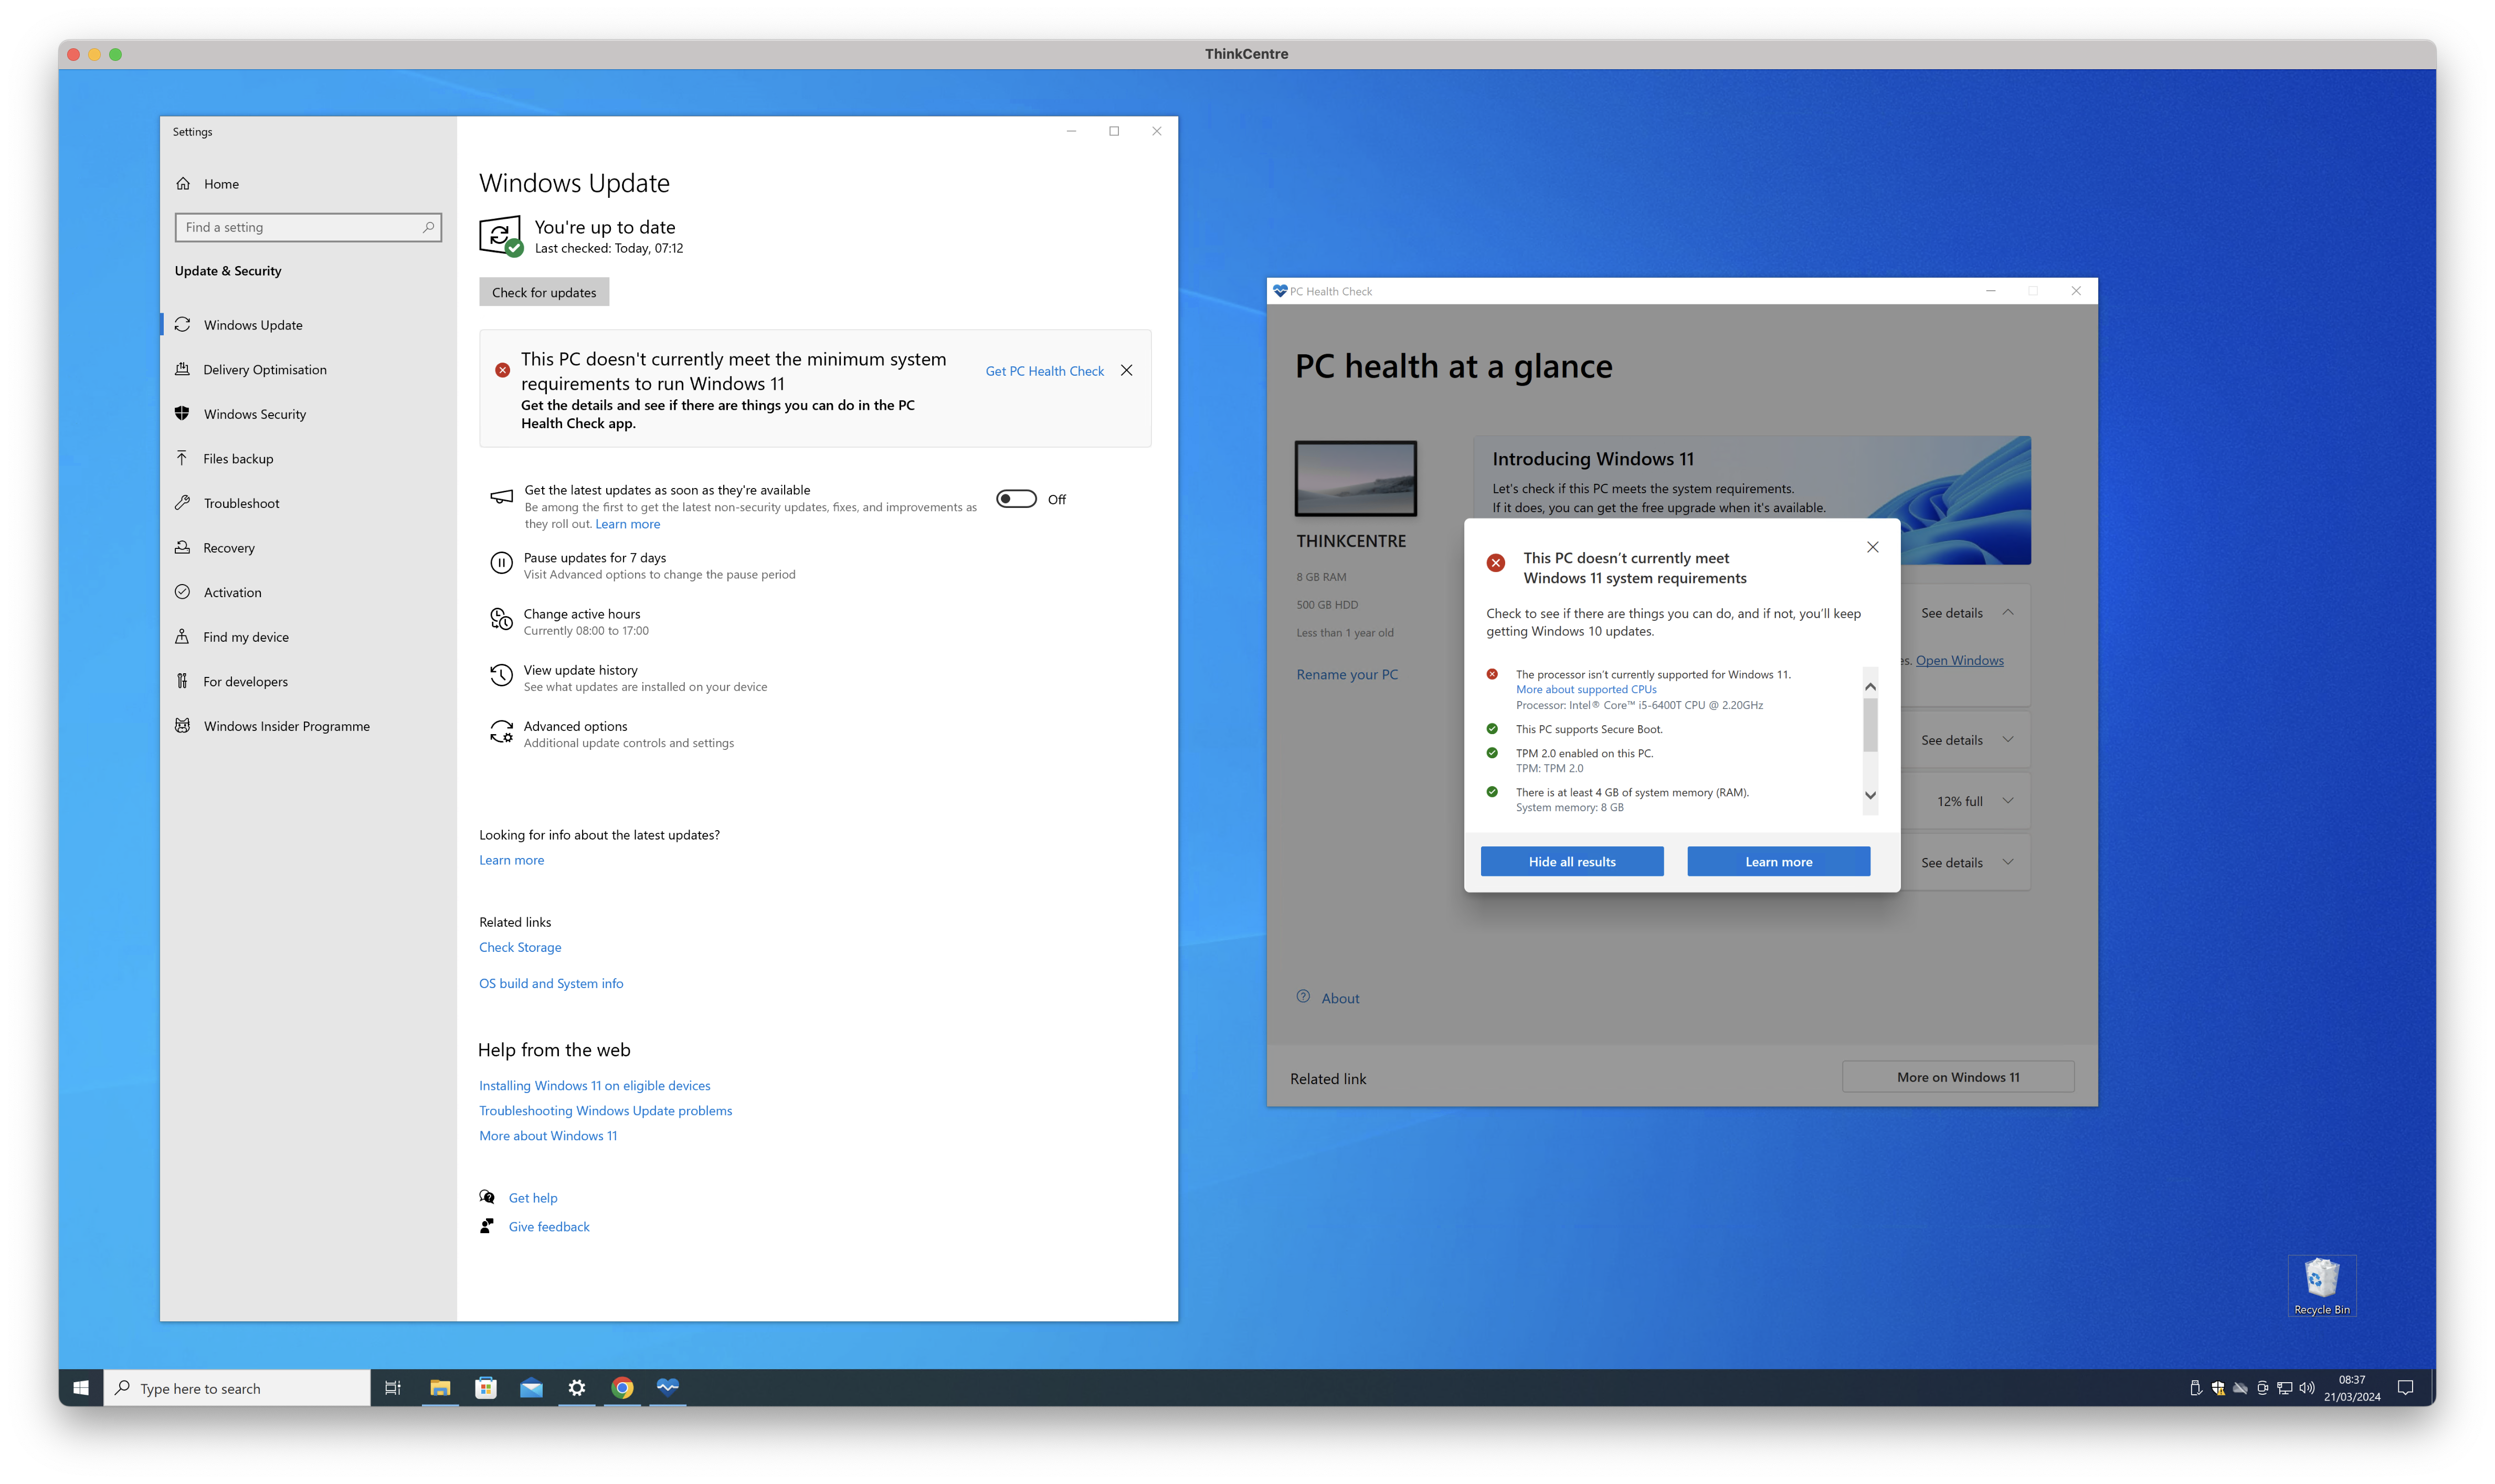
The siren song of Windows 11, with its sleek new interface and promised performance enhancements, can be incredibly alluring. However, for many users, particularly those with slightly older hardware like the reliable Intel Core i5-6500 processor, the prospect of upgrading can seem daunting. Microsoft’s official compatibility list for Windows 11 notoriously excludes CPUs from the 6th generation and earlier, leaving a significant portion of the user base in a hardware purgatory. But fear not, tech enthusiasts and budget-conscious upgraders! This guide will demystify the process of installing Windows 11 on your i5-6500, transforming your existing hardware into a capable Windows 11 machine.
While Microsoft’s official stance is that the i5-6500 is not supported, this doesn’t mean it’s impossible. The reality is that the core requirements for Windows 11, particularly regarding processing power and RAM, are often met by processors like the i5-6500. The limitations are primarily based on specific security features and firmware standards that Microsoft has chosen to enforce. Fortunately, there are well-established workarounds that allow you to bypass these checks and proceed with a smooth installation. We’ll walk you through the entire process, from understanding the prerequisites to the final setup, ensuring you can enjoy the latest Windows experience without shelling out for new hardware.
Understanding the Compatibility Hurdles and Essential Prerequisites
Before we dive into the installation process, it’s crucial to understand why your i5-6500 isn’t officially supported and what you’ll need to ensure a successful installation.
The Official Stance: Why the i5-6500 Isn’t on the “Supported” List
Microsoft’s decision to limit Windows 11 compatibility to 8th generation Intel Core processors and newer, along with AMD Ryzen 2000 series and newer, stems from a desire to enhance security and stability. The primary reasons cited are:
- TPM 2.0 (Trusted Platform Module): This hardware-based security feature is a cornerstone of Windows 11’s security architecture, designed to protect against advanced threats. While many motherboards for the i5-6500 era might have TPM headers, the module itself might not be present or enabled in the BIOS.
- Secure Boot: This is another crucial UEFI firmware feature that helps ensure your PC boots using only software trusted by the manufacturer.
- Modern CPU Architecture: Microsoft also emphasizes the benefits of newer CPU architectures for performance and power efficiency.
However, it’s important to note that the i5-6500 is a capable processor with sufficient computational power and often paired with systems that meet the RAM requirements (4GB minimum, 8GB recommended). The workarounds we’ll discuss focus on circumventing the strict hardware checks, allowing the operating system to be installed and run on hardware that, while not officially sanctioned, can handle it perfectly well.
Essential Prerequisites for a Smooth Installation
To proceed with installing Windows 11 on your i5-6500, you’ll need to gather a few key items and ensure your system meets certain basic requirements:
- A USB Drive (8GB or larger): This will be used to create a bootable Windows 11 installation media.
- Internet Connection: You’ll need this to download the Windows 11 Media Creation Tool and potentially the ISO file.
- A Backup of Your Important Data: While the installation process generally doesn’t affect your personal files, it’s always best practice to back up any critical data before making significant changes to your operating system. This could include documents, photos, videos, and application data.
- Windows 11 ISO File (Optional, but recommended for workarounds): You can download the official Windows 11 ISO file directly from Microsoft’s website. This is crucial for the most common bypass methods.
- Understanding Your BIOS/UEFI Settings: Familiarity with your motherboard’s BIOS/UEFI settings is beneficial, especially for enabling Secure Boot or TPM if your motherboard supports it.
The Installation Process: Bypassing Compatibility Checks
The core of installing Windows 11 on an unsupported CPU like the i5-6500 involves using a modified installation media or performing specific registry edits during the setup process. Here are the most common and effective methods.
Method 1: Using a Modified Windows 11 ISO with Rufus
This is arguably the most straightforward and popular method for bypassing the compatibility checks. Rufus is a free and open-source utility that can create bootable USB drives from ISO images. It has built-in options to remove the TPM, Secure Boot, and RAM requirements.

- Download the Windows 11 ISO: Go to the official Microsoft Windows 11 download page and select the option to download the “Disk Image (ISO)”. Choose the correct edition (e.g., Windows 11 multi-edition ISO).
- Download Rufus: Visit the official Rufus website and download the latest portable version.
- Create the Bootable USB Drive:
- Plug in your USB drive.
- Open Rufus.
- Under “Device,” select your USB drive.
- Under “Boot selection,” click “SELECT” and choose the Windows 11 ISO file you downloaded.
- Crucially, after selecting the ISO, Rufus will present a “Image Option” dropdown. Ensure “Extended Windows 11 Installation (no TPM/Secure Boot/4GB RAM)” is selected.
- Leave other settings as default unless you have specific needs.
- Click “START.” Rufus will warn you that all data on the USB drive will be destroyed. Confirm this to proceed.
- Boot from the USB Drive:
- Restart your computer with the i5-6500.
- Enter your BIOS/UEFI settings (usually by pressing F2, DEL, F10, or F12 during startup).
- Change the boot order to prioritize your USB drive.
- Save changes and exit BIOS/UEFI.
- Begin Windows 11 Installation: Your computer will now boot from the USB drive. The Windows 11 setup will begin. You will notice that the compatibility checks that would normally block the installation are no longer present. Proceed through the setup as you would with any normal Windows installation. You’ll be prompted to select your language, time, and keyboard layout, and then to install now.
- Install Windows 11: Follow the on-screen prompts to install Windows 11. You’ll choose the drive to install it on, and the installation will proceed.
Method 2: Registry Edits During a Standard Installation
If you prefer not to use Rufus or want to understand the underlying mechanism, you can manually edit the Windows Registry during a standard Windows 11 installation to bypass the checks. This method requires more careful execution.
- Create a Standard Windows 11 Bootable USB: Use the official Microsoft Media Creation Tool to create a bootable USB drive for Windows 11.
- Boot from the USB and Start Setup: Boot your i5-6500 system from the USB drive and proceed through the initial setup screens (language, keyboard layout, etc.) until you reach the screen that says “This PC can’t run Windows 11.”
- Open Command Prompt: Instead of clicking back, press
Shift + F10on your keyboard. This will open a Command Prompt window. - Launch Registry Editor: In the Command Prompt, type
regeditand press Enter. This will open the Registry Editor. - Navigate to the Correct Key: In the Registry Editor, navigate to the following path:
HKEY_LOCAL_MACHINESYSTEMSetup - Create a New Key: Right-click on the “Setup” key, select “New,” and then select “Key.” Name this new key
LabConfig. - Create New DWORD Values:
- Right-click on the newly created
LabConfigkey. - Select “New,” then “DWORD (32-bit) Value.”
- Name this value
BypassTPMCheckand press Enter. - Double-click on
BypassTPMCheckand set its “Value data” to1. Click “OK.” - Repeat the process to create another DWORD (32-bit) Value named
BypassSecureBootCheck. Set its “Value data” to1. - If you encounter RAM issues (though unlikely with the i5-6500), you can also create a
BypassRAMCheckDWORD (32-bit) Value and set its data to1.
- Right-click on the newly created
- Close Registry Editor and Command Prompt: Close both the Registry Editor and the Command Prompt windows.
- Go Back and Retry Setup: On the Windows 11 setup screen, click the back arrow (or X to close the window and restart the setup from scratch). The setup should now proceed without the compatibility error.
- Complete Windows 11 Installation: Continue with the standard Windows 11 installation process as prompted.
Post-Installation: Optimizing and Securing Your New Windows 11 System
Once Windows 11 is successfully installed on your i5-6500, there are a few important steps to take to ensure optimal performance, security, and a smooth user experience.
Updates and Driver Installation
After the initial setup, the most critical step is to ensure your system is up-to-date.
- Windows Updates: Navigate to
Settings > Windows Updateand check for updates. Install all available cumulative updates, security updates, and optional driver updates. This is essential for patching any potential vulnerabilities and ensuring your hardware is properly recognized by Windows 11. Your i5-6500 should be well-supported by Windows Update, but it’s always wise to verify. - Driver Updates: While Windows Update often handles most drivers, it’s a good practice to visit the manufacturer’s website for your motherboard, graphics card, and any other peripherals. Download and install the latest drivers specifically for Windows 11. This is particularly important for your graphics drivers (Intel HD Graphics 530 for the i5-6500) to ensure optimal display performance and feature support.
- Check for Optional Features: In
Settings > Apps > Optional features, you might find additional components you can install to enhance your Windows 11 experience.
Performance Tuning and System Tweaks
While the i5-6500 is capable, a few tweaks can help squeeze out even more performance and ensure a fluid experience.
- Disable Startup Programs: Many applications automatically start with Windows, slowing down boot times and consuming resources. Go to
Settings > Apps > Startupand disable any unnecessary programs. You can also manage startup items via Task Manager (Ctrl + Shift + Esc). - Adjust Visual Effects: Windows 11 has many eye-catching visual effects. For older hardware, disabling some of these can free up resources. Go to
System > About > Advanced system settings. In the “Performance” section, click “Settings” and choose “Adjust for best performance” or customize by unchecking specific visual effects. - Disk Cleanup and Optimization: Regularly run Disk Cleanup (
cleanmgr.exe) to remove temporary files and system junk. For your SSD or HDD, ensure it’s optimized. Right-click the drive in File Explorer, select “Properties,” go to the “Tools” tab, and click “Optimize.” - Power Plan Settings: While less critical for desktops, on laptops, ensuring you’re using a “Balanced” or “High performance” power plan can impact responsiveness.
Addressing Potential Limitations and Future-Proofing
Even with these workarounds, it’s important to be aware of the potential long-term implications.
- Future Windows Updates: While this installation method is robust, there’s always a small chance that a future, major Windows 11 feature update might re-introduce stricter hardware checks or introduce compatibility issues. Microsoft has, however, been relatively consistent in allowing these bypass methods to function.
- Security Features: The primary limitation remains the lack of official TPM 2.0 and Secure Boot. While the bypass methods circumvent the installation requirement, some advanced security features that rely on these hardware components might not function as intended. This is a trade-off for using unsupported hardware.
- Performance Expectations: While the i5-6500 can run Windows 11, it won’t perform identically to a modern, officially supported CPU. Heavy multitasking, demanding applications, or graphically intensive games might still be constrained by the processor’s capabilities.
- Considering an Upgrade: If you find yourself consistently hitting performance bottlenecks or are concerned about long-term support and security, consider that upgrading your CPU (and potentially motherboard and RAM) will eventually be necessary to fully leverage the capabilities of Windows 11 and future software advancements. However, for many users, this guide offers a fantastic way to extend the life of their existing hardware and enjoy the latest operating system for free.
By following these steps, you can successfully install Windows 11 on your Intel Core i5-6500 CPU, breathing new life into your computer and allowing you to enjoy the modern features and improved user experience of Microsoft’s latest operating system.
aViewFromTheCave is a participant in the Amazon Services LLC Associates Program, an affiliate advertising program designed to provide a means for sites to earn advertising fees by advertising and linking to Amazon.com. Amazon, the Amazon logo, AmazonSupply, and the AmazonSupply logo are trademarks of Amazon.com, Inc. or its affiliates. As an Amazon Associate we earn affiliate commissions from qualifying purchases.