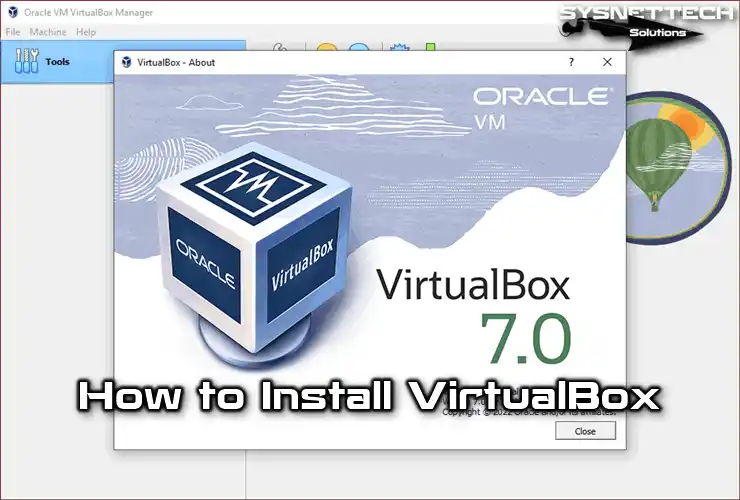
In the ever-evolving landscape of technology, the ability to experiment with different software and operating systems is not just a hobby for tech enthusiasts; it’s a powerful tool for developers, IT professionals, and even curious individuals looking to expand their digital horizons. VirtualBox, a free and open-source virtualization software developed by Oracle, stands as a cornerstone in this domain. It allows you to create and run virtual machines (VMs) on your existing computer, effectively simulating an entirely new computer within your current one. This means you can install and run different operating systems like Windows, Linux, or macOS alongside your primary OS, all without partitioning your hard drive or impacting your main system’s stability.
Whether you’re a budding developer needing to test software across various platforms, a cybersecurity professional practicing in a safe, isolated environment, or simply someone intrigued by the prospect of running a different operating system for a specific task, VirtualBox offers a remarkably accessible and powerful solution. This comprehensive guide will walk you through the entire process of installing VirtualBox, from understanding its prerequisites to completing the installation on your chosen operating system. We’ll also touch upon some essential post-installation steps to ensure you’re ready to embark on your virtualization journey.
Understanding Virtualization and Its Benefits
Before diving into the installation process, it’s crucial to grasp what virtualization is and why VirtualBox is such a valuable tool. At its core, virtualization is the process of creating a virtual version of something, such as an operating system, server, storage device, or network resources. In the context of VirtualBox, we’re primarily concerned with hardware virtualization, which allows a single physical computer to host multiple independent “guest” operating systems.
What is a Virtual Machine (VM)?
A virtual machine is essentially a software-based emulation of a physical computer. It has its own virtual CPU, RAM, storage (a virtual hard disk file), network adapter, and other hardware components, all managed by the virtualization software (the host). The operating system installed within this virtual environment is called the guest OS. Your physical computer, on which VirtualBox is installed, is referred to as the host machine.
Why Use VirtualBox?
The advantages of using VirtualBox are numerous and span across various domains:
- Operating System Exploration and Testing: Want to try out the latest Linux distribution without committing to a full installation? Need to see how your web application performs on different versions of Windows? VirtualBox makes it simple to install and test any operating system without affecting your primary system.
- Software Development and Testing: Developers can create isolated environments to build, test, and debug applications across multiple operating systems and configurations. This is particularly useful for ensuring cross-platform compatibility.
- Cybersecurity Practice: For those learning about cybersecurity, VMs provide a safe sandbox environment to experiment with malware analysis, penetration testing, and ethical hacking techniques without risking their main computer.
- Running Legacy Software: If you have older software that’s only compatible with an older operating system, you can install that OS in a VM and run the software within it.
- System Isolation: Running potentially risky software or browsing untrusted websites in a VM can protect your host system from infections or data loss. If the VM gets compromised, you can simply delete it and start fresh.
- Learning and Education: VirtualBox is an excellent tool for educational purposes, allowing students and enthusiasts to learn about different operating systems, networking concepts, and server administration in a hands-on, risk-free manner.
- Cost-Effectiveness: It eliminates the need for multiple physical machines for testing and development, saving significant hardware costs.
Preparing for VirtualBox Installation
Before you download and install VirtualBox, there are a few things you should consider to ensure a smooth experience.
System Requirements
VirtualBox is designed to be lightweight and runs on most modern operating systems. However, to run multiple operating systems concurrently within VMs, your host machine needs to have sufficient resources.
- Host Operating System: VirtualBox is available for Windows, macOS, Linux, and Solaris.
- Processor: A modern multi-core processor is highly recommended. Most processors manufactured in the last decade should suffice.
- RAM: The more RAM you have, the better. You’ll need enough RAM for your host OS plus the RAM you plan to allocate to each guest OS. A minimum of 4GB of RAM for the host is generally recommended, with 8GB or more being ideal for running multiple or resource-intensive VMs.
- Hard Disk Space: You’ll need space for the VirtualBox installation itself, but more importantly, for the virtual hard disk files of each VM you create. Each guest OS and its applications will require significant space, often ranging from 10GB to 50GB or more per VM. Ensure you have ample free space.
- Virtualization Technology (VT-x/AMD-V): For optimal performance, it’s highly recommended that your CPU supports hardware virtualization extensions (Intel VT-x or AMD-V). Most modern CPUs do. You may need to enable this in your computer’s BIOS/UEFI settings if it’s not already active.
Downloading VirtualBox
The first step is to download the latest version of VirtualBox and its corresponding VirtualBox Extension Pack.
- Navigate to the Official VirtualBox Website: Open your web browser and go to https://www.virtualbox.org/.
- Find the Downloads Section: On the homepage, you’ll typically see a prominent “Downloads” link or button. Click on it.
- Select Your Host Operating System: On the downloads page, you’ll find different package options. Under “VirtualBox [Version] platform packages,” select the download link for your host operating system (e.g., “Windows hosts,” “OS X hosts,” “Linux distributions”).
- Download the Extension Pack: Scroll down to find the “VirtualBox [Version] Oracle VM VirtualBox Extension Pack” link. This pack adds important functionalities like USB 2.0 and 3.0 support, RDP, disk encryption, and NVMe, which are essential for a full-featured virtualization experience. Download this as well.
Installing VirtualBox on Your Host System
The installation process is generally straightforward and follows the typical installation wizard for your operating system.
Installing VirtualBox on Windows
- Run the Installer: Locate the downloaded VirtualBox installer file (e.g.,
VirtualBox-x.x.x-xxxxxx-Win.exe) and double-click it to launch the setup wizard. - Welcome Screen: Click “Next” to proceed from the welcome screen.
- Custom Setup: You’ll be presented with a “Custom Setup” screen. For most users, the default components are sufficient. You can choose to deselect certain optional features if you wish, but it’s generally not recommended unless you have specific reasons. Click “Next.”
- Customization (Optional Components): This screen allows you to select or deselect specific features like networking capabilities, USB support, and command-line tools. Again, defaults are usually fine.
- Network Interface Warning: During the installation, VirtualBox will install network interfaces. Your network connection might temporarily disconnect. A warning prompt will appear. Click “Yes” to continue.
- Ready to Install: Click “Install” to begin the installation process.
- User Account Control (UAC): Windows may ask for your permission to install the software. Click “Yes.”
- Driver Installation: You might encounter prompts asking if you want to install device software (e.g., for network adapters). Click “Install” for all of these.
- Completing the Installation: Once the installation is complete, you’ll see a confirmation screen. Ensure “Start Oracle VM VirtualBox x.x.x after installation” is checked if you want to launch it immediately, and then click “Finish.”
Installing VirtualBox on macOS

- Run the Installer: Locate the downloaded
.dmgfile (e.g.,VirtualBox-x.x.x-xxxxxx-OSX.dmg) and double-click it. - Open the Package: A window will appear with the VirtualBox installer. Double-click the “VirtualBox.pkg” file to start the installation wizard.
- Introduction: Click “Continue” on the introduction screen.
- Installation Type: You can typically choose the “Standard Install” option, which is recommended for most users. Click “Continue.”
- Installation Confirmation: Click “Install” to begin.
- Password Prompt: macOS will ask for your administrator password to authorize the installation. Enter your password and click “Install Software.”
- Security Settings: You might be prompted to allow system extensions. Go to “System Settings” (or “System Preferences”) > “Privacy & Security” and click “Allow” next to the message about Oracle’s software being blocked. You may need to click “Details” first.
- Completing the Installation: Once the installation is successful, you’ll see a confirmation message. Click “Close.” You can move the installer to the Trash.
Installing VirtualBox on Linux (Debian/Ubuntu-based distributions)
There are several ways to install VirtualBox on Linux, including using your distribution’s package manager or downloading the .deb package. Using the .deb package is often the most straightforward for obtaining the latest version.
- Download the
.debPackage: Go to the VirtualBox downloads page and download the appropriate.debfile for your Ubuntu/Debian version under “Linux distributions.” - Open a Terminal: Navigate to the directory where you downloaded the
.debfile using thecdcommand (e.g.,cd Downloads). - Install the Package: Use the following command to install VirtualBox. You might need to replace
your_virtualbox_package.debwith the actual filename:
bash

sudo dpkg -i your_virtualbox_package.deb
- Resolve Dependencies (if any): If the above command reports dependency errors, run the following command to fix them:
bash

sudo apt --fix-broken install
This will download and install any missing dependencies. - Launch VirtualBox: You can now launch VirtualBox from your application menu or by typing
virtualboxin the terminal.
(Note: For other Linux distributions like Fedora, CentOS, or Arch Linux, the installation method will differ. Refer to the official VirtualBox documentation for specific instructions for your distribution.)
Installing the VirtualBox Extension Pack
The Extension Pack is crucial for unlocking the full potential of VirtualBox.
- Launch VirtualBox: Open Oracle VM VirtualBox.
- Access Preferences:
- On Windows: Go to “File” > “Preferences.”
- On macOS: Go to “VirtualBox” > “Preferences.”
- On Linux: Go to “File” > “Preferences.”
- Navigate to the Extensions Tab: In the Preferences window, click on the “Extensions” tab.
- Add New Extension: Click on the small “Add new package” icon (usually a plus sign or a download arrow with a box) on the right side.
- Select the Extension Pack: Browse to the location where you downloaded the VirtualBox Extension Pack file (e.g.,
Oracle_VM_VirtualBox_Extension_Pack-x.x.x.vbox-extpack) and select it. - Install the Extension Pack: A dialog box will appear asking if you want to install the extension pack. Click “Install.”
- License Agreement: You’ll be presented with the VirtualBox Extension Pack Personal Use and Evaluation License. Scroll down and click “I Agree.”
- User Account Control/Password: You may be prompted for your administrator password or to allow installation. Provide it.
- Confirmation: Once installed, you should see the extension pack listed in the “Extensions” tab. Close the Preferences window.
Post-Installation and Next Steps
Congratulations! You have successfully installed VirtualBox and its essential Extension Pack. Now you’re ready to create your first virtual machine and explore different operating systems.
Creating Your First Virtual Machine
The process of creating a VM involves defining its hardware specifications and then installing an operating system onto it. VirtualBox provides an intuitive wizard to guide you through this.
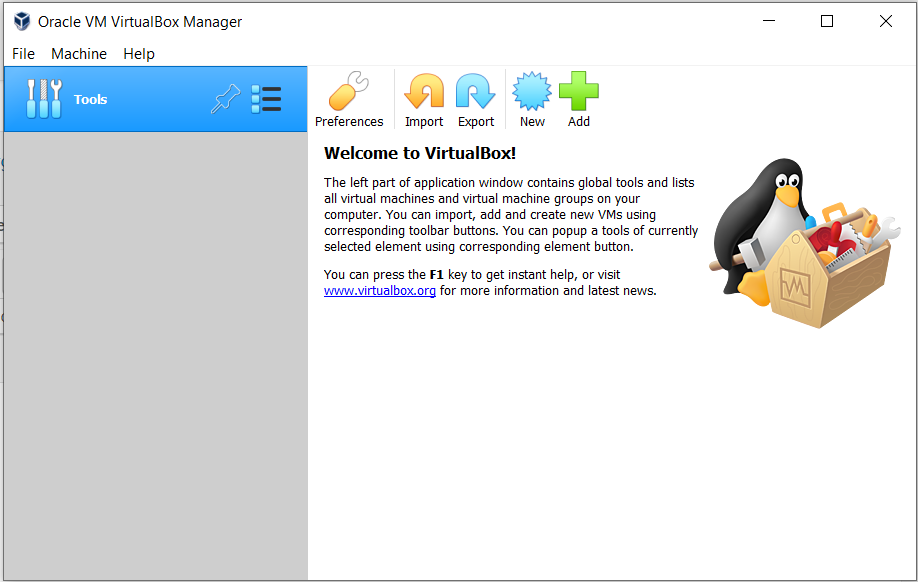
- Launch VirtualBox: Open Oracle VM VirtualBox.
- Click “New”: Click the “New” button on the main VirtualBox Manager window.
- Name and Operating System:
- Name: Give your VM a descriptive name (e.g., “Ubuntu Desktop,” “Windows 10 Test”).
- Machine Folder: Choose where to store the VM’s files.
- Type: Select the operating system type (e.g., Microsoft Windows, Linux, macOS).
- Version: Select the specific version of the operating system (e.g., “Ubuntu (64-bit),” “Windows 10 (64-bit)”). VirtualBox often auto-detects these based on the name.
- Memory Size: Allocate RAM to your VM. This is a crucial step. Ensure you allocate enough RAM for the guest OS to run smoothly, but don’t allocate so much that your host system becomes sluggish. VirtualBox usually suggests a reasonable amount.
- Hard Disk:
- Create a virtual hard disk now: This is the most common option.
- Hard disk file type: VDI (VirtualBox Disk Image) is the native format. VMDK and VHD are also supported for compatibility with other virtualization software.
- Storage on physical hard disk: “Dynamically allocated” means the virtual disk file will grow as you add data to it, up to the maximum size you set. “Fixed size” allocates the entire space immediately. Dynamically allocated is generally recommended for saving space.
- File location and size: Set the maximum size for your virtual hard disk. Again, consider the requirements of the OS and any applications you plan to install.
- Create: Click “Create” to finalize the VM’s basic settings.
Installing the Guest Operating System
After creating the VM, you’ll need to install the operating system within it.
- Select Your VM: In the VirtualBox Manager, select the VM you just created.
- Click “Start”: Click the “Start” button.
- Select Startup Disk: A dialog box will appear prompting you to select a virtual optical disk file. This is where you’ll point VirtualBox to the ISO image file of the operating system you want to install (e.g.,
ubuntu-22.04-desktop-amd64.iso). If you don’t have one, you’ll need to download it from the official OS website. - Proceed with OS Installation: The VM will boot from the selected ISO, and you’ll proceed with the standard installation process for that operating system, just as you would on a physical computer.
Installing VirtualBox Guest Additions
Once your guest OS is installed and running within the VM, installing “Guest Additions” is highly recommended. These are a set of device drivers and system applications that optimize the guest operating system for better performance and usability. They enable features like:
- Seamless mouse integration (no need to capture and release the mouse pointer)
- Shared clipboard between host and guest
- Drag and drop functionality
- Improved video performance and screen resolution adjustments
- Shared folders between host and guest
To install Guest Additions:
- Start Your VM: Boot up the guest operating system within VirtualBox.
- Insert Guest Additions CD Image: In the VM window’s menu bar, go to “Devices” > “Insert Guest Additions CD image…”
- Run the Installer: The guest OS should detect the virtual CD. You might see an auto-run prompt, or you may need to manually navigate to the CD drive within the guest OS and run the installer (e.g.,
VBoxWindowsAdditions.exeon Windows, or a script on Linux). - Reboot the VM: After the installation is complete, you will typically be prompted to reboot the guest operating system for the changes to take effect.
Conclusion
Installing VirtualBox is a fundamental step for anyone looking to explore the vast world of operating systems, test software in isolated environments, or enhance their technical skills. By following this guide, you’ve successfully set up VirtualBox on your host machine and learned how to install the essential Extension Pack. You are now equipped to create virtual machines, install different operating systems, and leverage the power of Guest Additions for a seamless virtualization experience. The possibilities are now at your fingertips, allowing you to experiment, learn, and innovate without limitations. Happy virtualizing!
aViewFromTheCave is a participant in the Amazon Services LLC Associates Program, an affiliate advertising program designed to provide a means for sites to earn advertising fees by advertising and linking to Amazon.com. Amazon, the Amazon logo, AmazonSupply, and the AmazonSupply logo are trademarks of Amazon.com, Inc. or its affiliates. As an Amazon Associate we earn affiliate commissions from qualifying purchases.