The world of entertainment has been revolutionized by streaming. Gone are the days of scheduling your viewing around broadcast times or being tethered to a limited cable package. Today, on-demand content is king, and at the forefront of making this accessible and affordable is Roku. Specifically, the Roku Express has emerged as a popular and budget-friendly choice for anyone looking to upgrade their television experience. Whether you’re a tech novice or a seasoned streamer, this guide will walk you through the simple, step-by-step process of installing your Roku Express, unlocking a universe of channels, movies, and TV shows.
The beauty of the Roku Express lies in its user-friendliness and its ability to transform virtually any television into a smart TV. For those who appreciate the intersection of technology and everyday life, understanding how to set up this device is a fundamental step towards embracing modern entertainment. It’s a testament to how accessible advanced technology has become, fitting perfectly within the broader “Tech” category of our website, which explores everything from emerging AI tools to practical tutorials for everyday gadgets.
Beyond just the technical setup, integrating a device like the Roku Express into your home entertainment system also touches upon aspects of “Brand.” Roku, as a brand, has cultivated a reputation for simplicity and value, a strategy that resonates deeply with consumers. This installation guide is, in essence, a user-facing “tutorial” that reinforces Roku’s brand promise of ease of use. Furthermore, the cost-effectiveness of the Roku Express aligns with the principles of “Money,” particularly in personal finance, as it offers a significant upgrade in entertainment value without a substantial financial outlay. It’s an investment in affordable, on-demand entertainment.
This article will not only cover the physical installation but also guide you through the initial software setup, connecting to your Wi-Fi network, and navigating the Roku interface. By the end, you’ll be ready to personalize your streaming experience, discover new content, and enjoy a world of entertainment at your fingertips.
Unpacking Your Roku Express: What’s Inside the Box
Before we dive into the installation process, it’s crucial to understand what comes with your Roku Express. The simplicity of the Roku Express extends to its packaging; you won’t find a bewildering array of components. Opening the box is the first step in this seamless journey towards enhanced entertainment.
The Core Components
Within the Roku Express packaging, you will typically find the following items:
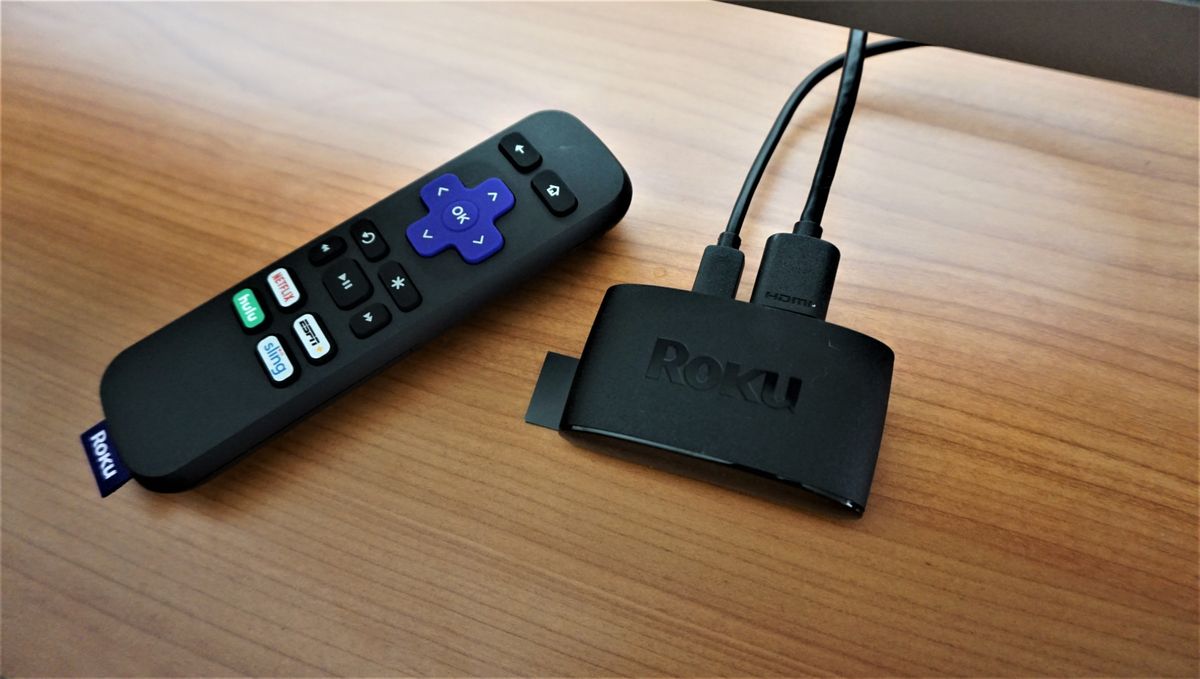
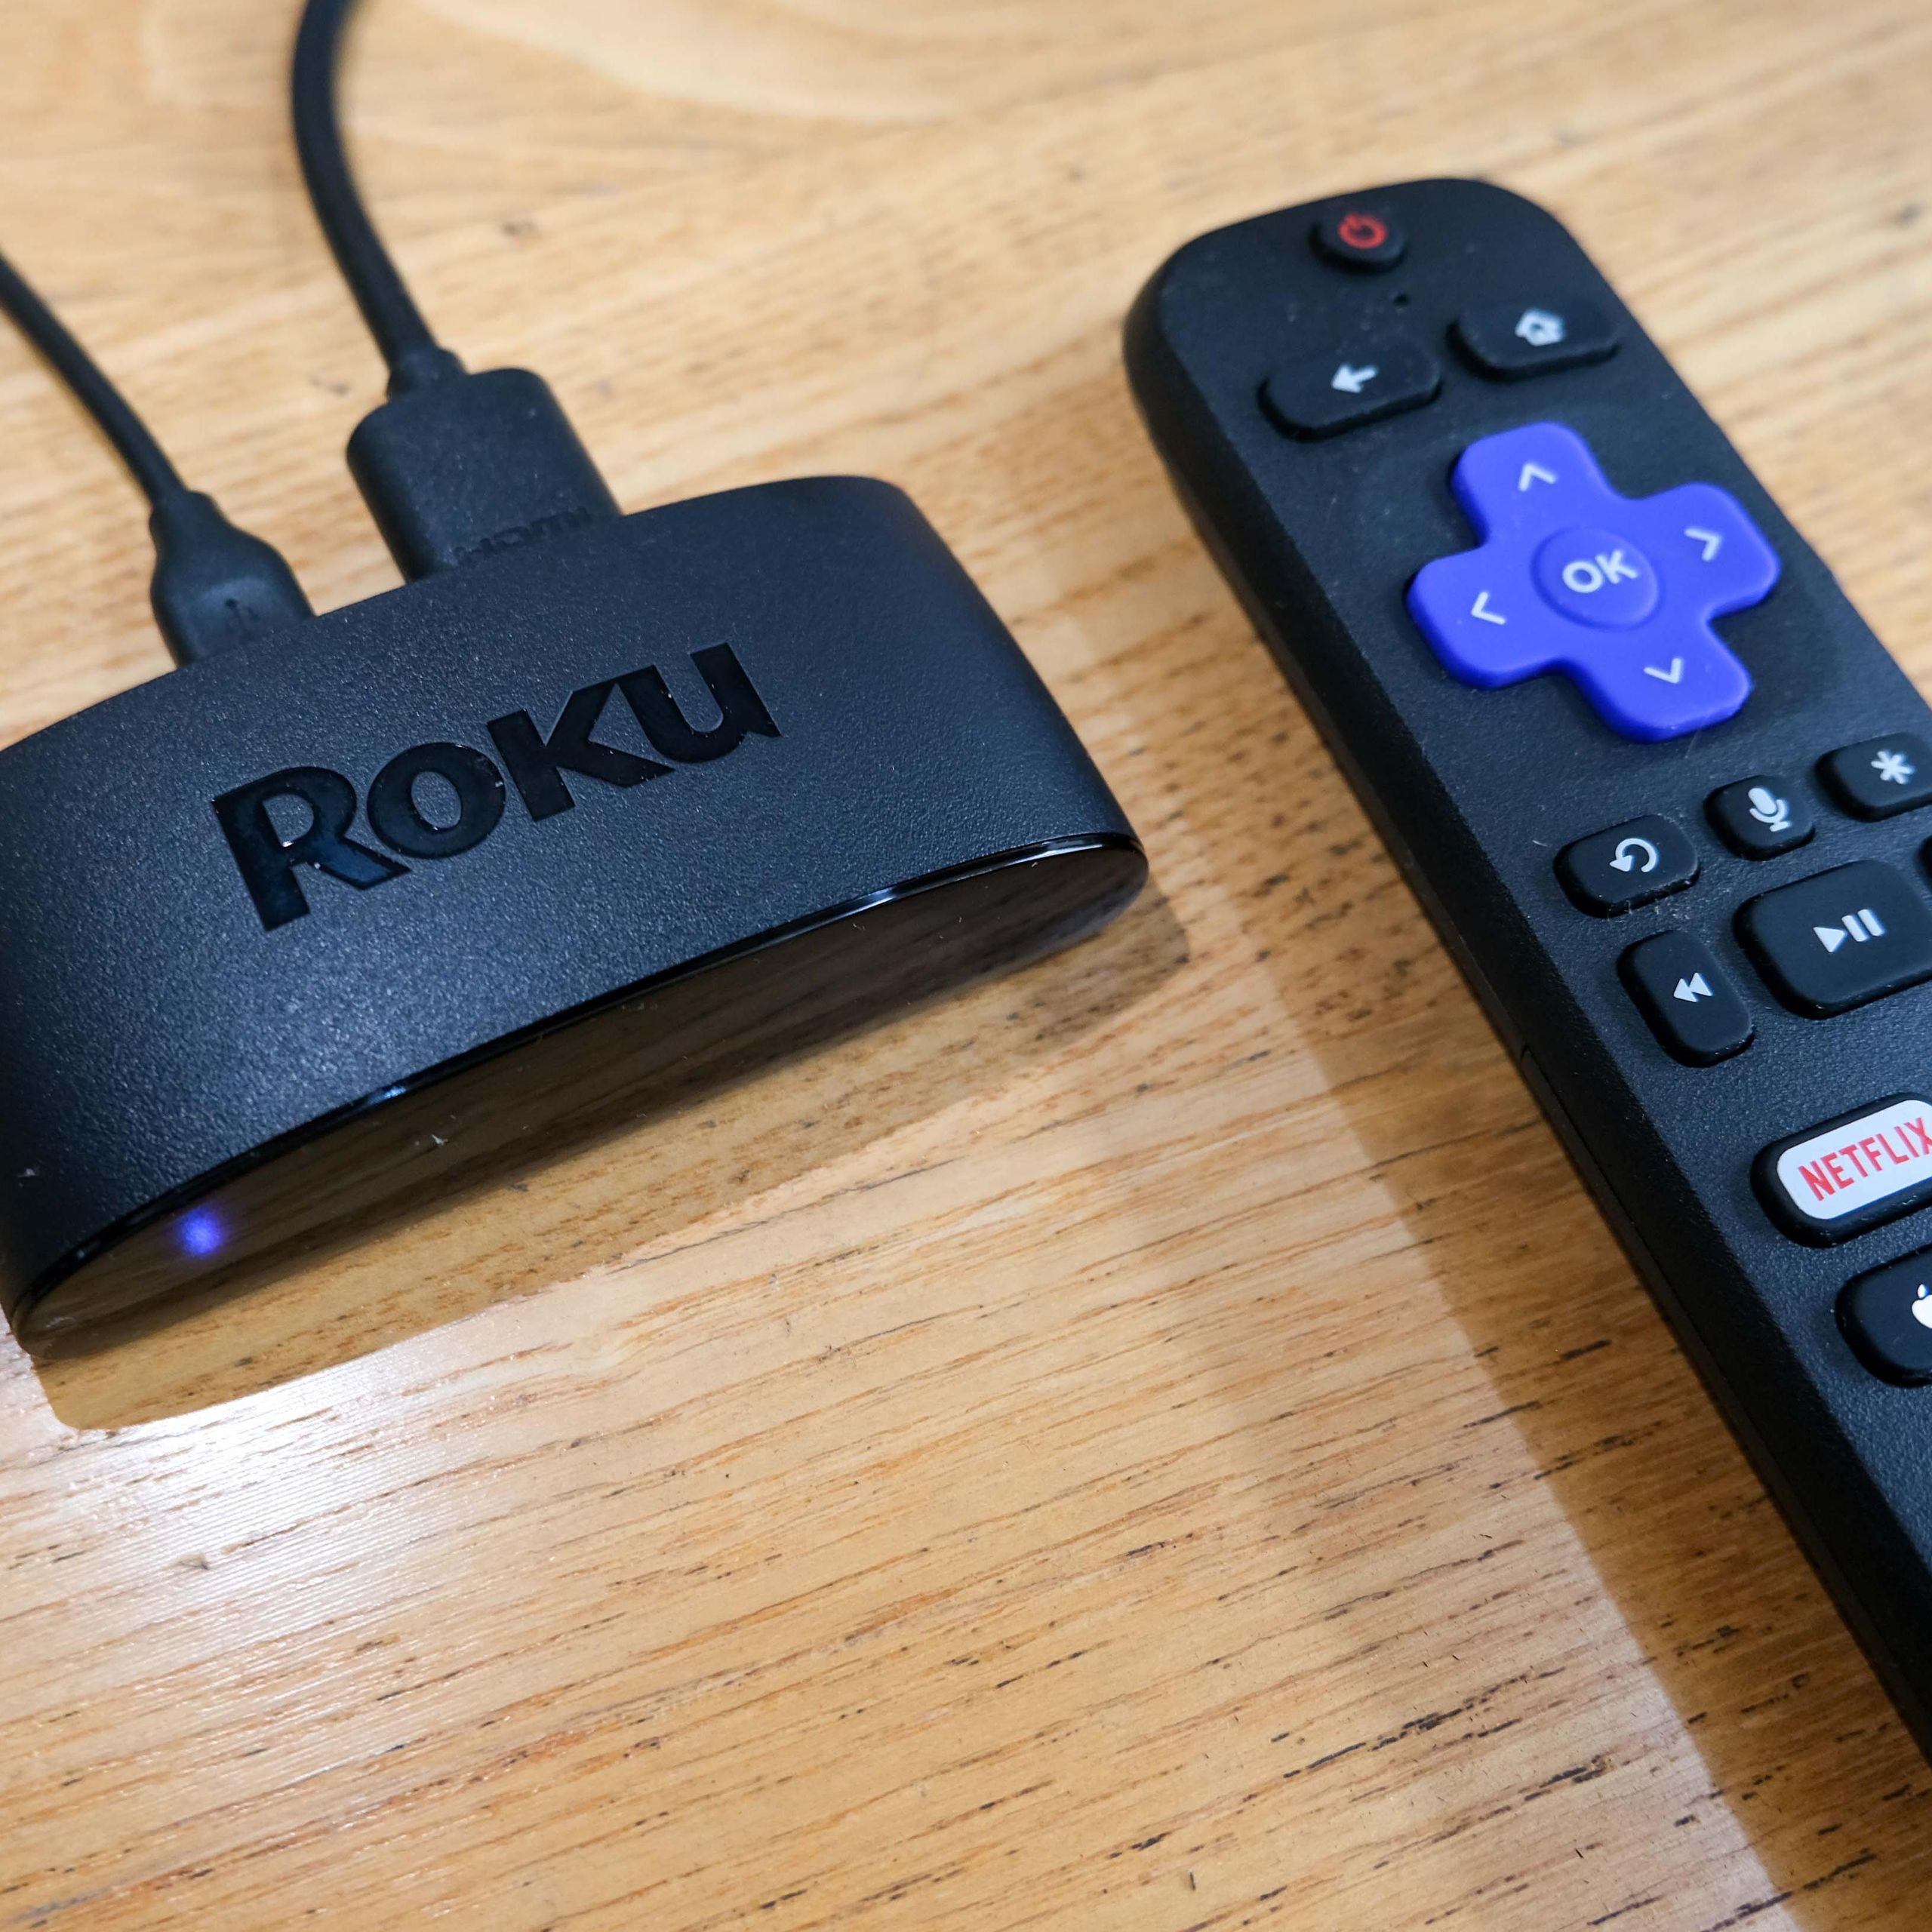
- The Roku Express Player: This is the heart of your streaming setup. A small, discreet, and lightweight device designed to connect to your TV. Its minimalist design ensures it won’t clutter your entertainment center.
- Remote Control: Roku remotes are renowned for their simplicity. The Roku Express remote usually features a straightforward button layout, including directional buttons, a home button, a back button, playback controls (play, pause, rewind, fast-forward), and dedicated shortcut buttons for popular streaming services.
- HDMI Cable: A high-definition multimedia interface (HDMI) cable is essential for transmitting both video and audio signals from the Roku Express to your TV. Roku typically includes a standard HDMI cable that is sufficient for most setups.
- Power Adapter: The Roku Express requires a power source. A USB power cable and AC adapter are provided to plug the device into a wall outlet.
- USB Cable: This cable connects the power adapter to the Roku Express player.
- Quick Start Guide: While this article serves as a comprehensive guide, the included Quick Start Guide offers a concise overview of the installation steps.
Verifying Your Connections
Before proceeding, take a moment to identify each component and ensure you have everything. This pre-installation check prevents potential delays and ensures a smooth setup. For instance, if you’re setting this up for a family member or friend, confirming they have all the necessary parts is a thoughtful gesture, embodying good “Brand” awareness for the Roku experience. From a “Tech” perspective, understanding these components is the foundational step before connecting anything.
Setting Up Your Roku Express: Connecting the Hardware
Now that you’ve unboxed your Roku Express, it’s time to connect it to your television and power source. This is where the “Tech” aspect of our website truly comes into play, focusing on practical gadget setup. The process is designed to be intuitive, reflecting Roku’s commitment to user-friendliness.
Connecting to Your Television
- Locate the HDMI Port: On the back or side of your television, find an available HDMI port. Most modern TVs have multiple HDMI ports, often labeled. If your TV is older and lacks an HDMI port, you might need an adapter, or consider a Roku device with different connection options. However, for the Roku Express, HDMI is the standard.
- Connect the HDMI Cable: Plug one end of the included HDMI cable into the HDMI port on your Roku Express player. Plug the other end into the chosen HDMI port on your TV.
- Identify the HDMI Input: Make a note of which HDMI port you used (e.g., HDMI 1, HDMI 2). You’ll need this information to select the correct input source on your TV.
Connecting to Power
- Connect the USB Cable to the Roku Express: Plug the smaller end of the USB cable into the power port on your Roku Express player.
- Connect the USB Cable to the Power Adapter: Plug the larger end of the USB cable into the provided AC power adapter.
- Plug the Power Adapter into a Wall Outlet: Connect the power adapter to a working electrical outlet. It’s generally recommended to plug directly into a wall outlet rather than a surge protector, as some surge protectors can interfere with the power delivery to the device. However, if a surge protector is your only option, ensure it’s functioning correctly.
Placing Your Roku Express
The Roku Express is a small device, so placement is flexible. Ideally, you’ll want it to be close enough to your Wi-Fi router for a strong signal, but also within reach of the HDMI cable and power outlet. Many users place it discreetly behind their TV, using the included adhesive strip if they wish, or simply letting it rest on a shelf or entertainment unit. Ensure it has some ventilation, though the device itself generates very little heat.
Initializing Your Roku Express: Software Setup and Network Connection
With the hardware in place, the next phase is powering on your Roku Express and guiding it through its initial software setup. This is where the device comes alive and begins its journey to connect you to the vast world of streaming entertainment. This section delves deeper into the “Tech” aspect, focusing on software configuration and connectivity.
Powering On and Selecting Input
- Turn on Your Television: With the Roku Express powered on, switch on your TV.
- Select the Correct HDMI Input: Using your TV’s remote control, navigate to the input or source menu. Select the HDMI input that corresponds to the port where you connected your Roku Express (e.g., HDMI 1, HDMI 2).
- Welcome Screen: You should now see the Roku welcome screen on your television. This indicates that the device is functioning correctly and is ready for setup.
On-Screen Setup Process
The Roku Express is designed for a guided setup experience. Follow the on-screen prompts:
- Language Selection: Choose your preferred language for the interface.
- Network Connection: This is a critical step. Your Roku Express needs an internet connection to stream content.
- Scan for Networks: Your Roku Express will scan for available Wi-Fi networks.
- Select Your Network: Choose your home Wi-Fi network from the list.
- Enter Your Password: Carefully enter your Wi-Fi password using the on-screen keyboard and the Roku remote. Be mindful of uppercase and lowercase letters, numbers, and symbols. If you’re unsure of your password, it’s usually found on your Wi-Fi router or in documentation from your internet service provider.
- Connect: Once the password is entered, select “Connect.” Your Roku Express will attempt to establish a connection to your network.
System Update
Once connected to the internet, your Roku Express will likely check for and install any available software updates. This is an automatic process and ensures you have the latest features and security enhancements. Allow this process to complete; it might take a few minutes. This is a good example of how brands maintain their products through ongoing “Tech” support.
Account Linking
After the system update, you will be prompted to link your Roku account.
- Create or Link an Account: If you don’t have a Roku account, you’ll need to create one. This typically involves providing an email address and creating a password. You can also do this via a web browser on a computer or smartphone by visiting
my.roku.com/link. - Enter the Link Code: The Roku screen will display a four-digit code. You’ll need to enter this code on the Roku website to link your device to your account.
- Account Benefits: Linking your account is essential for downloading apps (channels), managing your subscriptions, and accessing personalized recommendations. It’s a core part of the Roku “Brand” experience, tying your device to a central hub for content discovery.
Personalizing Your Roku Experience: Adding Channels and Customizing
With the initial setup complete, your Roku Express is now connected and ready to be transformed into your personalized entertainment hub. This stage focuses on tailoring the device to your specific viewing preferences, a process that bridges “Tech” and “Brand” by offering a customizable user experience.
Adding Streaming Channels (Apps)
The true power of the Roku Express lies in its vast library of streaming channels, often referred to as “apps.”
- Navigate to the Roku Channel Store: From the Roku home screen, select “Streaming Channels” or “Channel Store.”
- Browse and Search: You can browse channels by category (e.g., Movies & TV, Entertainment, Kids & Family) or use the search function to find specific services. Popular channels include Netflix, Hulu, Amazon Prime Video, Disney+, YouTube, HBO Max, and many more.
- Add Channels: When you find a channel you want, select it and then choose “Add channel.” Most channels are free to add, though you will need a separate subscription for many of them (like Netflix or Disney+).
- Organize Your Channels: After adding channels, you can rearrange their order on your home screen. Simply highlight a channel icon, press the “*” (star) button on your remote, and select “Move channel” to place it where you prefer. This level of customization reinforces the user’s control and the “Brand” promise of simplicity.
Understanding Subscriptions and Payments
It’s important to note that while adding a channel to your Roku is free, accessing the content within many of those channels often requires a paid subscription.
- Subscription Management: You can manage your subscriptions through your Roku account on
my.roku.com. - Payment Methods: Ensure your payment information is up-to-date in your Roku account for any purchases or subscriptions made directly through the Roku platform. This also touches upon the “Money” aspect, as managing subscriptions efficiently can impact your budget.

Exploring Roku Features
- Roku Search: Use the universal search function to find movies, TV shows, or actors across multiple channels. This saves you time from searching within individual apps.
- Roku Channel: Roku offers its own free, ad-supported streaming channel with a selection of movies and TV shows.
- Mobile App: Download the Roku mobile app on your smartphone for additional features like private listening (using your phone’s headphones), voice search, and casting content from your phone to your TV. This is a prime example of how “Tech” extends beyond the physical device.
By taking the time to personalize your Roku Express, you ensure that your streaming experience is efficient, enjoyable, and tailored to your interests. This thoughtful setup process, from the initial unboxing to the final channel selection, transforms a simple gadget into a powerful entertainment portal, perfectly embodying the blend of technology, brand experience, and smart spending that our website aims to cover. You’ve now successfully installed your Roku Express and are ready to enjoy the endless possibilities of streaming.
aViewFromTheCave is a participant in the Amazon Services LLC Associates Program, an affiliate advertising program designed to provide a means for sites to earn advertising fees by advertising and linking to Amazon.com. Amazon, the Amazon logo, AmazonSupply, and the AmazonSupply logo are trademarks of Amazon.com, Inc. or its affiliates. As an Amazon Associate we earn affiliate commissions from qualifying purchases.