Installing a wired Ring Doorbell, especially when you don’t have an existing doorbell setup, might seem like a daunting task. However, with the right guidance and a bit of DIY spirit, it’s an entirely achievable project. This guide will walk you through the process, covering everything from understanding your power options to the final mounting and setup. Our focus on Tech within the broader context of the Brand of Ring and its integration into your home’s Money and security landscape makes this a comprehensive resource.
Understanding the Power Challenge: Why a Wired Ring Doorbell Needs Power
The core of installing a wired Ring Doorbell without an existing system lies in providing a stable power source. Unlike their battery-powered counterparts, wired models continuously draw power, enabling features like uninterrupted live view and higher-resolution video. This constant power requirement means we need to address how to deliver electricity to your Ring Doorbell in a safe and effective manner.

The Options for Powering Your Wired Ring Doorbell
When there’s no existing doorbell wiring, you have a few primary avenues to explore for powering your device. Each has its own set of considerations regarding complexity, cost, and the need for professional assistance.
1. Utilizing Existing Electrical Outlets and a Transformer
This is often the most straightforward method for homeowners comfortable with basic electrical work. The principle is simple: tap into a nearby AC power source, convert the voltage to the low voltage required by your Ring Doorbell, and then route the wires to your doorbell’s location.
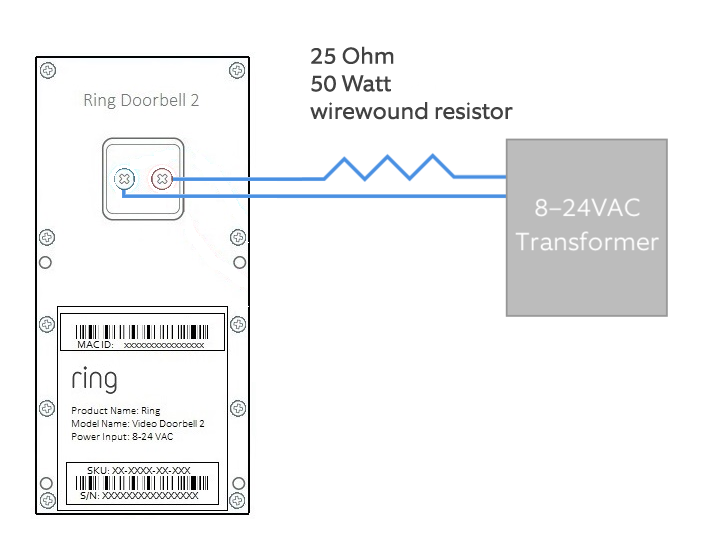
- The Concept: You’ll identify an accessible indoor electrical outlet. From this outlet, you’ll run low-voltage wiring to your Ring Doorbell. Crucially, you’ll need a transformer to step down the household voltage (typically 120V AC) to the Ring Doorbell’s operating voltage (usually 16-24V AC).
- What You’ll Need:
- Ring Doorbell Wired: Ensure you have the correct model that is designed for wired installation.
- Transformer: A plug-in or hardwired transformer specifically designed for doorbell systems. The voltage and wattage should match the Ring Doorbell’s requirements (check your Ring’s manual).
- Low-Voltage Wire: Typically 18-gauge or 20-gauge doorbell wire. You’ll need enough to run from your power source to the doorbell location.
- Wire Strippers/Cutters: For preparing the ends of your wires.
- Screwdrivers: For making connections.
- Drill and Drill Bits: To create holes for the wiring to pass through walls.
- Electrical Tape or Wire Connectors: For secure wire connections.
- Optional: Outlet Cover with Cord Hole: If you’re using a plug-in transformer and want a cleaner look.
- Optional: Small Junction Box: For housing wire connections safely.
- The Process (Simplified):
- Locate a Power Source: Choose an interior electrical outlet that’s relatively close to your desired doorbell location.
- Install the Transformer: If you’re using a plug-in transformer, simply plug it into the outlet. If you’re using a hardwired transformer, you’ll need to connect it directly to the outlet’s wiring. This step requires caution and understanding of electrical wiring. If you are not comfortable, hire an electrician.
- Run the Low-Voltage Wire: Carefully route the low-voltage wire from the transformer’s terminals to the exterior where your Ring Doorbell will be mounted. This might involve drilling through your wall, going through an attic, or under a crawl space. Ensure the wire is protected and neatly managed.
- Connect to the Transformer: Connect the two ends of your low-voltage wire to the output terminals of the transformer.
- Connect to the Ring Doorbell: At the exterior, strip the ends of the low-voltage wire and connect them to the screw terminals on the back of your Ring Doorbell. The order of the wires typically doesn’t matter for Ring Doorbells, but it’s good practice to keep them consistent.
2. Using a Plug-in Adapter (Transformer) with an External Outlet
This method is a variation of the first, but it’s particularly useful if you have an outdoor electrical outlet readily available near your front door. This can simplify the wire routing significantly.
- The Concept: You’ll use a plug-in transformer that plugs directly into an outdoor-rated electrical outlet. The low-voltage wire then runs from this transformer to your Ring Doorbell.
- What You’ll Need:
- Ring Doorbell Wired: As before.
- Outdoor-Rated Plug-in Transformer: Ensure it’s designed for doorbell use and meets your Ring Doorbell’s power specifications.
- Low-Voltage Wire: Enough to reach from the outdoor outlet to the doorbell location.
- Wire Strippers/Cutters, Screwdrivers, Drill, Drill Bits, Electrical Tape/Wire Connectors.
- Optional: Outdoor-Rated Wire Clips: For securing the wire neatly along the exterior of your home.
- The Process (Simplified):
- Identify an Outdoor Outlet: Locate an existing, functional outdoor electrical outlet near your desired doorbell mounting spot. Ensure it’s properly GFCIfault-protected and weatherproof.
- Plug in the Transformer: Connect the plug-in transformer to the outdoor outlet.
- Run the Low-Voltage Wire: Route the low-voltage wire from the transformer to your Ring Doorbell location. This might involve drilling a small hole through your exterior wall or running it along the siding using clips.
- Connect to the Ring Doorbell: Attach the low-voltage wires to the terminals on the back of your Ring Doorbell.
3. Hardwiring Directly to Your Home’s Electrical System (Advanced – Professional Recommended)
For those seeking a truly integrated and clean installation, hardwiring directly into your home’s electrical system is an option. This usually involves tapping into an existing circuit and installing a dedicated doorbell transformer. This is a more complex and potentially dangerous undertaking and is strongly recommended to be performed by a qualified electrician.
- The Concept: An electrician will find a suitable circuit, install a junction box, and connect a hardwired doorbell transformer directly to your home’s AC power. Low-voltage wiring will then be run from this transformer to your Ring Doorbell.
- What You’ll Need (Professional will provide):
- Hardwired Doorbell Transformer: Specifically designed for this purpose.
- Junction Box: To house the transformer and electrical connections safely.
- Appropriate Gauge Electrical Wire: For connecting to the main power.
- Low-Voltage Wire: For the doorbell run.
- All necessary tools and safety equipment.
- The Process (Overview):
- Consult an Electrician: Discuss your desire to install a wired Ring Doorbell and the absence of existing wiring.
- Transformer Installation: The electrician will safely tap into a home circuit, wire the transformer into a junction box, ensuring all connections are compliant with electrical codes.
- Wire Routing: They will then route the low-voltage wire from the transformer to the doorbell location.
- Ring Doorbell Connection: Finally, they will connect the low-voltage wires to your Ring Doorbell.
Mounting and Wiring Your Ring Doorbell
Once you have a reliable power source established, the next step is to physically mount the Ring Doorbell and make the final wire connections. This section focuses on the practical aspects of integrating the device into your home’s exterior.
Preparing the Mounting Location
Choosing the right spot is crucial for both functionality and security. The ideal height is typically around 4 feet (1.2 meters) from the ground, which provides a good vantage point for both adult faces and package deliveries.
- Marking and Drilling:
- Hold the Ring Doorbell’s mounting bracket against the wall at your chosen location.
- Use a pencil to mark the screw hole positions. Ensure the bracket is level.
- If you’re mounting to brick, stucco, or concrete, you’ll need to pre-drill holes and insert the provided wall anchors. Use a drill bit that matches the size of the anchors.
- If you’re mounting to wood siding, you might be able to screw directly into the studs.
- Running the Wires:
- If your low-voltage wire is entering from behind the wall (e.g., from an indoor outlet), you’ll need to feed it through the hole you drilled. Ensure there’s enough slack to comfortably connect to the Ring Doorbell.
- If your wire is coming from an outdoor outlet or has been routed along the exterior, ensure it reaches the mounting bracket with some extra length for connection. You may need to drill a small hole for the wire to pass through the wall behind the doorbell itself.
Connecting the Wires to the Ring Doorbell
This is the moment of truth – connecting your power source to the Ring Doorbell.
- Stripping the Wires: Carefully strip about half an inch (1 cm) of insulation from the ends of your low-voltage wires.
- Connecting to Terminals: Most Ring Doorbell wired models have two screw terminals on the back. Loosen these screws, wrap the stripped ends of your wires around the screws, and then tighten them securely. The order of the wires generally doesn’t matter for Ring’s wired doorbells, but double-check your specific model’s manual to be absolutely sure.
- Securing the Doorbell: Once the wires are connected, carefully push any excess wire back into the wall (if applicable) and then attach the Ring Doorbell to its mounting bracket. It should snap or screw into place.
Testing and Configuring Your Ring Doorbell
With the doorbell physically installed and wired, it’s time to bring it to life and configure it through the Ring app. This is where the Tech aspect truly shines, as you integrate this gadget into your digital life.
Powering Up and Initial Setup
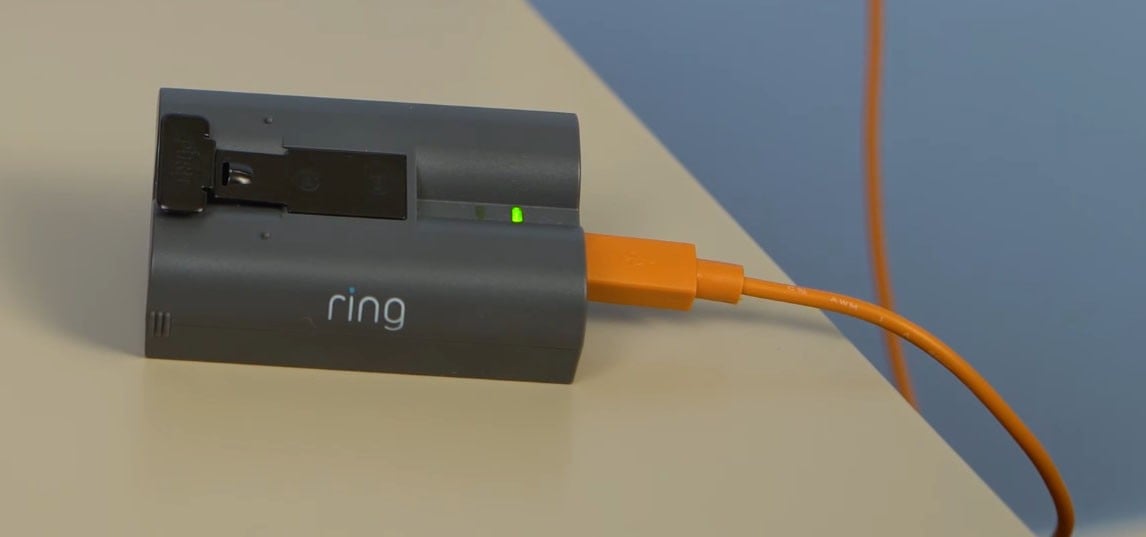
- Power On: Once the doorbell is mounted and wired correctly, power should be supplied to it from your transformer. You’ll likely see an indicator light on the Ring Doorbell illuminate, signaling it’s powered on.
- Download the Ring App: If you haven’t already, download the Ring app from your smartphone’s app store (iOS or Android).
- Create an Account/Log In: Open the app and either create a new Ring account or log in to your existing one.
- Add a Device: In the Ring app, select the option to “Set Up a Device” and choose “Doorbells.”
- Scan the QR Code: Your Ring Doorbell will have a QR code on its packaging or on the device itself. The app will prompt you to scan this code to link the doorbell to your account.
- Follow In-App Instructions: The app will guide you through connecting the doorbell to your Wi-Fi network, naming your device, and configuring basic settings.
Configuring Your Ring Doorbell Settings
The Ring app is your command center for customizing your doorbell’s behavior.
- Motion Detection Zones: You can define specific areas within the camera’s view where you want to receive motion alerts. This helps reduce false notifications from passing cars or distant movement.
- Alert Settings: Customize how and when you receive notifications – for motion, for button presses, or for both. You can also adjust the sensitivity of motion detection.
- Video Quality: Choose your preferred video resolution and quality settings.
- Two-Way Talk: Test the audio quality and practice using the two-way talk feature to communicate with visitors.
- Ring Protect Plan (Optional): For video history and advanced features like person detection, you’ll need to subscribe to a Ring Protect Plan. This ties into the Money aspect, as it’s an ongoing cost for enhanced security.
Ensuring Long-Term Security and Maintenance
A wired Ring Doorbell, once installed and configured, offers a significant boost to your home security. However, like any electronic device, it benefits from occasional checks.
Protecting Your Investment and Ensuring Reliability
- Weatherproofing: While Ring Doorbells are designed for outdoor use, ensure that all external wire connections are properly insulated and protected from the elements. If you ran wires externally, consider using outdoor-rated conduits or covers for added protection.
- Firmware Updates: Keep your Ring app updated, as this ensures your doorbell receives the latest firmware updates. These updates often include security patches and performance improvements.
- Wi-Fi Signal Strength: A strong and stable Wi-Fi connection is critical for a wired Ring Doorbell’s performance. If you experience connectivity issues, consider a Wi-Fi extender or mesh network.
- Regular Testing: Periodically test the motion detection and two-way talk features to ensure everything is working as expected.
Troubleshooting Common Issues
While the installation process is generally smooth, you might encounter minor hiccups.
- No Power: If your Ring Doorbell isn’t powering on, the first step is to re-check your transformer and all wire connections. Ensure the transformer is plugged in and functional, and that the low-voltage wires are securely connected to both the transformer and the doorbell.
- Poor Video Quality: This is often due to a weak Wi-Fi signal. Try moving your router closer to the doorbell, or consider a Wi-Fi extender.
- False Alerts: Adjust your motion detection zones and sensitivity settings in the Ring app.
- App Connectivity Issues: Ensure your phone has a stable internet connection and that the Ring app is up to date.
By following these steps, you can successfully install a wired Ring Doorbell even without an existing doorbell setup, enhancing your home’s security and connectivity. This project beautifully blends Tech innovation with practical home improvement, offering a tangible benefit to your personal Brand as a savvy homeowner, and ultimately contributing to the overall Money you invest in your property’s safety and value.
aViewFromTheCave is a participant in the Amazon Services LLC Associates Program, an affiliate advertising program designed to provide a means for sites to earn advertising fees by advertising and linking to Amazon.com. Amazon, the Amazon logo, AmazonSupply, and the AmazonSupply logo are trademarks of Amazon.com, Inc. or its affiliates. As an Amazon Associate we earn affiliate commissions from qualifying purchases.