In today’s rapidly evolving digital landscape, understanding and utilizing essential development tools is paramount. Whether you’re a budding programmer, a seasoned software architect, or simply a tech enthusiast looking to expand your skillset, mastering package management is a crucial step. For Mac users, one of the most fundamental tools to grasp is npm, the Node Package Manager. This comprehensive guide will walk you through the entire process of installing npm on your Mac, ensuring you’re equipped to leverage its power for your projects.
npm is the de facto package manager for JavaScript, a language that underpins a vast majority of web development, from front-end frameworks like React and Vue to back-end technologies like Node.js. It allows developers to easily share and reuse code, manage dependencies for their projects, and streamline the development workflow. Effectively, npm acts as a central repository and a command-line tool that makes it incredibly simple to install, update, and manage the various libraries and tools that power modern applications.
The beauty of npm lies in its simplicity and its integration with Node.js. While you can install npm independently, the most common and recommended method is to install Node.js, as npm is bundled with it by default. This means that by installing Node.js, you’re simultaneously acquiring npm, setting you up for a frictionless development experience.
Understanding npm and its Importance
Before we dive into the installation process, let’s take a moment to appreciate what npm is and why it’s so vital in the tech ecosystem.
What is npm?
npm stands for Node Package Manager. At its core, it’s a collection of command-line utilities and a vast online registry of JavaScript packages. Think of it as an app store specifically for code. Developers create reusable pieces of code, package them up, and submit them to the npm registry. Then, using the npm command-line interface (CLI), developers can search for, download, and install these packages into their own projects with just a few simple commands.
Why is npm Essential for Mac Users?
For anyone working with JavaScript on a Mac, npm is an indispensable tool. Here’s why:
- Dependency Management: Modern software development is rarely about writing every line of code from scratch. Projects rely on numerous external libraries and frameworks (dependencies). npm automates the process of downloading, installing, and managing these dependencies, ensuring that your project has all the necessary components and that they are compatible with each other. This saves immense amounts of time and reduces the risk of errors.
- Code Reusability and Sharing: npm fosters a collaborative environment. Developers can easily share their work with the community, and others can benefit from it. This leads to faster development cycles, as developers don’t have to reinvent the wheel for common functionalities.
- Tooling and Automation: Beyond libraries, npm is also used to manage development tools. This includes build tools (like Webpack and Gulp), linters (like ESLint), testing frameworks (like Jest), and task runners. npm allows you to install these tools globally or on a per-project basis, making your development workflow more efficient and automated.
- Consistency and Reproducibility: By defining project dependencies in a
package.jsonfile, npm ensures that anyone working on the project, or deploying it, can install the exact same versions of all required packages. This leads to consistent environments and reduces the dreaded “it works on my machine” problem. - Vast Ecosystem: The npm registry is the largest software registry in the world, boasting millions of packages covering virtually every imaginable use case. This vast ecosystem means you’re likely to find pre-built solutions for most of your development challenges.
Installing Node.js and npm on Your Mac
As mentioned earlier, the most straightforward and recommended way to install npm on your Mac is by installing Node.js. Node.js is a JavaScript runtime environment that allows you to execute JavaScript code outside of a web browser, making it perfect for server-side development, command-line tools, and much more.
There are a few primary methods for installing Node.js (and therefore npm) on your Mac, each with its own advantages.
Method 1: Using the Official Node.js Installer (Recommended for Beginners)
This is the simplest method for most users, especially if you’re new to Node.js and npm.
Step 1: Download the Node.js Installer
- Open your web browser and navigate to the official Node.js website: https://nodejs.org/.
- You’ll be presented with two download options:
- LTS (Long Term Support): This is the recommended version for most users. It’s stable, well-tested, and receives ongoing support, making it ideal for production environments.
- Current: This version includes the latest features and may be more suitable for users who want to experiment with cutting-edge capabilities. For installation purposes, either will work, but LTS is generally preferred.
- Click on the installer button for your preferred version (LTS is usually highlighted). This will download a
.pkgfile to your computer.
Step 2: Run the Installer
- Locate the downloaded
.pkgfile (usually in your Downloads folder). - Double-click the file to launch the Node.js installer.
- Follow the on-screen instructions. The installer is straightforward:
- You’ll see an introduction screen; click “Continue.”
- Review the software license agreement and click “Continue,” then “Agree” if you accept the terms.
- Choose the destination for the installation. The default location is usually fine for most users; click “Install.”
- You may be prompted to enter your Mac’s administrator password to authorize the installation.
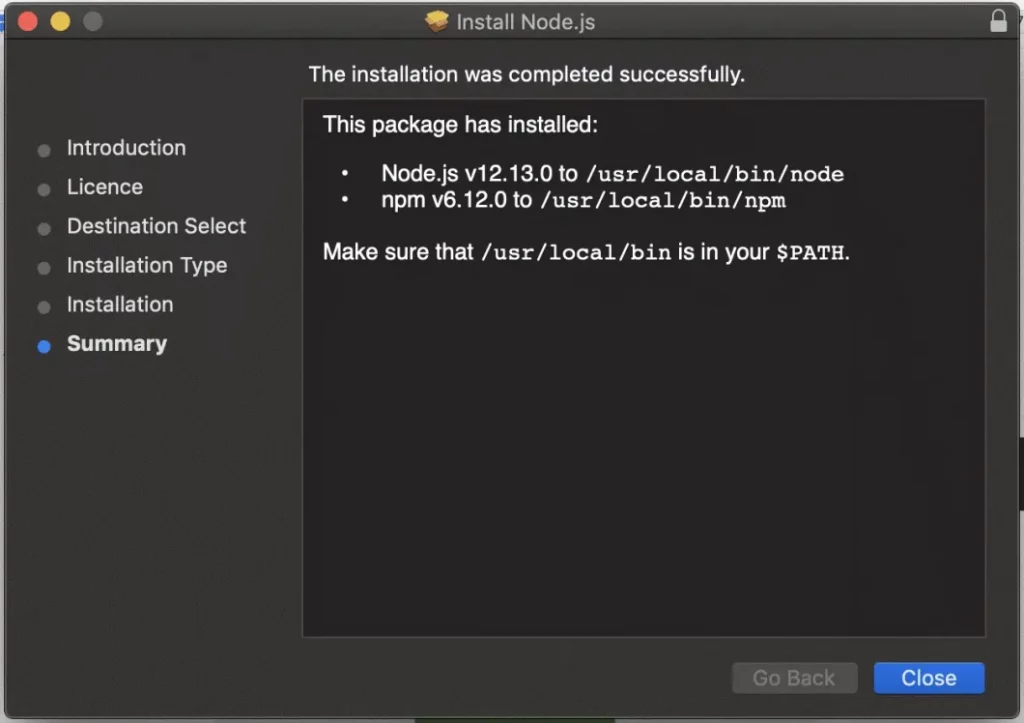
- The installer will proceed, copying files to your system. Once complete, you’ll see a confirmation screen. Click “Close.”
Step 3: Verify the Installation
After the installation is complete, it’s crucial to verify that Node.js and npm have been installed correctly and are accessible from your terminal.
- Open the Terminal application. You can find it in your Applications folder under Utilities, or by searching for “Terminal” using Spotlight (Command + Space).
- In the Terminal window, type the following command and press Enter:
bash

node -v
This command will display the installed Node.js version. If it shows a version number (e.g.,v18.17.1), Node.js is installed correctly. - Next, verify the npm installation by typing:
bash

npm -v
This command will display the installed npm version. If it shows a version number (e.g.,9.6.7), npm is also installed correctly.
If both commands return version numbers, you’ve successfully installed Node.js and npm on your Mac! You’re now ready to start using npm to manage your project dependencies.
Method 2: Using a Version Manager (Recommended for Advanced Users and Multiple Projects)
For developers who work on multiple projects that might require different versions of Node.js or npm, using a version manager is highly recommended. Version managers allow you to easily switch between different Node.js installations without conflicts. The most popular Node.js version manager is nvm (Node Version Manager).
Installing nvm
- Open Terminal: Launch your Terminal application.
- Install nvm: You can install nvm by running a script directly from its GitHub repository. The recommended way is to use
curlorwget. Check the official nvm GitHub repository for the most up-to-date installation command, as it might change. As of my last update, the command typically looks like this:
bash

curl -o- https://raw.githubusercontent.com/nvm-sh/nvm/v0.39.3/install.sh | bash
Replacev0.39.3with the latest version if a newer one is available. - Restart your Terminal: After the script finishes, close and reopen your Terminal window. This ensures that nvm is loaded into your shell environment.
- Verify nvm Installation: To check if nvm is installed correctly, run:
bash

command -v nvm
If nvm is installed, this command should outputnvm.
Using nvm to Install Node.js and npm
Once nvm is installed, you can use it to install specific versions of Node.js.
- Install the Latest LTS Version:
bash

nvm install --lts
This command will download and install the latest Long Term Support version of Node.js and its associated npm.

-
Install a Specific Version: If you need a particular version (e.g., Node.js v18):
nvm install 18 -
Use a Specific Version: After installing, you need to tell nvm which Node.js version to use for your current shell session:
nvm use --lts # To use the latest LTS versionor
nvm use 18 # To use Node.js version 18 -
Set a Default Version: To have a specific Node.js version used automatically whenever you open a new terminal window, you can set it as the default:
nvm alias default ltsor
nvm alias default 18 -
Verify Node.js and npm: After using a specific version, verify the installations as described in Method 1:
bash

node -v

npm -v
Using nvm provides immense flexibility for managing different project environments, which is a significant advantage for professional development.
Managing npm Packages: Your Next Steps
With npm successfully installed on your Mac, you’re ready to embark on the exciting world of package management. Here are some fundamental commands and concepts to get you started:
The package.json File
Every npm project typically starts with a package.json file. This JSON file acts as the manifest for your project, containing essential metadata such as:
- Name and Version: Identifies your project.
- Dependencies: Lists all the npm packages your project needs to run (and their versions).
- Dev Dependencies: Lists packages only needed for development (e.g., testing tools, build tools).
- Scripts: Defines custom commands you can run via npm (e.g.,
npm start,npm test).
Creating a package.json File
Navigate to your project’s root directory in the Terminal and run:
npm init -y
The -y flag will accept all default prompts, quickly creating a basic package.json file. For more control, you can run npm init without -y to answer the questions interactively.
Installing Packages
To install a package for your project:
npm install <package-name>
For example, to install the popular utility library Lodash:
npm install lodash
This command will download Lodash and its dependencies, place them in a node_modules folder within your project, and add lodash to your dependencies in package.json.
To install a package as a development dependency (e.g., a testing library like Jest):
npm install --save-dev jest
Or the shorthand:
npm install -D jest
Updating and Uninstalling Packages
- Update all packages:
bash

npm update
- Uninstall a package:
bash

npm uninstall <package-name>
Running Scripts
You can define and run custom scripts in your package.json file. For instance, if you have a start script defined, you can run it with:
npm start

Conclusion
Installing npm on your Mac is a foundational step for anyone venturing into modern web development or utilizing JavaScript-powered tools. By understanding the role of Node.js and npm, and by following the straightforward installation methods outlined in this guide – either through the official installer for simplicity or a version manager like nvm for flexibility – you’re well-equipped to begin your journey.
npm’s robust package management capabilities empower you to build complex applications efficiently, leverage a vast ecosystem of reusable code, and maintain consistent development environments. As you continue to explore the vast possibilities within the JavaScript world, remember that a well-configured npm installation is your gateway to unlocking powerful tools and collaborative innovation. Happy coding!
aViewFromTheCave is a participant in the Amazon Services LLC Associates Program, an affiliate advertising program designed to provide a means for sites to earn advertising fees by advertising and linking to Amazon.com. Amazon, the Amazon logo, AmazonSupply, and the AmazonSupply logo are trademarks of Amazon.com, Inc. or its affiliates. As an Amazon Associate we earn affiliate commissions from qualifying purchases.