Minecraft, the voxel-based sandbox phenomenon, has captivated millions globally with its boundless creativity and adventure. While the vanilla game offers an incredible experience, a vibrant community of mod developers constantly pushes its boundaries, introducing new features, optimizations, and gameplay enhancements. Among these innovations, “utility clients” have carved out a significant niche, particularly for players who delve into the more challenging and competitive aspects of Minecraft, such as anarchy servers or specialized PvP environments. One such prominent utility client is Meteor Client.
Meteor Client stands out as a powerful, feature-rich, and open-source solution designed to provide users with an extensive suite of tools to customize and optimize their Minecraft experience. From sophisticated combat assists to nuanced rendering options and quality-of-life improvements, Meteor Client empowers players with a level of control and functionality far beyond what the base game offers. However, like any third-party software, getting it up and running requires a clear, step-by-step approach. This comprehensive guide will walk you through the entire process of installing Meteor Client, ensuring you can seamlessly integrate it into your Minecraft setup and unlock its full potential.
Understanding Meteor Client: What It Is and Why You Need It
Before diving into the technicalities of installation, it’s crucial to understand what Meteor Client is and the unique advantages it brings to your Minecraft sessions. Often categorized as an “anarchy client” or “utility mod,” Meteor Client is a modification that adds a vast array of features not present in the standard Minecraft client. These features range from subtle tweaks that improve user interface and performance to more significant additions that alter gameplay mechanics.
Elevating Your Minecraft Experience
At its core, Meteor Client is about providing players with more information, control, and automation. Imagine being able to see hostile entities through walls, automatically dodge incoming projectiles, or efficiently manage inventory without constantly opening menus. These are just a few examples of how Meteor Client can fundamentally transform your interaction with the game world. It’s particularly popular among players navigating the chaotic and unrestricted environments of anarchy servers, where survival and resource acquisition often depend on leveraging every possible advantage. For those in competitive PvP, the precise controls and automated actions offered by Meteor Client can mean the difference between victory and defeat. Beyond competitive play, many of its modules serve to enhance general gameplay convenience, making long mining trips less tedious or base building more precise. It’s an evolution of the Minecraft client, designed to cater to advanced users seeking to push the limits of their gameplay.
Key Features and Advantages
Meteor Client boasts an impressive array of modules, each designed to serve a specific purpose. These modules are typically categorized for easy navigation within the client’s in-game GUI (Graphical User Interface). While the exact features can evolve with updates, some common and highly valued functionalities include:
- Combat Modules: Features like Killaura (automatically attacking nearby entities), Criticals (ensuring critical hits), and Auto-Crystal (placing and breaking end crystals for damage) give players an edge in combat scenarios. These tools require careful and ethical consideration, especially on servers that prohibit such enhancements.
- Movement Modules: Options like Fly (allowing players to fly in survival mode), Speed (increasing movement speed), and ElytraFlight (enhancing elytra gliding) offer unparalleled mobility, crucial for exploration and escaping dangerous situations.
- Render Modules: Visual enhancements such as ESP (Extra Sensory Perception, outlining entities and blocks), X-Ray (seeing through blocks to find ores or bases), and Freecam (detaching your camera from your player model) provide a significant informational advantage, helping players locate resources, scout areas, or track opponents.
- Player & World Modules: Tools for automatic farming, inventory management, automatic item eating, and interacting with specific game mechanics.
- Quality of Life: Small but impactful features that streamline common tasks, improve chat functions, and offer detailed information overlays (HUDs).
The primary advantage of Meteor Client lies in its comprehensive nature and its regular updates, which ensure compatibility with the latest Minecraft versions and address new anti-cheat measures. Its open-source nature also fosters a community of users and developers, contributing to its robustness and continuous improvement. By providing a centralized platform for these powerful tools, Meteor Client saves players the hassle of installing numerous individual mods, offering a streamlined and integrated experience.
Pre-Installation Checklist: Preparing Your System
Before you can enjoy the enhanced gameplay that Meteor Client offers, it’s essential to ensure your system is properly prepared. Skipping these preliminary steps can lead to installation failures, crashes, or an inability to launch the client. Think of this as laying the foundation before building a house – a sturdy base is critical for success.
Essential Software: Java and Minecraft
Meteor Client, like most Minecraft mods and clients, is built on Java. Therefore, having the correct version of Java installed and properly configured on your system is non-negotiable.
- Java Development Kit (JDK) or Runtime Environment (JRE):
- Which Version? The required Java version depends heavily on the Minecraft version you intend to use with Meteor Client.
- For older Minecraft versions (e.g., 1.12.2, 1.16.5), Java 8 is typically sufficient and often recommended.
- For newer Minecraft versions (e.g., 1.17, 1.18, 1.19, 1.20 and above), Java 17 or later (such as Java 21 for Minecraft 1.20.5+) is usually required.
- Checking Your Java Version:
- Open your command prompt or terminal.
- Type
java -versionand press Enter. - The output will show your currently installed Java version.
- Installation/Update: If you don’t have the correct Java version, you’ll need to download and install it.
- Recommended Source: Always download Java from official or reputable sources. Adoptium (formerly AdoptOpenJDK) is a popular and trustworthy source for open-source Java distributions (Temurin JDK). Oracle also provides official JDK downloads.
- Process: Visit the chosen website, select the appropriate Java version and your operating system (Windows, macOS, Linux), download the installer, and follow the on-screen instructions. Make sure to choose the correct architecture (x64 for most modern systems).
- Which Version? The required Java version depends heavily on the Minecraft version you intend to use with Meteor Client.
- Minecraft Launcher: You must have the official Minecraft Launcher installed and functional. Meteor Client integrates directly into this launcher, creating new profiles for easy selection. Ensure you have run your desired Minecraft version at least once in the vanilla launcher before installing Meteor Client. This ensures all necessary vanilla game files are downloaded and configured.
System Requirements and Compatibility
While Meteor Client itself is relatively lightweight, running Minecraft with additional modifications can increase resource consumption.
- Operating System: Meteor Client supports Windows, macOS, and Linux, mirroring Minecraft’s own compatibility.
- RAM (Memory): While vanilla Minecraft typically runs on 4-6GB of RAM, allocating 6-8GB or more is advisable when using utility clients and mods, especially on anarchy servers with many entities or complex rendering. You can adjust RAM allocation in the Minecraft Launcher’s profile settings.
- Processor (CPU) & Graphics Card (GPU): A modern multi-core processor and a dedicated graphics card (even an entry-level one) will provide a smoother experience, particularly when using performance-intensive modules like advanced ESP or complex rendering options.
- Internet Connection: A stable internet connection is required for downloading the client and for online multiplayer gameplay.
- Disk Space: Meteor Client itself is small, but Minecraft and Java installations require a few gigabytes of free disk space.
It’s also important to note compatibility with other mods. While Meteor Client can coexist with some client-side fabric mods, it’s generally best to install it into a clean Minecraft instance to avoid conflicts. Server-side mods are a different story and won’t directly conflict with Meteor Client’s client-side functionality. Always back up your .minecraft folder before making significant changes to your game files. This precaution ensures you can easily revert to a previous state if something goes wrong.
Step-by-Step Installation: Getting Meteor Client Up and Running
With your system prepared, you’re ready for the core process: installing Meteor Client. The developers have made this remarkably user-friendly through a dedicated installer, simplifying what could otherwise be a complex manual process.
Downloading the Meteor Client Installer
The first and most critical step is to obtain the Meteor Client installer. Always download software from its official source to ensure authenticity and avoid malicious files.
- Visit the Official Website: Navigate your web browser to the official Meteor Client website. While specific URLs can change, a quick search for “Meteor Client official website” should lead you to
meteorclient.comor similar. Be wary of unofficial mirrors or download sites. - Locate the Download Section: On the website, look for a “Download” or “Releases” section.
- Select the Correct Version: Meteor Client is constantly updated to support new Minecraft versions. You will typically see a list of available versions (e.g., for Minecraft 1.20.4, 1.19.4, 1.18.2, etc.). Crucially, download the installer that matches the specific Minecraft version you intend to play with. Downloading the wrong version will lead to installation errors or crashes.
- Download the
.jarFile: Click on the download link for the chosen version. This will typically initiate the download of a.jarfile, which is the executable installer. Your browser might issue a warning about downloading.jarfiles; you can safely proceed if you’re certain it’s from the official source.
Once downloaded, locate the .jar file in your Downloads folder or wherever your browser saves files.
Running the Installation Process
The Meteor Client installer is designed to be straightforward, automating most of the integration with your Minecraft Launcher.
- Execute the Installer:
- Double-click the downloaded Meteor Client
.jarfile. - If Java is correctly installed and associated with
.jarfiles, the installer GUI should pop up. If it doesn’t, ensure Java is properly installed and try right-clicking the.jarfile, then selecting “Open with” and choosing your Java executable (e.g.,javaw.exe).
- Double-click the downloaded Meteor Client
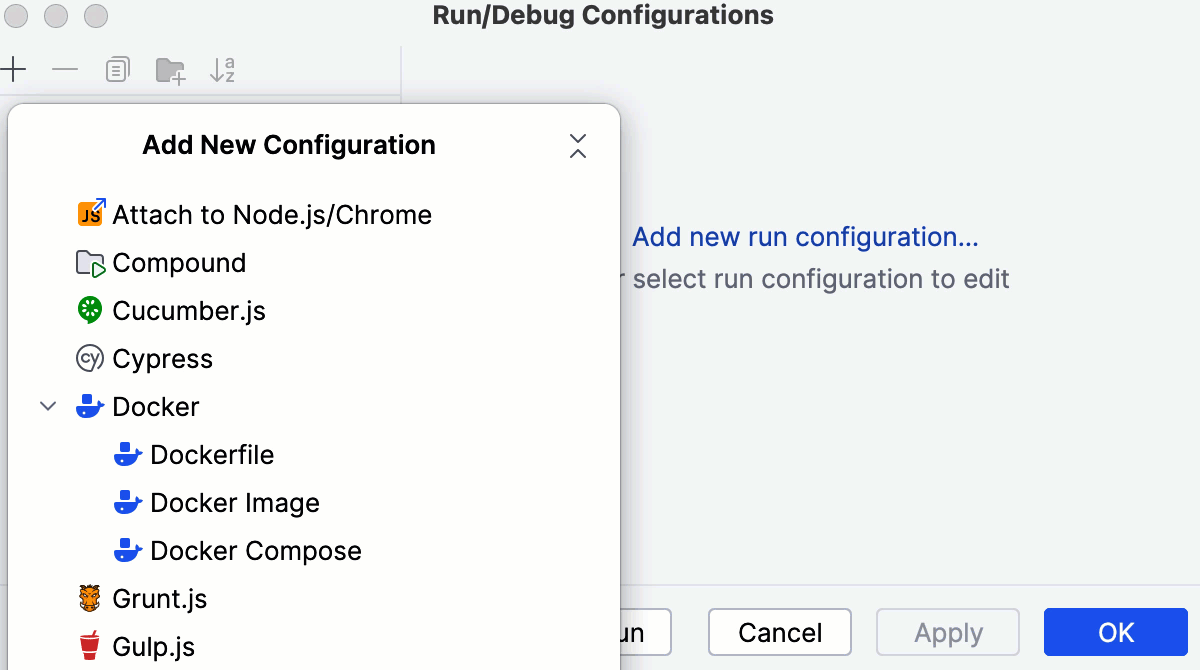
- Installer Interface: The Meteor Client installer window will appear. It’s usually quite minimalistic, displaying:
- Minecraft Version Selection: This dropdown should default to the latest installed Minecraft version that the client supports. Double-check that this matches the Minecraft version you downloaded the client for.
- Installation Location: It will typically detect your
.minecraftfolder automatically. Unless you have a custom setup, it’s best to leave this as the default. - Options: There might be checkboxes for additional components or settings. For a first-time installation, leaving these at their defaults is usually fine.
- Initiate Installation: Click the “Install” or “Install Client” button.
- Completion: The installer will proceed to:
- Download any necessary supplementary files.
- Create a new game profile within your Minecraft Launcher.
- Place the Meteor Client files in the appropriate location within your
.minecraft/versionsfolder. - You should see a “Installation Complete” or similar message upon success.
Integrating with Your Minecraft Launcher
![]()
The installer automatically handles this step, but it’s good to understand what happens and how to verify it.
- Open Minecraft Launcher: Close the Meteor Client installer and open your official Minecraft Launcher.
- Select Profile: Look for the profile selection dropdown menu, usually located on the bottom-left of the launcher window.
- Find “Meteor Client”: You should now see a new profile named something like “Meteor Client [Minecraft Version]” (e.g., “Meteor Client 1.20.4”). Select this profile.
- Verify Configuration:
- Click on “Installations” at the top of the launcher.
- Locate the “Meteor Client” entry.
- Hover over it and click the “…” (more options) button, then “Edit.”
- Here you can review game directory, resolution, and, most importantly, Java executable and JVM arguments. Ensure the Java version specified here matches the one required by Meteor Client and that the RAM allocation (
-Xmxargument) is sufficient (e.g.,-Xmx6Gfor 6GB). Adjust if necessary, but the installer usually sets reasonable defaults.
You are now ready to launch Minecraft with Meteor Client!
Post-Installation: First Launch and Basic Configuration
With Meteor Client successfully installed, the next exciting step is to launch it and begin customizing your enhanced Minecraft experience. This section guides you through the initial startup and introduces you to the client’s essential configuration options.
Launching Minecraft with Meteor Client
This is the moment of truth!
- Open Minecraft Launcher: Ensure the launcher is open.
- Select Meteor Client Profile: From the profile dropdown on the bottom left, select the “Meteor Client [Minecraft Version]” profile you verified earlier.
- Click “Play”: Hit the large “Play” button.
- Security Warning (if applicable): The Minecraft Launcher might display a warning about playing a modified version of the game. This is standard for any modded client; acknowledge and proceed by clicking “Play” again.
- Game Loading: Minecraft will now launch. You might notice a slightly different splash screen or loading messages indicating Meteor Client is loading. This initial load might take a bit longer than vanilla Minecraft, as the client initializes all its modules.
- In-Game Confirmation: Once you’re on the main menu, you might see “Meteor Client” text or a version number displayed, confirming that it has loaded successfully.
Congratulations! You’ve successfully launched Minecraft with Meteor Client.
Navigating the Meteor Client Interface
The true power of Meteor Client lies within its in-game Graphical User Interface (GUI), through which you can enable, disable, and configure its myriad modules.
- Open the GUI: By default, the Meteor Client GUI is opened by pressing the Right Shift key. Press it while in-game (either in a single-player world or on a multiplayer server).
- GUI Layout: The GUI typically appears as an overlay with several key components:
- Module Categories: On one side (often the left), you’ll see a list of categories (e.g., Combat, Movement, Render, Player, World, Misc, Fun, Client). These help organize the vast number of modules.
- Module List: Clicking on a category will display all modules belonging to that category. Each module will have a name and a toggle button (usually a checkbox or a simple “On/Off” switch).
- Module Settings: Clicking on a module’s name (not its toggle) will often open a panel on the other side of the screen, revealing detailed settings specific to that module. This is where you fine-tune parameters like speed values, detection ranges, color options, and keybinds.
- Search Bar: Many clients include a search bar to quickly find specific modules among hundreds.
- Config/Settings Button: There’s usually a button or section for global client settings, profiles, and saving/loading configurations.
- Navigation: You can navigate the GUI using your mouse. Click on categories, modules, and settings to make your selections.
- Closing the GUI: Press
Right Shiftagain to close the GUI and return to gameplay.
Spend some time exploring the GUI, familiarizing yourself with the categories and the types of modules available. Don’t feel pressured to enable everything at once.
Essential Settings and Customization
To make Meteor Client truly your own, you’ll want to dive into some initial customization.
- Keybinds: While
Right Shiftis the default for the GUI, you can change this and also assign specific keybinds to toggle individual modules on or off without opening the full GUI. This is crucial for quick activation in critical situations. Look for a “Keybinds” section within the client’s global settings or within individual module settings. - Module Configuration:
- Start Simple: Begin by enabling and configuring a few non-disruptive modules first, such as a custom HUD (Heads-Up Display) or a render module that outlines ores.
- Experiment Safely: Test modules in a single-player world before taking them to multiplayer, especially those that interact heavily with game mechanics. This helps you understand their behavior and avoid potential server rule violations.
- Adjust Parameters: Many modules have sliders, dropdowns, or text fields for precise adjustments. For example, a “Speed” module might allow you to set the exact movement multiplier, or an “ESP” module might let you customize colors for different entities.
- Profiles and Configurations: Meteor Client often allows you to save and load different configurations (profiles). This is incredibly useful if you play on multiple servers with different rules or have different playstyles. You might have one profile for anarchy servers with many aggressive modules, and another, more subtle profile for casual gameplay.
- Performance Settings: Within the client’s settings, you might find options to optimize performance. This could include adjusting rendering distances for ESP, disabling certain visual effects, or fine-tuning how modules interact with the game engine to reduce lag.
By carefully configuring your modules and settings, you can tailor Meteor Client to perfectly match your playstyle and the specific demands of the servers you frequent.
Troubleshooting Common Issues
While the Meteor Client installation process is generally smooth, issues can arise. Knowing how to diagnose and resolve common problems will save you time and frustration, getting you back to enhanced gameplay faster.
Addressing Installation Errors
Most installation problems stem from prerequisites or file integrity.
- “Java Not Found” or Installer Won’t Open:
- Symptom: Double-clicking the
.jarinstaller does nothing, or a “Java not found” error appears. - Solution: This almost always means Java is not installed, or your system isn’t associating
.jarfiles with Java.- Verify Java: Re-check your Java installation using
java -versionin the command prompt. - Install/Update Java: Ensure you have the correct Java version (Java 8 for older MC, Java 17+ for newer MC) from a reputable source like Adoptium.
- Associate
.jarfiles: Right-click the Meteor Client.jarfile, select “Open with,” then “Choose another app,” and navigate to your Java executable (javaw.exetypically found inC:Program FilesJavajdk-[version]bin). Check “Always use this app to open .jar files.”
- Verify Java: Re-check your Java installation using
- Symptom: Double-clicking the
- “Installation Failed” or “Error Installing Client”:
- Symptom: The installer encounters an error and fails to complete.
- Solution:
- Incorrect Minecraft Version: Ensure the Meteor Client installer you downloaded precisely matches the Minecraft version you have installed and selected in the installer.
- Corrupted Download: The
.jarinstaller file might be corrupted. Delete it and re-download from the official website. - Permissions: Ensure your user account has the necessary write permissions to the
.minecraftfolder. Running the installer as administrator (right-click, “Run as administrator”) can sometimes resolve this, though usually not required. - Antivirus Interference: Temporarily disable your antivirus/firewall to see if it’s blocking the installer. Remember to re-enable it afterward.
- Meteor Client Profile Missing in Launcher:
- Symptom: After successful installation, the “Meteor Client” profile doesn’t appear in the Minecraft Launcher.
- Solution:
- Restart Launcher: Close and reopen the Minecraft Launcher. Sometimes it needs a refresh.
- Manual Check: Navigate to your
.minecraft/versionsfolder. Look for a folder namedMeteor Client-[version](e.g.,Meteor Client 1.20.4). If it’s not there, the installation truly failed, and you need to re-run the installer. If it is there, try adding a new installation profile manually in the launcher, pointing it to the correct.jarfile within that folder.
Performance Optimization Tips
Even with a successful installation, you might encounter performance issues.
- Game Crashing on Launch/In-Game:
- Symptom: Minecraft crashes with an “Exit Code” or “JVM crash.”
- Solution:
- Allocate More RAM: This is a common culprit. In the Minecraft Launcher, go to “Installations,” edit the Meteor Client profile, go to “More Options,” and increase the “JVM Arguments”
-Xmxvalue (e.g., from-Xmx2Gto-Xmx6G). Ensure you don’t allocate too much RAM (e.g., leaving less than 2-4GB for your OS). - Conflicting Mods: If you have other Fabric mods installed, they might conflict. Try running Meteor Client on a clean Minecraft installation.
- Outdated Graphics Drivers: Ensure your graphics card drivers are up to date.
- Check Logs: The crash report (
.minecraft/crash-reports) can provide valuable clues about the cause.
- Allocate More RAM: This is a common culprit. In the Minecraft Launcher, go to “Installations,” edit the Meteor Client profile, go to “More Options,” and increase the “JVM Arguments”
- Lag or Low FPS:
- Symptom: The game runs slowly, stutters, or has very low frames per second.
- Solution:
- Reduce Render Distance: Lower your in-game render distance.
- Disable Intensive Modules: Some Meteor Client modules, particularly certain render features (e.g., advanced ESP with many effects, detailed chams), can be resource-intensive. Try disabling them one by one to identify culprits.
- Optimize Video Settings: Adjust standard Minecraft video settings (fast graphics, lower shadows, fewer particles, etc.).
- Check CPU/GPU Usage: Use your system’s task manager (Ctrl+Shift+Esc on Windows) to see if your CPU or GPU is maxing out.
- Fresh Installation: If all else fails, a complete re-installation of Minecraft and Meteor Client can sometimes resolve deeply rooted issues.
- Consider OptiFine/Sodium/Lithium: These are performance-enhancing mods. Meteor Client typically works with Fabric, so consider Sodium/Lithium (Fabric equivalents to OptiFine) for FPS boosts, but check compatibility before installing.
For persistent issues, the Meteor Client community Discord server or official forums are excellent resources. Provide detailed information about your system, Minecraft version, Meteor Client version, and the exact error messages you’re receiving.
Conclusion: Mastering Your Enhanced Minecraft Journey
The installation of Meteor Client marks the beginning of a significantly enriched Minecraft journey. By following this comprehensive guide, you’ve successfully navigated the technical steps, ensuring your system is primed and the client is seamlessly integrated. From understanding its core functionalities and preparing your environment to executing the installation and troubleshooting potential hurdles, you are now equipped to unlock a new dimension of gameplay.
Meteor Client is more than just a collection of hacks; it’s a powerful toolkit that empowers players with unprecedented control and insight into the Minecraft world. Whether you’re an avid explorer, a determined builder, or a seasoned veteran of anarchy servers, the customization options and enhancements available through Meteor Client can transform your approach to the game. Remember to use these tools responsibly and ethically, respecting server rules and the experience of other players.
Dive into the Meteor Client GUI, experiment with its vast array of modules, and discover how its features can streamline your tasks, boost your efficiency, and even spark new creative ways to interact with Minecraft. With this advanced client at your fingertips, the only limit is your imagination. Happy adventuring!
aViewFromTheCave is a participant in the Amazon Services LLC Associates Program, an affiliate advertising program designed to provide a means for sites to earn advertising fees by advertising and linking to Amazon.com. Amazon, the Amazon logo, AmazonSupply, and the AmazonSupply logo are trademarks of Amazon.com, Inc. or its affiliates. As an Amazon Associate we earn affiliate commissions from qualifying purchases.