In the evolving landscape of modern computing, the lines between operating systems are increasingly blurring. For developers, system administrators, and tech enthusiasts alike, the ability to seamlessly integrate the powerful command-line tools and vast open-source ecosystem of Linux with the familiar desktop environment of Windows has become a game-changer. This guide will walk you through the process of installing Linux on Windows 10, primarily leveraging the Windows Subsystem for Linux (WSL), transforming your Windows machine into a dual-powered workstation.
The integration of Linux on Windows offers unparalleled flexibility. Gone are the days of complex dual-boot setups or resource-intensive virtual machines for basic Linux tasks. With WSL, you can run a full-fledged Linux distribution directly within Windows, accessing its file system, command-line utilities, and even graphical applications (with WSLg) without ever leaving your Windows desktop. This not only streamlines workflows but also fosters a more productive and versatile computing environment, aligning perfectly with the productivity focus of our tech section. Whether you’re a web developer needing specific server tools, a data scientist leveraging Linux-native libraries, or simply curious about the world of open-source, WSL provides an accessible and efficient pathway.
Unlocking the Power of Linux on Windows: Why WSL Matters
Before diving into the technicalities, it’s crucial to understand why WSL has become such a pivotal tool for many. The benefits extend beyond mere convenience, impacting productivity, development workflows, and even digital security practices.
Bridging the OS Divide for Enhanced Productivity
Traditionally, running Linux on a Windows machine involved either a virtual machine (VM) or a dual-boot setup. VMs, while versatile, can be resource-intensive, often leading to slower performance and a fragmented user experience. Dual-booting, on the other hand, requires partitioning your hard drive and rebooting every time you wish to switch operating systems, which is impractical for quick context switches during development.
WSL, particularly WSL 2, eliminates these hurdles. It provides a lightweight virtualized environment that runs a real Linux kernel, offering near-native performance. This means you can:
- Access Linux command-line tools: Use Bash, Zsh, or other shells directly from Windows Terminal, running commands like
grep,awk,sed,ssh, andrsyncwithout compatibility layers. - Develop with Linux-native tools: Run popular development stacks like LAMP (Linux, Apache, MySQL, PHP), MEAN (MongoDB, Express.js, Angular, Node.js), or MERN (MongoDB, Express.js, React, Node.js) with ease. Utilize compilers, debuggers, and scripting languages (Python, Ruby, Perl) that often have better or exclusive Linux support.
- Streamline containerization: Integrate seamlessly with Docker Desktop, allowing you to build and run Docker containers with a Linux backend, which is essential for modern microservices architectures.
- Improve digital security workflows: Experiment with security tools and scripts often designed for Linux, within a somewhat isolated environment. While not a full security sandbox, it offers more flexibility than trying to port every tool to Windows.
This seamless integration significantly boosts productivity, allowing developers to focus on coding and problem-solving rather than wrestling with environment setups. For businesses, this translates to faster development cycles and more efficient resource utilization, directly impacting potential “Money” opportunities through quicker time-to-market for software products or services.
Understanding WSL 1 vs. WSL 2
When WSL was first introduced, it leveraged a compatibility layer to translate Linux system calls into Windows system calls (WSL 1). While innovative, it had performance limitations, especially with file I/O, and couldn’t run all Linux applications due to the absence of a true Linux kernel.
WSL 2 was a major overhaul. Instead of a translation layer, it runs a full, genuine Linux kernel within a lightweight utility virtual machine. This brings several advantages:
- Full system call compatibility: WSL 2 can run all Linux applications, including Docker, FUSE, and more.
- Significantly improved file system performance: Especially when working with Linux files, WSL 2 offers dramatically faster I/O operations, making it ideal for large development projects.
- Enhanced networking performance: Better network stack performance and compatibility.
For these reasons, WSL 2 is the recommended version for almost all users. This guide will focus on setting up WSL 2.
Your Linux Journey Begins: Prerequisites and System Preparation
Before you can embark on your Linux installation, ensure your Windows 10 system is ready. A little preparation goes a long way in ensuring a smooth setup process.
System Requirements and Updates
To get the most out of WSL 2, your Windows 10 installation needs to meet specific criteria:
- Windows 10, version 1903 or higher, with Build 18362 or higher for x64 systems.
- Windows 10, version 2004 or higher, with Build 19041 or higher for ARM64 systems.
You can check your Windows version by pressingWin + R, typingwinver, and hitting Enter. If your version is older, it’s highly recommended to update Windows 10 to the latest available version through Windows Update (Settings > Update & Security > Windows Update). Regular updates not only bring new features but also crucial security patches and performance improvements, aligning with best practices for digital security.
Enabling Virtualization
WSL 2 relies on virtualization technology. You’ll need to ensure that virtualization is enabled in your computer’s BIOS/UEFI settings. The exact steps vary by manufacturer, but generally involve:
- Restarting your computer.
- During boot-up, repeatedly pressing a specific key (e.g.,
F2,Del,F10,F12,Esc) to enter the BIOS/UEFI setup. - Navigating to a section typically labeled “CPU Configuration,” “Virtualization Technology,” “Intel VT-x,” “AMD-V,” or similar.
- Enabling the relevant virtualization option.
- Saving changes and exiting BIOS/UEFI.
If virtualization is not enabled, you will encounter errors during the WSL 2 setup.
Step-by-Step Installation: Enabling WSL and Installing a Linux Distribution
With your system prepared, it’s time to activate WSL and install your preferred Linux distribution. We’ll use PowerShell for most of these steps, as it provides precise control over Windows features.
Enabling the Windows Subsystem for Linux Features
First, we need to enable the necessary Windows features. Open PowerShell as an administrator. You can do this by searching for “PowerShell” in the Start menu, right-clicking “Windows PowerShell,” and selecting “Run as administrator.”
Once PowerShell is open, execute the following commands one by one. These commands enable the “Windows Subsystem for Linux” feature, which is the foundation, and the “Virtual Machine Platform” feature, which is required for WSL 2’s lightweight virtualization.
dism.exe /online /enable-feature /featurename:Microsoft-Windows-Subsystem-Linux /all /norestart
dism.exe /online /enable-feature /featurename:VirtualMachinePlatform /all /norestart
dism.exe: Deployment Image Servicing and Management tool, used for managing Windows features./online: Specifies that the command is run against the running operating system./enable-feature: Enables a specified Windows feature./featurename:Microsoft-Windows-Subsystem-Linux: The core WSL component./featurename:VirtualMachinePlatform: The virtualization component for WSL 2./all: Enables all parent features of the specified feature (if any)./norestart: Prevents the computer from restarting immediately.
After running these commands, you must restart your computer for the changes to take effect. You will be prompted to do so, or you can restart manually.
Installing the Linux Kernel Update Package
WSL 2 requires a specific Linux kernel update package to function correctly. This package is maintained by Microsoft and ensures that your Windows installation has the necessary kernel components to run a full Linux environment.

- Download the latest WSL 2 Linux kernel update package: Visit the official Microsoft documentation page for WSL. Search for “Download the latest WSL 2 Linux kernel update package” or directly navigate to the download link, which is typically
https://wslstore.blob.core.windows.net/wsl2kernel/wsl_update_x64.msi. - Run the downloaded installer: Once downloaded, simply double-click the
wsl_update_x64.msifile and follow the prompts to install it. This is a straightforward installation process, much like any other Windows application.
Setting WSL 2 as Your Default Version
Now that the kernel is installed, we need to instruct WSL to use version 2 by default for all new Linux distributions you install.
Open PowerShell as an administrator again and run the following command:
wsl --set-default-version 2
You should see a message indicating “For information on key differences with WSL 2, please visit [link]”. This confirms that WSL 2 is now your default. If you encounter an error like “WSL 2 requires an update to its kernel component,” it means the kernel update package from the previous step wasn’t installed correctly or needs to be rerun.
Installing a Linux Distribution from the Microsoft Store
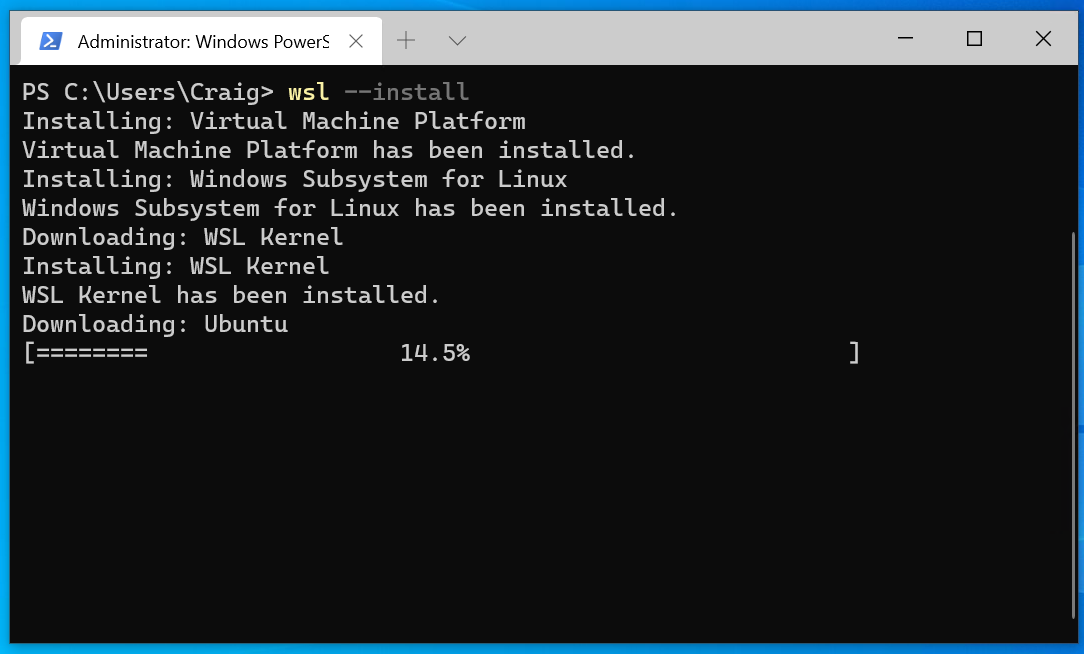
With WSL configured, the next step is to choose and install your preferred Linux distribution. Ubuntu is a popular choice for beginners and experienced users alike due to its vast community support and extensive package repositories.
- Open the Microsoft Store: Click on the Start menu and search for “Microsoft Store” or locate its icon.
- Search for a Linux distribution: In the Microsoft Store, use the search bar to find “Ubuntu.” You’ll see several versions, such as “Ubuntu 22.04 LTS” (Long Term Support) or “Ubuntu 20.04 LTS.” LTS versions are recommended for stability.
- Select and Install: Click on the distribution you wish to install (e.g., Ubuntu 22.04 LTS), then click the “Get” or “Install” button. The download and installation process will begin.
- Launch and Initial Setup: Once the installation is complete, you’ll see a “Launch” button. Click it, or find your newly installed distribution in your Start menu (e.g., “Ubuntu 22.04 LTS”). A console window will open, and you’ll be prompted to:
- Create a UNIX username: This is your Linux username, distinct from your Windows username.
- Create a password: This password will be used for
sudocommands (superuser do) within your Linux environment. Remember it well!
Congratulations! You now have a working Linux distribution running on Windows 10.
Post-Installation: Basic Usage, Integration, and Advanced Tips
Having installed Linux is just the beginning. Understanding how to use it, integrate it with Windows, and leverage its full potential will make your experience truly productive.
Accessing Your Linux Environment
You can launch your installed Linux distribution in several ways:
- From the Start menu: Search for “Ubuntu” (or your chosen distro) and click its icon. This will open a terminal window.
- From Windows Terminal (Recommended): If you don’t have it, download “Windows Terminal” from the Microsoft Store. It’s a modern, powerful terminal application that supports multiple tabs, panes, and profiles for PowerShell, Command Prompt, Azure Cloud Shell, and all your WSL distributions. Once installed, opening Windows Terminal will usually show your WSL distribution as an option in the dropdown menu.
- From PowerShell/CMD: Simply type
wsland press Enter. This will open a session in your default Linux distribution.
Essential Linux Commands and Updates
Once inside your Linux terminal, the first thing you should do is update your package lists and upgrade any installed packages. This ensures you have the latest security patches and software versions.
sudo apt update         # Refreshes the list of available packages
sudo apt upgrade        # Upgrades all installed packages to their newest versions
sudo: Grants superuser (administrator) privileges for the command that follows. You’ll be prompted for the password you set during initial setup.apt: Advanced Package Tool, the command-line package manager for Debian-based systems like Ubuntu.
Seamless File System Integration
One of the most powerful features of WSL is the seamless interoperability between your Windows and Linux file systems.
Accessing Windows Files from Linux
Your Windows drives are automatically mounted under /mnt/. For example:
- Your C: drive is at
/mnt/c/ - Your D: drive is at
/mnt/d/
So, to navigate to your Windows Documents folder from Linux, you would use:
cd /mnt/c/Users/<YourWindowsUsername>/Documents
Accessing Linux Files from Windows
You can access your Linux files directly from File Explorer in Windows.
- Open File Explorer.
- In the address bar, type
\wsl$and press Enter. - You will see a list of your installed Linux distributions (e.g.,
Ubuntu-22.04). Double-click on one to browse its file system. Your Linux home directory will typically be found underhome<YourLinuxUsername>.
Self-Correction: While you can access Linux files from Windows, it is strongly advised not to create or modify Linux files using Windows applications (like Notepad, File Explorer, etc.) when the Linux distribution is running. This can lead to file corruption due to differences in file system permissions and handling. Always use Linux tools to modify files within the WSL environment.
Leveraging WSLg for Graphical Applications
WSL 2 now includes “WSLg” (Windows Subsystem for Linux GUI), which allows you to run Linux GUI applications directly on your Windows desktop. These applications integrate seamlessly, appearing in your Start menu alongside Windows apps.
If your Windows 10 is updated (specifically, if you have Windows 10 version 21H2 or later), WSLg is often installed by default when you install WSL 2. You can test it by installing a simple GUI application:
sudo apt install x11-apps -y
xeyes
If xeyes (a simple program that shows eyes following your mouse cursor) launches in a new window, WSLg is working! You can now install more complex applications like VS Code (Linux version), GIMP, Firefox, or development IDEs.
Advanced Tips and Troubleshooting
- Default User: To change the default user for your WSL distribution (if you want to switch from the one you created during initial setup), run
ubuntu config --default-user <new_username>from an elevated Command Prompt or PowerShell. - Terminating/Restarting WSL: If your WSL environment becomes unresponsive or you need to restart it, open PowerShell and use:
powershell

wsl --shutdown         # Shuts down all running WSL distributions

wsl --list --verbose   # Lists running distributions and their state
Then, simply launch your distribution again. - VS Code Integration: Visual Studio Code has excellent remote development extensions. Install the “Remote – WSL” extension in VS Code. Once installed, you can open a WSL folder directly from VS Code, and it will run the VS Code server within your Linux environment, giving you a full development experience with access to all your Linux tools.
- Docker Desktop: Docker Desktop for Windows fully integrates with WSL 2, offering a highly performant and stable environment for running Docker containers. Make sure to enable the “Use the WSL 2 based engine” option in Docker Desktop settings.
- Common Troubleshooting:
- “WSL 2 requires an update to its kernel component”: This means you either missed installing the
wsl_update_x64.msipackage or need to rerun it. - Virtualization not enabled in BIOS: Go back to the “Enabling Virtualization” section and ensure it’s enabled.
- Problems after Windows updates: Occasionally, Windows updates might disrupt WSL. Rerunning the
wsl --updatecommand in an elevated PowerShell might help, followed bywsl --shutdown.
- “WSL 2 requires an update to its kernel component”: This means you either missed installing the

Conclusion: Your Hybrid Workspace Awaits
Installing Linux on Windows 10 via WSL is a transformative step for anyone needing the power and flexibility of both operating systems. By following this comprehensive guide, you’ve not only set up a powerful development environment but also unlocked new possibilities for productivity, learning, and exploration. The seamless integration allows you to harness Linux’s robust command-line tools and open-source ecosystem without sacrificing the familiarity and convenience of your Windows desktop.
This hybrid workspace empowers you to tackle diverse projects, experiment with cutting-edge technologies, and streamline your workflow in ways that were once cumbersome. Whether you’re a seasoned developer, a budding data scientist, or an IT professional, embracing WSL will undoubtedly enhance your technical capabilities and open doors to new opportunities in the ever-evolving tech landscape. Dive in, explore, and let your Windows 10 machine become the ultimate versatile computing platform.
aViewFromTheCave is a participant in the Amazon Services LLC Associates Program, an affiliate advertising program designed to provide a means for sites to earn advertising fees by advertising and linking to Amazon.com. Amazon, the Amazon logo, AmazonSupply, and the AmazonSupply logo are trademarks of Amazon.com, Inc. or its affiliates. As an Amazon Associate we earn affiliate commissions from qualifying purchases.