
Python’s immense popularity as a programming language stems not just from its elegant syntax and readability, but also from its extraordinarily rich ecosystem of libraries. These pre-written modules of code act as building blocks, allowing developers to leverage existing solutions for complex tasks, accelerating development, and enabling the creation of sophisticated applications across diverse domains like data science, web development, artificial intelligence, and more. Whether you’re a budding programmer just starting your Python journey or a seasoned professional expanding your toolkit, understanding how to effectively install and manage these libraries is a fundamental skill. This comprehensive guide will demystify the process, covering the most common methods and best practices.
The Power of Python Libraries: Expanding Your Coding Horizons
Before diving into the mechanics of installation, it’s crucial to appreciate why you’d want to install libraries in the first place. Imagine building a house without pre-fabricated windows or doors. You could certainly construct them yourself, but it would be incredibly time-consuming and prone to errors. Python libraries function similarly. They provide ready-made solutions for common challenges.
For instance:
- Data Science & Machine Learning: Libraries like NumPy and Pandas are indispensable for numerical computations and data manipulation. Scikit-learn offers a vast array of machine learning algorithms, while TensorFlow and PyTorch are the titans of deep learning.
- Web Development: Frameworks such as Django and Flask streamline the creation of dynamic web applications. For front-end interactions, Requests allows you to send HTTP requests, and BeautifulSoup is excellent for web scraping.
- Automation & Scripting: Libraries like os (built-in) and shutil simplify file system operations, while Selenium automates browser interactions.
- Visualization: Matplotlib and Seaborn enable the creation of stunning and informative data visualizations.
- And much more: The Python Package Index (PyPI) hosts hundreds of thousands of libraries catering to almost any conceivable programming need.
The ability to tap into this vast repository of pre-built functionality dramatically reduces the time and effort required to bring your ideas to life. It allows you to focus on the unique aspects of your project rather than reinventing the wheel for common tasks.
The Essential Tool: Pip, the Python Package Installer
At the heart of Python library installation lies pip. Short for “Pip Installs Packages,” pip is the de facto standard package manager for Python. It’s designed to easily install and manage third-party software written in Python. Fortunately, pip is included by default with most modern Python installations (Python 3.4 and later). If you’ve installed Python from the official website or through common package managers like Homebrew (on macOS) or apt (on Debian/Ubuntu), pip should already be at your disposal.
Verifying Your Pip Installation
To confirm that pip is installed and accessible on your system, open your terminal or command prompt and execute the following command:
pip --version
This command should output the version of pip you have installed, along with the Python version it’s associated with. If you receive an error like “command not found,” it might indicate that Python or pip isn’t correctly added to your system’s PATH environment variable, or that your Python installation is older and doesn’t include pip by default. In such cases, you might need to reinstall Python or manually install pip (though this is rarely necessary for contemporary setups).
Basic Pip Commands
The fundamental syntax for using pip to install a library is remarkably straightforward:
pip install <library_name>
For example, to install the popular data manipulation library Pandas, you would run:
pip install pandas
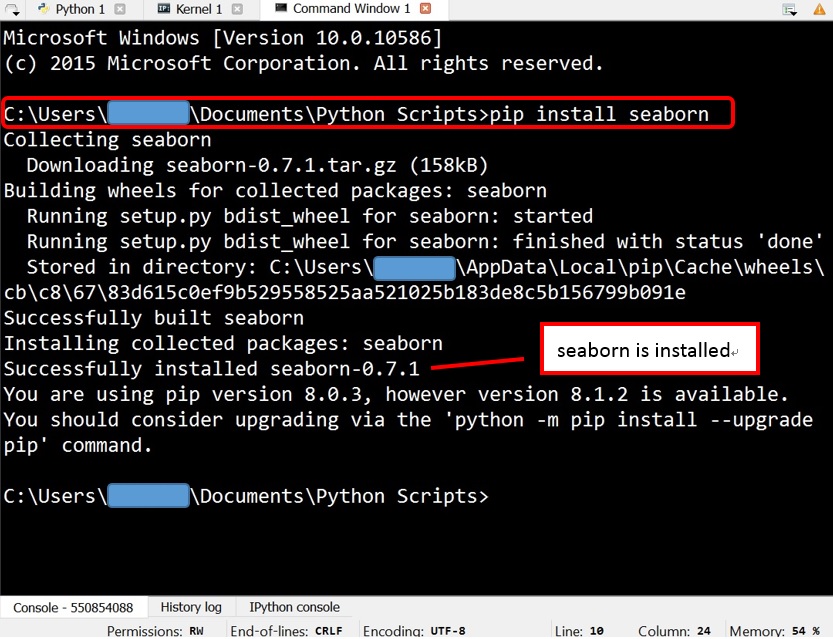
Pip will then connect to the Python Package Index (PyPI), download the specified library and any of its dependencies, and install them into your Python environment.
Installing Libraries: The Recommended Approach with Pip
As established, pip is the go-to tool for installing Python libraries. It’s versatile, widely supported, and handles dependencies automatically, making it the most efficient and recommended method for most users.
Installing a Single Library
The most common scenario is needing to install a specific library. As shown above, the command is simple:
pip install library_name
Example: To install the requests library for making HTTP requests:
pip install requests
Installing Multiple Libraries at Once
If your project requires several libraries, you can install them all in a single command by listing them, separated by spaces:
pip install library1 library2 library3
Example: To install numpy, pandas, and matplotlib:
pip install numpy pandas matplotlib
This is a convenient way to set up your development environment quickly.
Installing Libraries from a Requirements File
For larger projects or when collaborating with others, it’s best practice to maintain a list of all project dependencies in a file, typically named requirements.txt. This file lists each required library, often with a specific version number to ensure reproducibility.
requirements.txt example:
numpy==1.23.5
pandas>=1.4.0,<2.0.0
requests~=2.28.1
To install all libraries listed in this file, navigate to the directory containing requirements.txt in your terminal and run:
pip install -r requirements.txt
This command tells pip to read the file and install each specified package. The version specifiers (==, >=, <, ~=) ensure that you install compatible versions, preventing potential conflicts or unexpected behavior due to updates in library APIs.

Upgrading Libraries
It’s good practice to keep your libraries updated to benefit from bug fixes, performance improvements, and new features. To upgrade a specific library:
pip install --upgrade library_name
Example: To upgrade Pandas to the latest version:
pip install --upgrade pandas
To upgrade all installed packages, you can use a combination of pip commands, though this is less common and can sometimes lead to dependency conflicts if not managed carefully. A more robust approach for managing all project dependencies is typically handled through virtual environments.
Uninstalling Libraries
If you no longer need a library or want to remove it to free up space or avoid conflicts, use the uninstall command:
pip uninstall library_name
Pip will prompt you to confirm the uninstallation.
Example: To uninstall the requests library:
pip uninstall requests
The Importance of Virtual Environments
While installing libraries globally on your system is possible, it’s generally not recommended for anything beyond very simple, one-off scripts. This is where virtual environments become indispensable. A virtual environment is an isolated Python installation that allows you to manage dependencies for specific projects independently of your global Python installation.
Why Use Virtual Environments?
- Dependency Isolation: Different projects might require different versions of the same library. For example, Project A might need an older version of a library for compatibility, while Project B needs the latest features. Virtual environments prevent these version conflicts.
- Reproducibility: By creating a
requirements.txtfile within an activated virtual environment, you can guarantee that anyone working on the project can install the exact same set of dependencies, ensuring that the code behaves consistently across different machines. - Cleanliness: Your global Python installation remains uncluttered, containing only essential system-wide packages. This reduces the risk of accidental modification or corruption of vital Python components.
- Testing: You can easily test your project with different Python versions or dependency sets by creating multiple virtual environments.
Creating and Activating Virtual Environments
Python 3.3 and later come with the built-in venv module for creating virtual environments.
Creating a Virtual Environment
-
Navigate to your project directory in the terminal.
-
Run the following command to create a virtual environment (e.g., named
.venv):python -m venv .venvThis command creates a new directory (e.g.,
.venv) within your project folder, containing a copy of the Python interpreter and the necessary scaffolding for a virtual environment.
Activating a Virtual Environment
Before you can install or use libraries within a virtual environment, you need to activate it. The activation command differs slightly based on your operating system and shell:
-
On Windows (Command Prompt):
.venvScriptsactivate.bat -
On Windows (PowerShell):
.venvScriptsActivate.ps1 -
On macOS and Linux (Bash/Zsh):
bash

source .venv/bin/activate
Once activated, your terminal prompt will typically change to indicate the active virtual environment (e.g., (.venv) C:ProjectsMyProject>).
Installing Libraries within an Activated Virtual Environment
With your virtual environment activated, any pip install commands will install libraries only within that environment, not globally.
pip install library_name
Deactivating a Virtual Environment
When you’re finished working on a project within a virtual environment, you can deactivate it by simply typing:
deactivate
Your terminal prompt will return to its normal state, and you’ll revert to using your system’s global Python installation.
Pipenv and Poetry: Advanced Environment Management
For more complex projects or professional workflows, tools like Pipenv and Poetry offer enhanced dependency management features. They combine the functionality of virtual environments and requirements.txt into a single, more integrated system, often using a Pipfile or pyproject.toml file respectively. These tools automate many of the manual steps involved in managing environments and dependencies, making them powerful allies for larger projects and teams.

Best Practices for Library Management
- Always use virtual environments: This is the single most important piece of advice for managing Python libraries. It prevents conflicts and ensures project reproducibility.
- Pin your dependencies: When creating a
requirements.txtfile, specify exact or range-bound versions of your libraries. This prevents your project from breaking due to unexpected changes in future library releases. Tools likepip freeze > requirements.txtcan help generate this file for your current environment. - Keep libraries updated judiciously: While staying updated is good, blindly upgrading all libraries can sometimes introduce breaking changes. It’s often wise to update libraries incrementally and test your application thoroughly after each update.
- Understand library licenses: Before using a library in a commercial project, be aware of its licensing terms. Most libraries on PyPI are open-source with permissive licenses, but it’s always good to be informed.
- Check library reputation and activity: For critical projects, consider the popularity, maintenance status, and community support of a library. Libraries that are actively developed and have a strong user base are generally more reliable.
By mastering the art of installing and managing Python libraries, you unlock the full potential of this versatile language. You gain the power to build increasingly complex and innovative applications, leveraging the collective ingenuity of the global Python community. Happy coding!
aViewFromTheCave is a participant in the Amazon Services LLC Associates Program, an affiliate advertising program designed to provide a means for sites to earn advertising fees by advertising and linking to Amazon.com. Amazon, the Amazon logo, AmazonSupply, and the AmazonSupply logo are trademarks of Amazon.com, Inc. or its affiliates. As an Amazon Associate we earn affiliate commissions from qualifying purchases.