The world of computing is a dynamic landscape, constantly evolving with new software, hardware, and operating systems. For many users, Ubuntu represents a powerful and versatile open-source operating system, offering a robust platform for both personal and professional use. While Ubuntu comes pre-loaded with excellent web browsers like Firefox, some users prefer the distinct features, performance, and ecosystem of Google Chrome. Whether you’re a seasoned Ubuntu user looking to switch or a newcomer exploring your options, this guide will walk you through the straightforward process of installing Google Chrome on your Ubuntu system.

This tutorial is designed for a broad audience, aligning with the core themes of our website: Tech, Brand, and Money. From a Tech perspective, we’ll delve into the practical steps of software installation and system integration. For those interested in Brand, understanding how to customize your user experience and utilize tools from major tech players like Google is crucial for personal and professional branding. Financially, while this installation is free, a well-equipped digital workspace can indirectly impact your Money by enhancing productivity and opening up avenues for online income or efficient financial management.
Why Choose Google Chrome on Ubuntu?
Before we dive into the installation process, it’s worth considering why you might opt for Google Chrome on your Ubuntu machine. While Ubuntu’s default browser, Firefox, is a highly capable and privacy-focused option, Chrome offers its own set of compelling advantages that resonate with many users.
Technical Advantages and User Experience
From a Tech standpoint, Google Chrome is renowned for its speed, stability, and efficient memory management, particularly when handling numerous tabs. Its V8 JavaScript engine is a powerhouse, enabling faster execution of web applications and complex web pages. Chrome’s synchronization capabilities across devices, leveraging your Google account, are a significant draw. Bookmarks, history, passwords, and extensions can seamlessly sync, providing a consistent browsing experience whether you’re on your Ubuntu desktop, a Windows laptop, or an Android tablet.
Furthermore, the Chrome Web Store boasts an extensive library of extensions and applications. These add-ons can dramatically enhance your productivity, customize your browsing experience, improve security, and integrate with other services you use daily. For professionals and individuals focused on Productivity, these extensions can be game-changers. Think of password managers for enhanced Digital Security, project management tools for better workflow, or grammar checkers for polished communication – many of these are readily available and optimized for Chrome.
Brand Integration and Personalization
In the realm of Brand, your digital tools are an extension of your personal or corporate identity. Using a browser that aligns with your existing digital ecosystem, especially if you are heavily invested in Google services, can streamline your workflow and reinforce your brand. For instance, if your personal brand is built around content creation and online marketing, Chrome’s integration with tools like Google Docs, Google Drive, and Google Analytics can be invaluable. The ability to quickly access and manage these services from a familiar browser interface contributes to a cohesive and professional online presence.
For those building a Personal Branding or Corporate Identity, a consistent and efficient digital toolset is paramount. Google Chrome, with its widespread adoption and integration with a suite of Google’s business and creative tools, fits this requirement for many. It allows for easy access to communication platforms, content creation suites, and marketing analytics, all contributing to a polished and effective brand image.
Financial Considerations and Productivity Boosts
While the installation itself is free, the impact of your browser choice can indirectly influence your Money. Increased productivity can lead to more efficient work, potentially opening doors to Online Income or Side Hustles. For entrepreneurs and small business owners managing Business Finance, efficient access to financial tools, online banking, and market research platforms through a fast and reliable browser can save valuable time and potentially prevent costly errors.
The ability to quickly research investment opportunities, track market trends, or manage personal finances using web-based tools becomes more fluid with a browser like Chrome. The seamless integration with cloud storage solutions also means that important financial documents or business plans are always accessible and backed up, contributing to better Financial Tools management and overall Personal Finance well-being.
Installing Google Chrome on Ubuntu: Step-by-Step Guide
Google provides an official .deb package for Debian-based systems like Ubuntu, making the installation process remarkably simple. There are two primary methods: downloading the package directly and installing it via the graphical software center, or using the command line for a more automated approach.
Method 1: Downloading and Installing the .deb Package (Graphical)
This method is ideal for users who prefer a visual interface and are comfortable with a few clicks.
Downloading the Latest Chrome Package
- Open your current web browser: Launch the default web browser on your Ubuntu system, which is typically Firefox.
- Navigate to the official Chrome download page: In the address bar, type
google.com/chromeand press Enter. This will take you to the official Google Chrome download page. - Initiate the download: You will see a prominent “Download Chrome” button. Click on it.
- Select the correct package: A pop-up window will appear asking you to choose a package. Ensure that “64 bit .deb (For Debian/Ubuntu)” is selected.
- Accept and Download: Click on the “Accept and Install” button. The browser will prompt you to save the
.debfile. Choose a location to save it, such as your Downloads folder.
Installing the Downloaded .deb File
Once the download is complete, you can install the package using Ubuntu’s graphical software installer.
- Open your file manager: Navigate to the folder where you saved the downloaded
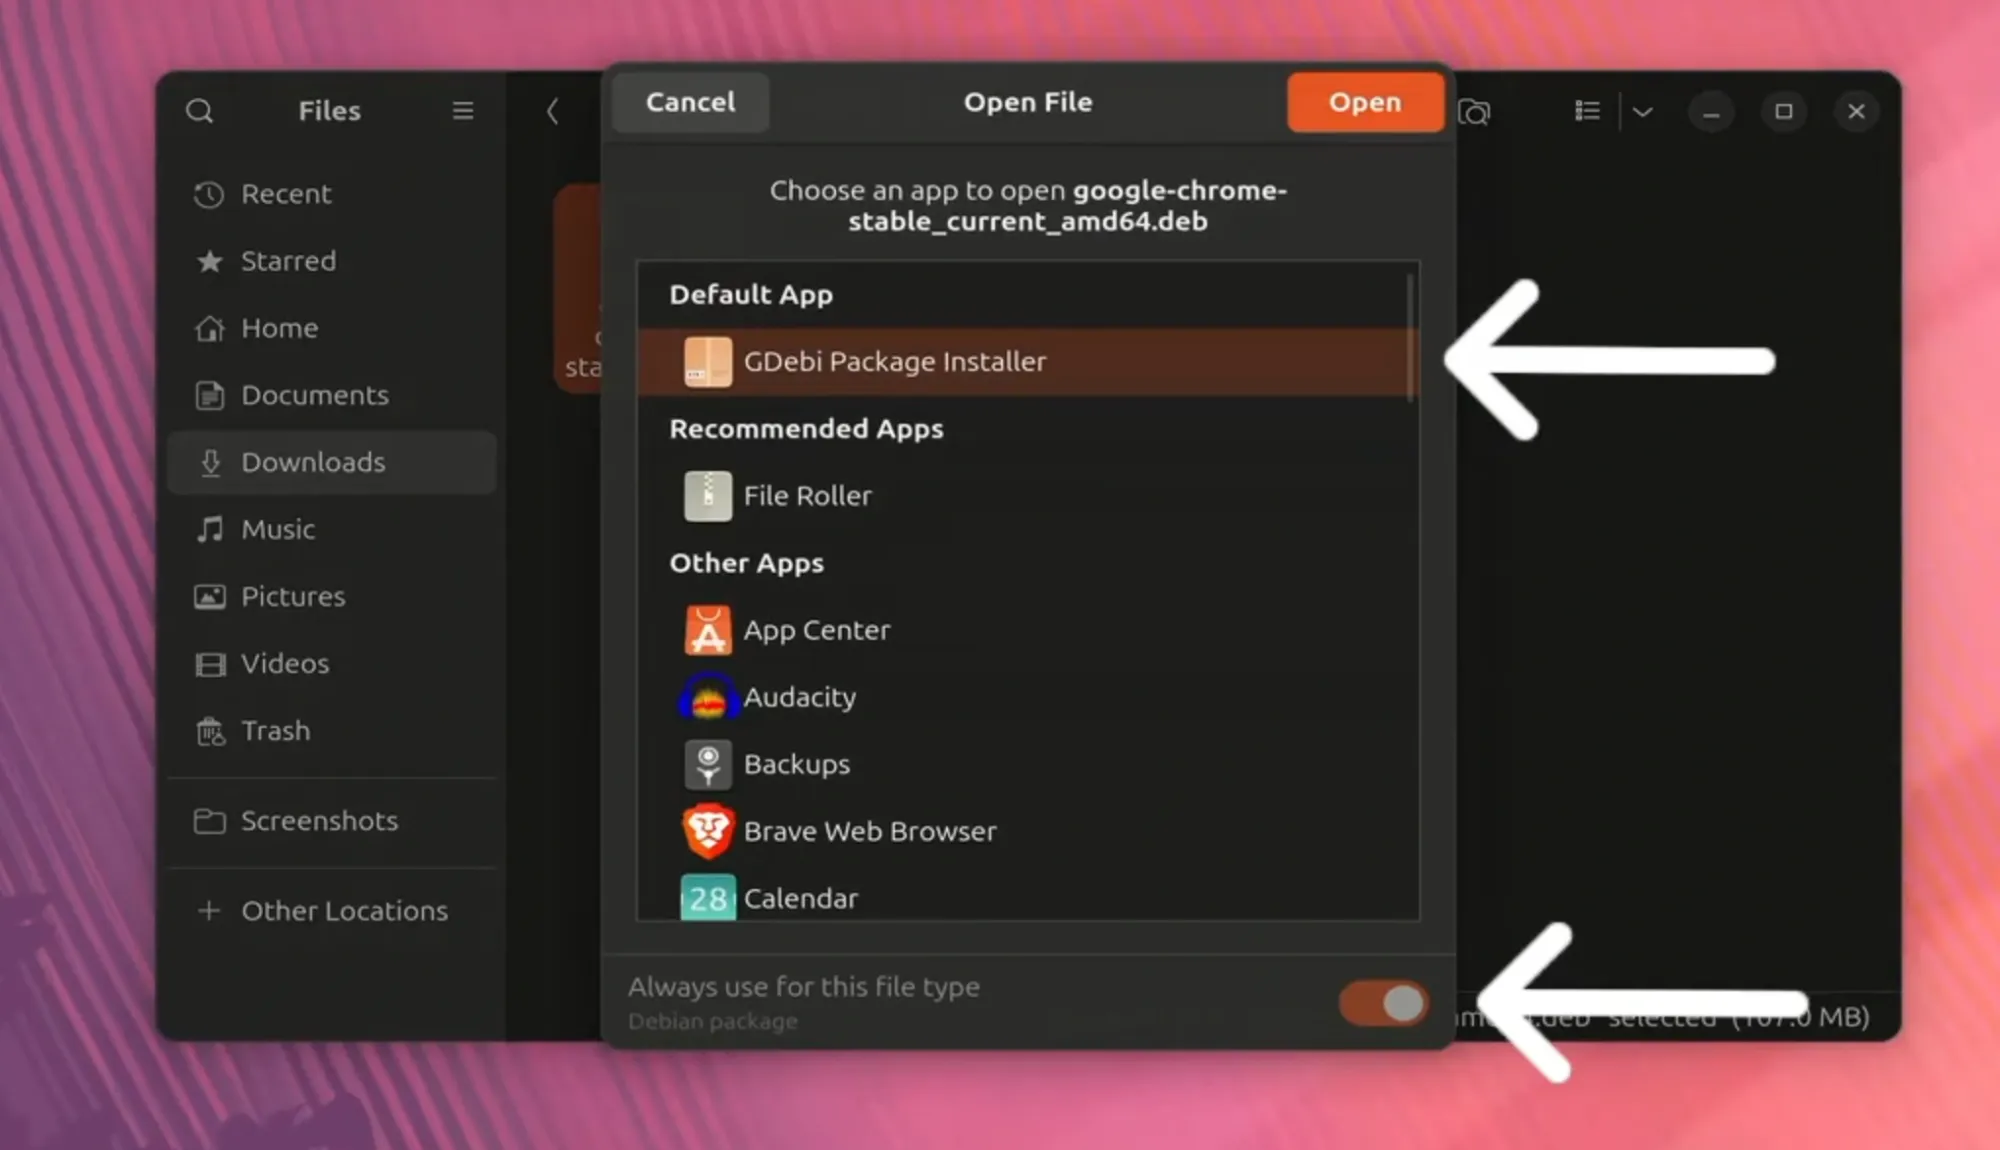
.debfile (usually your Downloads folder). - Locate the Chrome .deb file: You should see a file named something like
google-chrome-stable_current_amd64.deb. - Double-click the file: This will open the file with Ubuntu Software, the default application installer.
- Install the application: In the Ubuntu Software window, you will see details about the Google Chrome package. Click the “Install” button.
- Authenticate: You will be prompted to enter your user password to authorize the installation. Type your password and press Enter.
- Wait for installation to complete: Ubuntu Software will now install Google Chrome on your system. This process typically takes a minute or two.
Upon successful installation, you will see an “Launch” or “Close” button. You can now launch Google Chrome directly from the Ubuntu applications menu.
Method 2: Installing Chrome via the Command Line
For users who are comfortable with the terminal, this method offers a more streamlined and often faster installation experience. It also has the advantage of setting up automatic updates for Chrome.
Adding the Google Chrome Repository
The most robust way to install and maintain Google Chrome on Ubuntu is by adding Google’s official software repository. This ensures that you receive future updates automatically through Ubuntu’s standard update manager.
-
Open the Terminal: You can do this by pressing
Ctrl + Alt + Tsimultaneously, or by searching for “Terminal” in the applications menu. -
Import the Google Chrome signing key: This step is crucial for verifying the authenticity of the software you’re about to install.
wget -q -O - https://dl.google.com/linux/linux_signing_key.pub | sudo apt-key add -wget -q -O -: This part downloads the key quietly (-q) and outputs it to standard output (-O -).https://dl.google.com/linux/linux_signing_key.pub: This is the URL where Google hosts its public signing key.|: This is a pipe, which sends the output of thewgetcommand as input to the next command.sudo apt-key add -: This command adds the provided key to your system’s list of trusted keys. You’ll be prompted for your password.
-
Add the Google Chrome repository to your sources list: This tells your system where to find Chrome packages.
sudo sh -c 'echo "deb [arch=amd64] http://dl.google.com/linux/chrome/deb/ stable main" >> /etc/apt/sources.list.d/google-chrome.list'sudo sh -c '...': This executes the command within the single quotes as a superuser.echo "deb [arch=amd64] http://dl.google.com/linux/chrome/deb/ stable main": This line creates the repository entry.[arch=amd64]specifies that we only want the 64-bit version, which is standard for modern Ubuntu installations.>> /etc/apt/sources.list.d/google-chrome.list: This appends the repository entry to a new file namedgoogle-chrome.listwithin the/etc/apt/sources.list.d/directory. This is the recommended way to add third-party repositories.
-
Update your package list: After adding a new repository, you need to refresh your system’s package list so it knows about the new software available.
bash

sudo apt update
This command fetches the latest package information from all configured repositories, including the newly added Google Chrome one.
Installing Google Chrome
Now that the repository is set up and your package list is updated, you can install Google Chrome.
-
Install the
google-chrome-stablepackage:sudo apt install google-chrome-stablesudo apt install: This is the standard command to install packages on Ubuntu.google-chrome-stable: This is the name of the package that installs the stable version of Google Chrome.
-
Confirm installation: The terminal will show you the packages that will be installed and ask for confirmation. Type
Yand press Enter to proceed.
Google Chrome will now be downloaded and installed on your system.
Verifying the Installation and Launching Chrome
After either installation method, you can verify that Chrome has been successfully installed.
- Search for “Google Chrome”: Click on the Ubuntu applications grid (usually a series of dots in the bottom-left corner of your screen) and type “Google Chrome” in the search bar.
- Launch Chrome: Click on the Google Chrome icon to open the browser.
The first time you launch Chrome, you might be prompted to set it as your default browser or sign in with your Google account to sync your settings.
Maintaining Google Chrome on Ubuntu
Installing Chrome is just the first step. Keeping it updated ensures you have the latest features, security patches, and performance improvements.
Automatic Updates (When Installed via Repository)
If you installed Google Chrome using the command-line method (Method 2), the browser is now configured to receive automatic updates. When you run your regular system updates, Google Chrome will be updated along with other Ubuntu packages.
To manually check for and apply updates to all your installed software, including Chrome, open the Terminal and run:
sudo apt update && sudo apt upgrade
This command will refresh your package list and then install any available upgrades for all packages on your system.
Manual Updates (for .deb Installation)
If you installed Chrome by manually downloading and installing the .deb package (Method 1), it won’t automatically be part of your system’s update cycle. To update it, you’ll need to repeat the download and installation process periodically:
- Visit the Chrome download page: Go to
google.com/chrome. - Download the latest
.debpackage. - Install the new
.debfile by double-clicking it in your file manager. Ubuntu’s software installer will recognize that Chrome is already installed and offer to upgrade it.
Recommendation: For most users, using the command-line method and adding the Google repository is the preferred approach as it automates updates and simplifies maintenance, contributing to a more secure and efficient Digital Security posture.
Troubleshooting Common Issues
While the installation process is generally smooth, you might encounter a few hiccups. Here are some common issues and their solutions:
“Package google-chrome-stable is not available”
This error typically means your system’s package list is out of date or the repository was not added correctly.
- Solution:
- Open your Terminal.
- Run
sudo apt update. - Try installing
sudo apt install google-chrome-stableagain. - If the error persists, double-check that you added the repository correctly in Method 2 (Step 3) and that the repository file
/etc/apt/sources.list.d/google-chrome.listexists and contains the correct entry.
Chrome Fails to Launch After Installation
Sometimes, especially on older systems or with specific hardware configurations, Chrome might refuse to launch.
- Solution:
- Open your Terminal.
- Try launching Chrome from the terminal:
google-chrome-stable - Observe any error messages. A common one relates to graphics drivers or compatibility. If you see messages about sandboxing or GPU, you might need to disable certain features. For example, try launching with
--no-sandbox:
bash

google-chrome-stable --no-sandbox
If this works, you can create a desktop shortcut that includes this flag, or investigate updating your graphics drivers for a more permanent fix.

Installation Issues with dpkg
If you are using the dpkg command directly (e.g., sudo dpkg -i google-chrome-stable_current_amd64.deb) and encounter dependency errors, it means some required packages are missing.
- Solution:
- After running
dpkgand encountering errors, run this command to fix broken dependencies:
bash

sudo apt --fix-broken install
- This will download and install any missing dependencies that Chrome requires. You may then need to re-run the
dpkgcommand or try installing viaaptagain.
- After running
By following these steps, you should be able to successfully install and maintain Google Chrome on your Ubuntu system, enhancing your browsing experience and productivity. This process aligns with our website’s focus on empowering users with the Tech knowledge to leverage tools that can positively impact their Brand and Money.
aViewFromTheCave is a participant in the Amazon Services LLC Associates Program, an affiliate advertising program designed to provide a means for sites to earn advertising fees by advertising and linking to Amazon.com. Amazon, the Amazon logo, AmazonSupply, and the AmazonSupply logo are trademarks of Amazon.com, Inc. or its affiliates. As an Amazon Associate we earn affiliate commissions from qualifying purchases.