
Flask is a lightweight and incredibly popular Python web framework that empowers developers to build dynamic and interactive web applications with remarkable ease. Its minimalist design and flexibility have made it a favorite for everything from simple personal websites to complex APIs and microservices. If you’re looking to dive into web development with Python, understanding how to install and set up Flask is your crucial first step. This guide will walk you through the process, ensuring you’re ready to start crafting your own web applications.
The topics covered by the website, including Tech, Brand, and Money, all intersect with the power of web development. In the realm of Tech, Flask is a fundamental tool for building the digital experiences we interact with daily. For Brand building, a well-designed and functional website powered by Flask can significantly enhance a company’s or individual’s online presence and reputation. And in the world of Money, efficient and scalable web applications built with Flask can unlock new revenue streams, streamline business operations, and facilitate online transactions.
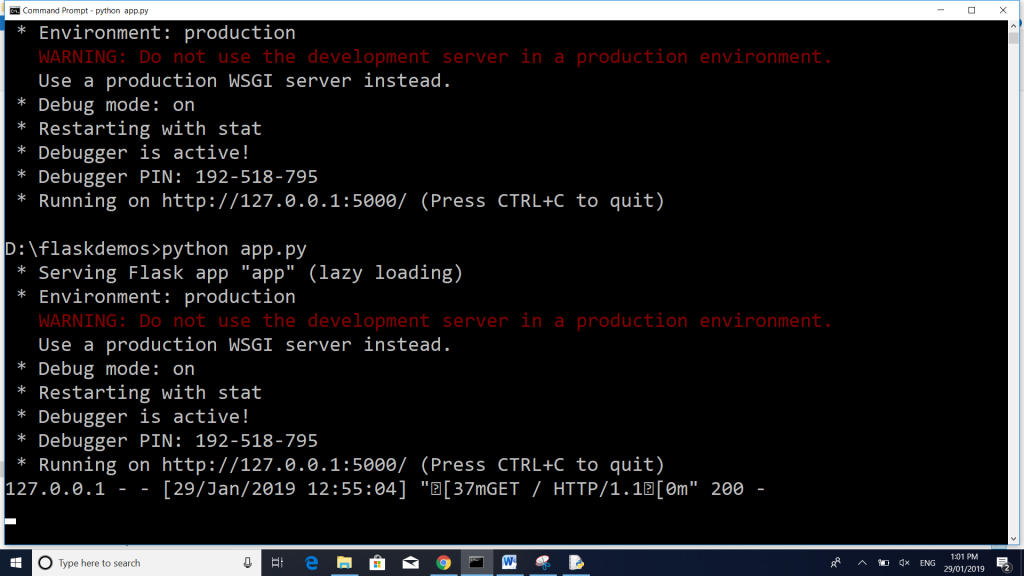
Let’s get started on your journey to becoming a Flask developer.
Setting the Stage: Prerequisites for Flask Installation
Before we can embark on the exciting adventure of installing Flask, it’s essential to ensure your development environment is properly prepared. This involves having the right foundational software in place. Think of this as gathering your tools before you start building your masterpiece.
Python: The Foundation of Flask Development
Flask, at its core, is a Python framework. This means you absolutely need Python installed on your system to use Flask. If you don’t have Python installed, or if you’re unsure about your current version, this is the first hurdle to overcome.
Checking Your Python Installation:
To check if Python is already installed and what version you have, open your terminal or command prompt. Then, type the following command and press Enter:
python --version
or on some systems:
python3 --version
If Python is installed, you’ll see output displaying the version number (e.g., Python 3.9.7).
Installing Python:
If Python is not installed, or if you need a newer version (Flask generally works best with Python 3.6+), you’ll need to download and install it.
- Visit the Official Python Website: Go to python.org and navigate to the Downloads section.
- Download the Latest Stable Release: Choose the installer for your operating system (Windows, macOS, or Linux).
- Run the Installer:
- Windows: During the installation process, it is highly recommended to check the box that says “Add Python X.X to PATH.” This makes it easier to run Python commands from your terminal. Follow the on-screen instructions.
- macOS: Run the downloaded
.pkgfile and follow the installer prompts. - Linux: Python is often pre-installed on Linux distributions. If not, you can usually install it via your distribution’s package manager (e.g.,
sudo apt-get install python3on Debian/Ubuntu, orsudo yum install python3on Fedora/CentOS).
Verifying the Installation:
After installation, close and reopen your terminal or command prompt and run python --version (or python3 --version) again to confirm the installation was successful.
Understanding Package Management: Pip and Virtual Environments
Python has a powerful package manager called pip, which is the standard tool for installing and managing Python libraries and their dependencies. Flask itself is installed using pip.
Pip is usually bundled with Python installations. You can check if pip is installed by running:
pip --version
or
pip3 --version
If pip is not found, you might need to install it separately or ensure your Python installation included it.
The Importance of Virtual Environments:
While you can install Flask directly into your global Python environment, it’s a strongly recommended best practice to use virtual environments. A virtual environment is a self-contained directory that holds a specific Python installation and a number of additional packages.
Why use virtual environments?
- Isolation: It prevents conflicts between different projects that might require different versions of the same library.
- Cleanliness: It keeps your global Python installation tidy.
- Reproducibility: It makes it easier to share your project with others by allowing them to recreate the exact environment.
Creating and Activating a Virtual Environment (using venv):
Most modern Python installations (Python 3.3+) come with the venv module built-in.
-
Navigate to Your Project Directory: Open your terminal and navigate to the folder where you want to create your Flask project. For example:
cd Documents/my_flask_project(Create the directory if it doesn’t exist:
mkdir my_flask_projectthencd my_flask_project). -
Create the Virtual Environment: Run the following command:
python -m venv venvThis command creates a directory named
venv(you can name it anything, butvenvis a common convention) inside your project folder. This directory will contain a copy of the Python interpreter and the necessary structure for your isolated environment. -
Activate the Virtual Environment:
-
On Windows:
venvScriptsactivateYou should see
(venv)appear at the beginning of your terminal prompt, indicating that the virtual environment is active. -
On macOS and Linux:
bash

source venv/bin/activate
Again, your terminal prompt will change to show(venv).
Once your virtual environment is activated, any
pipcommands you run will install packages only within this environment. This is crucial for maintaining project integrity. -
Installing Flask: The Core Step
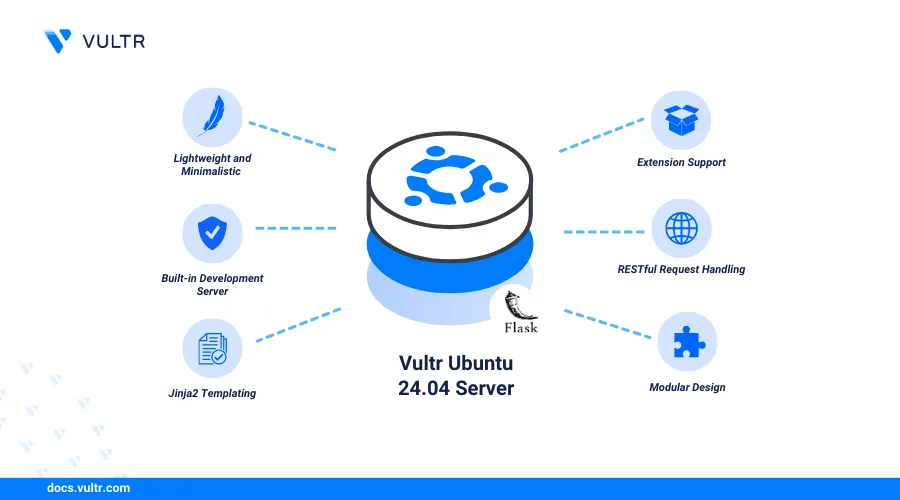
With your Python environment ready and your virtual environment activated, installing Flask is a straightforward command.
Using Pip to Install Flask
The pip package installer is your tool for fetching and installing Flask from the Python Package Index (PyPI).
-
Ensure Your Virtual Environment is Activated: Double-check that you see
(venv)(or whatever you named your environment) at the beginning of your terminal prompt. -
Run the Installation Command: In your activated terminal, type:
pip install FlaskPress Enter. Pip will download Flask and any necessary dependencies from PyPI and install them into your activated virtual environment. You’ll see output indicating the progress of the download and installation.
-
Verify the Installation: To confirm Flask has been installed, you can try importing it in a Python interpreter session.
- Start a Python interpreter by typing
pythonin your activated terminal. - Then, type
import flask. - If there are no error messages, Flask is installed correctly. You can then exit the interpreter by typing
exit().
Alternatively, you can simply run
pip freezein your activated environment. This command lists all the packages installed in the current environment, and you should seeFlask(and its dependencies likeWerkzeug,Jinja2, etc.) in the list. - Start a Python interpreter by typing
Understanding Flask’s Dependencies
When you install Flask using pip install Flask, you’re not just getting the Flask library itself. Flask is a “microframework,” meaning it provides the essentials for web development but doesn’t force many pre-built components on you. This minimalist approach means Flask relies on several other excellent Python libraries to function:
- Werkzeug: This is a WSGI utility library that acts as the low-level foundation for Flask. It handles request routing, request/response objects, and other core web server functionalities.
- Jinja2: This is a fast, expressive, and widely used templating engine. It allows you to embed dynamic content within your HTML files, making it easy to generate dynamic web pages.
- Itsdangerous: Used for securely passing data to a client via cookies or URLs.
- Click: A package for creating command-line interfaces, which Flask uses for its development server and other utilities.
pip automatically handles the installation of these dependencies for you, so you don’t need to install them individually.
Your First Flask Application: A Simple “Hello, World!”
Now that Flask is installed, let’s write a minimal “Hello, World!” application to see it in action. This will solidify your understanding of the installation process and provide a tangible result.
Creating Your Application File
-
Create a Python File: In your project directory (the same one where you created your
venv), create a new file namedapp.py(or any other.pyfilename you prefer). -
Add the Following Code: Open
app.pyin your favorite text editor and paste the following code:from flask import Flask # Create an instance of the Flask class app = Flask(__name__) # Define a route and the function that will be executed when that route is accessed @app.route('/') def hello_world(): return 'Hello, World!' # This block allows you to run the app directly from the command line if __name__ == '__main__': # Run the development server # debug=True enables helpful error messages and auto-reloading app.run(debug=True)
Running Your Flask Application
-
Ensure Your Virtual Environment is Activated: Again, make sure you see
(venv)in your terminal prompt. -
Run the Python Script: In your activated terminal, navigate to your project directory if you’re not already there, and run:
python app.pyYou should see output similar to this:
* Serving Flask app 'app' * Debug mode: on WARNING: This is a development server. Do not use it in a production deployment. Use a production WSGI server instead. * Running on http://127.0.0.1:5000/ (Press CTRL+C to quit) -
Access Your Application in a Browser: Open your web browser and go to the address
http://127.0.0.1:5000/orhttp://localhost:5000/. You should see the text “Hello, World!” displayed on the page.
Congratulations! You’ve successfully installed Flask and run your first web application.
Next Steps and Best Practices
Installing Flask is just the beginning. To truly harness its power for your tech projects, enhance your brand’s online presence, or create opportunities for online income, here are some essential next steps and best practices to keep in mind.
Exploring Flask’s Capabilities
- Routing: Learn how to define more complex routes to handle different URLs and HTTP methods (GET, POST, etc.).
- Templates: Dive deeper into Jinja2 templating to create dynamic HTML pages with variables, loops, and conditionals.
- Forms: Integrate form handling to allow user input.
- Databases: Connect your Flask application to databases like SQLite, PostgreSQL, or MySQL using extensions like Flask-SQLAlchemy.
- APIs: Build RESTful APIs to serve data to other applications or front-end frameworks.
- Extensions: Discover the vast ecosystem of Flask extensions that add functionality like authentication (Flask-Login), database management (Flask-SQLAlchemy), and more.
Production Deployment Considerations
The app.run(debug=True) command is excellent for development, providing helpful error messages and automatic code reloading. However, it is not suitable for production environments. For a live website or application, you’ll need to deploy your Flask app using a production-ready WSGI server like Gunicorn or uWSGI, often in conjunction with a web server like Nginx or Apache.
Version Control and Project Management
- Git: Always use a version control system like Git to track your code changes. This is fundamental for any serious development project.
requirements.txt: After activating your virtual environment and installing your project’s dependencies (including Flask), create arequirements.txtfile to list them all. This allows others (or yourself on a different machine) to easily install the same dependencies:
bash

pip freeze > requirements.txt
To install from this file on a new environment:
bash

pip install -r requirements.txt
By mastering the installation of Flask and understanding these fundamental concepts, you’re well on your way to building sophisticated web applications that can serve a wide range of purposes, from showcasing your technical skills to building powerful online businesses. The journey into web development is an exciting one, and Flask provides a robust and enjoyable path forward.
aViewFromTheCave is a participant in the Amazon Services LLC Associates Program, an affiliate advertising program designed to provide a means for sites to earn advertising fees by advertising and linking to Amazon.com. Amazon, the Amazon logo, AmazonSupply, and the AmazonSupply logo are trademarks of Amazon.com, Inc. or its affiliates. As an Amazon Associate we earn affiliate commissions from qualifying purchases.