
In an increasingly digital world, peer-to-peer (P2P) payment applications have become indispensable tools for managing personal finances, simplifying everything from splitting dinner bills to sending rent payments. Among these, Venmo stands out as a leading platform, renowned for its user-friendly interface, integrated social features, and robust functionality. For anyone looking to streamline their digital transactions, understanding how to effectively create and utilize a Venmo account is a fundamental step into modern financial tech. This comprehensive guide will walk you through the entire process, from initial download to advanced security settings, ensuring a smooth and secure setup of your Venmo profile.
Understanding Venmo: A Digital Payment Revolution
Venmo, owned by PayPal, has transformed how individuals send and receive money, effectively bridging the gap between traditional banking and the immediate demands of digital life. It’s more than just a payment app; it’s a social payment network, allowing users to share payment notes and emojis, fostering a unique blend of financial utility and social interaction. This duality is central to its widespread appeal, especially among younger demographics, but its core technical capabilities make it a vital tool for anyone navigating personal payments.
At its heart, Venmo facilitates instant transfers between users, drawing funds directly from linked bank accounts, debit cards, or a Venmo balance. Its technological infrastructure is designed for speed and convenience, reducing the friction typically associated with money transfers. Beyond simple P2P transactions, Venmo has evolved to offer features like direct deposit, a Venmo Debit Card, credit card options, and even business profiles, making it a versatile digital wallet. The ease of setting up an account and its intuitive user interface are key technical design achievements that have propelled its adoption. Understanding these foundational aspects is crucial before diving into the account creation process.
Prerequisites for Seamless Registration
Before you embark on the journey of setting up your Venmo account, a few essential technical and personal prerequisites must be met. Gathering these items beforehand will ensure a smooth, uninterrupted registration process, preventing potential roadblocks and ensuring a secure setup from the get-go. Venmo, like most financial technology platforms, requires specific information to verify your identity and link your digital payment ecosystem to your real-world financial instruments.
Essential Devices and Information
The primary requirement for using Venmo is a compatible mobile device. Venmo is fundamentally a mobile-first application, designed for smartphones running modern operating systems. You’ll need:
- A Smartphone: An iPhone (running iOS 13.0 or later) or an Android phone (running Android 7.0 or later) is necessary. Ensure your device’s operating system is up-to-date for optimal performance and security.
- Reliable Internet Connection: A stable Wi-Fi or cellular data connection is imperative for downloading the app and completing the registration steps without interruption.
- A Valid Email Address: This will be used for account verification, password resets, and important notifications from Venmo. Choose an email address you check regularly and have secure access to.
- A Valid U.S. Phone Number: Venmo uses your phone number for identity verification, security (via SMS codes), and to help friends find you on the platform. The number must be able to receive text messages.
- Personal Identification Information: To fully verify your identity and unlock all features, Venmo will eventually require information such as your full legal name, date of birth, and potentially the last four digits of your Social Security Number (SSN). This is standard practice for financial services operating under Know Your Customer (KYC) regulations.
Linking Your Financial Instruments
To make Venmo truly functional for sending and receiving money, you’ll need to link it to a funding source. This step is critical for performing transactions beyond simply receiving money into your Venmo balance.
- Bank Account: Linking a bank account (checking or savings) is the most common and often recommended method. You’ll typically provide your bank’s routing number and your account number. Venmo uses micro-deposits (small, verifiable transactions) to confirm account ownership, a standard security protocol that can take a few business days.
- Debit Card: This offers instant verification and is convenient for quick setup. You’ll need the 16-digit card number, expiration date, and CVV code. Debit card transactions for sending money usually do not incur fees.
- Credit Card: While credit cards can be linked, Venmo typically charges a 3% fee for sending money from a credit card. This is important to note for cost-conscious users. Credit cards are useful as a backup or for specific transaction needs where the fee is acceptable.
Having these details ready will significantly expedite the setup process, allowing you to quickly move from initial download to active use of the Venmo platform.
Step-by-Step Guide: Creating Your Venmo Profile
The process of creating a Venmo account is designed to be straightforward, guiding users through a series of intuitive steps from app download to initial account configuration. This section breaks down each stage, emphasizing the technical interactions and decisions you’ll make along the way.
Downloading the Venmo Application
Your journey begins by acquiring the Venmo application itself. It’s crucial to download the official app to ensure security and functionality.
- Access Your Device’s App Store:
- For iOS users: Open the “App Store” icon on your iPhone.
- For Android users: Open the “Google Play Store” icon on your Android device.
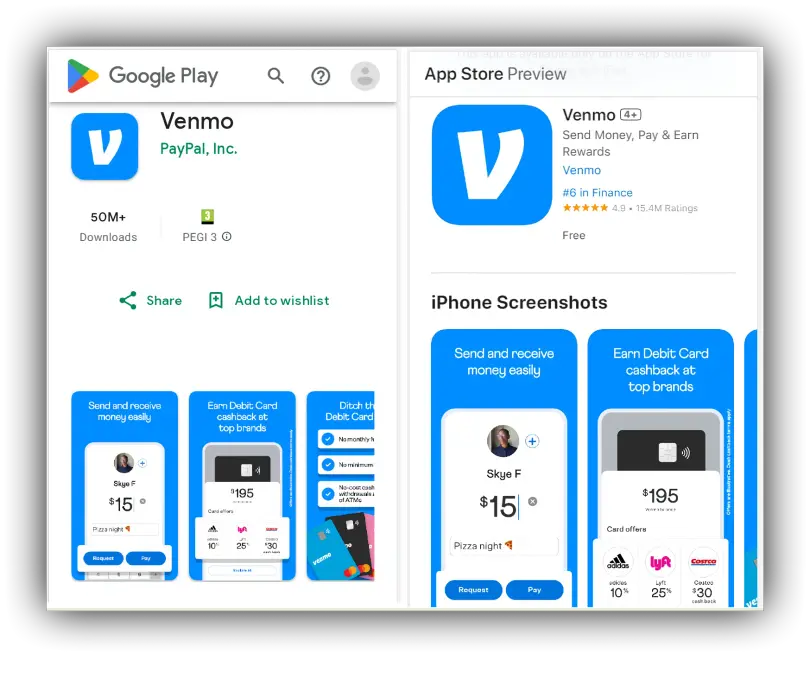
- Search for Venmo: In the search bar at the top of the store interface, type “Venmo” and press search.
- Identify the Official App: Look for the app published by “Venmo” (often with the Venmo logo, a stylized ‘V’). Be wary of lookalike apps to prevent phishing or malware.
- Download and Install: Tap the “Get” or “Install” button. You may need to authenticate with your device’s password, Face ID, or fingerprint, depending on your device settings. Ensure you have sufficient storage space and a stable internet connection for the download.
Initiating the Sign-Up Process
Once the app is installed, open it to begin the account creation.
- Launch Venmo: Tap the Venmo icon on your home screen or app drawer.
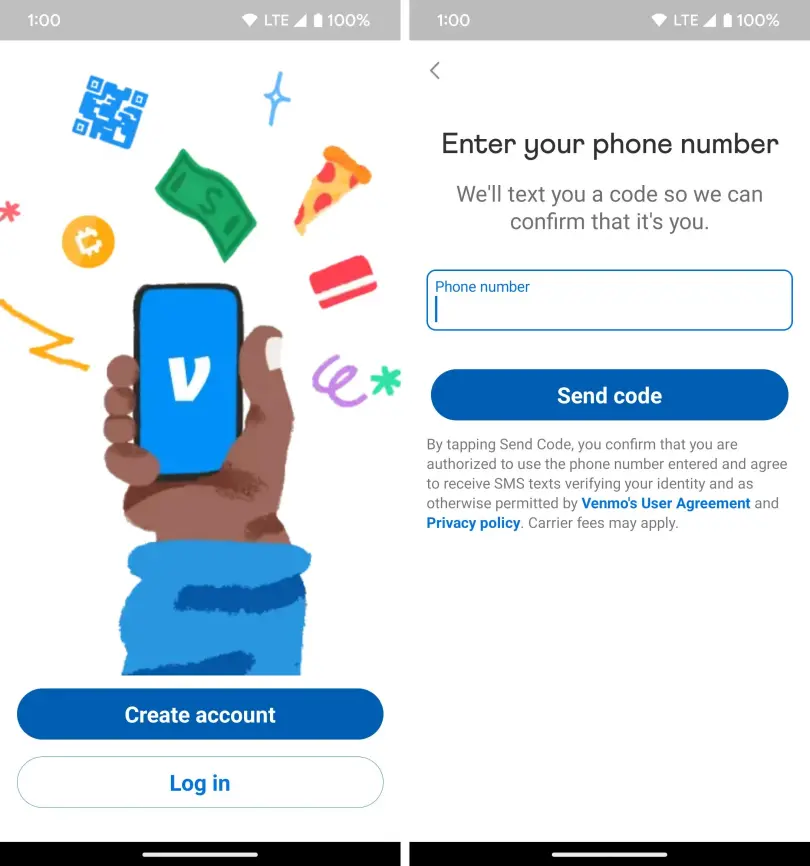
- Choose “Get Started” or “Sign Up”: On the welcome screen, you’ll typically see options to “Sign up with Facebook” or “Sign up with Email/Phone.” While Facebook login can be faster, using your email or phone number often provides a more direct and privacy-controlled setup. For this guide, we’ll proceed with the email/phone option.
- Enter Your Details:
- You’ll be prompted to enter your first name, last name, email address, and a strong password. Choose a password that is unique and complex, combining uppercase and lowercase letters, numbers, and symbols. This is a critical security measure.
- You’ll also need to enter your U.S. phone number. Venmo uses this for verification and as a primary identifier.
- Agree to Terms of Service: Before proceeding, you’ll be required to review and agree to Venmo’s User Agreement and Privacy Policy. It’s advisable to at least skim these documents to understand your rights and Venmo’s operational guidelines.
Verifying Your Identity and Contact Information
Security and regulatory compliance are paramount for financial technology platforms. Venmo employs several verification steps to ensure the integrity of your account and protect against fraud.
- Phone Number Verification:
- After entering your phone number, Venmo will send a verification code via SMS to that number.
- Enter this code into the app when prompted. This confirms that you are the legitimate owner of the phone number.
- Email Verification:
- Venmo will also send a verification link or code to the email address you provided.
- Open your email client, find the Venmo verification email, and click the link or enter the code in the app. This step confirms your email ownership and secures your account recovery method.
- Optional: Full Identity Verification: To send larger sums, withdraw funds, or use certain features like the Venmo Debit Card, you will eventually need to complete a more thorough identity verification. This typically involves providing:
- Your full legal name
- Date of birth
- Physical U.S. street address (P.O. boxes are usually not accepted)
- The last four digits of your Social Security Number (SSN)
This information is securely encrypted and used to comply with federal regulations designed to prevent money laundering and terrorist financing. Without full verification, transaction limits will be significantly lower.
Connecting Your Financial Institutions
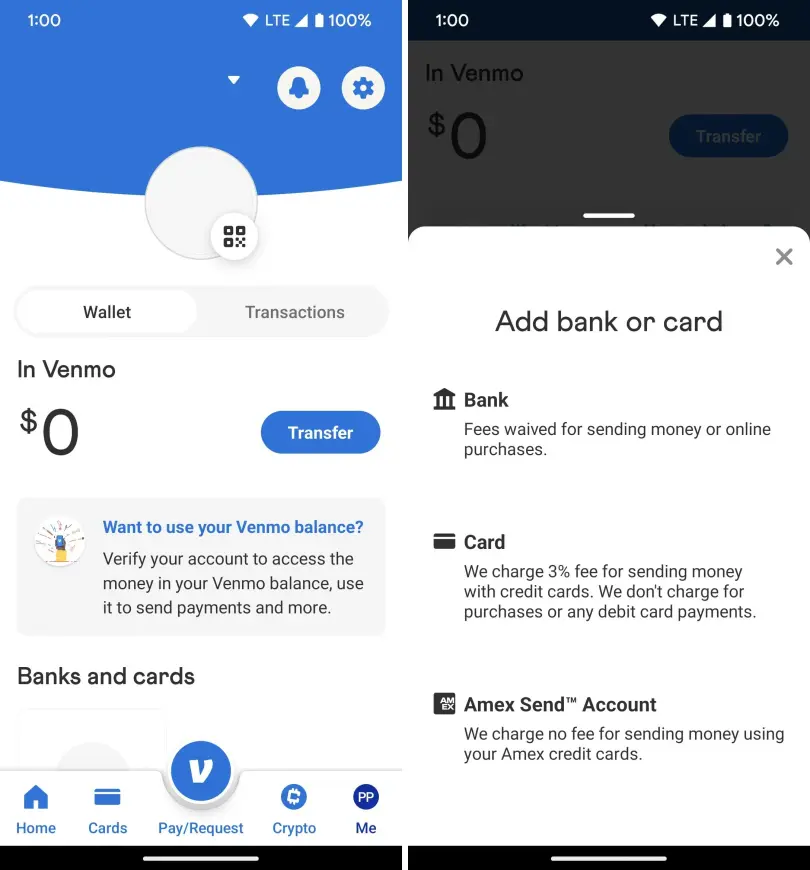
The final crucial step in making your Venmo account fully operational is linking a funding source.
- Navigate to “Settings”: Once logged in, tap the “Me” tab (your profile picture/initials) and then the “Settings” icon (gear icon) in the top right.
- Select “Payment Methods”: Within settings, find and tap “Payment Methods.”
- Add a Bank Account:
- Tap “Add a bank or card.”
- Select “Bank.”
- You can choose between “Instant Verification” (requires logging into your online banking through a secure third-party service like Plaid, offering immediate setup) or “Manual Verification” (requires inputting routing and account numbers, followed by waiting 1-3 business days for micro-deposits). Instant verification is generally faster and more convenient if your bank supports it.
- Follow the on-screen prompts to complete the process.
- Add a Debit or Credit Card:
- Tap “Add a bank or card.”
- Select “Card.”
- Enter the card number, expiration date, and CVV. You can also scan your card using your phone’s camera for convenience.
- Confirm the details.
Once your bank account or card is successfully linked and verified, your Venmo account is officially ready for use!
Securing Your Account and Initial Setup
Beyond the initial creation, ensuring the security of your Venmo account is paramount. As a financial technology platform, Venmo handles sensitive data and funds, making robust security practices non-negotiable. Post-registration, there are several key technical configurations and habits you should adopt to safeguard your account.
Navigating Privacy Settings
Venmo’s social feed is a defining feature, but it also means your transactions can be visible to others by default. Managing your privacy settings is a critical first step.
- Access Privacy Settings: Go to “Settings” (gear icon) > “Privacy.”
- Default Transaction Privacy: You’ll find options for “Public,” “Friends,” and “Private.”
- Public: Anyone on Venmo can see your transactions (sender, recipient, and message, but not the amount).
- Friends: Only your Venmo friends can see your transactions.
- Private: Only you and the other party involved in the transaction can see it.
It is generally recommended to set your default privacy to “Private” or “Friends” to protect your financial activities from unsolicited viewing. You can always change the privacy setting for individual transactions if you wish to make them public.
- Past Transaction Privacy: Venmo also allows you to change the privacy of all your past transactions. This is a crucial feature if you initially set your account to “Public” and wish to retroactively secure your payment history.
Enabling Multi-Factor Authentication
Multi-Factor Authentication (MFA), also known as Two-Factor Authentication (2FA), adds a vital layer of security to your account, protecting it even if your password is compromised.
- Locate MFA Settings: Within “Settings,” navigate to “Security” or “Login & Security.”
- Turn on 2FA: You’ll typically find an option for “Multi-Factor Authentication” or “Two-Factor Authentication.” Enable this feature.
- Verification Method: Venmo usually uses SMS verification, sending a code to your registered phone number each time you log in from a new device or perform a sensitive action. Confirm your phone number if prompted.
This technical safeguard ensures that even if a malicious actor obtains your password, they cannot access your account without also having physical access to your phone to receive the verification code.
Understanding Transaction Limits and Verification
Venmo implements various technical limits on transactions to manage risk and comply with financial regulations. Understanding these limits and the process of increasing them is important for power users.
- Unverified Accounts: Initially, accounts that haven’t fully verified their identity (i.e., haven’t provided SSN and date of birth) will have lower weekly sending limits (e.g., $299.99 for P2P transactions).
- Verified Accounts: Once your identity is fully verified, your weekly rolling limits for sending money will significantly increase (e.g., up to $6,999.99 for P2P transactions). Specific limits can vary for purchases with authorized merchants, Venmo Debit Card transactions, and withdrawals to your bank.
- Verification Process: To increase limits, Venmo will explicitly prompt you to complete identity verification. This involves providing the previously mentioned personal details. The platform securely processes this information to comply with federal banking laws.
Maximizing Your Venmo Experience: Beyond the Basics
With your Venmo account securely set up, you’re now ready to explore its full capabilities. Beyond simple P2P transfers, Venmo offers a suite of features designed to enhance your digital financial management. Understanding and utilizing these additional functionalities can further integrate Venmo into your daily tech and financial routines.
Sending and Receiving Money
The core functionality of Venmo is its ease of money transfer.
- Sending Money:
- Tap the “Pay & Request” button (often a pencil and paper icon) in the app.
- Search for the recipient by username, phone number, or email. You can also scan their QR code.
- Enter the amount, add a descriptive note (and emoji!), and select the privacy setting for that specific transaction.
- Choose your funding source (Venmo balance, bank, or card).
- Tap “Pay.”
- Receiving Money:
- When someone sends you money, you’ll receive a notification. The funds will typically appear in your Venmo balance instantly.
- You can either keep the money in your Venmo balance for future transactions or transfer it to your linked bank account.
- To transfer to your bank: Go to the “Me” tab, tap “Transfer Balance,” choose your linked bank account, select “Instant Transfer” (for a small fee) or “Standard Transfer” (free, typically 1-3 business days), and confirm.
Exploring Additional Features
Venmo’s ecosystem has expanded significantly, offering more than just P2P payments.
- Venmo Debit Card: This Mastercard debit card is directly linked to your Venmo balance, allowing you to spend your Venmo funds anywhere Mastercard is accepted. It also offers cash-back rewards at participating merchants and ATM access. Managing the card, freezing/unfreezing it, and tracking transactions are all done within the Venmo app, providing a seamless digital banking experience.
- Venmo Credit Card: For eligible users, Venmo offers a credit card with customized rewards categories. This integrates your credit spending and rewards directly into your Venmo app, offering a consolidated view of your financial activity.
- Business Profiles: Venmo allows individuals and small businesses to create separate business profiles. This feature enables them to accept payments from customers, manage transactions, and track income, all within the Venmo platform. It’s a valuable tool for freelancers, small business owners, and those running side hustles, offering dedicated payment processing capabilities.
- Direct Deposit: You can set up direct deposit to receive your paycheck or other regular payments directly into your Venmo balance. Venmo provides unique routing and account numbers for this purpose, acting as a direct digital intermediary for your income.
Troubleshooting Common Issues
While Venmo is designed for ease of use, occasional technical issues can arise. Knowing how to address them can save time and frustration.
- Login Issues:
- Incorrect Password: Use the “Forgot Password” link on the login screen.
- Account Locked: If you try too many incorrect passwords, your account may be temporarily locked for security. Wait a few minutes or contact Venmo support.
- Verification Code Not Arriving: Check your phone’s signal, ensure the correct phone number is registered, and check your spam/junk folders for email codes.
- Transaction Problems:
- Payment Declined: Check your linked funding source (bank account balance, card expiration). Ensure you haven’t exceeded your weekly sending limits.
- Pending Transactions: Sometimes transactions remain pending if there’s a network delay or an issue with the recipient’s account.
- Scams and Fraud: Be vigilant. Venmo cannot reverse payments sent to other Venmo users. Only send money to people you know and trust. Report any suspicious activity immediately through the app’s security features.
- App Glitches:
- Restart the App: Close and reopen Venmo.
- Check for Updates: Ensure your Venmo app is updated to the latest version via your app store.
- Clear Cache (Android): In your phone’s settings, find Venmo under “Apps” and clear its cache.
- Reinstall the App: As a last resort, uninstall and reinstall the app.
By understanding these features and troubleshooting techniques, you can ensure a seamless and powerful experience with your Venmo account, leveraging its technological capabilities to manage your digital payments effectively and securely.
aViewFromTheCave is a participant in the Amazon Services LLC Associates Program, an affiliate advertising program designed to provide a means for sites to earn advertising fees by advertising and linking to Amazon.com. Amazon, the Amazon logo, AmazonSupply, and the AmazonSupply logo are trademarks of Amazon.com, Inc. or its affiliates. As an Amazon Associate we earn affiliate commissions from qualifying purchases.