In today’s digitally interconnected world, a robust and reliable internet connection is no longer a luxury but a necessity. Whether you’re streaming high-definition movies, participating in video conferences, or engaging in intense online gaming, a stable signal is paramount. While wireless solutions like Wi-Fi have become ubiquitous, the backbone of many internet and cable television services still relies on coaxial cable. Installing a new coax outlet, or replacing an old one, is a task that can significantly enhance your home’s connectivity, ensuring a strong, direct signal to your devices. This guide will walk you through the process, demystifying what might seem like a daunting DIY project.
Understanding the Coax System: The Foundation of Your Signal
Before diving into the installation process, it’s crucial to understand the fundamental components of a coax system. Coaxial cable, often referred to as “coax,” is characterized by its central conductor, surrounded by an insulating dielectric, then a metallic shield, and finally an outer protective jacket. This layered design effectively protects the signal from electromagnetic interference, ensuring a clear and consistent transmission.
The coax outlet, also known as a wall plate or F-connector outlet, is the point where your coaxial cable terminates inside your home, providing a connection for your modem, router, television, or other compatible devices. Understanding the different types of coax cable (RG-6 is the most common for modern home installations) and the various connectors (F-connectors are standard) will equip you with the knowledge needed for a successful installation.
Why Install a New Coax Outlet?
The reasons for installing a new coax outlet are varied but generally revolve around improving your home’s digital infrastructure:
- Expanding Connectivity: You might have moved into a new home or are looking to set up a new entertainment center or home office in a room that currently lacks a coax outlet. This allows you to connect your modem or TV directly without relying on lengthy extension cables or potentially weaker wireless signals.
- Optimizing Signal Strength: An existing coax outlet might be damaged, poorly installed, or simply outdated. Replacing it with a new, properly installed outlet can significantly improve your internet speed and cable TV reception by reducing signal loss.
- Future-Proofing Your Home: As technology evolves, so do our connectivity needs. Adding new coax outlets ensures your home is equipped to handle future demands for high-speed internet and advanced entertainment systems.
- Streamlining Your Setup: Eliminating messy, exposed cables by having outlets strategically placed can greatly improve the aesthetics and organization of your living space.
Essential Tools and Materials for Coax Outlet Installation
Successfully installing a coax outlet requires a few specific tools and materials. Having these on hand before you begin will make the process smoother and more efficient.
Tools You’ll Need:
- Wire Stripper/Coax Stripper: This specialized tool is designed to precisely remove the outer jacket, dielectric insulation, and expose the center conductor of the coaxial cable without damaging it. A good quality coax stripper is essential for a clean and professional finish.
- Crimping Tool: For securing the F-connector onto the coax cable. There are different types, including crimp and compression connectors. For a more robust and reliable connection, compression connectors are often preferred.
- Coaxial Cable Cutter: While a sharp utility knife can work, a dedicated cable cutter provides a clean, perpendicular cut, which is crucial for proper connector attachment.
- Screwdriver: Typically a Phillips head screwdriver will be needed to attach the wall plate to the electrical box.
- Drill (Optional but Recommended): If you need to run new cable through walls or joists, a drill with various bit sizes will be necessary.
- Fish Tape (Optional): For running cable through walls and conduits, fish tape is an invaluable tool for pulling the cable through tight spaces.
- Stud Finder (Optional): If you’re mounting the outlet box to a wall, a stud finder can help you locate wall studs for secure mounting.
- Pencil or Marker: For marking drilling or cutting locations.
- Safety Glasses: Always wear safety glasses when working with tools, especially when cutting or stripping cable.
Materials You’ll Need:
- Coaxial Cable (RG-6 Recommended): Ensure you have enough length of RG-6 coaxial cable to run from your signal source (e.g., outside demarcation point or splitter) to the new outlet location.
- F-Connectors: These are the screw-on or crimp-on fittings that attach to the end of the coaxial cable. Ensure they are designed for RG-6 cable. Compression F-connectors are highly recommended for their durability and signal integrity.
- Coax Wall Plate/Outlet: This is the decorative plate that mounts to the wall and houses the F-connector receptacle. They come in various styles and configurations, but a single-port outlet is most common for a new installation.
- Low-Voltage Mounting Bracket/Old Work Box (if no existing box): If you’re installing the outlet in a new location without an existing electrical box, you’ll need a low-voltage mounting bracket or an “old work” electrical box designed for drywall installation.
- Wall Plate Screws: Usually come with the wall plate itself.
Step-by-Step Installation Guide: From Cable to Connectivity
Now that you have your tools and materials ready, let’s get started with the installation process. This guide assumes you have a coaxial cable run to the vicinity of your desired outlet location.
Step 1: Planning and Preparation
Before you make any cuts or drill any holes, take a moment to plan.
- Determine the Outlet Location: Choose a convenient and accessible spot for your new coax outlet. Consider where your modem, router, or TV will be located.
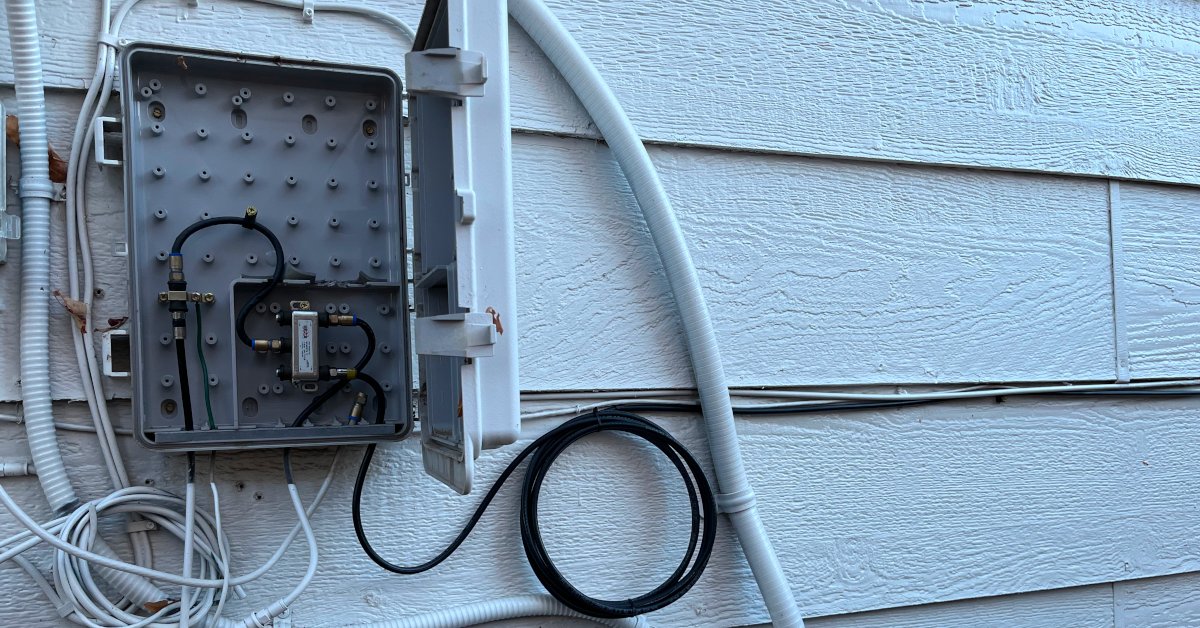
- Identify the Cable Source: Locate the existing coaxial cable that will feed your new outlet. This might be coming from your internet service provider’s entry point, a splitter, or another existing outlet.
- Measure and Plan Cable Run: If you need to run new cable, carefully measure the distance from the source to the new outlet location. Plan the route of the cable, considering whether it will run along baseboards, through walls, or in the attic or crawl space. Ensure the cable run is as direct as possible to minimize signal loss.
Step 2: Preparing the Coaxial Cable
This is a critical step that requires precision.
- Measure and Cut the Cable: Measure the required length of coaxial cable and cut it cleanly and squarely using your coaxial cable cutter.
- Strip the Outer Jacket: Using your coax stripper, carefully remove approximately ¾ inch of the outer protective jacket from the end of the cable. Be careful not to nick the braided shield underneath.
- Fold Back the Braided Shield: Gently fold the exposed braided shield back over the outer jacket.
- Strip the Dielectric Insulation: Now, use the coax stripper to remove approximately ¼ inch of the white dielectric insulation from the center of the cable. This will expose the center conductor. Ensure you do not nick the center conductor.
- Inspect the Stripped Cable: You should now have a clean center conductor, surrounded by the folded-back braided shield, and then the outer jacket.
Step 3: Attaching the F-Connector
This step ensures a secure and signal-reliable connection.
-
For Compression F-Connectors (Recommended):
- Slide the compression F-connector onto the prepared end of the coaxial cable, pushing it firmly until the center conductor protrudes slightly through the connector’s opening.
- Ensure the braided shield is neatly folded back over the connector’s body and that no stray strands are touching the center conductor.
- Use your coax compression tool to firmly crimp the connector onto the cable. Follow the manufacturer’s instructions for your specific tool. This creates a permanent and weather-resistant seal.
-
For Screw-On F-Connectors (Less Recommended for permanent installations):
- Screw the F-connector onto the prepared end of the coaxial cable. It should thread on easily.
- Ensure the center conductor extends about ¼ inch beyond the connector’s tip.
- Tighten the connector securely, but do not overtighten, as this can damage the cable or connector.
Step 4: Installing the Wall Plate and Outlet
This is where your new coax outlet takes shape.
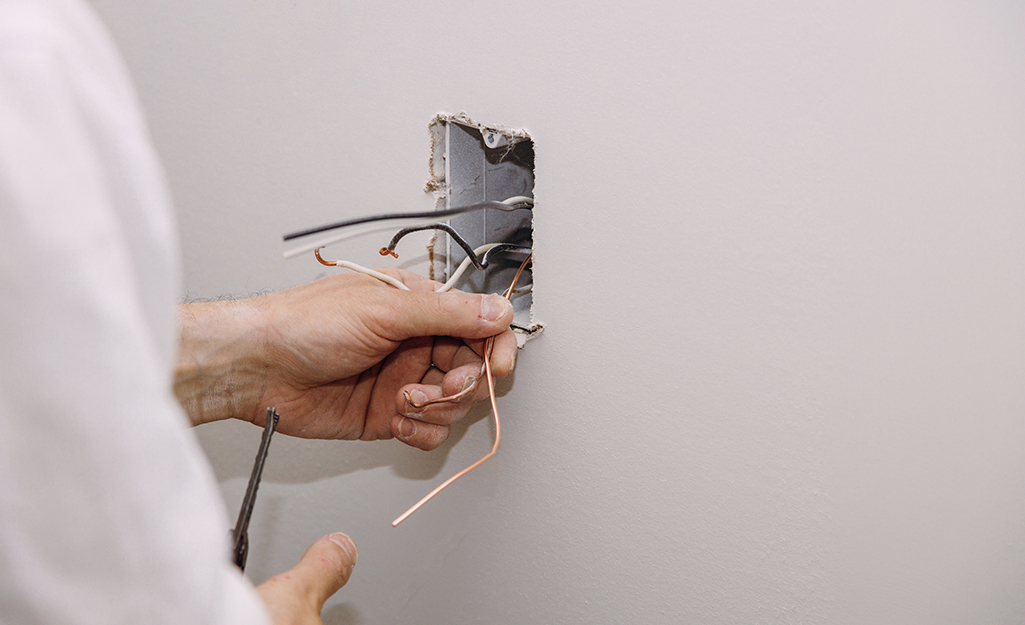
- Prepare the Wall Opening: If you are replacing an existing outlet, unscrew and remove the old wall plate and outlet. If you are installing in a new location, you will need to cut an appropriate opening in the drywall for your low-voltage bracket or old work box. Follow the manufacturer’s instructions for the bracket or box for precise cutting dimensions.
- Secure the Mounting Bracket/Box: Insert the low-voltage bracket or old work box into the wall opening and secure it according to its instructions. These are designed to grip the drywall and provide a stable mounting point.
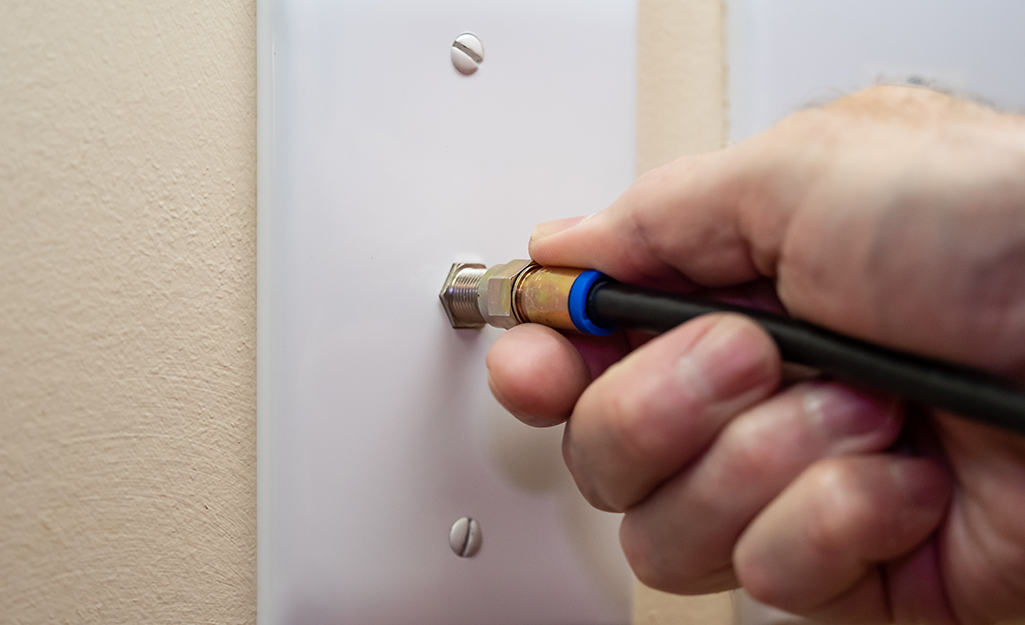
- Connect the Coax Cable to the Outlet: Most coax wall plates have an F-connector receptacle on the back. Screw the prepared end of your coaxial cable (with the attached F-connector) onto this receptacle until snug.
- Mount the Wall Plate: Position the wall plate over the mounting bracket or box, aligning the screw holes. Use the provided screws to secure the wall plate to the bracket or box, ensuring it is flush and stable against the wall.
Step 5: Testing Your New Outlet
The final and most important step is to ensure your new coax outlet is working correctly.
- Connect Your Device: Plug your modem, router, television, or other device into the newly installed coax outlet using a short, high-quality coaxial patch cable.
- Power Up and Test: Power on your device and check for a signal.
- For Internet: Access your modem’s or router’s configuration page (usually by typing an IP address into a web browser) to check the signal strength and connection status. You can also perform an internet speed test.
- For Cable TV: Tune into a few channels to check for clear reception.
If you encounter any issues, re-check your connections, ensuring the F-connectors are properly attached and that the coax cable is not damaged.
Troubleshooting Common Coax Installation Issues
While the installation process is generally straightforward, occasional issues can arise. Here are some common problems and their solutions:
-
No Signal or Weak Signal:
- Check Connections: Ensure all F-connectors are properly seated and tightened on both ends of the cable.
- Inspect Cable Integrity: Look for any kinks, cuts, or damage to the coaxial cable.
- Verify Cable Routing: Ensure the cable isn’t running too close to sources of electromagnetic interference (e.g., power cables, fluorescent lights).
- Splitter Issues: If you’re using a splitter, ensure it’s a high-quality splitter rated for your service and that all ports are properly terminated.
- ISP Signal Strength: In some cases, the issue might be with the signal coming from your internet service provider. Contact them if you suspect this.
-
F-Connector Won’t Screw On:
- Incorrect Cable Type: Ensure you are using F-connectors designed for RG-6 cable if that’s what you’re using.
- Damaged Cable End: The cable end might be damaged or improperly stripped. Re-strip and try again.
- Faulty Connector: The F-connector itself might be defective. Try a new connector.
-
Outlet Plate Doesn’t Sit Flush:
- Incorrect Box/Bracket: Ensure you’re using the correct low-voltage bracket or old work box for your wall type and thickness.
- Cable Obstruction: The coaxial cable might be preventing the plate from sitting flush. Ensure the cable is neatly tucked behind the outlet.
By following these steps and paying attention to detail, you can successfully install a new coax outlet, significantly improving your home’s connectivity and ensuring a reliable signal for all your devices. This DIY project empowers you to take control of your home’s digital infrastructure, leading to a more seamless and enjoyable online experience.
aViewFromTheCave is a participant in the Amazon Services LLC Associates Program, an affiliate advertising program designed to provide a means for sites to earn advertising fees by advertising and linking to Amazon.com. Amazon, the Amazon logo, AmazonSupply, and the AmazonSupply logo are trademarks of Amazon.com, Inc. or its affiliates. As an Amazon Associate we earn affiliate commissions from qualifying purchases.