In an increasingly connected world, the concept of a smart home has evolved from futuristic fantasy to everyday reality. At the forefront of this revolution are devices designed to enhance security, convenience, and peace of mind. Among these, the Ring Doorbell stands out as a pioneering gadget, transforming the traditional doorbell into an intelligent sentinel for your home. This guide, drawing upon the latest in technology trends and best practices for digital security, will walk you through the seamless installation process, ensuring your home benefits from this cutting-edge smart device.
Ring, as a brand, has carved a significant niche in the smart home security market, renowned for its user-friendly interfaces, robust hardware, and comprehensive ecosystem of products. Installing a Ring Doorbell is not just about mounting a new piece of technology; it’s an investment in your home’s safety, offering features like real-time video monitoring, two-way audio communication, and instant alerts directly to your smartphone. For anyone looking to bolster their home security, keep an eye on deliveries, or simply know who’s at the door even when they’re miles away, a Ring Doorbell is an indispensable tool.
This tutorial is designed to be comprehensive, covering everything from initial preparation and understanding different Ring models to the step-by-step physical installation and crucial app configuration. We’ll also touch upon common troubleshooting tips and maintenance advice to ensure your Ring Doorbell functions optimally for years to come, truly integrating into your smart home ecosystem and contributing to your digital security posture.
Why Choose a Ring Doorbell? Enhanced Security and Smart Home Integration
The decision to invest in a smart doorbell often stems from a desire for heightened security and unparalleled convenience. A Ring Doorbell goes far beyond a traditional chime, offering a suite of features that address modern homeowner concerns. Understanding these benefits solidifies the value proposition, aligning with our focus on technology trends, digital security, and strategic brand choices.
Enhanced Home Security and Convenience
At its core, a Ring Doorbell is a powerful surveillance tool. Equipped with a high-definition camera, it provides a clear view of anyone approaching your front door, day or night, thanks to infrared night vision. The live-view feature, accessible through the intuitive Ring app on your smartphone, allows you to see, hear, and speak to visitors from anywhere in the world, provided you have an internet connection. This two-way talk functionality is invaluable for instructing delivery drivers, greeting guests, or even deterring potential intruders by letting them know they are being monitored.
Beyond real-time interaction, the motion detection capabilities of a Ring Doorbell are a significant security asset. Using advanced AI algorithms, the device can detect movement within customizable zones, triggering immediate alerts to your phone. This proactive notification system means you’re always aware of activity at your doorstep, whether it’s a package being delivered, a neighbor stopping by, or an unexpected visitor. For those concerned about package theft, this feature alone can offer immense peace of mind. Moreover, Ring devices often support pre-roll recording, capturing a few seconds of video before a motion event is even triggered, providing crucial context that might otherwise be missed. This commitment to continuous surveillance and immediate alerting positions Ring as a leading brand in accessible home digital security.
Seamless Smart Home Integration
The true power of a Ring Doorbell is amplified when integrated into a broader smart home ecosystem. Ring, a subsidiary of Amazon, naturally boasts seamless compatibility with Amazon Alexa devices. This means you can ask your Echo Show to display your front door camera feed, or have Alexa announce when someone is at the door, providing hands-free convenience. This level of integration showcases the potential of modern technology trends to simplify daily life.
Beyond Alexa, Ring products often integrate with other smart home platforms and devices through services like IFTTT (If This Then That), allowing for custom automation routines. Imagine your smart lights automatically turning on when motion is detected at your door after dark, or your smart lock engaging automatically when you leave the house. This interconnectivity not only enhances security by creating a more responsive home environment but also elevates the overall smart home experience, demonstrating how gadgets and software can work in concert to deliver superior functionality. This ease of integration speaks volumes about Ring’s brand strategy to be a central pillar in the smart home, making it an appealing choice for tech-savvy users and those looking to build a cohesive smart living space.
The Ring Brand Advantage
Choosing Ring also means opting for a brand with a strong reputation for customer support, continuous product development, and a commitment to user experience. Ring’s software, accessible via its dedicated app, is regularly updated with new features and security enhancements, reflecting the dynamic nature of digital security and software development. The brand’s ecosystem includes not just doorbells but also security cameras, alarm systems, and smart lighting, all designed to work together harmoniously. This comprehensive approach ensures that once you’re within the Ring family, expanding your home security network is straightforward and efficient. Their investment in AI tools for motion detection and notification management further solidifies their position at the forefront of smart home technology, constantly refining the user experience and the effectiveness of their devices. This focus on a holistic security solution provides significant value, making it a sound financial and security decision.
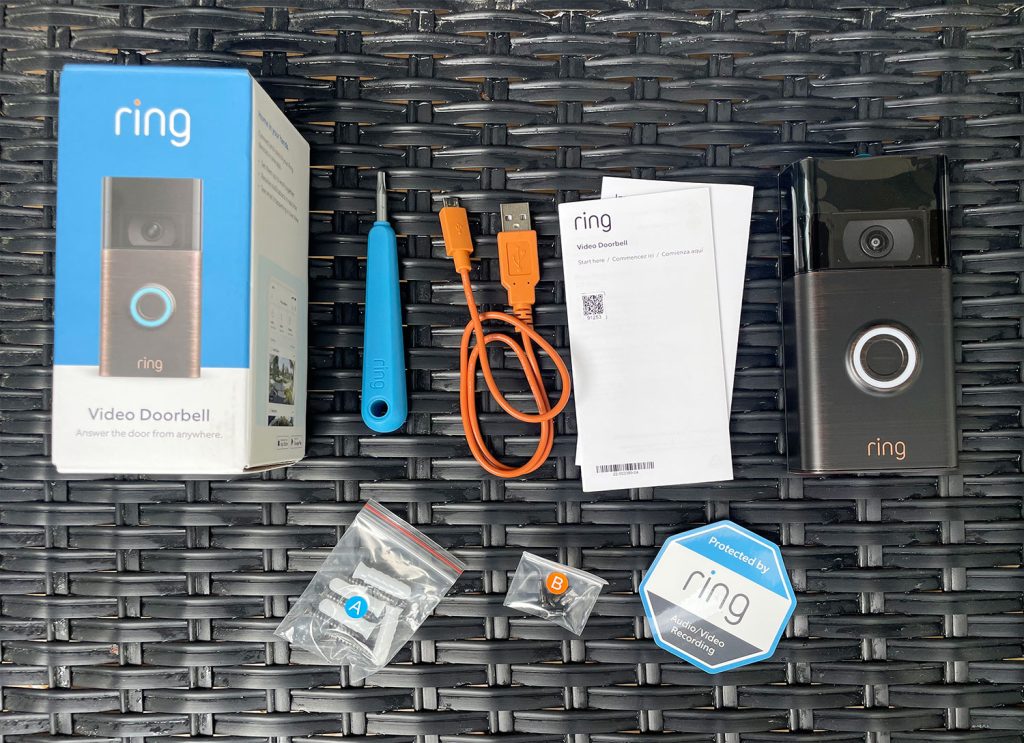
Preparing for Your Ring Doorbell Installation
Before you dive into the physical installation, thorough preparation is key to a smooth and successful setup. This phase involves understanding your specific Ring model, gathering the necessary tools, and conducting essential pre-installation checks. A little foresight here can save a lot of frustration later, aligning with best practices for managing any technology project.
Understanding Different Ring Models: Wired vs. Battery
Ring offers a variety of doorbell models, primarily categorized into battery-powered and wired options. Each has its advantages and specific installation requirements:
- Battery-Powered Models (e.g., Ring Video Doorbell, Ring Video Doorbell 2/3/4): These are the easiest to install as they don’t require existing doorbell wiring. They are ideal for homes without a traditional doorbell or for renters who cannot modify existing wiring. The downside is that the battery needs to be recharged periodically (typically every 1-6 months, depending on usage), or you can connect it to existing doorbell wires for trickle charging. The installation flexibility of battery models makes them popular for a quick and simple upgrade.
- Wired Models (e.g., Ring Video Doorbell Pro, Pro 2, Elite): These models connect directly to your home’s existing doorbell wiring, providing continuous power and eliminating the need for battery recharging. Wired models often offer advanced features like pre-roll video (capturing footage before motion is detected), more granular motion detection, and sometimes higher video quality. However, they require a compatible doorbell transformer (typically 16-24 VAC) and can be more complex to install, particularly if your existing chime system is mechanical. The Elite model even uses Ethernet for power and data, offering the most stable connection but requiring professional installation or more significant DIY effort.
Before purchasing, check your existing doorbell setup. If you have a traditional wired doorbell, measure its voltage. If not, a battery-powered model might be your best bet. This initial assessment helps ensure you select the right gadget for your home, minimizing installation headaches and maximizing functionality.
Essential Tools and Safety Precautions
Regardless of the model, you’ll need a few common tools:
- Drill: For pilot holes if mounting on masonry or wood.
- Screwdriver: Often, Ring provides a specialized security screwdriver, but standard Phillips and flathead screwdrivers might also be needed.
- Level: To ensure your doorbell is mounted straight.
- Pencil: For marking drill holes.
- Step Ladder: If your doorbell is positioned high.
- Wiring Tools (for wired models): Wire strippers, electrical tape, and potentially a multimeter to check voltage.
- Safety Glasses: Always recommended when drilling.
Crucial Safety Precaution: If you are installing a wired Ring Doorbell, ALWAYS turn off the power to your existing doorbell at the breaker box before you begin any work. This is paramount to prevent electrical shock and damage to your home’s electrical system or the new device. Double-check that the power is off using a voltage tester or by pressing the old doorbell button to confirm it’s unresponsive.
Pre-Installation Checks: Existing Wiring and Wi-Fi Strength
Beyond tools, two critical checks ensure a smooth installation and optimal performance:
- Existing Doorbell Wiring (for wired models):
- Voltage: Most wired Ring Doorbells require a transformer with a voltage between 16 and 24 Volts AC. Older homes might have lower voltage transformers (e.g., 8-10 VAC), which will need to be upgraded for your Ring device to function correctly. A low voltage can cause intermittent power issues or prevent the device from working altogether.
- Chime Compatibility: Ring wired doorbells often include a “Chime Kit” or “Pro Power Kit” to ensure compatibility with your existing indoor chime. Follow the specific instructions provided for your Ring model to install this kit, typically inside your existing chime box.
- Wi-Fi Strength: A strong, stable Wi-Fi signal at your front door is absolutely essential for your Ring Doorbell to operate effectively. Without it, you’ll experience delayed notifications, dropped video feeds, or an inability to connect.
- Test Signal: Use your smartphone to check Wi-Fi signal strength near where you plan to install the doorbell. If the signal is weak, consider repositioning your router or investing in a Wi-Fi extender (like a Ring Chime Pro, which also acts as a Wi-Fi booster specifically for Ring devices).
- Bandwidth: Ensure your internet connection has sufficient bandwidth, especially if you plan to install multiple Ring devices or stream a lot of video.
By meticulously going through these preparation steps, you lay a solid foundation for a successful installation, maximizing your return on investment in this smart home gadget.
Step-by-Step Installation Guide
With preparations complete, it’s time to install your Ring Doorbell. While specific instructions might vary slightly depending on your model, the general process follows these logical steps, ensuring a robust and secure setup.
Charging the Battery and Initial Device Setup
For battery-powered Ring models, this is your first crucial step.
- Charge the Battery: Fully charge the provided battery using the included USB cable. A complete charge can take several hours, indicated by both the red and green lights turning solid green. Ensure the battery is fully charged before proceeding, as this prevents issues during setup and ensures optimal initial performance.
- Download the Ring App: Go to your smartphone’s app store (iOS App Store or Google Play Store), search for “Ring – Always Home,” and download the official app.
- Create an Account: Open the app, and if you don’t already have one, create a Ring account. You’ll need an email address and a strong, unique password. Enable two-factor authentication (2FA) for enhanced digital security – this is a critical best practice for all smart home devices.
- Add Your Device: In the Ring app, tap “Set Up a Device,” then select “Doorbells.” The app will guide you through scanning the QR code on your Ring Doorbell (usually on the back or side) to initiate the setup process.
Removing Your Old Doorbell (If Applicable)
If you’re replacing an existing wired doorbell:
- Turn Off Power: Crucially, turn off the power to your existing doorbell at the circuit breaker. This cannot be stressed enough for safety.
- Remove Old Doorbell: Carefully unscrew and detach your old doorbell from the wall. You will typically see two wires connected to it.
- Disconnect Wires: Gently disconnect the two wires from the old doorbell. If the wires are short, you might need to use the wire extenders often provided by Ring to ensure they reach the new device comfortably. Ensure the bare ends of the wires are not touching each other or anything else until you’re ready to connect them to the Ring Doorbell.
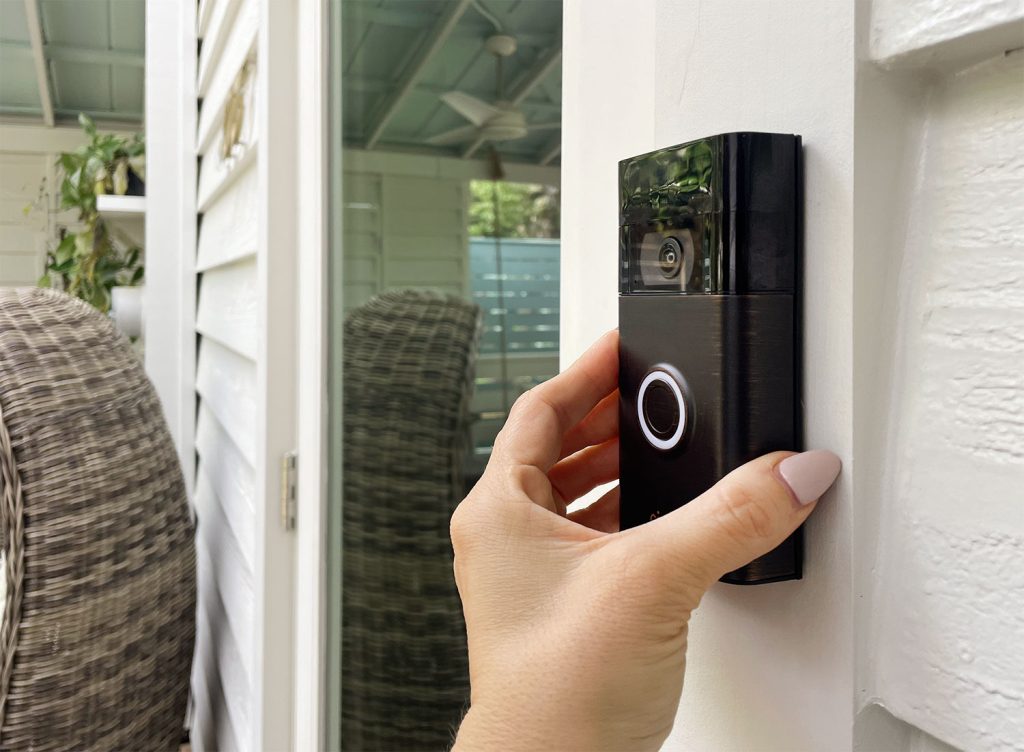
Mounting the Ring Doorbell (Battery-Powered Models)
For battery-powered doorbells, the process is straightforward:
- Choose Mounting Location: Select a spot that offers a clear view of your entryway and is within range of your Wi-Fi signal. Consider the recommended height (approximately 48 inches or 1.2 meters from the ground) to capture optimal facial recognition.
- Install Mounting Bracket: Place the mounting bracket (often angled for better viewing) against the wall at your desired height. Use a level to ensure it’s straight, then mark the drill holes with a pencil.
- Drill Pilot Holes: Use a drill bit appropriate for your wall material (e.g., masonry bit for brick/stucco, wood bit for siding) to drill the pilot holes.
- Insert Wall Anchors: If drilling into masonry or stucco, gently tap the provided wall anchors into the pilot holes.
- Screw in Bracket: Secure the mounting bracket to the wall using the provided screws.
- Insert Battery: Insert the fully charged battery into the bottom of your Ring Doorbell until it clicks into place.
- Attach Doorbell: Align the doorbell with the mounting bracket and firmly push it into place, ensuring it clicks securely.
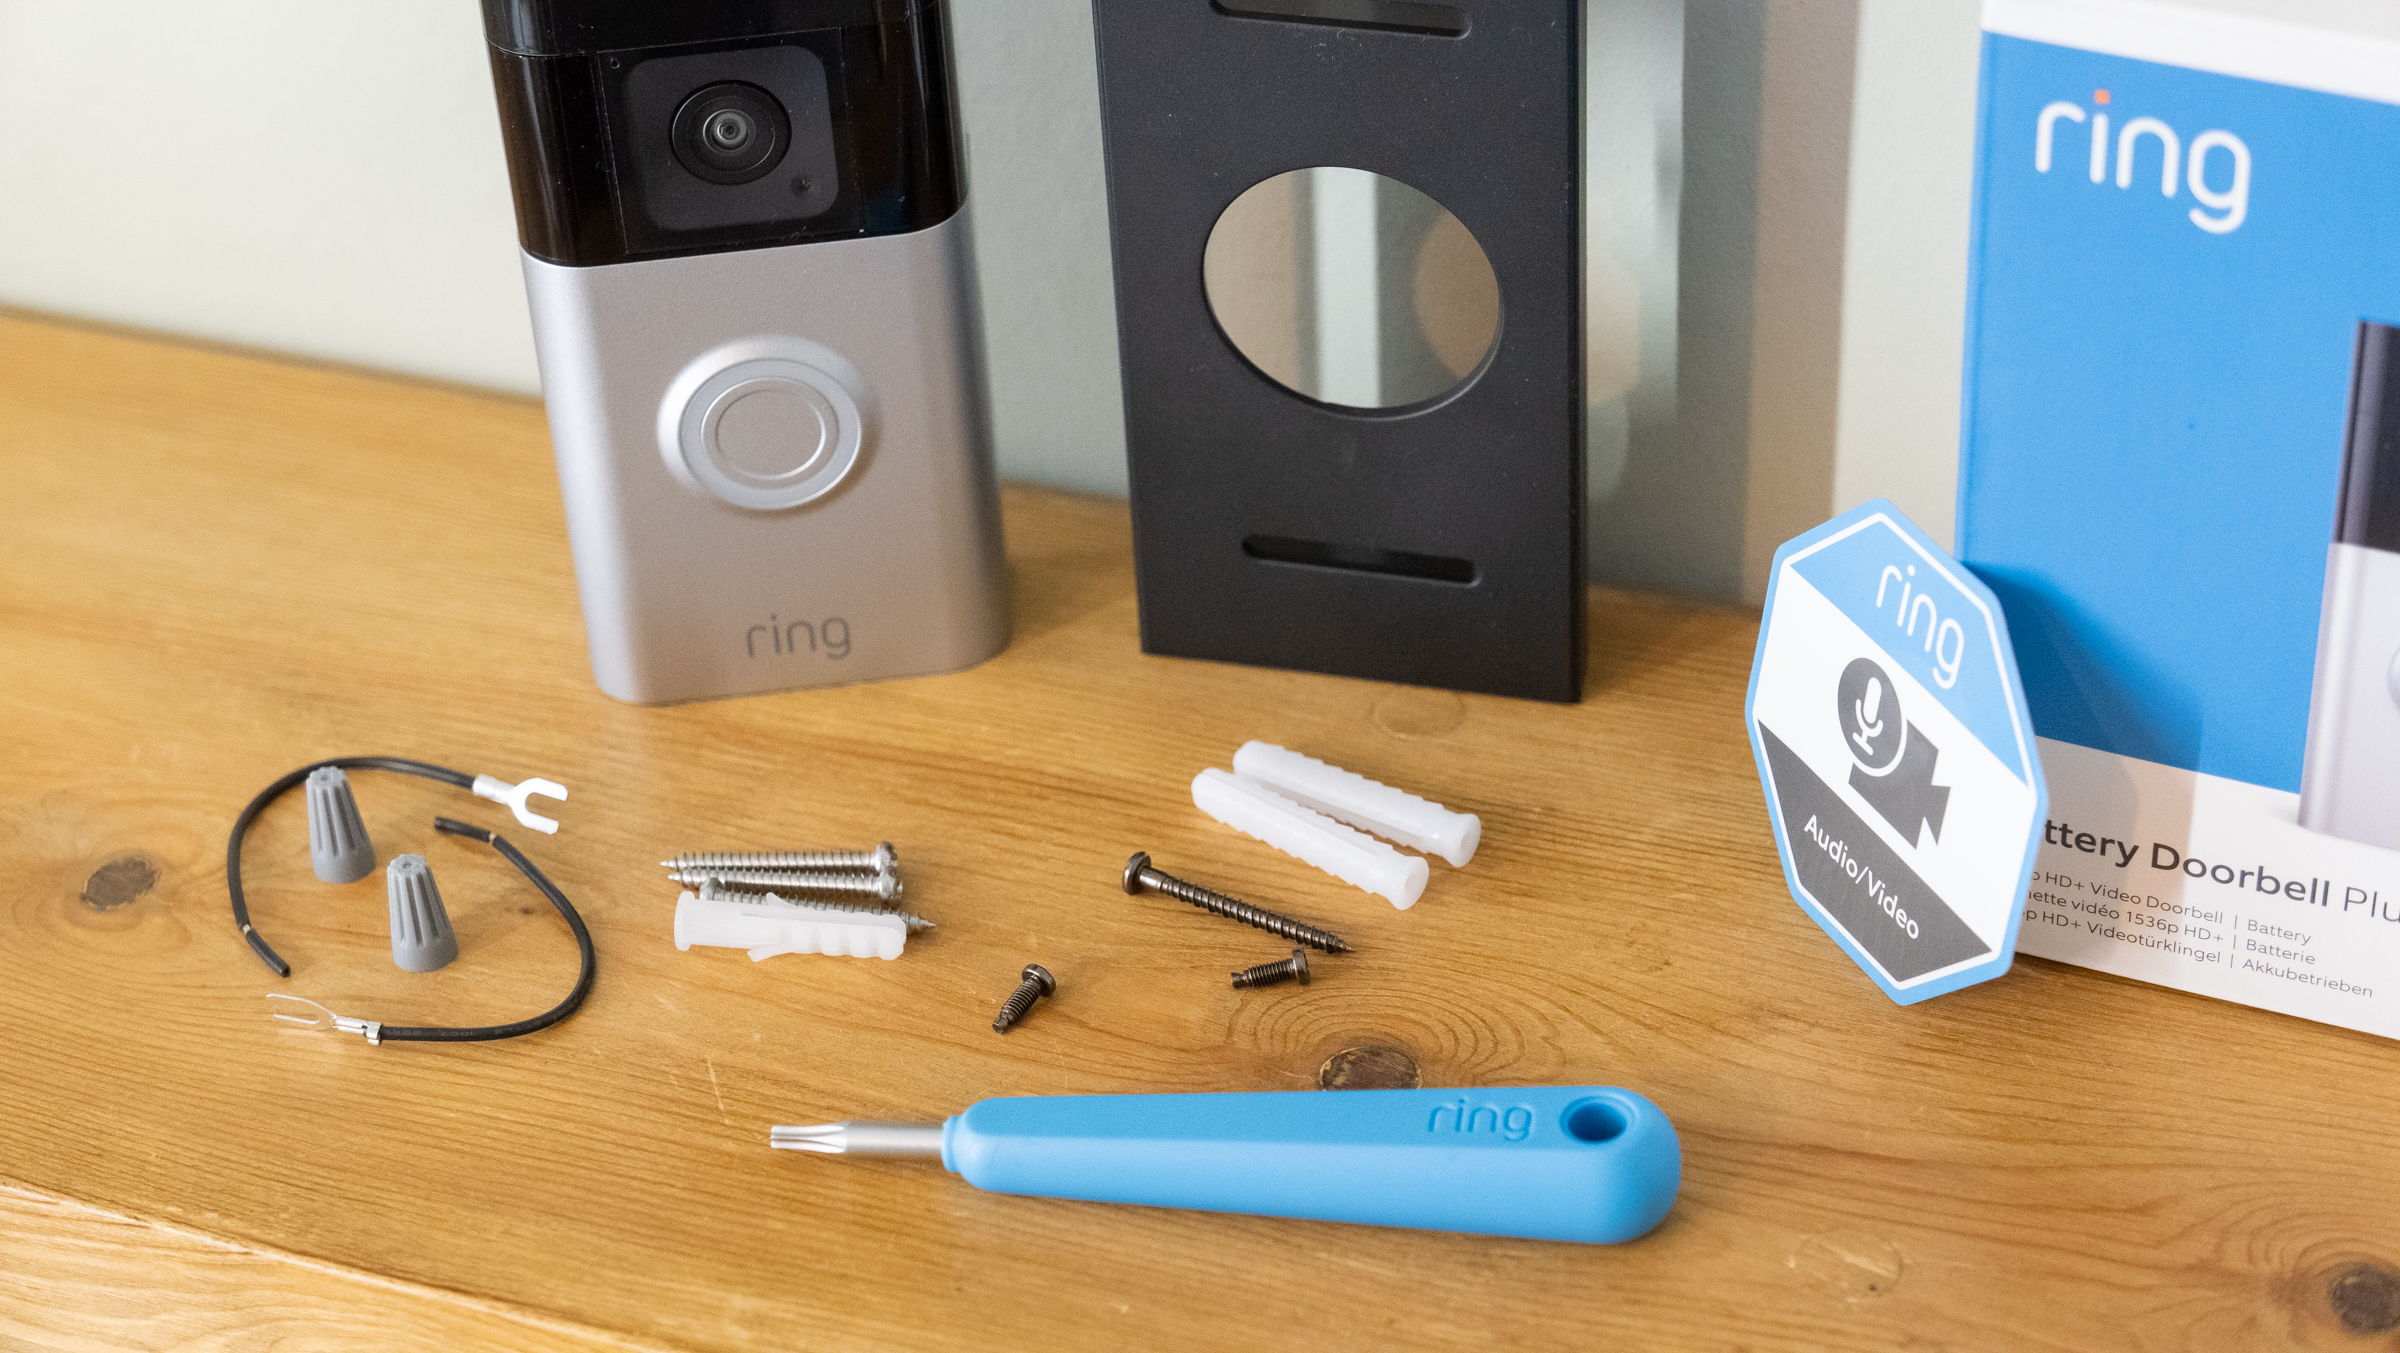
Wiring the Ring Doorbell (Wired Models)
This step requires more precision and adherence to specific model instructions:
- Install Chime Kit (if required): For many wired models (like Ring Pro), you’ll first need to install a “Pro Power Kit” or “Chime Kit” to your indoor mechanical chime box. This kit ensures proper power regulation and chime functionality. Again, ensure power to the chime is off at the breaker. Open your chime box cover, identify the “Front” and “Transformer” terminals, and follow the kit’s wiring diagram precisely. Close the chime box cover after installation.
- Connect Wires to Doorbell: Take the two wires from your old doorbell and connect them to the terminals on the back of your Ring Doorbell. It typically doesn’t matter which wire goes to which terminal, but ensure they are securely fastened. Use the provided wire extenders if needed.
- Attach Doorbell to Mounting Plate: Attach the Ring Doorbell to its mounting plate, aligning the screw holes.
- Secure Doorbell: Screw the Ring Doorbell firmly to the wall, making sure the wires are neatly tucked away and not pinched.
Securing the Device and Finishing Touches
For all models:
- Attach Faceplate: Snap the decorative faceplate onto the Ring Doorbell.
- Install Security Screw: Use the specialized security screw (often a star-shaped Torx screw) and the matching screwdriver provided by Ring to secure the doorbell to its mount from the bottom. This prevents easy removal by unauthorized individuals, enhancing your digital security.
- Restore Power: Once the doorbell is physically installed and secured, return to your breaker box and turn the power back on. The Ring Doorbell should light up, indicating it’s receiving power (or has battery power).
Your Ring Doorbell is now physically installed! The next crucial step is to configure it using the Ring app.
Configuring Your Ring Doorbell with the App
The physical installation is only half the battle. To unlock the full potential of your Ring Doorbell and integrate it seamlessly into your smart home, you must configure it through the Ring app. This involves connecting to your Wi-Fi, customizing settings, and exploring integration options, harnessing the power of software and AI tools.
Downloading and Setting Up the Ring App
As mentioned previously, ensure you have the latest version of the “Ring – Always Home” app installed on your smartphone or tablet. If you haven’t already, create your Ring account and enable two-factor authentication for robust digital security.
- Initiate Setup in App: Within the app, if you haven’t already, tap “Set Up a Device” and select “Doorbells.”
- Scan QR Code: The app will prompt you to scan the QR code located on your Ring Doorbell (or on its packaging/manual). This code uniquely identifies your device and initiates the pairing process.
- Enter Location Information: Provide your address. This is important for emergency services if you integrate with a Ring Alarm system and for accurate motion zone calibration.
Connecting to Wi-Fi and Device Pairing
This is a critical step for your doorbell’s connectivity.
- Ring Wi-Fi Network: The app will instruct you to connect your phone to a temporary Wi-Fi network broadcast by your Ring Doorbell itself (e.g., “Ring-XXXXXX”). Go to your phone’s Wi-Fi settings, select this network, and then return to the Ring app.
- Connect to Home Wi-Fi: The Ring app will then ask you to select your home Wi-Fi network from a list and enter its password. Ensure you choose your primary 2.4GHz network for optimal compatibility and range (most Ring devices prefer 2.4GHz, though some Pro models support 5GHz).
- Device Pairing: Once connected to your home Wi-Fi, the Ring Doorbell will attempt to connect to the Ring servers. This might take a few moments. A voice prompt from the doorbell will confirm successful setup.
Customizing Settings: Motion Zones, Notifications, Two-Way Talk
Now that your doorbell is online, it’s time to tailor its behavior to your preferences using the app’s powerful software features.
- Naming Your Device: Give your doorbell a descriptive name (e.g., “Front Door,” “Main Gate”).
- Motion Settings:
- Motion Zones: This is where Ring’s AI tools truly shine. Create specific “motion zones” – areas within the camera’s view that you want it to monitor. This helps reduce false alerts from passing cars, trees swaying, or pets in your yard. Drag and resize the zone boundaries to precisely cover your entryway.
- Motion Sensitivity: Adjust the sensitivity level to fine-tune how easily motion triggers an alert. Experiment with this to find the sweet spot that captures relevant activity without overwhelming you with notifications.
- Motion Frequency: For battery models, you can adjust how often the device checks for motion. Higher frequency drains the battery faster but provides more real-time monitoring.
- Notification Settings: Customize how you receive alerts. You can enable or disable push notifications for motion, rings, and live view events. You can also link your Ring Doorbell to a Ring Chime or Chime Pro for an audible alert inside your home.
- Two-Way Talk: Test the two-way talk feature to ensure audio is clear both ways. Adjust speaker and microphone volume if needed.
- Linked Devices: Explore the “Linked Devices” feature to set up automatic actions. For example, if your Ring Doorbell detects motion, it could automatically turn on your Ring Floodlight Cam or start recording on another Ring camera.
- Privacy Settings: Configure “Privacy Zones” to black out areas within the camera’s view that you do not wish to record, respecting neighbors’ privacy.
Integrating with Other Smart Home Devices
Beyond Ring’s ecosystem, leverage its compatibility with other smart home platforms:
- Amazon Alexa: Link your Ring account to your Amazon account through the Alexa app. You can then use voice commands like “Alexa, show me the front door” or have Alexa announce visitors on your Echo devices.
- Smart Locks & Lights: Many smart locks (e.g., Yale, Schlage) and smart lighting systems (e.g., Philips Hue, Ring Smart Lighting) can be integrated. For instance, when your Ring Doorbell rings, your smart lights could flash, or you could remotely unlock your door for a trusted visitor after verifying their identity via the video feed. These integrations enhance both security and the convenience offered by smart home gadgets.
This comprehensive configuration ensures your Ring Doorbell is not just a standalone gadget but a fully integrated component of your smart home, providing seamless security and convenience tailored to your specific needs.
Troubleshooting and Maintenance Tips
Even the most well-installed technology can encounter hiccups. This section provides solutions to common Ring Doorbell issues and best practices for ongoing maintenance and digital security, ensuring your investment continues to provide reliable service.
Common Installation Hurdles and Solutions
- No Power/Intermittent Power (Wired Models):
- Issue: The doorbell doesn’t light up, or it frequently disconnects.
- Solution: Check your transformer voltage (needs to be 16-24 VAC). If it’s too low, you’ll need to upgrade it. Ensure all wire connections are secure and that the Chime Kit/Pro Power Kit is correctly installed in your indoor chime box. Verify the circuit breaker is on.
- No Indoor Chime Sound:
- Issue: The Ring Doorbell works, but your traditional indoor chime doesn’t ring.
- Solution: Double-check the Chime Kit/Pro Power Kit installation. Ensure you’ve selected “Mechanical” or “Digital” chime in the Ring app’s settings, corresponding to your chime type. Some very old chimes might not be compatible. If you only want a digital chime, consider purchasing a Ring Chime Pro.
- Poor Wi-Fi Connectivity/Laggy Video:
- Issue: Video feeds are choppy, slow to load, or the doorbell frequently disconnects.
- Solution: Your Wi-Fi signal at the doorbell location is likely weak. Try repositioning your router, installing a Wi-Fi extender (such as a Ring Chime Pro), or upgrading your internet plan if bandwidth is an issue. Obstructions like thick walls can also degrade the signal.
- Excessive False Motion Alerts:
- Issue: You’re receiving too many notifications from passing cars, pets, or tree branches.
- Solution: Revisit your motion zone settings in the Ring app. Make them more specific, excluding high-traffic areas. Adjust motion sensitivity to a lower level. For some models, you can also utilize “People Only Mode” to filter out non-human motion.
- Battery Drains Too Quickly (Battery Models):
- Issue: The battery requires frequent recharging.
- Solution: High motion detection frequency, high motion sensitivity, and frequent Live View access can all drain the battery faster. Reduce these settings in the app. Ensure good Wi-Fi strength, as the device expends more power trying to connect to a weak signal. Extreme cold weather can also reduce battery efficiency.
Optimizing Performance and Battery Life
Regular maintenance ensures your Ring Doorbell remains a reliable part of your digital security infrastructure.
- Clean the Lens: Periodically wipe the camera lens with a soft, clean microfiber cloth to remove dust, dirt, or smudges that could obscure the view.
- Keep Software Updated: The Ring app automatically prompts you for firmware updates for your doorbell. Always install these as they often contain performance enhancements, bug fixes, and crucial digital security patches.
- Monitor Battery Life: For battery-powered models, keep an eye on the battery percentage in the Ring app and charge it proactively before it completely depletes. Consider having a spare fully charged battery for quick swaps if available for your model.
- Review Motion Zones: As seasons change or landscaping evolves, you might need to adjust your motion zones to maintain optimal detection and avoid false alerts.
- Check Wiring (Wired Models): Periodically ensure the wires are still securely fastened and that no corrosion has occurred at the terminals.
Digital Security Best Practices
Your Ring Doorbell is a window into your home, making its digital security paramount.
- Strong, Unique Passwords: Use a complex, unique password for your Ring account. Never reuse passwords from other services.
- Two-Factor Authentication (2FA): Always enable 2FA on your Ring account. This adds an extra layer of security, requiring a code from your phone in addition to your password, significantly reducing the risk of unauthorized access.
- Limit Shared Access: If you share access with family members, use Ring’s “Shared Users” feature. Avoid sharing your primary account credentials. For shared users, ensure they also use strong passwords and 2FA.
- Review Account Activity: Periodically check your Ring app for any unusual activity or logins.
- Wi-Fi Security: Ensure your home Wi-Fi network uses WPA2 or WPA3 encryption and a strong password. This protects all devices connected to your network, including your Ring Doorbell.
- Understand Privacy Settings: Be aware of privacy zones and how your motion detection settings might affect your neighbors. Transparency and good etiquette can prevent disputes.
By following these troubleshooting and maintenance guidelines, alongside robust digital security practices, your Ring Doorbell will continue to serve as an effective, reliable, and secure smart home guardian, providing invaluable peace of mind and demonstrating the longevity of thoughtful tech investments. This approach also subtly touches upon the ‘money’ aspect by protecting your investment and potentially reducing insurance premiums through enhanced security.
Conclusion: Embracing Smart Security for a Smarter Home
Installing a Ring Doorbell is a tangible step towards a more secure and convenient smart home. From the initial excitement of unboxing this cutting-edge gadget to the final configuration within the intuitive Ring app, each stage of the process is designed to be manageable for the average homeowner, even those with limited technical expertise. By understanding the different models, meticulously preparing for the installation, and following the step-by-step guidance provided, you can confidently integrate this powerful tool into your daily life.
The benefits extend far beyond simply knowing who’s at the door. You gain a proactive surveillance system that deters potential threats, monitors deliveries, and allows for real-time interaction from anywhere in the world. This blend of hardware innovation, intelligent software, and AI-driven features exemplifies the best of modern technology trends in enhancing personal safety and convenience. Moreover, by adhering to crucial digital security practices—like strong passwords and two-factor authentication—you ensure your smart home remains resilient against evolving online threats, safeguarding both your privacy and your investment.
Ring, as a brand, has successfully positioned itself at the nexus of technology and home security, offering a comprehensive ecosystem that not only functions effectively but also integrates seamlessly with other smart home devices. This strategic approach ensures that your Ring Doorbell is not just a standalone piece of tech but a foundational element of a connected, intelligent, and secure living environment. Embracing such smart security solutions is not just about adopting new gadgets; it’s about investing in peace of mind, leveraging the power of connectivity, and building a truly smarter home for the future.
aViewFromTheCave is a participant in the Amazon Services LLC Associates Program, an affiliate advertising program designed to provide a means for sites to earn advertising fees by advertising and linking to Amazon.com. Amazon, the Amazon logo, AmazonSupply, and the AmazonSupply logo are trademarks of Amazon.com, Inc. or its affiliates. As an Amazon Associate we earn affiliate commissions from qualifying purchases.