The performance of your computer, especially when it comes to graphics-intensive tasks like gaming, video editing, or even running multiple high-resolution displays, hinges significantly on one often-overlooked component: your graphics card drivers. For users equipped with NVIDIA GPUs, understanding how to properly install and maintain these drivers isn’t just a suggestion; it’s a critical step toward unlocking your hardware’s full potential and ensuring a smooth, stable, and visually rich digital experience.
NVIDIA, a global leader in graphics processing units (GPUs), consistently releases driver updates designed to introduce new features, optimize performance for the latest games and applications, and patch security vulnerabilities or bugs. Without the correct and up-to-date drivers, your cutting-edge NVIDIA graphics card might perform no better than an entry-level model, leaving you with stuttering frame rates, graphical glitches, or even outright compatibility issues. This guide will walk you through the comprehensive process of installing NVIDIA drivers, ensuring you’re equipped with the knowledge to maintain peak graphical performance and system stability. Whether you’re setting up a brand-new PC, upgrading your GPU, or simply troubleshooting a lingering performance issue, mastering driver installation is a fundamental skill for any tech enthusiast.
Essential Preparations Before Installation
Before you dive into the installation process, a few preparatory steps are crucial. These steps ensure you download the correct drivers, minimize potential conflicts, and provide a safety net in case something goes awry. Skipping these can lead to frustration and wasted time, so consider them non-negotiable for a smooth experience.
Identify Your NVIDIA GPU Model
The very first step is to accurately identify which NVIDIA graphics card is installed in your system. NVIDIA produces a vast array of GPUs, from the high-end RTX series to the more budget-friendly GTX and MX lines. Each series, and often specific models within a series, requires distinct driver packages. Installing the wrong driver can lead to errors, instability, or a complete failure of your graphics card to function.
There are several straightforward ways to find your GPU model:
- Device Manager (Windows): Right-click the Start button, select “Device Manager,” and expand the “Display adapters” section. Your NVIDIA GPU will be listed here (e.g., NVIDIA GeForce RTX 3070).
- NVIDIA Control Panel: If you have existing NVIDIA drivers, right-click on your desktop and select “NVIDIA Control Panel.” In the panel, click “System Information” in the bottom-left corner. Your GPU model will be displayed.
- Physical Inspection: If you’re building a new PC or have easy access to your desktop’s internals, the GPU model is often printed prominently on the graphics card itself, sometimes on a sticker or etched onto the cooler shroud.
- System Information Tools: Third-party tools like CPU-Z or GPU-Z provide detailed information about your hardware, including the exact GPU model.
Determine Your Operating System and Version
NVIDIA drivers are also operating system-specific. Most modern systems run 64-bit versions of Windows 10 or Windows 11. It’s rare to encounter 32-bit systems or older Windows versions (like Windows 7/8) that still support the latest NVIDIA drivers, but verifying this information is nonetheless important. To check your Windows version and architecture:
- Go to Settings > System > About (Windows 10/11). Look for “System type” to see if it’s a “64-bit operating system.”
Download the Correct NVIDIA Drivers
With your GPU model and OS details in hand, you can now confidently download the correct drivers. Always obtain drivers directly from NVIDIA’s official website to ensure authenticity and avoid potential malware or outdated software from third-party sites.
- Navigate to the NVIDIA Driver Download Page: Open your web browser and go to
www.nvidia.com/drivers. - Use the Manual Driver Search: On this page, you’ll find a series of dropdown menus. Select:
- Product Type: (e.g., GeForce, Quadro, NVS)
- Product Series: (e.g., GeForce RTX 30 Series, GeForce GTX 16 Series)
- Product: (e.g., GeForce RTX 3070, GeForce GTX 1660 SUPER)
- Operating System: (e.g., Windows 10 64-bit, Windows 11)
- Download Type: You’ll typically have two main options for GeForce cards:
- Game Ready Driver (GRD): These are optimized for the latest games and provide the best day-one gaming experience. Most gamers should choose this.
- Studio Driver (SD): These are designed for creative professionals and offer enhanced stability and performance for applications like Adobe Creative Suite, Blender, and Autodesk tools.
- Language: Choose your preferred language.
- Search and Download: Click “Search” and then “Download.” Review the release notes if you wish, then click “Download” again to save the executable file to your computer.
Back Up Your System (Optional but Recommended)
While driver installation is generally safe, creating a system restore point or a full system backup before major changes is a smart digital security practice. This provides a quick way to revert your system to a previous stable state if any unforeseen issues arise after the driver installation.
- Create a System Restore Point (Windows): Search for “Create a restore point” in the Windows search bar, open the System Properties window, and click “Create…” under the System Protection tab.
Uninstall Previous Drivers (Crucial for a Clean Slate)
This is perhaps the most critical preparatory step, especially if you’re upgrading from an older GPU, experiencing graphical issues, or simply want to ensure optimal performance. Leftover files from previous driver versions (even from the same NVIDIA card) can cause conflicts, leading to system instability, performance drops, or installation failures.
- Use Display Driver Uninstaller (DDU): This third-party tool is highly recommended by tech enthusiasts and professionals for its thoroughness.
- Download DDU from its official source (e.g., Guru3D).
- Restart your PC in Safe Mode. This is crucial as it prevents Windows from loading the graphics drivers, allowing DDU to remove them completely. (To enter Safe Mode: Hold Shift while clicking Restart, then Troubleshoot > Advanced Options > Startup Settings > Restart, and press 4 or F4 for Safe Mode).
- Run DDU, select “GPU” and “NVIDIA,” then choose “Clean and restart.” DDU will meticulously remove all NVIDIA driver components.
- Standard Windows Uninstall (Less Thorough): If you prefer not to use DDU, you can try:
- Go to Settings > Apps > Apps & features.
- Find any entries starting with “NVIDIA” (e.g., “NVIDIA Graphics Driver,” “NVIDIA GeForce Experience,” etc.) and uninstall them.
- Restart your PC after uninstalling.
Step-by-Step Installation Methods
With your system prepped and the correct driver downloaded, you’re ready to proceed with the installation. There are a few methods, each catering to slightly different scenarios or user preferences.
Method 1: Using the NVIDIA Driver Installer (Recommended)
This is the most common and recommended method for most users, offering a streamlined and guided installation process.
- Run the Installer: Locate the NVIDIA driver executable file you downloaded (e.g.,
551.61-desktop-win10-win11-64bit-international-dch-whql.exe) and double-click it. - Extraction Location: The installer will first ask for a location to extract the driver files. The default location is usually fine. Let it complete the extraction.
- NVIDIA System Check: The installer will perform a quick system compatibility check.
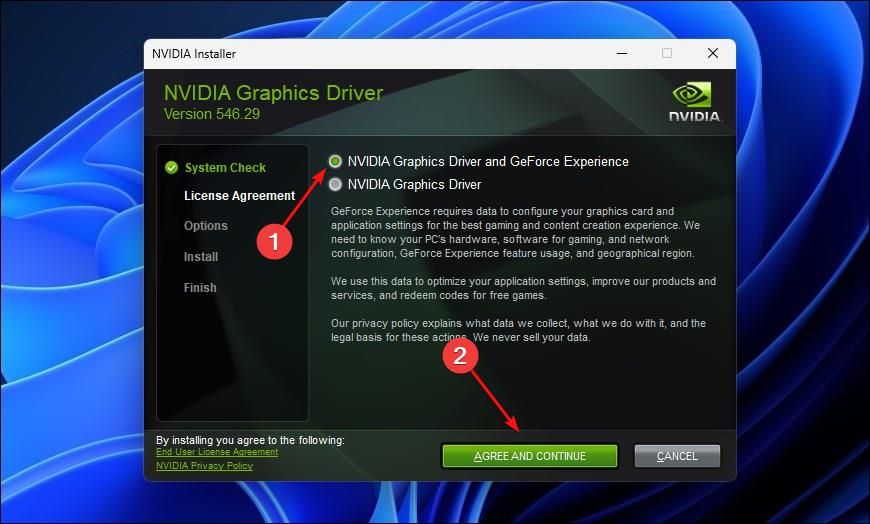
- License Agreement: Read and accept the NVIDIA Software License Agreement to continue.
- Installation Options: This is a crucial step:
- Express Installation (Recommended): This option installs all components (graphics driver, GeForce Experience, PhysX, etc.) with default settings. It’s convenient for most users.
- Custom (Advanced) Installation: This allows you to choose which components to install. More importantly, it offers the “Perform a clean installation” checkbox. Even if you used DDU, checking “Perform a clean installation” here is highly recommended. This ensures the installer completely overwrites any existing or leftover driver files, preventing potential conflicts and ensuring optimal performance. If you did not use DDU, definitely choose Custom and check this box.
- Component Selection (Custom Only): If you chose “Custom,” you can deselect components you don’t need (e.g., if you don’t use GeForce Experience for game optimization).
- Initiate Installation: Click “Next” to begin the installation. Your screen might flicker, go black, or change resolution several times during this process. This is normal as the old display drivers are removed and the new ones are loaded.
- Completion and Restart: Once the installation is complete, the installer will prompt you to restart your computer. It is vital to restart your PC immediately to finalize the driver installation and ensure all components are loaded correctly.
Method 2: Installing via GeForce Experience (Convenience Focus)
If you already have GeForce Experience installed (either from a previous driver installation or by purchasing a pre-built PC), this method offers a very convenient way to keep your drivers updated.
- Launch GeForce Experience: Open the application from your desktop shortcut or Start menu.
- Navigate to Drivers Tab: Click on the “Drivers” tab located in the top-left corner of the GeForce Experience window.
- Check for Updates: GeForce Experience will automatically check for the latest Game Ready Driver or Studio Driver available for your system.
- Download Driver: If a new driver is found, click the “Download” button.
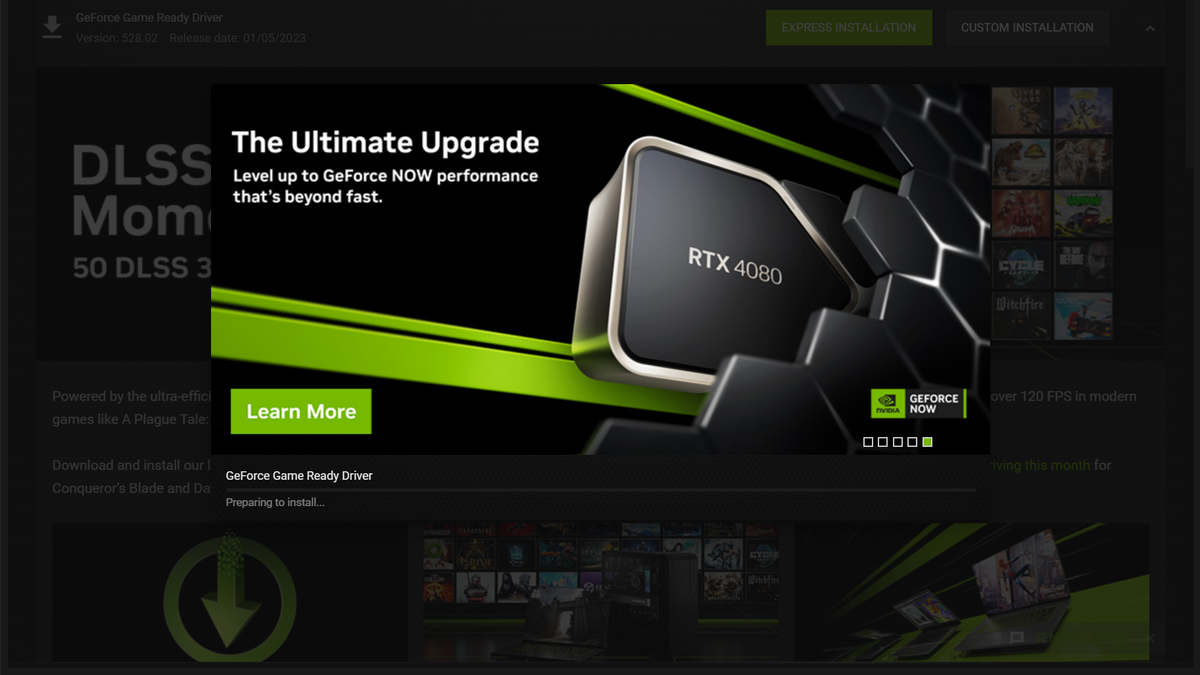
- Choose Installation Type: Once downloaded, you’ll be given two options:
- Express Installation: Installs all components automatically.
- Custom Installation: Allows you to select components and, crucially, offers the “Perform a Clean Installation” option. As mentioned before, if you’re doing a fresh install or troubleshooting, select Custom and check this box.
- Complete Installation: Follow the on-screen prompts. Like with the standalone installer, your screen may flicker, and a restart will be required after completion.
Method 3: Manual Installation via Device Manager (Advanced/Troubleshooting)
This method is less common for full driver installations but can be useful for troubleshooting specific issues or installing only the core display driver without additional NVIDIA software.
- Extract Drivers (Important): The NVIDIA driver executable is a self-extracting archive. Run the installer (as in Method 1), but when it asks where to extract the files, note this location. Cancel the installation after extraction. You now have a folder containing the raw driver files.
- Open Device Manager: Right-click the Start button and select “Device Manager.”
- Locate Your GPU: Expand “Display adapters,” right-click on your NVIDIA graphics card, and select “Update driver.”
- Browse for Driver Software: Choose “Browse my computer for driver software.”
- Specify Location: Click “Browse…” and navigate to the folder where you extracted the NVIDIA driver files in step 1. Make sure “Include subfolders” is checked.
- Install: Click “Next.” Windows will search for and install the compatible driver.
- Restart: Restart your PC once the installation is complete.
This method typically only installs the core display driver. You might need to install GeForce Experience or NVIDIA Control Panel separately if you require those components.
Verifying Your Installation and Troubleshooting Common Issues
Once the drivers are installed and your system has restarted, it’s essential to verify that everything is working as expected. If you encounter problems, knowing how to troubleshoot them can save you a lot of headaches.
Confirming Successful Driver Installation
- NVIDIA Control Panel: Right-click on your desktop. If the “NVIDIA Control Panel” option is present and opens without error, it’s a good sign. Inside the Control Panel, you can go to “Help” > “System Information” to check the driver version installed.
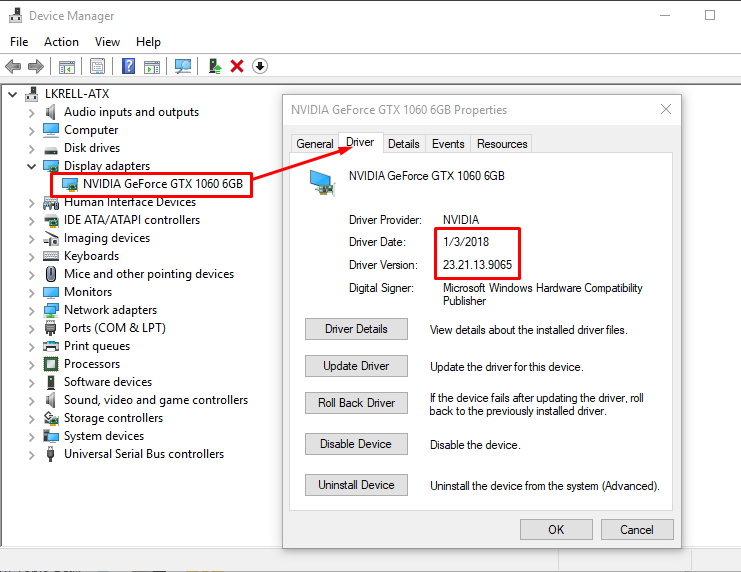
- Device Manager: Open Device Manager again, expand “Display adapters,” and double-click your NVIDIA GPU. Go to the “Driver” tab. Check the “Driver Version” and “Driver Date” to ensure they match the version you just installed.
- Run a Game or Application: The ultimate test is to run a graphics-intensive game or application. Check for smooth frame rates, proper rendering, and the absence of artifacts or crashes.
Common Troubleshooting Tips
- Black Screen or No Display:
- This often indicates a critical driver conflict or a failed installation. Restart your PC in Safe Mode (as described earlier for DDU). If you can get into Safe Mode, run DDU again to completely remove the problematic drivers, then attempt a clean installation from scratch.
- Check your monitor cables. Ensure they are securely plugged into the graphics card outputs, not the motherboard’s integrated graphics ports.
- Installation Failure:
- Ensure you have downloaded the correct driver for your exact GPU and operating system (64-bit vs. 32-bit).
- Disable antivirus software temporarily during installation, as it might interfere.
- Run the installer as an administrator (right-click the executable and select “Run as administrator”).
- Perform a thorough clean installation using DDU in Safe Mode, then try again.
- Performance Issues After Update:
- If you experience worse performance or new bugs after an update, it’s possible the new driver has an issue with your specific hardware configuration.
- Consider rolling back to a previous, stable driver version. You can find older drivers on the NVIDIA website under the “Beta and Older Drivers” section.
- Check online forums (like NVIDIA’s official forums or Reddit) to see if others are reporting similar issues with the latest driver.
- NVIDIA Control Panel Missing:
- Sometimes, after an update, the NVIDIA Control Panel might not appear. Try reinstalling the drivers using the “Custom” option and ensure the “NVIDIA Control Panel” component is selected.
- For Windows 10/11, it can sometimes be downloaded directly from the Microsoft Store as a separate app.
- Insufficient Disk Space: Ensure you have enough free disk space for the driver extraction and installation.
Maintaining Optimal Performance: Keeping Your Drivers Updated
Installing NVIDIA drivers isn’t a one-time event; it’s an ongoing maintenance task that contributes significantly to your system’s long-term performance, stability, and security.
The Importance of Regular Updates
- Performance Enhancements: NVIDIA frequently releases optimizations for the latest games and professional applications, leading to higher frame rates and smoother experiences.
- Bug Fixes and Stability: Updates address bugs, crashes, and compatibility issues that might arise with new software or hardware.
- New Features: Drivers can unlock new features for your GPU, such as DLSS, Reflex, or new CUDA capabilities.
- Security Patches: Like any other software, drivers can have security vulnerabilities. Updates often include patches to protect your system.
Update Strategies
- GeForce Experience (Recommended for Gamers): If you use GeForce Experience, it will automatically notify you when new Game Ready Drivers are available. You can download and install them directly through the application with a few clicks, often choosing the “Express” or “Custom (Clean Installation)” option. This is the easiest way to stay current.
- Manual Checks (For Professionals or Specific Needs): For those using Studio Drivers or who prefer more control, periodically visit the NVIDIA driver download page (every few weeks or before installing a new game/app) to check for updates.
- Strategic Updates: While regular updates are good, sometimes it’s wise to wait a few days after a major driver release. This allows you to check online forums for any widespread issues before updating, especially if your current setup is stable and critical for work.
Considerations
- Stable System First: Never update drivers if your system is already unstable. Address the root cause of instability first.
- Backup (Again): Before major driver updates, especially if you rely on your PC for critical work, consider creating a system restore point.
Conclusion: Empowering Your Visual Experience
Properly installing and maintaining your NVIDIA drivers is a fundamental aspect of PC ownership, essential for anyone looking to maximize their graphics card’s performance, ensure system stability, and stay ahead in the world of visually demanding applications. By following the comprehensive steps outlined in this guide – from careful preparation and clean installation to diligent verification and ongoing updates – you empower your NVIDIA GPU to deliver the immersive gaming, efficient content creation, and reliable visual experience it was designed for. Embrace these practices, and your PC will thank you with smooth frame rates and flawless graphics, making every digital interaction a pleasure.
aViewFromTheCave is a participant in the Amazon Services LLC Associates Program, an affiliate advertising program designed to provide a means for sites to earn advertising fees by advertising and linking to Amazon.com. Amazon, the Amazon logo, AmazonSupply, and the AmazonSupply logo are trademarks of Amazon.com, Inc. or its affiliates. As an Amazon Associate we earn affiliate commissions from qualifying purchases.