In the ever-evolving digital landscape, having the right tools at your fingertips is crucial for seamless productivity, efficient research, and engaging online experiences. For Mac users, Google Chrome stands out as a ubiquitous and powerful web browser, celebrated for its speed, extensive feature set, and deep integration with the Google ecosystem. Whether you’re a seasoned tech enthusiast or new to the macOS environment, understanding how to install and utilize Chrome is a fundamental skill. This comprehensive guide will walk you through the entire process, from downloading the installer to setting up Chrome as your default browser, ensuring you can harness its full potential.

The decision to install Google Chrome on your Mac often stems from a desire for a browser that offers a different experience than Safari, the default Apple browser. While Safari is undoubtedly a robust and optimized option for macOS, Chrome brings its own unique advantages. Its cross-platform availability means your browsing data, bookmarks, and extensions can sync effortlessly across different devices, including Windows PCs, Android phones, and even iOS devices. This interoperability is a significant draw for many users who navigate multiple platforms throughout their day. Furthermore, Chrome’s vast library of extensions provides an unparalleled opportunity to customize your browsing experience, adding functionality for everything from productivity and project management to creative tools and entertainment.
This article will delve into the step-by-step process of obtaining and installing Google Chrome on your Mac. We’ll cover the initial download, the installation procedure, and some essential post-installation configurations that will help you get the most out of your new browser. By the end, you’ll be equipped to confidently navigate the digital world with Chrome as your preferred portal.
Downloading Google Chrome for macOS
The journey to installing Google Chrome on your Mac begins with acquiring the official installer package. This is a straightforward process, and it’s essential to ensure you’re downloading the software directly from Google’s official website to avoid any potential security risks associated with third-party download sources.
Accessing the Official Chrome Download Page
To initiate the download, open your current web browser on your Mac. This will likely be Safari, unless you’ve already installed another browser.
- Navigate to the Google Chrome website: In the address bar of your browser, type
google.com/chromeand press Enter. This will take you directly to the official Google Chrome download page. - Locate the Download Button: On the Chrome homepage, you’ll see a prominent button, usually labeled “Download Chrome” or something similar. This button is designed to automatically detect your operating system and offer the correct version.
- Accept Terms and Conditions: Before the download begins, you’ll likely be presented with Google Chrome’s Terms of Service. Click “Accept and Install” or a similar button to proceed. This action confirms that you agree to the terms and initiates the download of the Chrome installer file.
The download process typically starts automatically after you accept the terms. You will see a progress indicator in your browser, showing the download status of the .dmg file. The .dmg file is a disk image format used by macOS for software distribution, similar to an .exe file on Windows.
Understanding the Downloaded File
Once the download is complete, you will find the Chrome installer file (typically named googlechrome.dmg) in your default download location, usually the “Downloads” folder in your Finder. This file is not the application itself but rather a container that allows you to install Chrome onto your Mac’s hard drive.
Ensuring You Download the Correct Version
Google’s download page is intelligent and usually detects whether you are on a Mac. However, if for any reason it doesn’t, or if you want to be absolutely sure you’re getting the right architecture for your Mac, there might be an option to choose between Intel and Apple Silicon (M1, M2, etc.) versions. For most users, the automatic detection will be sufficient. If you have a newer Mac with an Apple Silicon chip, downloading the correct version ensures optimal performance and compatibility. If you’re unsure, downloading the default option offered by google.com/chrome is generally safe and will likely be the correct version for your system.
Installing Google Chrome on Your Mac
With the installer file downloaded, the next step is to run it and place the Google Chrome application into your Mac’s Applications folder. This is a standard installation procedure for macOS applications.
The Installation Process
- Locate the
.dmgFile: Open your Finder and navigate to your “Downloads” folder (or wherever your browser saves downloaded files). Double-click thegooglechrome.dmgfile you downloaded. - Mount the Disk Image: A new window will appear, often resembling a Finder window, showing the Google Chrome application icon and usually a shortcut to your “Applications” folder.
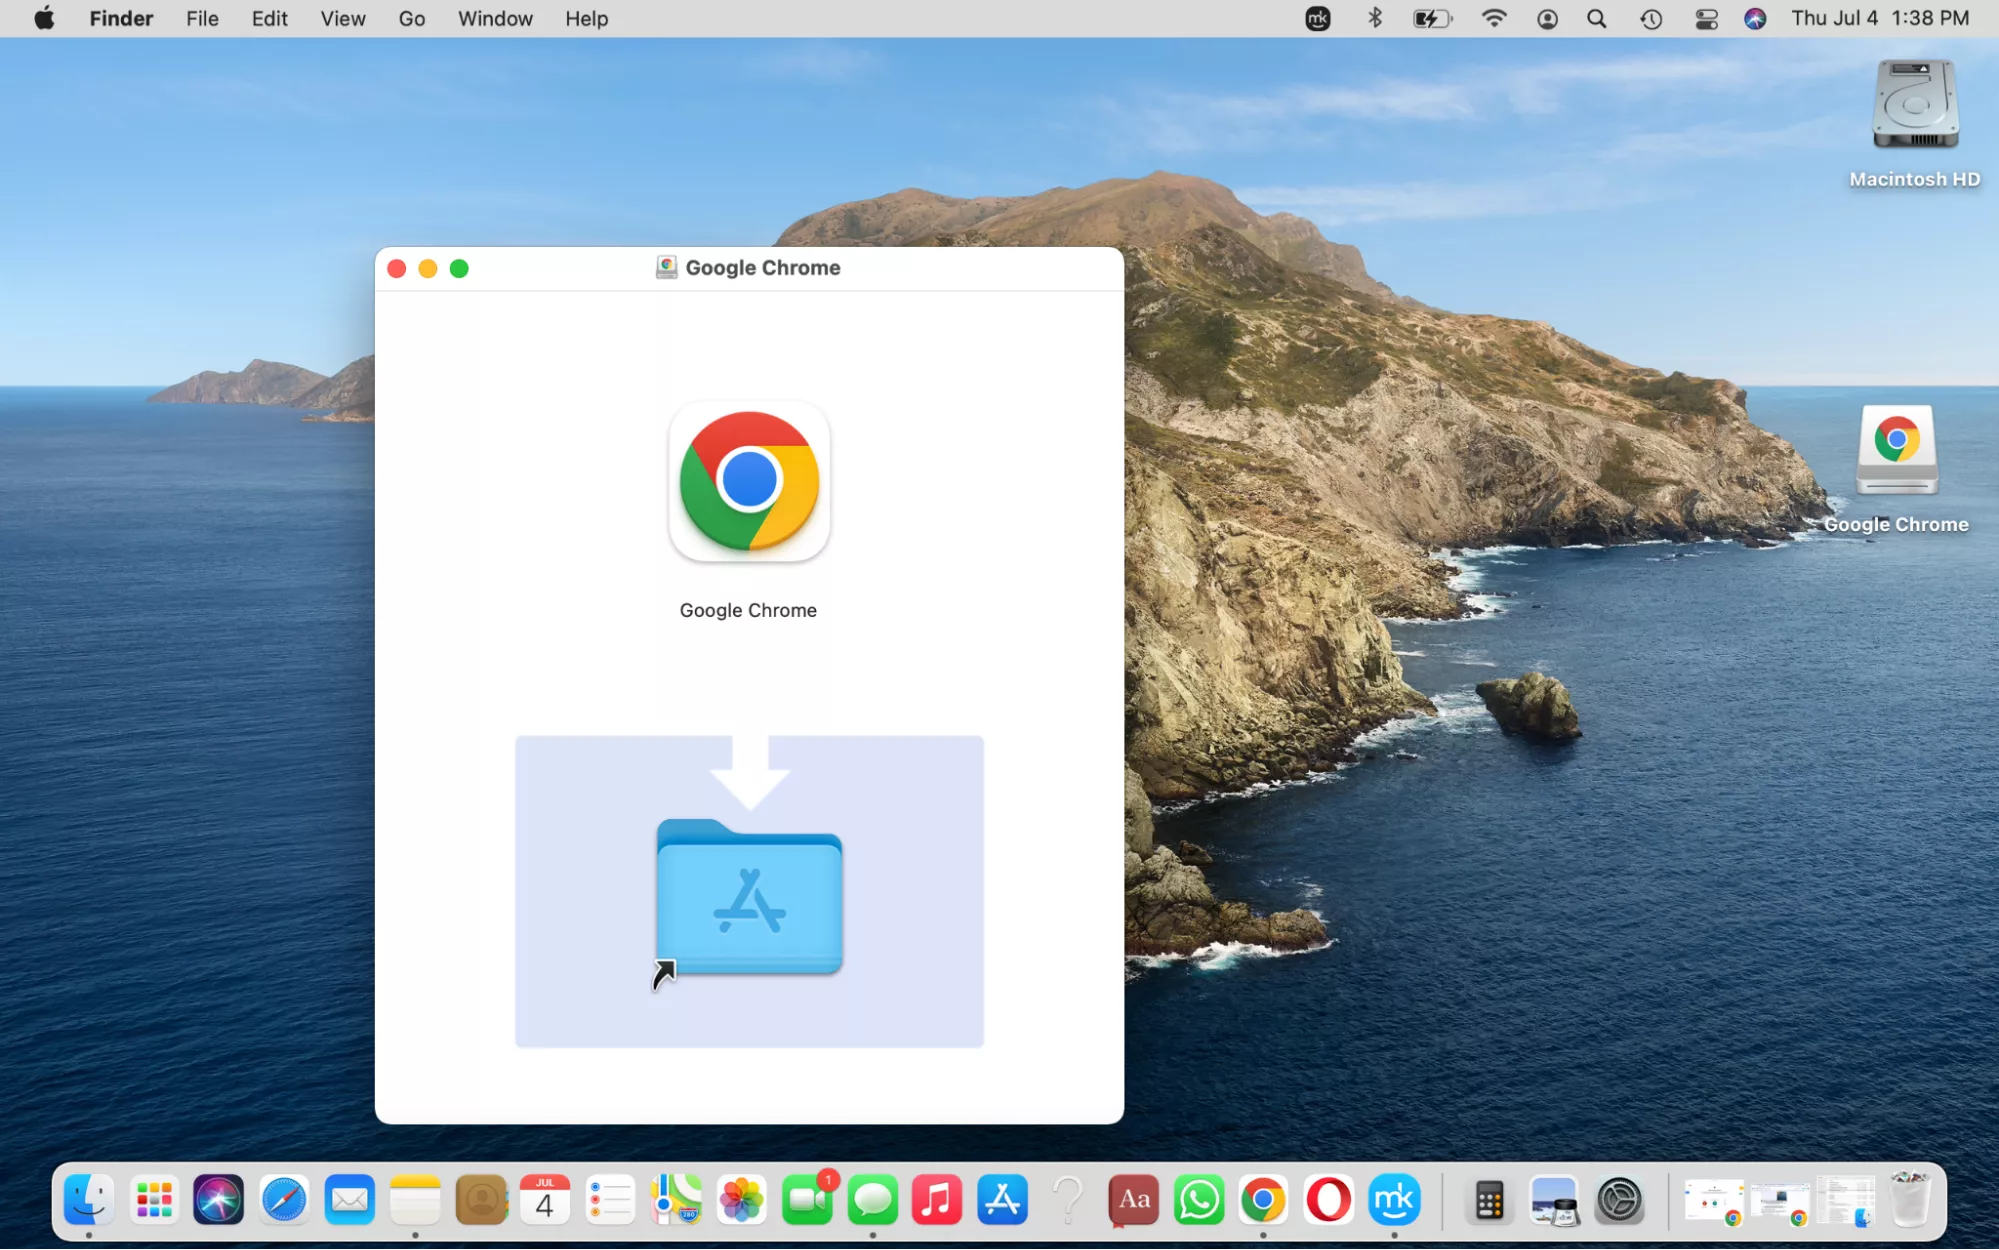
- Drag and Drop to Install: The core of the installation process for
.dmgfiles on macOS is a simple drag-and-drop operation. Click and drag the Google Chrome application icon from the mounted disk image window into the “Applications” folder icon that is also displayed in that same window. - Eject the Disk Image: Once the copying process is complete (which is usually very quick), you can close the disk image window. You will then see a small eject icon next to the mounted “Google Chrome” volume in the Finder sidebar. Click this eject icon to safely unmount the disk image. This is similar to safely ejecting a USB drive.
After these steps, the Google Chrome application will be permanently installed on your Mac, residing within your “Applications” folder. You can now find it by opening your Applications folder in Finder or by using Spotlight search (Cmd + Spacebar and typing “Google Chrome”).
First Launch and Security Prompts
When you launch Google Chrome for the very first time, macOS may present you with a security prompt. This is a standard macOS feature designed to ensure that you are intentionally opening applications downloaded from the internet. You will likely see a message asking if you’re sure you want to open an application downloaded from the internet. Click “Open” to proceed.
Chrome may also ask if you want to allow it to access your contacts or other system features. Review these prompts carefully and grant permissions only if you are comfortable with them. For basic browsing, most of these initial prompts are for informational purposes or optional integrations.
Configuring Google Chrome on Your Mac
Once Google Chrome is installed and launched, you’ll want to configure it to suit your preferences and integrate it into your daily workflow. This includes setting it as your default browser, signing into your Google account for synchronization, and exploring some initial settings.
Setting Chrome as Your Default Browser
Making Google Chrome your default browser means that any time you click on a web link in an email, a document, or another application, it will automatically open in Chrome rather than your previous default browser (likely Safari). This streamlines your browsing experience.
- Open Chrome Settings: Launch Google Chrome. Click on the three vertical dots (⋮) in the top-right corner of the browser window. This opens the Chrome menu. Select “Settings” from the dropdown menu.
- Find the Default Browser Option: In the Settings tab, look for a section or a prominent link related to your default browser. It’s often found near the top of the Settings page or under a “Default browser” heading.
- Set as Default: You should see a button or link that says “Make default.” Click this button.
- macOS System Prompt: macOS will then likely prompt you to confirm this change. You might need to go into your Mac’s System Settings (or System Preferences on older macOS versions) to confirm. Navigate to “General” and find the “Default web browser” dropdown menu. Select “Google Chrome” from this list.
Once this is done, Chrome will be your default browser for all web links.
Signing in for Synchronization
One of the most powerful features of Google Chrome is its ability to sync your browsing data across all your devices. This includes bookmarks, browsing history, passwords, extensions, and open tabs. To enable this, you need to sign in with your Google account.
- Sign-in Prompt: The first time you launch Chrome, or if you navigate to the settings, you’ll often see a prompt to sign in.
- Enter Google Account Credentials: Click on the profile icon (usually a person silhouette or your initial) in the top-right corner of the Chrome window. If you’re not signed in, you’ll see an option to “Sign in to Chrome.” Click this and enter your Google account email address and password.
- Enable Sync: After signing in, Chrome will usually ask you to confirm what you want to sync. You can choose to sync everything or select specific categories like bookmarks, history, and passwords. It’s generally recommended to enable sync for a seamless experience across devices.
By signing in, your browsing preferences and data will be backed up to your Google account and made available on any other device where you sign into Chrome with the same account.

Exploring Initial Chrome Settings and Features
Beyond setting Chrome as your default and signing in, there are many other settings and features to explore:
- Privacy and Security: In the Settings menu, you can configure Chrome’s privacy and security settings, including managing cookies, site permissions, safe browsing, and clearing browsing data.
- Appearance: Customize the look of your Chrome browser by changing themes, wallpapers, and how your new tab page looks.
- Extensions: Visit the Chrome Web Store to discover and install extensions that add new functionalities to your browser. This is where Chrome truly shines, offering a vast array of tools for productivity, research, and customization.
- Search Engine: While Google is the default, you can choose other search engines like Bing, DuckDuckGo, or Yahoo in the “Search engine” settings.
- Performance: Chrome offers settings to manage how it uses your Mac’s resources, helping to improve performance, especially on older machines.
By taking a few minutes to configure these initial settings, you can ensure that your Google Chrome experience on your Mac is tailored precisely to your needs, making it an indispensable tool for both personal and professional use.
aViewFromTheCave is a participant in the Amazon Services LLC Associates Program, an affiliate advertising program designed to provide a means for sites to earn advertising fees by advertising and linking to Amazon.com. Amazon, the Amazon logo, AmazonSupply, and the AmazonSupply logo are trademarks of Amazon.com, Inc. or its affiliates. As an Amazon Associate we earn affiliate commissions from qualifying purchases.