Embarking on the journey with a brand-new PC is an exciting prospect. Whether you’ve just unboxed a custom-built powerhouse, replaced an aging system, or are setting up a fresh machine for productivity or gaming, the first crucial step is installing an operating system. While Windows 11 is the latest offering from Microsoft, Windows 10 remains an incredibly popular, stable, and widely supported choice for millions of users worldwide. Its maturity, extensive software compatibility, and refined user experience make it an excellent platform for everything from professional work and creative projects to immersive entertainment. This comprehensive guide will walk you through every step of installing Windows 10 on your new PC, ensuring a smooth, secure, and successful setup from start to finish. We’ll delve into the necessary preparations, the detailed installation process, and crucial post-installation steps to get your system running optimally, fully integrated into the technological ecosystem that defines modern digital life.
Preparing for a Seamless Installation
Before you even think about powering on your new machine with the intent to install Windows 10, a series of preparatory steps are essential. These actions not only streamline the installation process but also prevent potential headaches and ensure you have all the necessary components for a successful setup. Think of this phase as laying the groundwork for a stable and efficient computing experience, aligning perfectly with the meticulous approach often required in tech endeavors.
Essential Prerequisites and Tools
To begin, gather the following items. Having them ready will make the installation flow without interruption:
- A New PC: This goes without saying, but ensure all hardware components are properly installed and connected. This includes the CPU, RAM, storage drive (SSD or HDD), graphics card, power supply, and any necessary peripherals like a monitor, keyboard, and mouse. For those who built their own PC, a quick double-check of connections is always prudent.
- A Stable Internet Connection: While not strictly required for the initial installation files, an internet connection is vital for downloading the Windows 10 media creation tool, fetching updates, and activating Windows post-installation.
- A USB Flash Drive (8GB or larger): This will be your primary installation media. Ensure it’s empty, as its contents will be erased during the bootable drive creation process. Using a USB 3.0 or higher drive will significantly speed up the process compared to older USB 2.0 drives.
- Another Working Computer: You’ll need this to download the Windows 10 Media Creation Tool and create the bootable USB drive. This can be any computer with internet access and a USB port.
- Your Windows 10 Product Key (Optional, but Recommended): While you can install Windows 10 without a product key and activate it later, having it handy can simplify the process. Product keys are typically found on a sticker on your PC (if pre-built with Windows), in a confirmation email, or on a physical card if purchased separately. Remember, a legitimate product key is crucial for long-term use and receiving critical updates, an aspect of digital security and productivity that underpins many aspects of modern tech.
- Patience and Time: Installation, especially with initial setup and updates, can take a couple of hours. Allocating sufficient time without rushing is key.
Downloading the Windows 10 Installation Media
Microsoft provides an official and free tool, the Media Creation Tool, to download the Windows 10 ISO file and create bootable media. This ensures you’re getting a legitimate, up-to-date version directly from the source.
- Access the Microsoft Website: On your working computer, open a web browser and navigate to the official Windows 10 download page on Microsoft’s website. Search for “Download Windows 10 disk image (ISO file)” or “Windows 10 Media Creation Tool.”
- Download the Tool: Locate the section for “Create Windows 10 installation media” and click on the “Download tool now” button. Save the
MediaCreationTool.exefile to your computer. - Run the Tool: Once downloaded, double-click the
MediaCreationTool.exefile to launch it. You may need to grant administrator permissions. - Accept Terms: Read and accept the applicable notices and license terms.
- Choose “Create installation media”: When prompted, select “Create installation media (USB flash drive, DVD, or ISO file) for another PC” and click “Next.”
- Select Language, Architecture, and Edition: The tool will usually recommend options based on your current PC. However, if you’re installing on a different system or want specific settings, uncheck “Use recommended options for this PC.” Choose your preferred language, “Windows 10” for the edition, and the correct architecture (64-bit is standard for most modern PCs, 32-bit is rare now). Click “Next.”
Creating a Bootable USB Drive
This is the final step in preparing your installation media.
- Select USB Flash Drive: On the “Choose which media to use” screen, select “USB flash drive” and click “Next.”
- Choose Your USB Drive: The tool will list available USB drives. Carefully select the correct USB drive you prepared earlier. Double-check to ensure you don’t accidentally select another drive, as all data on the chosen drive will be erased.
- Start Creation: Click “Next” to begin the process. The tool will download the Windows 10 files and then write them to your USB drive, making it bootable. This can take some time, depending on your internet speed and the speed of your USB drive.
- Finish: Once the process is complete, you’ll see a message indicating that your USB flash drive is ready. You can now safely remove the USB drive from your working computer.
With your bootable USB drive in hand, you are now fully equipped to move to the next phase: the actual installation on your new PC.
The Step-by-Step Windows 10 Installation Process
With your bootable USB drive prepared, it’s time to bring your new PC to life. This section details the core installation steps, guiding you through the initial boot, setup options, and partitioning of your storage drive. Following these steps carefully will ensure Windows 10 is installed correctly and efficiently.
Booting from the Installation Media
The first challenge with a new PC is often getting it to boot from your USB drive rather than an empty hard drive. This usually involves adjusting the boot order in the PC’s BIOS/UEFI settings.
- Connect USB Drive: Plug the bootable Windows 10 USB flash drive into an available USB port on your new PC.
- Power On and Enter BIOS/UEFI: Turn on your PC. As soon as it starts, repeatedly press the designated key to enter the BIOS or UEFI setup utility. Common keys include
Del,F2,F10,F12, orEsc. The exact key varies by manufacturer (e.g., ASUS, MSI, Gigabyte, Dell, HP, Lenovo). Look for a message on the screen during startup, often something like “Press DEL to enter Setup” or “Press F2 for BIOS.” - Adjust Boot Order: Once in the BIOS/UEFI, navigate to the “Boot” or “Boot Options” section. Here, you’ll need to change the boot priority to list your USB drive (it might be labeled as “USB-HDD,” “Removable Devices,” or by the brand of your USB drive) as the primary boot device.
- Save and Exit: Save your changes (usually by pressing
F10) and exit the BIOS/UEFI. Your PC will restart and should now boot from the USB drive. If it doesn’t, revisit the BIOS settings to ensure the boot order is correct and that “Secure Boot” (if enabled) isn’t interfering – sometimes temporarily disabling it helps for installation.
Initial Setup and Language Selection
Once your PC boots from the USB drive, you’ll be greeted by the Windows Setup environment.
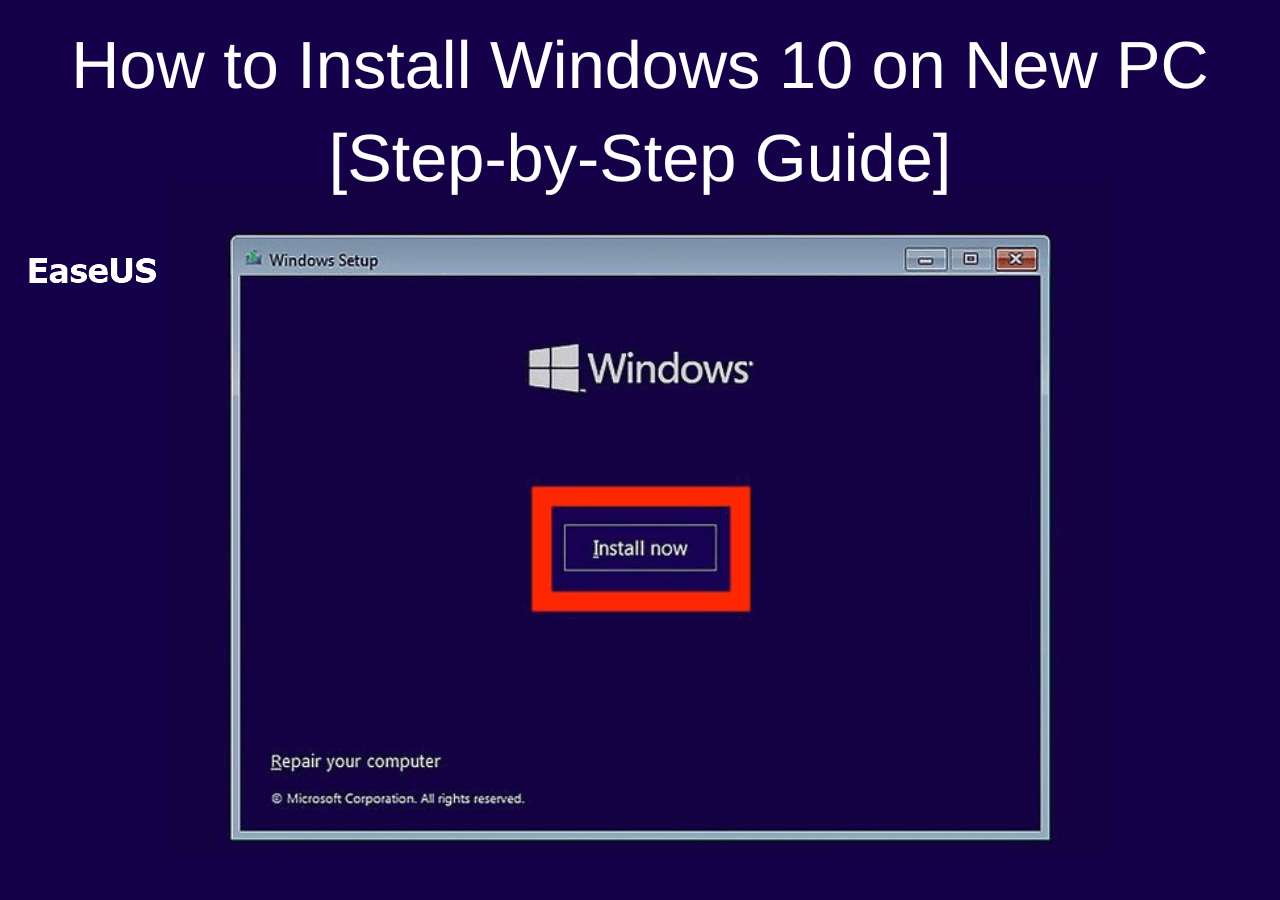
- Windows Setup Screen: The first screen will ask you to select your language, time and currency format, and keyboard or input method. Make your selections and click “Next.”
- Install Now: On the next screen, click the “Install now” button.
Entering Your Product Key (or Skipping for Later)
This step allows you to activate Windows 10.
- Enter Product Key: If you have your Windows 10 product key, enter it in the provided field and click “Next.”
- “I don’t have a product key”: If you don’t have a product key handy, or plan to activate later, click the “I don’t have a product key” link. Windows 10 will install but remain unactivated until a valid key is entered.
- Select Operating System: If you skipped the product key, you’ll be asked to choose which version of Windows 10 you want to install (e.g., Home, Pro). Select the version corresponding to your product key or your desired edition, then click “Next.”
- Accept License Terms: Read the license terms carefully and check the “I accept the license terms” box, then click “Next.”
Choosing the Installation Type (Custom vs. Upgrade)
For a new PC, you’ll almost always choose a custom installation.
- Which type of installation do you want?: Select “Custom: Install Windows only (advanced).” This option allows you to manage disk partitions, which is crucial for a clean installation on a new drive. “Upgrade” is for existing Windows installations.
Partitioning Your Hard Drive
This is a critical step, especially on a brand new, empty drive.
- Drive Selection: You’ll see a list of available drives and partitions. Since this is a new PC, you’ll likely see “Drive 0 Unallocated Space” or a similar entry indicating your main storage drive is empty.
- Create New Partition: Select the “Drive 0 Unallocated Space” and click “New.” Windows will usually suggest creating a primary partition that uses the entire available space. It will also typically create small system partitions for recovery and EFI (boot information). Click “Apply” and then “OK” when prompted about creating additional system partitions.
- Format (Optional but Recommended): Once the partitions are created, select the “Primary” partition (which will be your C: drive) and click “Format.” This ensures the drive is clean and ready for Windows files.
- Select Destination: Make sure the “Primary” partition (or the largest partition you just created) is selected for the installation, then click “Next.”
The Core Installation Phase
Now, Windows will begin copying files and performing the installation.
- File Copying: Windows will start copying files, expanding them, installing features, and applying updates. This process is fully automated. Your PC will restart multiple times during this phase. Do not remove the USB drive until after the first restart, or ideally, until the “Getting devices ready” phase. It’s often safest to remove the USB drive after the PC restarts for the final time and begins preparing your desktop.
Initial PC Setup and Account Creation
After the core installation, Windows will guide you through some final configuration steps.
- Regional Settings: Select your region and click “Yes.”
- Keyboard Layout: Confirm your keyboard layout and click “Yes.” You can add a second layout if needed.
- Internet Connection: Connect to a network if you haven’t already. An internet connection is highly recommended for this stage to ensure you can sign in with a Microsoft account and get the latest updates.
- Sign in with Microsoft Account: You’ll be prompted to sign in with your Microsoft account (Outlook, Hotmail, Live). This is highly recommended as it syncs settings, provides access to the Microsoft Store, and simplifies future interactions with Microsoft services. If you prefer a local account, look for a “Offline account” or “Domain join instead” option, though Microsoft makes these less prominent.
- Create PIN: Set up a PIN for faster and more secure login than a password.
- Privacy Settings: Review the privacy settings (location, diagnostic data, tailored experiences, etc.). Microsoft gives you control over these; adjust them to your comfort level before clicking “Accept.”
- Choose Your Experience (Optional): You might be asked to customize your experience based on how you plan to use the PC (gaming, creativity, family, etc.). This helps tailor some initial settings and app suggestions.
- Cortana Setup: Decide whether you want to use Cortana as your digital assistant.
- Final Preparations: Windows will go through a “Getting things ready for you” phase, preparing your desktop and installing default apps. This can take several minutes.
Congratulations! Once this is complete, you will be presented with the Windows 10 desktop. Your operating system is now installed.
Post-Installation Essentials: Optimizing Your New System
Installing Windows 10 is a significant first step, but the journey to a fully optimized and secure PC doesn’t end there. To ensure your new system runs at its peak performance, remains secure, and caters to your specific needs, several crucial post-installation tasks are necessary. This phase is about fine-tuning, hardening security, and setting up your environment for maximum productivity – aspects vital in the modern tech landscape.
Installing Drivers for Optimal Performance
Drivers are software components that allow your operating system to communicate effectively with your hardware. While Windows 10 includes many generic drivers, installing manufacturer-specific drivers is crucial for unlocking the full potential of your components, especially for graphics, chipset, and network adapters.
- Identify Missing Drivers:
- Right-click the Start button and select “Device Manager.”
- Look for any devices with a yellow exclamation mark or question mark. These indicate missing or incorrectly installed drivers.
- Download Drivers from Manufacturer Websites:
- Motherboard: Visit the website of your motherboard manufacturer (e.g., ASUS, MSI, Gigabyte, ASRock) and navigate to the support or downloads section for your specific motherboard model. Download the latest chipset drivers, LAN/Ethernet drivers, audio drivers, and any other essential utilities.
- Graphics Card: If you have a dedicated graphics card (NVIDIA or AMD), visit their respective websites to download the latest drivers for your model. These are critical for gaming, video editing, and overall display performance.
- Other Peripherals: For Wi-Fi adapters, printers, webcams, etc., check the manufacturer’s website for the latest Windows 10 compatible drivers.
- Install Drivers: Run the downloaded driver installers. It’s often best to install chipset drivers first, followed by graphics, network, and audio drivers. Restart your PC after installing major driver sets.
Tip: Having the LAN/Ethernet driver installed first is vital, as it allows your PC to connect to the internet to download other drivers or updates directly. If your wired connection isn’t working, you might need to use another device to download the LAN driver onto a USB drive.
Updating Windows and Essential Software
Keeping your operating system and applications up-to-date is paramount for security, stability, and access to new features. This directly impacts digital security and productivity.
- Windows Update:
- Click the Start button, then
Settings>Update & Security>Windows Update. - Click “Check for updates.” Let Windows download and install all available updates. This process might involve multiple restarts. Repeat checking for updates until no more are found. These updates often include critical security patches and performance improvements.
- Click the Start button, then
- Microsoft Store Apps:
- Open the Microsoft Store app.
- Click the “…” (three dots) in the top-right corner, then select “Downloads and updates.”
- Click “Get updates” to update pre-installed Microsoft apps.
- Install Essential Software:
- Web Browser: Download and install your preferred web browser (Chrome, Firefox, Edge, Brave, etc.).
- Security Software: While Windows Defender provides robust protection, you might opt for a third-party antivirus solution if you have a preference or subscription. Regardless, ensure your security software is up-to-date. This is a core pillar of digital security.
- Productivity Suites: Install office software (Microsoft Office, LibreOffice, Google Workspace desktop apps) or any other professional tools you rely on.
- Creative Tools: Install any design, video editing, or audio production software.
- Gaming Platforms: If you game, install Steam, Epic Games Launcher, GOG Galaxy, etc.
Activating Windows 10
While you could defer activation during installation, it’s crucial for full functionality and continued updates.
- Access Activation Settings:
- Go to
Settings>Update & Security>Activation.
- Go to
- Enter Product Key:
- If Windows isn’t activated, you’ll see an option to “Change product key.” Click this, enter your 25-character Windows 10 product key, and follow the prompts.
- Digital License: If your Windows 10 license is linked to your Microsoft account (e.g., from a free upgrade from Windows 7/8), signing into your Microsoft account on the new PC should automatically activate it.
- Troubleshoot: If activation fails, there’s usually a “Troubleshoot” option that can help resolve common issues. You may need to ensure your internet connection is stable.
Security Best Practices and Productivity Tools
Beyond basic updates, proactive measures enhance security and user experience.
- Set Up Backup Solutions: Configure Windows File History, OneDrive sync, or a third-party backup solution to protect your important data. Data loss can be catastrophic for personal and business finance alike.
- Create Restore Points: Search for “Create a restore point” in the Start menu. Configure system protection and manually create a restore point after all drivers and essential software are installed. This acts as a safety net.
- User Account Control (UAC): Keep UAC enabled (default setting). It prompts you before allowing changes that require administrator permissions, adding a layer of security.
- Firewall Configuration: Ensure Windows Defender Firewall is enabled and correctly configured.
- Explore Productivity Tools: Windows 10 offers many built-in productivity features (Task View, Virtual Desktops, Focus Assist). Explore them to enhance your workflow. Consider third-party apps like clipboard managers, hotkey managers, or specialized note-taking apps that align with your work style.
- Personalize Your Experience: Adjust display settings, themes, taskbar items, and Start menu layout to make your new PC truly feel like yours.
By diligently completing these post-installation steps, you transform a bare-bones Windows 10 installation into a robust, secure, and personalized computing environment ready for any task.
Troubleshooting Common Installation Issues
Even with careful preparation, the complex nature of PC hardware and software can sometimes lead to hitches during installation. Encountering issues is not uncommon, but understanding how to diagnose and resolve them can save significant time and frustration. This section addresses some of the most frequent challenges users face when installing Windows 10 on a new machine.
Boot Order Problems
This is arguably the most common issue when trying to install an operating system. If your PC repeatedly boots into a blank screen, an error message, or directly to BIOS/UEFI after restarting, it’s likely a boot order problem.
- Symptoms: PC won’t boot from the USB drive, keeps going into BIOS, or displays a “No boot device found” error.
- Solution:
- Re-enter BIOS/UEFI: Restart your PC and repeatedly press the key to enter BIOS/UEFI (usually
Del,F2,F10). - Verify Boot Priority: Navigate to the “Boot” section. Ensure your USB drive is listed as the first boot device. Sometimes, the USB drive might appear under a generic name (like “Removable Devices”) or even as a specific USB drive model.
- Disable Secure Boot (Temporarily): In some UEFI systems, “Secure Boot” can prevent booting from non-signed media. Try disabling it during installation and re-enabling it afterward if desired.
- Check UEFI/Legacy Mode: Ensure your BIOS/UEFI is set to the correct boot mode for your installation media. Most modern installations use UEFI mode. If your USB was created with a specific mode in mind (e.g., CSM for legacy BIOS), match that in your BIOS settings.
- Try Another USB Port: Sometimes, specific USB ports (especially front panel ones) can be finicky. Try a different USB port, preferably directly on the motherboard’s rear I/O.
- Recreate Bootable USB: If all else fails, the USB drive itself might be corrupted. Try recreating the bootable USB using the Media Creation Tool, or even using a different USB drive.
- Re-enter BIOS/UEFI: Restart your PC and repeatedly press the key to enter BIOS/UEFI (usually
Driver Compatibility Headaches
After Windows 10 is installed, you might notice devices not working correctly (no sound, slow graphics, no Wi-Fi, unrecognized peripherals). This points to driver issues.
- Symptoms: No internet, low screen resolution, generic audio, devices listed with yellow exclamation marks in Device Manager.
- Solution:
- Check Device Manager: As mentioned in post-installation, open Device Manager (right-click Start -> Device Manager) and look for problematic devices.
- Motherboard Drivers First: Always prioritize motherboard chipset and LAN/Wi-Fi drivers. Without a network connection, downloading other drivers becomes impossible. If you lack internet, download the network driver using another computer and transfer it via USB.
- Manufacturer Websites: Go directly to the manufacturer’s official support website for your specific motherboard, graphics card, and other components. Generic drivers from Windows Update are often not as optimized as manufacturer-provided ones.
- Driver Update Utilities (Use with Caution): While some third-party driver update tools exist, they can sometimes install incorrect or outdated drivers. Stick to manufacturer websites or Windows Update.
- Clean Installation of Graphics Drivers: For graphics cards, use the manufacturer’s utility (e.g., NVIDIA’s GeForce Experience or AMD’s Adrenalin Software) to perform a “clean installation,” which uninstalls old drivers before installing new ones.
Activation Woes
You’ve installed Windows, but it won’t activate, or you keep seeing “Windows isn’t activated” messages.
- Symptoms: Watermark on desktop, inability to personalize, activation errors in Settings.
- Solution:
- Verify Internet Connection: Activation requires an active internet connection to communicate with Microsoft’s servers.
- Double-Check Product Key: Ensure you’ve entered the product key correctly, paying attention to hyphens and distinguishing between similar characters (e.g., O and 0, I and 1, B and 8).
- Correct Windows Edition: Make sure the product key matches the installed Windows 10 edition (e.g., a Pro key won’t activate a Home installation). If you installed the wrong edition, you might need to reinstall or upgrade (sometimes possible via “Change product key”).
- Microsoft Account Link (Digital License): If you upgraded from an activated Windows 7/8/8.1, your Windows 10 license is likely a “digital license” linked to your Microsoft account. Sign in with that account in Windows 10 settings. Go to
Settings>Update & Security>Activationand look for the “Troubleshoot” option if it doesn’t activate automatically. - Microsoft Activation Servers: Occasionally, Microsoft’s activation servers might be temporarily busy. Wait a few hours and try again.
- Contact Microsoft Support: If all else fails, contacting Microsoft support directly can help. They can often diagnose specific error codes and assist with activation.
By systematically addressing these common issues, you can navigate the post-installation phase with greater confidence, ensuring your new Windows 10 PC is running smoothly and ready for action.
Why Windows 10 Remains a Powerful Choice (Even with Windows 11 Available)
In a rapidly evolving tech landscape, the introduction of newer operating systems like Windows 11 often overshadows their predecessors. However, for many users, businesses, and specific use cases, Windows 10 remains an exceptionally viable and often preferred operating system. Its continued relevance speaks volumes about its robust design, widespread adoption, and a careful balance of innovation and stability, making it a compelling choice even for new PC builds.
Stability, Compatibility, and Longevity
One of the most significant advantages of Windows 10 is its maturity. Having been released in 2015, it has undergone years of refinement, patching, and feature updates. This extensive development cycle has resulted in an operating system renowned for its stability and reliability. For professionals, gamers, and everyday users alike, a stable OS means fewer crashes, fewer compatibility issues with critical software, and a more consistent user experience.
- Broad Hardware Compatibility: Windows 10 supports a vast array of older and newer hardware components, from CPUs and GPUs to obscure peripherals. This makes it ideal for users who might be upgrading specific parts of their PC or who have specialized hardware that hasn’t received official Windows 11 driver support yet. Its less stringent hardware requirements compared to Windows 11 mean a broader range of systems can run it without issues, which can translate to cost savings for those building new PCs on a budget.
- Extensive Software Compatibility: The sheer volume of applications, games, and utilities designed and optimized for Windows 10 is enormous. Developers have had nearly a decade to ensure their products run seamlessly on Windows 10. While Windows 11 boasts backward compatibility, some legacy software or niche professional applications might perform more reliably or require fewer workarounds on the more established Windows 10 platform. This ensures uninterrupted productivity and workflow for users reliant on specific software.
- Long-Term Support: Microsoft has committed to supporting Windows 10 with security updates and bug fixes until October 14, 2025. This extended support period provides users with peace of mind, knowing their system will remain secure and functional for several more years. For businesses and IT departments, this longevity translates into predictable planning cycles and reduced upgrade costs, a significant financial consideration in corporate tech strategy.
Future-Proofing and Upgrade Paths
While Windows 10 offers stability today, it also provides a clear and straightforward path to the future. Microsoft designed Windows 10 with upgradeability in mind, making the transition to Windows 11 remarkably smooth for eligible systems.
- Seamless Upgrade to Windows 11: If your new PC meets the hardware requirements for Windows 11 (TPM 2.0, Secure Boot, compatible CPU), you can perform a free in-place upgrade from Windows 10 to Windows 11 at any time. This means you can start with the known stability of Windows 10, get accustomed to your new PC, and then seamlessly transition to Windows 11 when you feel ready, without the need for a full reinstallation. This flexibility allows users to avoid the initial teething problems sometimes associated with new OS releases.
- Familiar User Experience: For many long-time Windows users, the interface and workflow of Windows 10 are deeply ingrained. While Windows 11 introduced a refreshed UI, new Start Menu, and centered taskbar, Windows 10 provides a familiar environment that minimizes the learning curve. This familiarity can be a significant boost to productivity, allowing users to hit the ground running on their new PC without adapting to a new layout or navigating redesigned menus. This ensures immediate utility and a stronger return on investment from the moment the OS is installed.
In conclusion, while Windows 11 represents Microsoft’s vision for the future, Windows 10 remains a robust, reliable, and highly compatible operating system. Its established ecosystem, extensive support, and clear upgrade path make it an excellent choice for anyone setting up a new PC today, offering a blend of current stability and future readiness that few other operating systems can match. It provides a solid foundation, ensuring your technological investment yields immediate returns in productivity and performance.
aViewFromTheCave is a participant in the Amazon Services LLC Associates Program, an affiliate advertising program designed to provide a means for sites to earn advertising fees by advertising and linking to Amazon.com. Amazon, the Amazon logo, AmazonSupply, and the AmazonSupply logo are trademarks of Amazon.com, Inc. or its affiliates. As an Amazon Associate we earn affiliate commissions from qualifying purchases.