
In today’s dynamic technological landscape, the ability to experiment, develop, and operate diverse software environments without the need for multiple physical machines is invaluable. This is precisely where virtualization steps in, and Oracle’s VirtualBox stands out as a powerful, free, and open-source solution that empowers users to run various operating systems (known as “guest” operating systems) within their existing “host” operating system. For Ubuntu users, installing VirtualBox unlocks a world of possibilities, from testing new software and exploring different Linux distributions to running Windows applications natively or creating isolated development environments.
This comprehensive guide will walk you through the entire process of installing VirtualBox on your Ubuntu system, covering prerequisites, different installation methods, essential post-installation configurations, and common troubleshooting tips. By the end of this article, you’ll be well-equipped to harness the full potential of virtualization, enhancing your productivity and expanding your digital capabilities.
Understanding VirtualBox and Its Advantages
Before diving into the installation process, it’s beneficial to understand what VirtualBox is and why it has become an indispensable tool for so many tech enthusiasts, developers, and everyday users.
What is VirtualBox?
VirtualBox is a Type 2 hypervisor, meaning it runs on top of an existing operating system (your Ubuntu host OS). It creates a virtual hardware environment where you can install and run other operating systems. Imagine having a completely separate computer simulated entirely in software, running within a window on your desktop – that’s essentially what a virtual machine (VM) powered by VirtualBox offers. It emulates standard PC hardware like a CPU, RAM, hard disk, network adapter, and graphics card, allowing guest operating systems to believe they are running on physical hardware.
Being developed by Oracle, VirtualBox benefits from continuous updates and a robust community, ensuring its compatibility with a wide range of host and guest operating systems, including Windows, various Linux distributions, macOS, Solaris, and more.
Why Virtualize? Key Benefits for Ubuntu Users
The utility of VirtualBox extends far beyond mere novelty. For Ubuntu users, leveraging virtualization brings a multitude of practical benefits that can significantly impact productivity, security, and learning:
- Software Compatibility and Testing: One of the most common reasons for virtualization is the need to run software incompatible with Linux. If you require a specific Windows-only application, VirtualBox allows you to install a Windows guest OS and run that application seamlessly. Furthermore, developers and power users can test new software, beta releases, or potentially unstable applications within a VM without risking their primary Ubuntu installation. This isolated environment ensures that any issues within the guest OS won’t affect the host.
- Operating System Exploration: Are you curious about a different Linux distribution like Fedora, Arch Linux, or even an older version of Ubuntu? VirtualBox provides a safe sandbox to download, install, and experiment with these operating systems without partitioning your hard drive or performing a fresh installation. It’s an excellent learning tool for those wanting to expand their knowledge of various OS environments.
- Enhanced Security: Virtual machines offer an additional layer of security. If you need to browse potentially malicious websites, open suspicious attachments, or test untrusted software, doing so within a VM can protect your host system from malware or viruses. You can simply discard the VM or revert it to a previous snapshot if anything goes wrong. This isolation is a critical aspect of digital security best practices, particularly for researchers and those handling sensitive data.
- Development and Staging Environments: Developers often need to work with specific versions of operating systems or software stacks. VirtualBox allows them to create and manage multiple development environments, each tailored to a particular project’s requirements. This ensures consistency and prevents conflicts between different project dependencies on the host system. It’s also ideal for creating staging environments that mirror production setups, ensuring smoother deployments.
- Resource Efficiency and Cost Savings: VirtualBox is a free, open-source solution, meaning there are no licensing costs involved. Instead of purchasing multiple physical machines for different operating systems or testing scenarios, you can use one powerful Ubuntu machine and run several virtualized instances. This translates directly into cost savings and reduces hardware clutter, aligning with smart “Tech” and “Money” management principles.
- Snapshots and Cloning: VirtualBox offers powerful features like snapshots, which allow you to save the exact state of a VM at any given moment. This is incredibly useful for testing; you can revert to a clean state if an installation goes awry or you want to repeat a test. Cloning enables you to duplicate a VM effortlessly, providing a quick way to set up identical environments for multiple tasks.
In essence, VirtualBox transforms your Ubuntu machine into a versatile computing hub, significantly boosting your technical capabilities and efficiency.
Preparing Your Ubuntu System for VirtualBox Installation
Before proceeding with the installation, it’s crucial to ensure your Ubuntu system meets the necessary prerequisites and is properly updated. This foundational step will prevent most common installation issues.
System Requirements and Prerequisites
While VirtualBox is relatively lightweight, a few key elements are essential for optimal performance:
-
Ubuntu Operating System: This guide assumes you are running a recent, supported version of Ubuntu (e.g., Ubuntu 20.04 LTS, 22.04 LTS, or a later stable release). The commands might vary slightly for much older versions.
-
Internet Connection: You’ll need an active internet connection to download packages and update your system.
-
Sudo Privileges: You must have a user account with
sudo(superuser do) privileges to install software and make system-level changes. -
Sufficient Hardware Resources:
- RAM: Allocate enough RAM for both your host Ubuntu system and the guest virtual machine(s). A minimum of 4GB RAM on the host is recommended, with 8GB or more being ideal, especially if you plan to run resource-intensive guest OSes like Windows.
- Disk Space: Ensure you have ample free disk space. A typical guest OS installation can easily consume 20-30GB or more, plus space for VirtualBox itself and any downloaded packages.
- CPU: A modern multi-core CPU is highly recommended.
-
Hardware Virtualization (VT-x / AMD-V): This is perhaps the most critical prerequisite. Most modern CPUs from Intel (VT-x) and AMD (AMD-V) include hardware virtualization extensions. Enabling these in your computer’s BIOS/UEFI settings is essential for VirtualBox to run 64-bit guest operating systems efficiently. Without it, performance will be severely degraded, or you might be limited to 32-bit guests.
- How to Check: You can check if hardware virtualization is enabled from your Ubuntu terminal with:
bash

lscpu | grep -E 'Virtualization|VMX|SVM'
If you seeVT-xorAMD-V(orVMX/SVM), your CPU supports it. To confirm it’s enabled and available for use, you can also try:
bash

grep -E 'vmx|svm' /proc/cpuinfo
If this command returns output, hardware virtualization is enabled. If it returns nothing, you’ll need to reboot your computer and enable it in your BIOS/UEFI settings (look for options like “Intel VT-x,” “AMD-V,” “Virtualization Technology,” or “SVM Mode” under CPU or Security settings).
- How to Check: You can check if hardware virtualization is enabled from your Ubuntu terminal with:
Essential System Updates
It’s always a good practice to update your package lists and upgrade your installed packages to their latest versions before installing new software. This ensures you have the most recent security patches and compatible system libraries.
Open your terminal (Ctrl+Alt+T) and execute the following commands:
sudo apt update
sudo apt upgrade -y
The sudo apt update command refreshes your package lists, while sudo apt upgrade -y downloads and installs any available updates for your current packages. The -y flag automatically confirms prompts, allowing the process to run unattended.
Step-by-Step Installation Methods for VirtualBox on Ubuntu
There are primarily three ways to install VirtualBox on Ubuntu, each with its advantages. We’ll explore the most common and recommended methods.
Method 1: Installing from Ubuntu’s Official Repositories
This is the simplest and often the most stable method, as the packages are maintained by Ubuntu’s package managers. However, the version of VirtualBox available in Ubuntu’s repositories might be slightly older than the very latest release from Oracle.
-
Update Package Lists (if not done already):
bash

sudo apt update
-
Install VirtualBox and its DKMS Package:
sudo apt install virtualbox virtualbox-dkms -yvirtualbox: This is the main VirtualBox application.virtualbox-dkms: The Dynamic Kernel Module Support (DKMS) package is crucial. It ensures that the VirtualBox kernel modules are automatically rebuilt whenever your kernel is updated. This prevents issues where VirtualBox might stop working after a system kernel upgrade.
-
Verify Installation: Once the installation completes, you can verify it by checking the installed version:
bash

vboxmanage --version
You should see an output indicating the VirtualBox version. You can then launch VirtualBox from your applications menu.
This method is recommended for users who prioritize stability and ease of maintenance over having the absolute latest features.
Method 2: Installing from VirtualBox’s Official Website (Oracle’s Repository)
If you need the very latest version of VirtualBox with all the newest features and bug fixes, installing directly from Oracle’s official repository is the way to go. This method ensures you get updates directly from the VirtualBox developers.
-
Add Oracle’s GPG Key:
First, you need to import Oracle’s public key to verify the authenticity of the packages you’ll download.wget -O- https://www.virtualbox.org/download/oracle_vbox_2016.asc | sudo gpg --dearmor --output /usr/share/keyrings/oracle-virtualbox-2016.gpgAnd for newer VirtualBox versions (e.g., VirtualBox 7.x), you might also need this key:
wget -O- https://www.virtualbox.org/download/oracle_vbox.asc | sudo gpg --dearmor --output /usr/share/keyrings/oracle-virtualbox.gpgNote: The specific key to use may vary based on the VirtualBox version. Checking the official VirtualBox Linux downloads page is always recommended.
-
Add VirtualBox Repository to APT Sources:
Next, add the VirtualBox repository to your system’saptsources list. The$(lsb_release -cs)command automatically fetches your Ubuntu version’s codename (e.g.,jammyfor 22.04,focalfor 20.04).
bash

echo "deb [arch=amd64 signed-by=/usr/share/keyrings/oracle-virtualbox-2016.gpg] https://download.virtualbox.org/virtualbox/debian $(lsb_release -cs) contrib" | sudo tee /etc/apt/sources.list.d/virtualbox.list
Self-correction: For VirtualBox 7.x, the repository line might sometimes require theoracle-virtualbox.gpgkey if it’s explicitly specified on the download page. It’s safe to include both keys or just the one relevant to your target VirtualBox version.

-
Update Package Lists:
sudo apt updateYou should now see the VirtualBox repository being fetched during the update.
-
Install VirtualBox (Specific Version):
Now you can install the specific VirtualBox version. For example, to install VirtualBox 7.0:sudo apt install virtualbox-7.0 -yIf you want to install a different major version, replace
7.0with the desired version number (e.g.,virtualbox-6.1). The associatedvirtualbox-dkmsmodule will typically be pulled in as a dependency. -
Verify Installation:
bash

vboxmanage --version
Confirm that the installed version matches the one you intended to install.
This method provides the most up-to-date VirtualBox experience, which is beneficial for accessing the newest features and ensuring compatibility with the latest guest operating systems.
Post-Installation Configuration and Enhancements
Installing VirtualBox is just the first step. To unlock its full potential and ensure a smooth, integrated experience with your guest operating systems, you need to perform some crucial post-installation steps.
Initial Launch and Creating Your First Virtual Machine
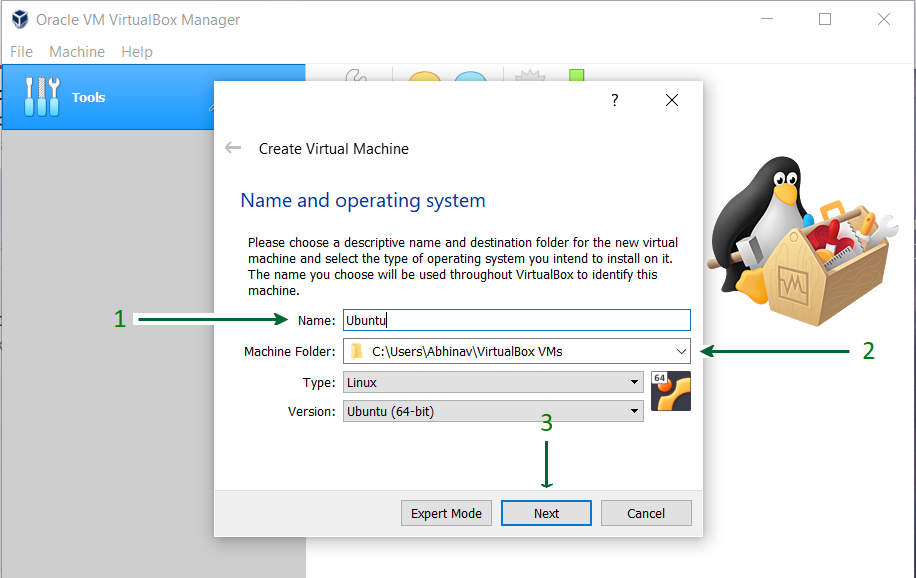
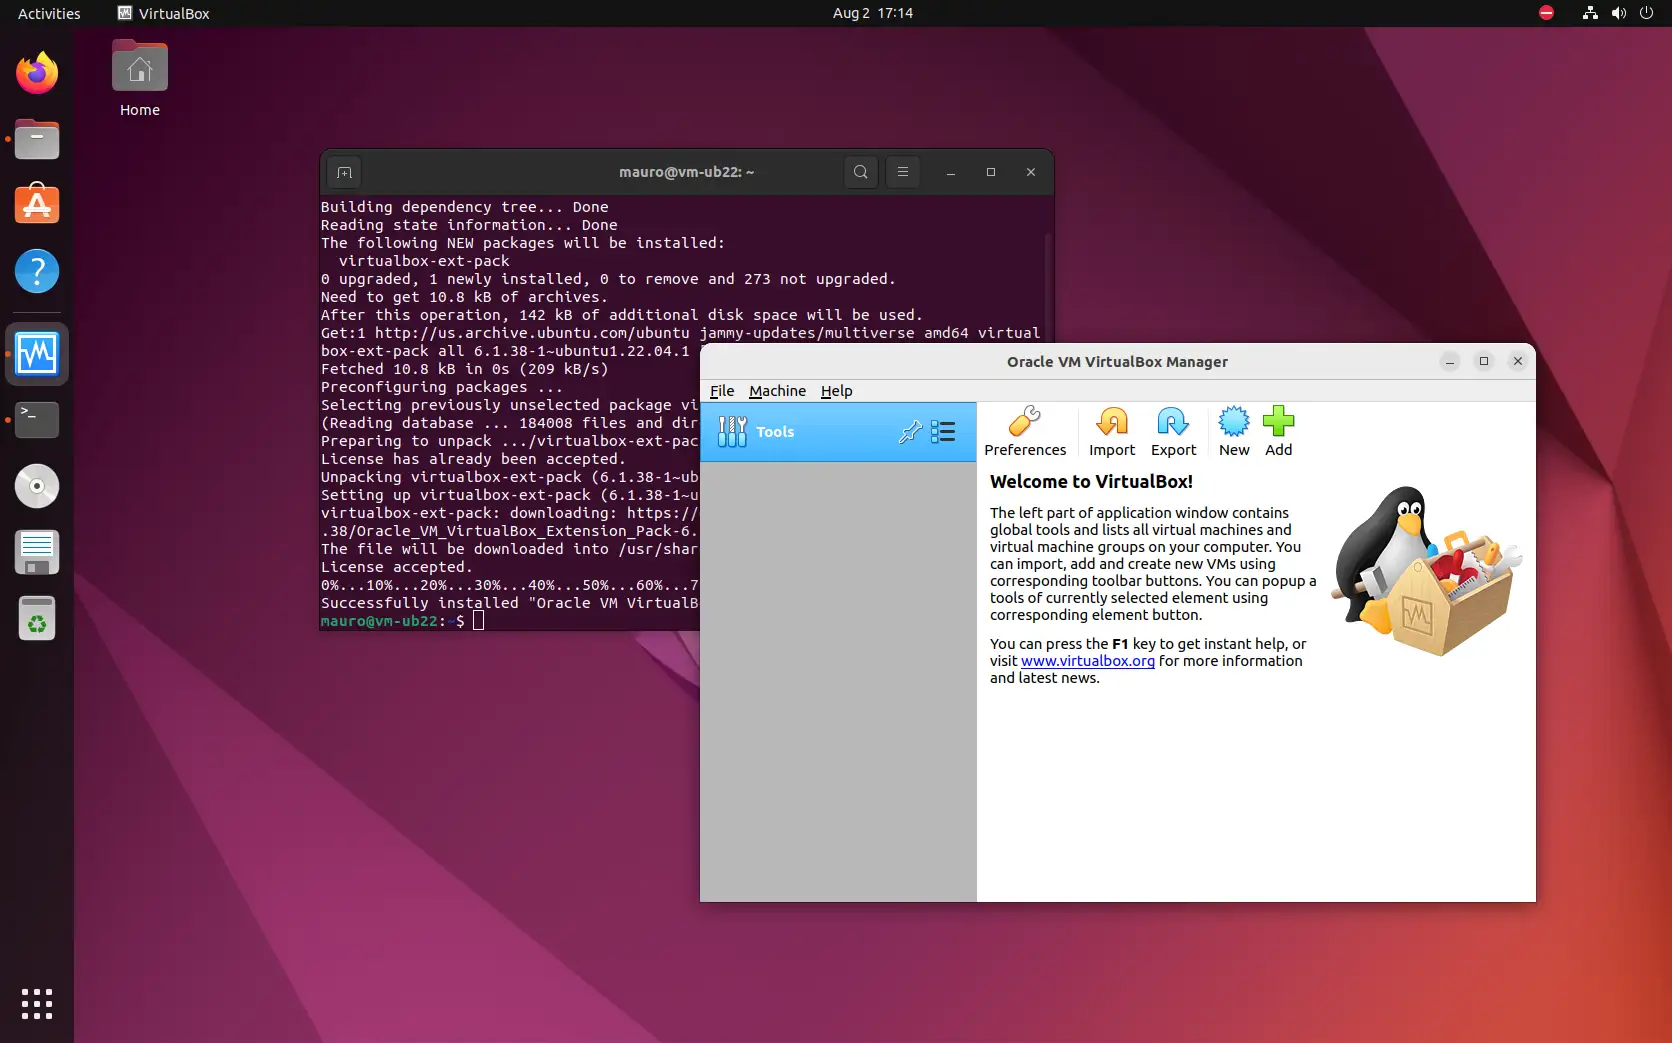
After installation, you can launch VirtualBox from your applications menu (search for “VirtualBox”). The VirtualBox Manager window will appear. From here, you can click “New” to start creating your first virtual machine, where you’ll define its name, type of OS, amount of RAM, and create a virtual hard disk.
Installing VirtualBox Guest Additions
This is arguably the most important post-installation step. VirtualBox Guest Additions are a set of device drivers and system applications that are installed inside a running guest operating system. They significantly improve the performance and usability of the guest OS.
Benefits of Guest Additions:
- Better Graphics Performance: Enables accelerated 2D/3D graphics, allowing for smoother animations and resolutions.
- Seamless Mouse Pointer Integration: No more grabbing and releasing the mouse; it moves freely between host and guest.
- Shared Clipboard: Copy and paste text and files between your host and guest OS.
- Drag-and-Drop Functionality: Drag files directly from your host to your guest and vice-versa.
- Automatic Display Resizing: The guest OS resolution automatically adjusts when you resize the VM window.
- Shared Folders: Easily share files and directories between the host and guest systems.
How to Install Guest Additions:
- Start your virtual machine.
- Once the guest OS is fully booted, go to the VirtualBox menu at the top of the VM window:
Devices->Insert Guest Additions CD image.... - Inside the guest OS, navigate to its virtual CD/DVD drive.
- For Linux Guests: A prompt might appear asking to run the software. If not, open a terminal in the guest OS, navigate to the mounted CD-ROM drive (e.g.,
/media/username/VBox_GAs_XXXXX), and run the appropriate installer script:
bash

sudo sh ./VBoxLinuxAdditions.run
You might need to installbuild-essentialanddkmsfirst in the guest OS:
bash

sudo apt update

sudo apt install build-essential dkms -y
- For Windows Guests: The installer should auto-run. If not, open “My Computer” or “This PC,” locate the VirtualBox Guest Additions CD drive, and double-click the
VBoxWindowsAdditions.exeinstaller.
- For Linux Guests: A prompt might appear asking to run the software. If not, open a terminal in the guest OS, navigate to the mounted CD-ROM drive (e.g.,
- Follow the on-screen prompts. You will likely need to reboot the guest OS after installation.
Enabling USB Device Support
By default, your virtual machines might not recognize USB devices connected to your host. To enable this functionality, you need to install the VirtualBox Extension Pack and add your user to the vboxusers group.
-
Install VirtualBox Extension Pack:
The Extension Pack provides additional features like USB 2.0/3.0 support, VirtualBox RDP, disk encryption, and PXE boot.- Go to the VirtualBox Downloads page on your host Ubuntu system.
- Under “VirtualBox X.X.X Oracle VM VirtualBox Extension Pack”, click the “All supported platforms” link to download the
.vbox-extpackfile. Ensure the Extension Pack version matches your installed VirtualBox version. - Open VirtualBox Manager, go to
File->Tools->Extension Pack Manager, click theInstallicon (a green plus sign), and select the downloaded.vbox-extpackfile. - Review the license agreement and click
Install. Enter your sudo password if prompted.
-
Add Your User to
vboxusersGroup:
Your user needs to be part of thevboxusersgroup to access USB devices.
bash

sudo usermod -a -G vboxusers $USER
Replace$USERwith your actual username, or simply use$USERif you’re executing this from your logged-in user’s terminal.
Important: You must log out and log back in (or reboot) for these group changes to take effect.
After these steps, you can start your VM, go to Devices -> USB, and select the USB device you wish to attach to the guest.
Setting Up Shared Folders
Shared Folders provide a convenient way to exchange files between your host and guest operating systems, particularly useful for development or data transfer.
- Ensure Guest Additions are Installed: Shared Folders rely on Guest Additions.
- Create a Shared Folder on the Host: On your Ubuntu host, create a directory you want to share (e.g.,
~/VirtualBox_Share). - Configure in VirtualBox Manager:
- With your VM powered off, go to its
Settings->Shared Folders. - Click the
Add new shared foldericon (a blue folder with a green plus sign). - For “Folder Path,” click “Other” and browse to the host directory you created (e.g.,
~/VirtualBox_Share). - For “Folder Name,” choose a descriptive name (e.g.,
vboxshare). - Check
Auto-mountand optionallyMake Permanent.Read-onlycan be checked if you only want the guest to read files. - Click
OKtwice to save settings.
- With your VM powered off, go to its
- Access in Guest OS:
- Start your VM.
- For Linux Guests: The shared folder will usually be mounted under
/media/sf_<folder_name>(e.g.,/media/sf_vboxshare). Your user in the guest OS might need to be added to thevboxsfgroup to access it:
bash

sudo usermod -a -G vboxsf $USER
Then, log out and back in within the guest OS. - For Windows Guests: The shared folder will appear as a network drive under “This PC” or “My Computer.”
Troubleshooting Common VirtualBox Issues
While VirtualBox is robust, you might encounter issues. Here are some common problems and their solutions:
“Kernel driver not installed (rc=-1908)” Error
This is a very common error, indicating that VirtualBox’s kernel modules failed to load or were not built correctly for your current kernel.
- Check Hardware Virtualization: Ensure VT-x/AMD-V is enabled in your BIOS/UEFI settings. Without it, you might get this error, especially with 64-bit guests.
- Reinstall
virtualbox-dkms: Sometimes, rebuilding the modules fixes the issue.
bash

sudo apt reinstall virtualbox-dkms

sudo modprobe vboxdrv
- Check DKMS Status:
bash

dkms status
Ensure VirtualBox modules are listed and correctly installed for your kernel. If not, manually force a rebuild:
bash

sudo dkms autoinstall
- Secure Boot: If you have Secure Boot enabled, kernel modules not signed by an approved key might fail to load. You may need to disable Secure Boot in BIOS/UEFI or manually sign the modules. Disabling Secure Boot is often the quickest solution for home users.
USB Devices Not Appearing
vboxusersGroup: Confirm your user is added to thevboxusersgroup and you’ve logged out and back in (or rebooted) after adding.
bash

groups $USER
You should seevboxusersin the output.- VirtualBox Extension Pack: Ensure the Extension Pack is installed and its version matches your VirtualBox version.
- USB Filter Settings: In the VM’s
Settings->USB, check if any USB filters are configured that might be preventing your device from showing up.
Performance Slowdowns in Guest OS
- Guest Additions: Ensure Guest Additions are installed in the guest OS. This is the primary fix for performance.
- RAM Allocation: Allocate sufficient RAM to the VM (e.g., 2GB for lightweight Linux, 4GB+ for Windows). Avoid allocating more than 50% of your host’s RAM.
- CPU Cores: In the VM’s
Settings->System->Processor, increase the number of CPU cores allocated to the VM (e.g., 2 or 4, depending on your host CPU). - Video Memory: In
Settings->Display->Screen, increase video memory and enable 3D acceleration (if Guest Additions are installed). - SSD vs. HDD: Running VMs on an SSD will significantly improve performance compared to a traditional HDD.
- Hardware Virtualization: Verify VT-x/AMD-V is enabled in your BIOS/UEFI.
Conclusion
Installing VirtualBox on Ubuntu opens up a world of possibilities, transforming your single computer into a versatile platform capable of hosting multiple operating systems and environments. Whether you’re a developer needing isolated testing grounds, a curious enthusiast eager to explore new distributions, or simply require specific software that only runs on a different OS, VirtualBox provides a powerful, free, and efficient solution.
By following this comprehensive guide, you’ve learned how to prepare your system, choose the most suitable installation method, enhance your virtual machine’s performance with Guest Additions and USB support, and troubleshoot common issues. Embracing virtualization with VirtualBox on Ubuntu is a smart move for anyone looking to maximize their tech productivity, maintain robust digital security, and get more value from their hardware investment. Dive in, experiment, and enjoy the limitless potential of virtual computing!
aViewFromTheCave is a participant in the Amazon Services LLC Associates Program, an affiliate advertising program designed to provide a means for sites to earn advertising fees by advertising and linking to Amazon.com. Amazon, the Amazon logo, AmazonSupply, and the AmazonSupply logo are trademarks of Amazon.com, Inc. or its affiliates. As an Amazon Associate we earn affiliate commissions from qualifying purchases.