
In the dynamic world of computing, the graphics processing unit (GPU) stands as a cornerstone for everything from immersive gaming and professional content creation to complex data processing. For users leveraging NVIDIA GPUs, keeping their drivers meticulously updated isn’t just a recommendation; it’s a critical practice that directly impacts performance, stability, and access to the latest technological advancements. An outdated driver can be the silent saboteur behind stuttering frame rates, inexplicable crashes, or a general lack of optimization in your favorite applications. This comprehensive guide will walk you through the essential methods and best practices for updating your NVIDIA driver, ensuring your system operates at its peak potential.
The Imperative of Keeping Your NVIDIA Drivers Current
The notion of “set it and forget it” simply doesn’t apply to GPU drivers. NVIDIA, a leader in graphics technology, consistently releases new driver versions, each packed with a myriad of improvements. Understanding why these updates are so crucial is the first step toward embracing a proactive approach to driver management.
Enhanced Gaming Performance and Stability
For PC gamers, driver updates are akin to getting a free performance boost. New Game Ready Drivers are often released in conjunction with major game titles, offering day-one optimizations that can dramatically improve frame rates, reduce latency, and eliminate graphical glitches specific to those games. These updates fine-tune the communication between your GPU and the game engine, unlocking previously inaccessible levels of performance and ensuring a smoother, more stable gaming experience. Without these updates, you might be playing new releases with sub-optimal settings or encountering frustrating bugs that have already been patched out.
Accessing the Latest Features and Optimizations
NVIDIA drivers aren’t just about speed; they also introduce support for new technologies and features. This could range from advancements in ray tracing and DLSS (Deep Learning Super Sampling) to new capabilities for creative applications. For professionals using NVIDIA GPUs for video editing, 3D rendering, or AI development, driver updates often bring significant performance enhancements for specialized software, leveraging the full power of the GPU’s architecture. Staying current means you’re always equipped with the latest tools and optimizations, keeping your workflow efficient and cutting-edge.
Crucial Security Patches and Bug Fixes
Beyond performance and features, driver updates often include critical security patches and bug fixes. Software, no matter how robust, can have vulnerabilities that malicious actors might exploit. NVIDIA actively identifies and addresses these security loopholes in new driver releases, protecting your system from potential threats. Similarly, minor bugs that could cause crashes, display issues, or system instability are regularly resolved. Regularly updating your drivers is a fundamental aspect of maintaining a secure and reliable computing environment.
Preparing for Your Driver Update
Before embarking on the update process, a little preparation can save you a lot of headaches. Knowing your system’s specifications and understanding the different driver types will ensure a smooth and successful update.
Identifying Your Current Driver Version and GPU Model
The first step is to know what you currently have. This information is vital for downloading the correct driver. You can find your GPU model and current driver version through a few simple methods:
- NVIDIA Control Panel: Right-click on your desktop and select “NVIDIA Control Panel.” In the bottom-left corner, click “System Information.” Here, you’ll see your GPU model and the driver version.
- Device Manager: Press
Windows key + X, then select “Device Manager.” Expand “Display adapters,” and your NVIDIA GPU will be listed. Right-click it, select “Properties,” then go to the “Driver” tab to see the version. - GeForce Experience: If you have GeForce Experience installed, open it. Navigate to the “Drivers” tab, and your current driver version will be displayed.
Backing Up Essential Data (Optional but Recommended)
While driver updates are generally safe, unforeseen issues can sometimes occur. As a general best practice for any significant system change, considering a backup of your critical data is wise. This isn’t strictly necessary for a driver update, but for peace of mind, especially if you have sensitive or irreplaceable files, a quick backup to an external drive or cloud service can prevent potential data loss. You might also create a system restore point as an additional safeguard.
Understanding Different Driver Types (Game Ready vs. Studio Drivers)
NVIDIA offers two primary types of drivers:
- Game Ready Drivers (GRD): These are the most common and are designed for gamers. They provide the best performance and bug fixes for the latest games and include optimizations for new titles as soon as they’re released.
- Studio Drivers (SD): Tailored for content creators, designers, and developers, Studio Drivers prioritize stability and performance in creative applications like Adobe Creative Suite, DaVinci Resolve, Blender, and more. While they still support games, their focus is on providing a robust and reliable experience for professional workflows.
Choose the driver type that best suits your primary use case. GeForce Experience typically offers Game Ready Drivers by default, but you can switch to Studio Drivers if preferred. When downloading manually from NVIDIA’s website, you’ll have the option to select.
Step-by-Step Methods for Updating Your NVIDIA Driver
There are several reliable ways to update your NVIDIA driver, each catering to different preferences and levels of control.
Method 1: Utilizing NVIDIA GeForce Experience (Recommended for Gamers)
NVIDIA GeForce Experience (GFE) is a companion application that streamlines driver updates and optimizes game settings. It’s the most convenient method for most gamers.
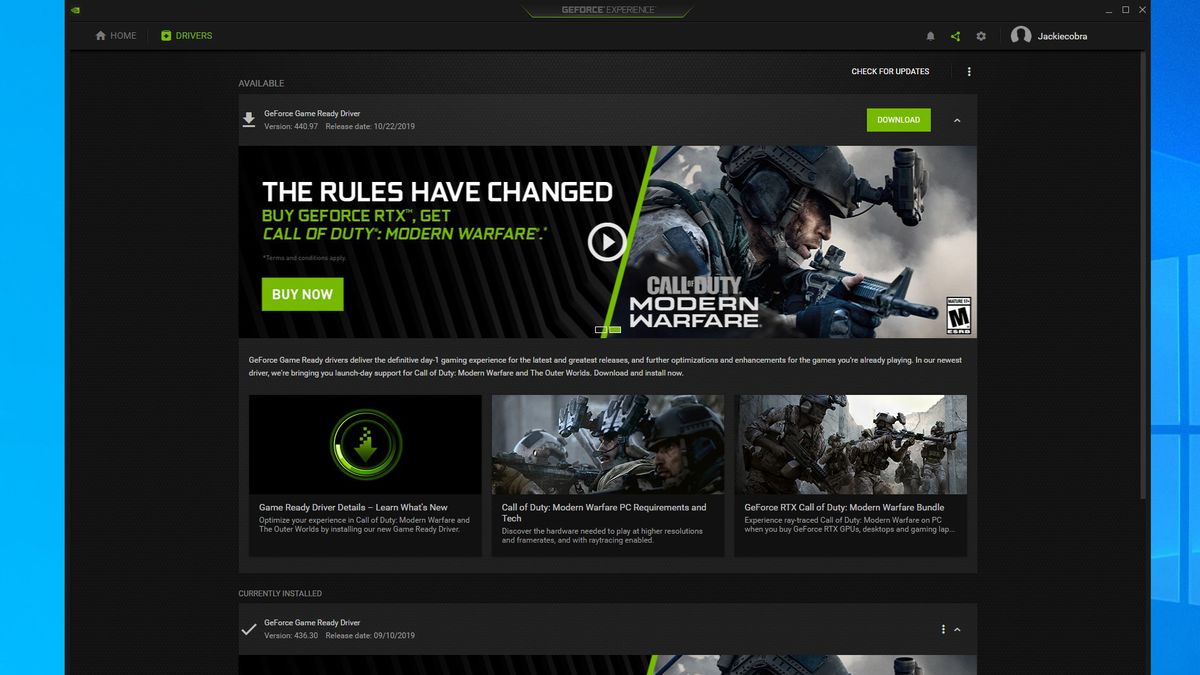
- Open GeForce Experience: Launch the application from your desktop shortcut or by searching for it in the Windows Start menu.
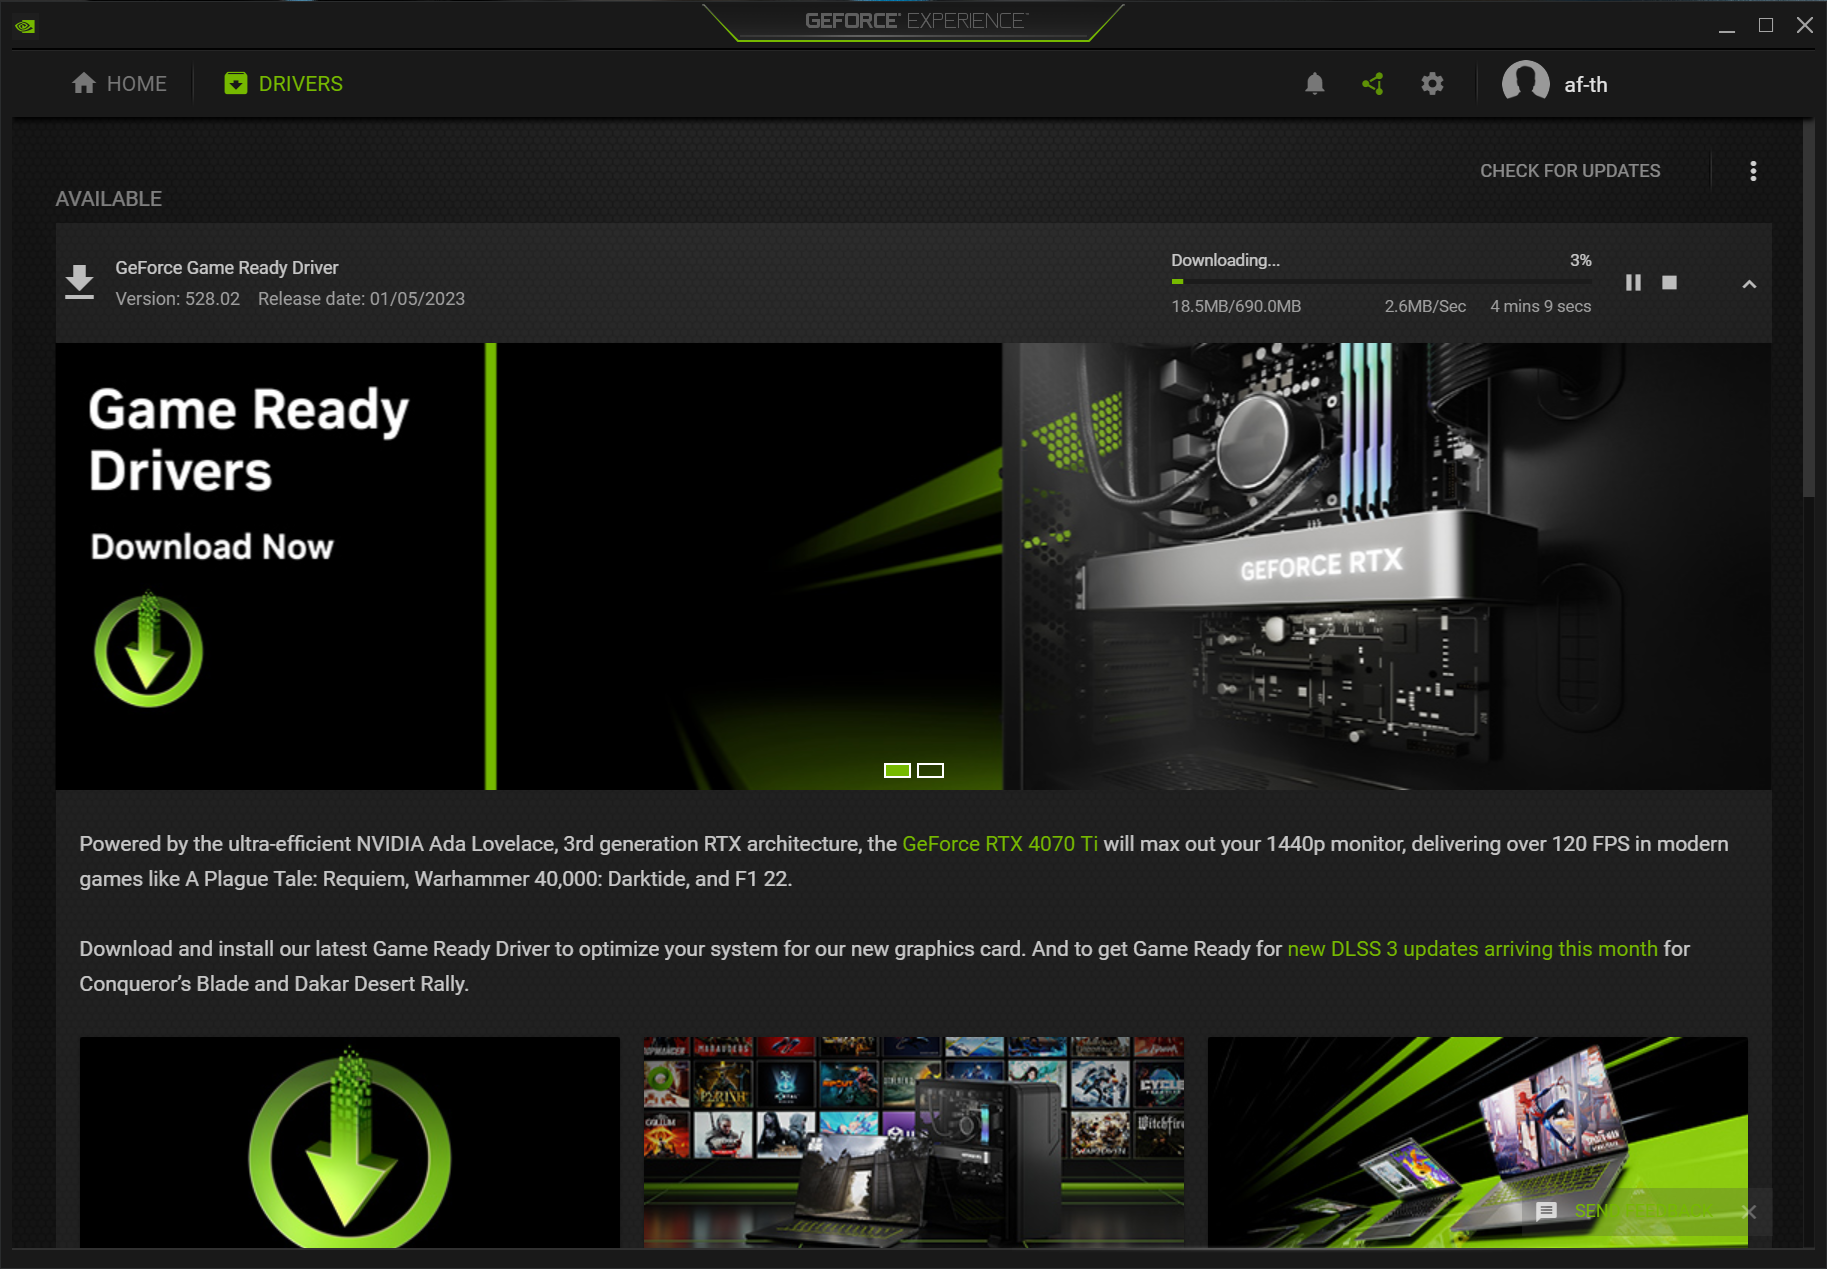
- Navigate to the Drivers Tab: Once GFE is open, click on the “Drivers” tab located in the top-left corner.
- Check for Updates: GFE will automatically check for new drivers. If an update is available, you’ll see a notification and a “Download” button.
- Download the Driver: Click “Download.” GFE will download the latest Game Ready Driver to your system.
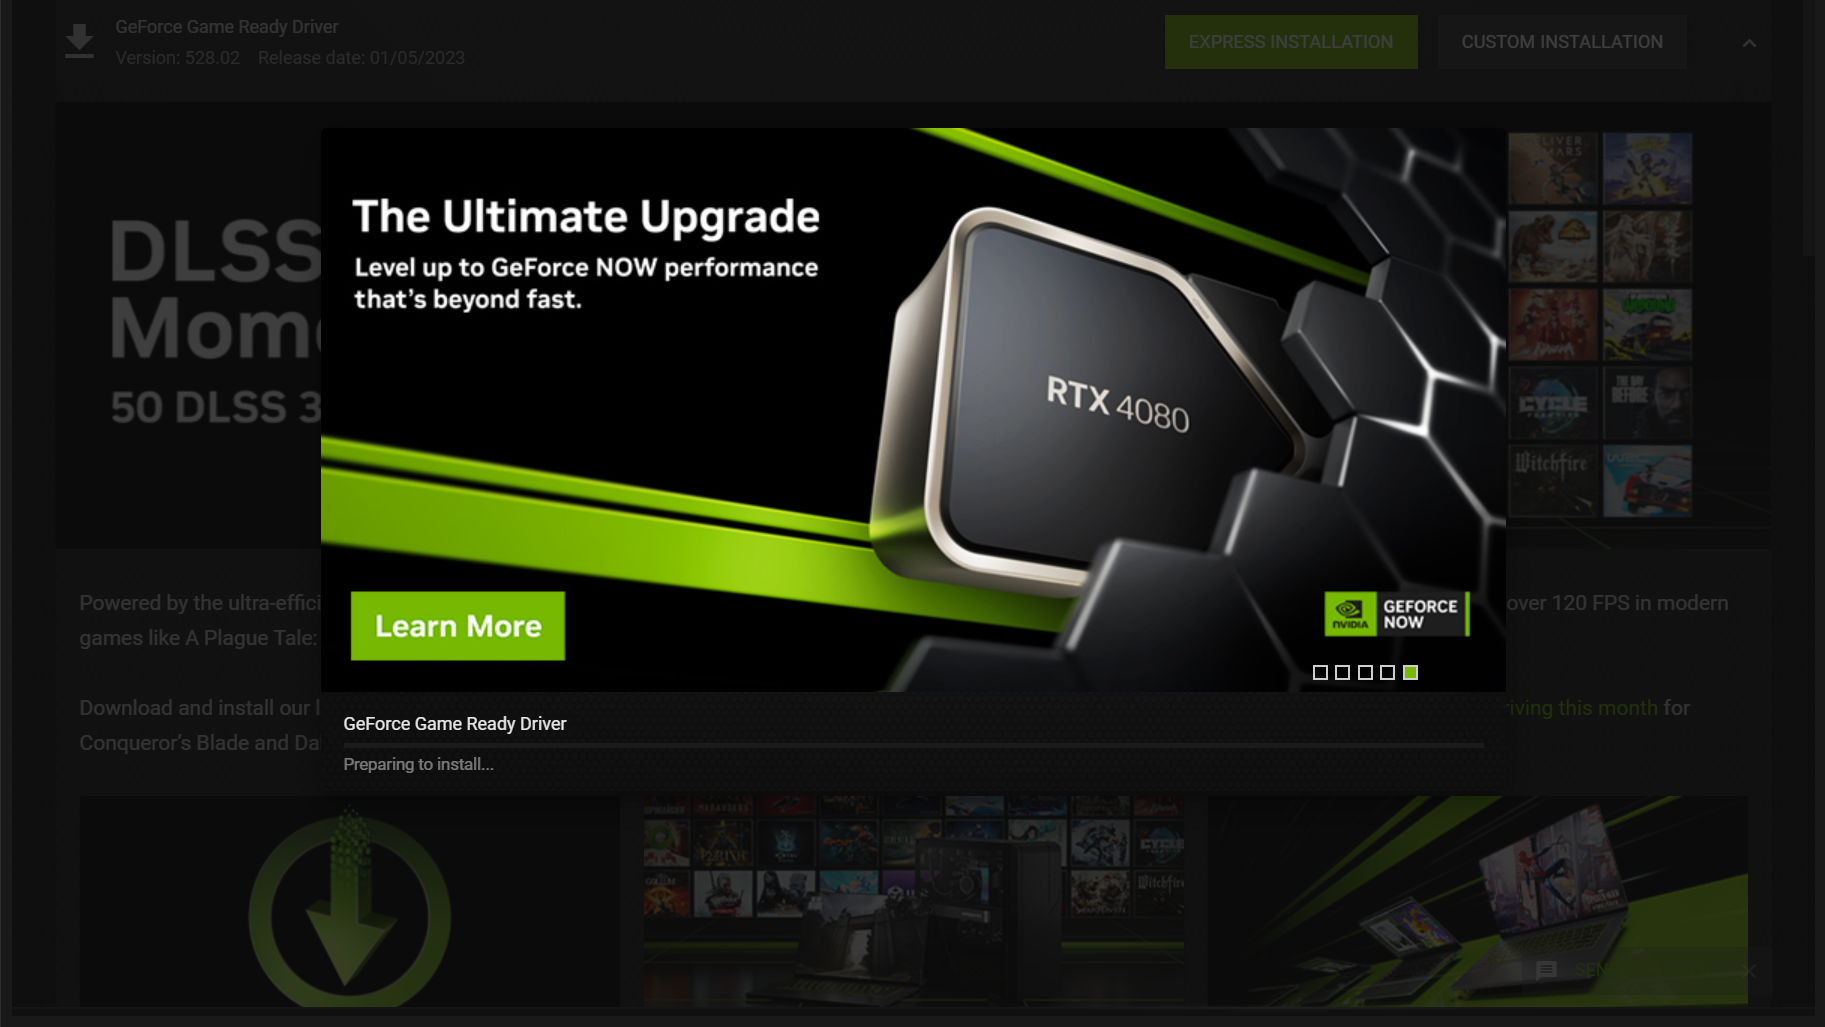
- Choose Installation Type: After the download completes, you’ll be presented with two options:
- Express Installation: This is the quickest and recommended option for most users. It installs all components over your existing driver.
- Custom Installation: This allows you to choose specific components to install (e.g., driver, PhysX, GeForce Experience itself) and offers a “Perform a clean installation” checkbox, which removes previous driver files before installing the new ones. A clean installation can sometimes resolve persistent issues or driver conflicts. Unless you have specific reasons not to, Express is usually fine. For troubleshooting or when moving to a significantly newer driver version, Custom with a clean install is beneficial.
- Complete the Installation: Follow the on-screen prompts. Your screen may flicker or go black momentarily during the installation process, which is normal. A system restart may be required to finalize the update.
Method 2: Manual Download from the Official NVIDIA Website (For Precision and Control)
This method gives you the most control over the driver selection and installation process, ideal if you prefer Studio Drivers or need a specific driver version.
- Visit the NVIDIA Driver Download Page: Open your web browser and go to www.nvidia.com/drivers.
- Select Your Product: Use the dropdown menus to accurately specify your:
- Product Type: GeForce, Quadro, NVS, etc. (e.g., GeForce)
- Product Series: RTX 40 Series, GTX 16 Series, etc. (e.g., GeForce RTX 40 Series)
- Product: Your specific GPU model (e.g., GeForce RTX 4090)
- Operating System: Your version of Windows (e.g., Windows 11 64-bit)
- Driver Type: Game Ready Driver (GRD) or Studio Driver (SD)
- Search and Download: Click “Search.” The website will display the latest compatible driver. Click “Download” and then “Download” again on the next page to save the installer file to your computer.
- Run the Installer: Once the download is complete, locate the executable file (e.g.,
552.12-desktop-win11-64bit-international-dch-whql.exe) and double-click it to start the installation. - Extraction Location: The installer will first ask for a location to extract its files. The default is usually fine; click “OK.”
- License Agreement: Read and accept the NVIDIA Software License Agreement.
- Choose Installation Type: Similar to GeForce Experience, you’ll have “Express” and “Custom (Advanced)” options.
- Express Installation: Installs all components automatically.
- Custom (Advanced): Allows you to select individual components and includes the crucial “Perform a clean installation” option. For most manual installations, performing a clean installation is highly recommended to ensure no residual files from older drivers cause conflicts.
- Complete the Installation: Follow the prompts. Your screen may flicker, and a restart will likely be required.
Method 3: Via Windows Device Manager (Basic Option)
This method is the least comprehensive but can be a quick way to check for updates if other methods are inaccessible. It relies on Windows Update to provide a driver, which might not always be the very latest version directly from NVIDIA.
- Open Device Manager: Press
Windows key + Xand select “Device Manager.” - Locate Display Adapters: Expand the “Display adapters” section.
- Update Driver: Right-click on your NVIDIA GPU (e.g., “NVIDIA GeForce RTX 4090”) and select “Update driver.”
- Search for Drivers: Choose “Search automatically for drivers.” Windows will then attempt to find and install the best available driver on your system or through Windows Update.
- Complete: If a newer driver is found, Windows will install it. You may need to restart your computer.
Post-Update Checks and Troubleshooting Common Issues
After updating your drivers, it’s good practice to verify the installation and be prepared to troubleshoot any unexpected issues.
Verifying the New Driver Installation
To confirm that the new driver has been successfully installed:
- NVIDIA Control Panel: Right-click desktop > NVIDIA Control Panel > System Information. Check the driver version.
- GeForce Experience: Open GFE > Drivers tab. It should show the newly installed driver version and indicate “You have the latest Game Ready Driver.”
- Device Manager: Press
Windows key + X> Device Manager > Display adapters > Right-click NVIDIA GPU > Properties > Driver tab. Verify the driver version.
Resolving Installation Errors and Black Screens
Occasionally, you might encounter issues during or after an update:
- Installation Failure: This could be due to corrupted download files, conflicts with existing software, or insufficient system resources. Try redownloading the driver, temporarily disabling antivirus software, or performing a clean installation (Method 2, Custom option).
- Black Screen/No Display: If your screen goes black and doesn’t recover after a few minutes during installation, try pressing
Alt + F4or restarting your PC. If the issue persists after a reboot, try booting into Safe Mode (Windows Key + R,msconfig, Boot tab, Safe boot) and then uninstalling the NVIDIA drivers using Display Driver Uninstaller (DDU) (a third-party tool available online) before attempting a clean install of a fresh driver download. - Performance Issues: If you experience worse performance or new bugs after an update, it’s possible the new driver has a specific incompatibility with your system or software.
Rolling Back to a Previous Driver Version
If a new driver causes instability or performance degradation, Windows allows you to roll back to the previously installed driver:
- Open Device Manager: Press
Windows key + Xand select “Device Manager.” - Locate Display Adapters: Expand “Display adapters.”
- Access Driver Properties: Right-click on your NVIDIA GPU and select “Properties.”
- Roll Back Driver: Go to the “Driver” tab and click “Roll Back Driver.” You may need to provide a reason. This will revert your system to the driver version that was installed before the latest update. If this option is grayed out, Windows doesn’t have a previous driver package to revert to, in which case you’d need to manually download an older, known-stable driver version from the NVIDIA website and install it.
Best Practices for Driver Maintenance
Maintaining your drivers goes beyond just the initial update; it involves thoughtful practices to keep your system robust and performing well over time.
Establishing a Regular Update Schedule
While there’s no fixed rule, a good approach is to check for new Game Ready Drivers whenever a major new game is released that you plan to play, or roughly once a month. For Studio Drivers, checking quarterly or when a new version of your primary creative software is released is often sufficient. Don’t feel compelled to update every single time a new driver drops, especially if your system is perfectly stable and performing well. Prioritize updates that specifically address issues you’re experiencing or offer features you need.
Clean Installation vs. Express Installation
Understanding when to choose a “clean installation” is vital.
- Express Installation: Suitable for routine updates where you haven’t encountered any issues with previous drivers. It’s faster and retains your NVIDIA Control Panel settings.
- Clean Installation: Highly recommended when:
- Upgrading to a new GPU.
- Experiencing driver-related issues (crashes, artifacts, performance drops).
- Transitioning between Game Ready and Studio Drivers.
- Performing a major Windows version update.
- Moving from very old driver versions to very new ones.
A clean installation thoroughly removes all previous driver files and settings, ensuring a fresh slate and minimizing potential conflicts.
Monitoring System Performance After Updates
After any driver update, pay attention to your system’s behavior. Launch your most demanding games or professional applications and observe performance. Look for improvements in frame rates, responsiveness, and stability. Conversely, be alert to any unexpected slowdowns, crashes, or graphical anomalies. Early detection of post-update issues allows you to troubleshoot or roll back the driver quickly, minimizing disruption to your workflow or gaming sessions. Using monitoring tools like MSI Afterburner or NVIDIA’s own performance overlay can help quantify changes.
Keeping your NVIDIA drivers updated is a simple yet profoundly impactful aspect of PC maintenance. By adopting a proactive approach and understanding the various methods and best practices, you can unlock the full potential of your graphics card, ensuring a consistently smooth, high-performance, and secure computing experience.
aViewFromTheCave is a participant in the Amazon Services LLC Associates Program, an affiliate advertising program designed to provide a means for sites to earn advertising fees by advertising and linking to Amazon.com. Amazon, the Amazon logo, AmazonSupply, and the AmazonSupply logo are trademarks of Amazon.com, Inc. or its affiliates. As an Amazon Associate we earn affiliate commissions from qualifying purchases.