
The allure of arcade lightgun games is undeniable. The thrill of pointing a realistic firearm at the screen, blasting pixelated enemies, and feeling the satisfying “click” of the trigger is a cornerstone of gaming nostalgia. For decades, however, this immersive experience was largely confined to CRT televisions, making it inaccessible to modern gamers with their sleek LCDs and LED displays. Enter the Sinden Lightgun – a revolutionary device that bridges this gap, bringing authentic lightgun gameplay back to contemporary screens.
This comprehensive guide will walk you through every step of installing, configuring, and optimizing your Sinden Lightgun, transforming your gaming setup into a retro arcade haven. Whether you’re a seasoned emulator enthusiast or a newcomer eager to relive classic shooting action, follow along to unlock the full potential of this incredible peripheral.

What is the Sinden Lightgun and Why You Need One?
Before diving into the technicalities, it’s worth understanding what makes the Sinden Lightgun so special and why it’s become an essential gadget for retro gaming aficionados. Unlike traditional lightguns that rely on scanning the electron beam of a CRT, the Sinden Lightgun employs an ingenious camera-based system that tracks a specially generated white border around your display. This innovation means it works flawlessly with any modern TV or monitor, liberating lightgun gaming from its CRT shackles.
A Modern Take on Classic Arcade Fun
The brilliance of the Sinden Lightgun lies in its ability to emulate the precise pointing and shooting mechanics of classic arcade cabinets without demanding outdated hardware. It uses a small camera located at the front of the gun to detect the white border displayed on your screen. By calculating the gun’s position relative to this border, it accurately determines where you’re aiming. This elegant solution bypasses the limitations of infrared (IR) lightbars and offers unparalleled precision, often making it feel more responsive than many original arcade setups.
Key Features and Advantages
Beyond its core compatibility with modern displays, the Sinden Lightgun boasts a suite of features that enhance the gaming experience:
- Lag-Free Precision: The camera-based tracking system provides remarkably low latency, making aiming feel natural and responsive.
- Recoil and Rumble Feedback: Many models feature a built-in solenoid for realistic recoil simulation and rumble motors for haptic feedback, adding a tangible layer of immersion to every shot.
- Integrated Buttons: Beyond the trigger, Sinden Lightguns typically include several side buttons that can be mapped to various in-game functions like reloading, starting games, or inserting coins, mimicking arcade controls.
- Mouse Emulation: The Sinden Lightgun functions as a standard mouse, making it incredibly versatile for PC lightgun games or even navigating menus.
- Wide Compatibility: It integrates seamlessly with popular emulators like RetroArch, MAME, Demul, and PC games that support mouse input, opening up a vast library of classic and modern titles.
- Future-Proof Design: Regular software and firmware updates from the Sinden team ensure ongoing compatibility and performance enhancements.
Investing in a Sinden Lightgun isn’t just about playing old games; it’s about preserving a cherished piece of gaming history and experiencing it in a way that feels authentic, yet perfectly adapted for today’s technology.
Preparing for Installation: Prerequisites and Unboxing
A smooth installation process begins with proper preparation. Ensuring you have the right hardware, software, and understanding what to expect from your new gadget will save you time and potential headaches down the line.
Essential Hardware and Software
Before your Sinden Lightgun even touches your setup, gather the following:
- A Compatible PC: While the Sinden Lightgun works with various operating systems, Windows (7, 8, 10, 11) is generally the most straightforward for setup and driver support. Ensure your PC has enough processing power and RAM to comfortably run your chosen emulators and games.
- Display: Any modern LCD, LED, Plasma, or Projector screen will work. The size doesn’t matter as much as its ability to display a clear white border around the game area.
- Available USB Ports: The Sinden Lightgun connects via a standard USB port. If you have multiple guns, you’ll need one port per gun. Direct motherboard USB ports are often preferred over USB hubs, especially unpowered ones, to ensure stable power delivery and data transfer.
- Internet Connection: Required for downloading the Sinden Lightgun software, drivers, and any necessary emulator files or game ROMs.
- Emulators: Decide which emulators you’ll use. Popular choices include:
- RetroArch: A powerful frontend for multiple emulator cores, excellent for console lightgun games (e.g., NES, SNES, PlayStation).
- MAME (Multiple Arcade Machine Emulator): Essential for arcade lightgun classics.
- Demul/TeknoParrot: For more modern arcade systems.
- PC Games: Any PC game that uses mouse input for aiming can potentially be configured.
Unboxing Your Sinden Lightgun
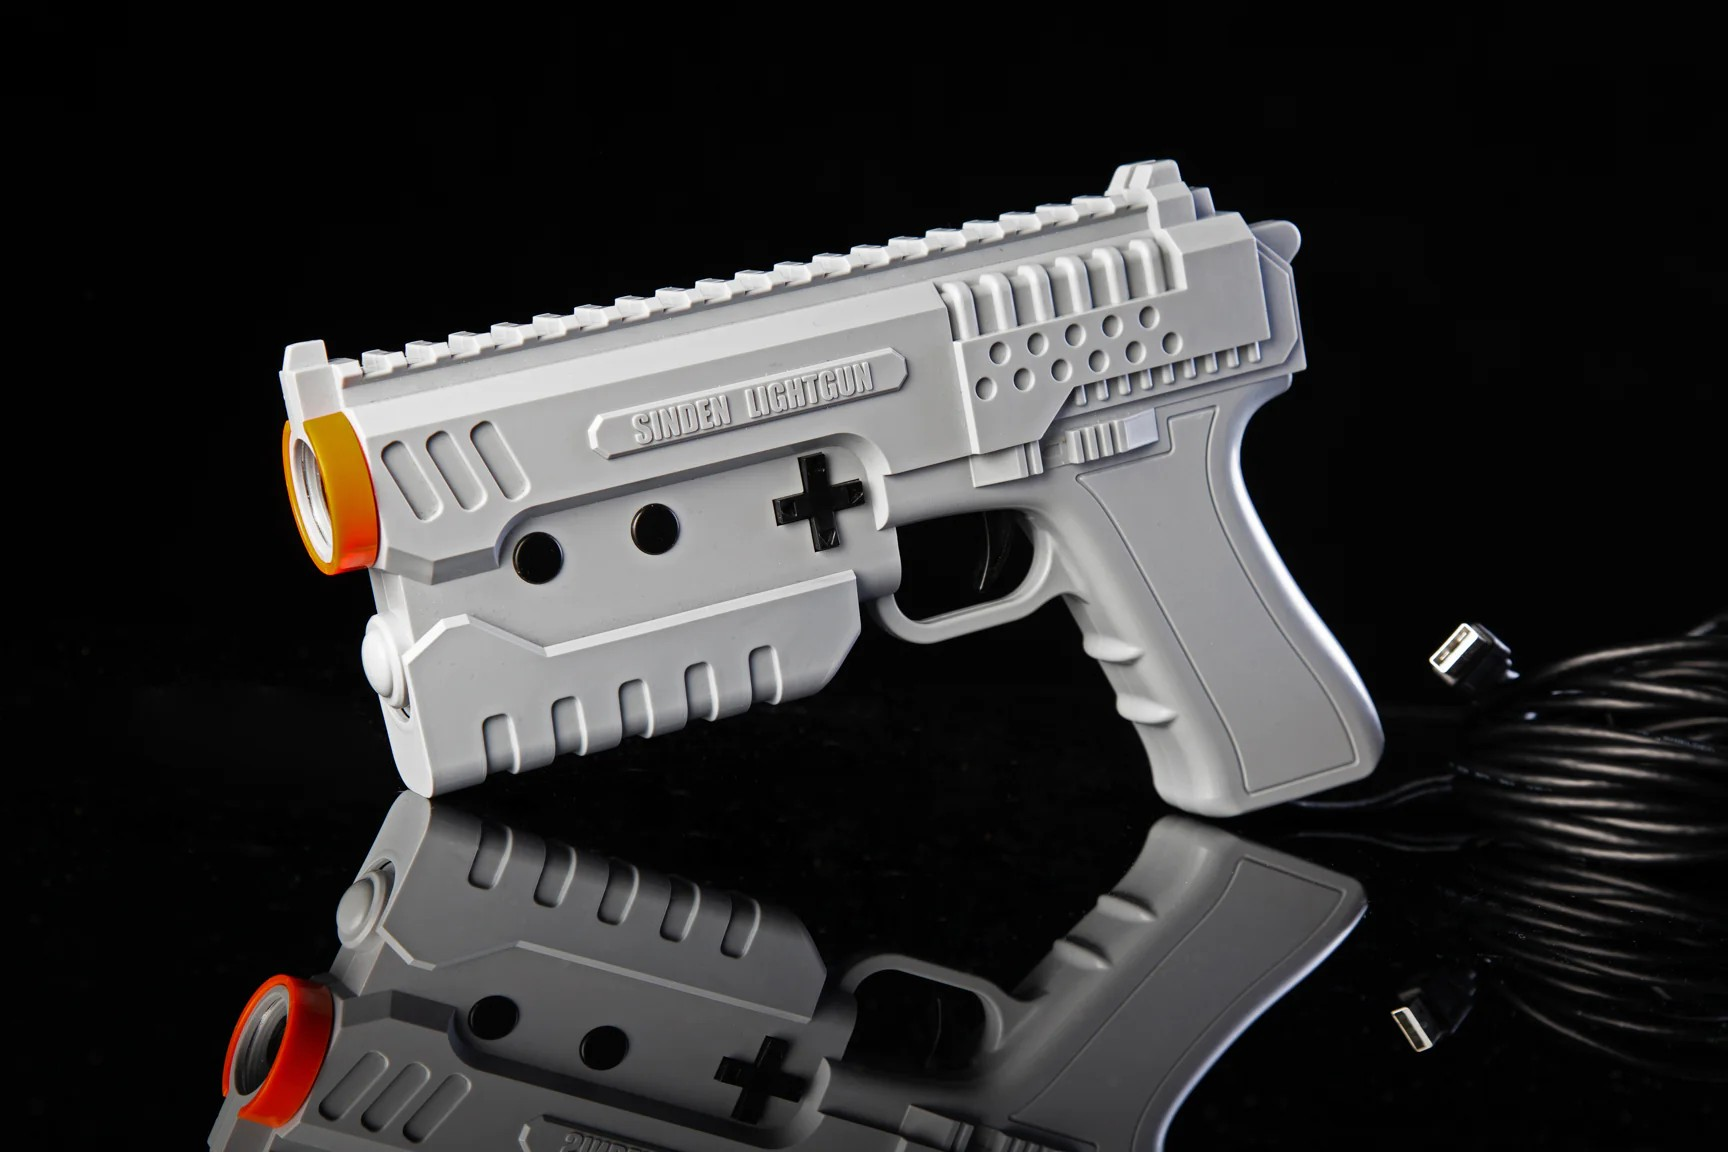
Upon receiving your Sinden Lightgun, carefully unbox it and inspect its contents. Typically, you’ll find:
- The Sinden Lightgun Unit: The main device itself.
- USB Cable: For connecting the gun to your PC.
- Recoil Power Adapter (if applicable): If you purchased a recoil model, it will likely come with a separate power supply for the recoil mechanism. This is crucial as USB alone often can’t provide enough power for consistent recoil.
- Instruction Manual/Quick Start Guide: While this guide is comprehensive, always cross-reference with the official Sinden documentation for any specific model variations or critical updates.
Take a moment to familiarize yourself with the physical layout of the gun – the trigger, reload button, and any auxiliary buttons. Ensure all cables are present and undamaged.
Step-by-Step Installation and Configuration
With preparations complete, it’s time to bring your Sinden Lightgun to life. This section details the physical connection, software installation, and initial configuration to get you ready for action.
Connecting the Hardware
- Connect the USB Cable: Plug the USB-A end of the Sinden Lightgun cable into an available USB port on your PC. It’s highly recommended to use a direct USB port on your motherboard (typically on the back of a desktop PC) rather than a front panel port or an unpowered USB hub. This minimizes potential power delivery issues and ensures a stable connection.
- Connect Recoil Power (if applicable): If your Sinden Lightgun has recoil, plug the recoil power adapter into an electrical outlet and then connect its DC barrel jack to the dedicated power input on your lightgun. The recoil mechanism requires significant power, and this separate supply ensures consistent performance without drawing too much from your PC’s USB ports. Ensure the power adapter matches the voltage and current requirements specified by Sinden.
- Initial OS Detection: Your operating system (Windows, typically) should detect the new hardware and attempt to install generic USB device drivers. This is normal, but dedicated Sinden drivers will be installed in the next step.
Software Installation and Driver Setup
This is where the magic begins. The Sinden Lightgun software is essential for the gun to function correctly and for calibrating its camera.
- Download the Sinden Lightgun Software: Navigate to the official Sinden Lightgun website (a quick search for “Sinden Lightgun official website” should lead you there). Locate the “Downloads” or “Support” section and download the latest version of the Sinden Lightgun software. Always download from the official source to ensure you have genuine, up-to-date, and secure software.
- Extract the Software: The downloaded file will likely be a ZIP archive. Extract its contents to a easily accessible folder on your PC, such as
C:SindenLightgun. Avoid installing it in Program Files as it can sometimes cause permission issues. - Install Drivers (if prompted): Within the extracted folder, you might find a dedicated driver installer. Run it if present. The Sinden software itself will often prompt you to install necessary drivers upon its first launch. Follow the on-screen instructions. You might be asked to approve driver installation from an “unknown publisher”; this is normal for specialized hardware drivers.
- Antivirus Exception: It’s not uncommon for antivirus software to flag niche hardware drivers or game-related executables as suspicious. If you encounter any issues, temporarily disable your antivirus during installation, or, better yet, add an exception for the Sinden Lightgun software folder in your antivirus settings after verifying it’s from the official source.
Configuring the Sinden Lightgun Software
With the software installed, it’s time to calibrate and customize your lightgun.
- Launch the Sinden Lightgun Application: Find the executable file (e.g.,
SindenLightgun.exe) in the folder where you extracted the software and run it. You might want to create a desktop shortcut for easy access. - Initial Setup Wizard: The software will likely guide you through an initial setup.
- Select Your Lightgun: If you have multiple Sinden devices or different models, ensure the correct one is selected.
- Screen Resolution: Input your monitor’s native resolution. This is crucial for accurate tracking.
- Aspect Ratio: Confirm your screen’s aspect ratio (e.g., 16:9, 4:3).
- Border Settings: The Sinden software generates a white border around your game window. You can usually customize its thickness and position. Ensure it’s clearly visible and encompasses the entire game area.
- Camera Calibration: The software will ask you to point the gun at various corners of the screen. Follow these prompts carefully for precise calibration. This step teaches the gun your screen’s dimensions and its relative position.
- Test and Fine-Tune: Once the initial setup is complete, you’ll enter the main software interface.
- Test Tracking: Move the lightgun around and observe the on-screen cursor. It should move smoothly and accurately reflect where you’re pointing.
- Button Mapping: Configure the lightgun’s physical buttons (trigger, reload, side buttons) to desired functions. The software often allows you to map these to keyboard keys or mouse clicks, which is invaluable for emulator integration.
- Recoil/Rumble Settings: Adjust the strength and duration of the recoil and rumble effects to your preference. Test them to ensure they are working correctly.
- Save Configuration: Always save your settings after making changes!
Integrating with Emulators (e.g., RetroArch, MAME)
The final, and arguably most important, step is getting your Sinden Lightgun to work with your favorite emulators. The general principle is to map the lightgun’s output to the emulator’s mouse input or specific lightgun controls.
RetroArch Configuration
RetroArch is incredibly versatile but can be intimidating due to its numerous settings.
- Launch RetroArch: Open RetroArch and load a lightgun game (e.g., a NES Zapper game with
Nestopiacore, or a PlayStation lightgun game withPCSX-ReARMedorDuckStationcore). - Open Quick Menu: While the game is running, press
F1(or your assigned hotkey) to open the Quick Menu. - Navigate to Controls: Go to
Controls->Port 1 Controls(or the port corresponding to your lightgun). - Set Device Type: Change
Device TypetoLightgunorMouse. For many cores,Lightgunis the preferred option, which often automatically maps the axis to mouse X/Y. - Map Inputs:
Lightgun Trigger: Map this toMouse 1(left click).Lightgun Reload: Map this toMouse 2(right click) or a dedicated button on your Sinden.- Map other Sinden buttons (e.g.,
Start,Coin) to their respective functions within RetroArch’sPort 1 ControlsorHotkey Bindssections.
- Core Options: Go back to the Quick Menu and select
Core Options. Many lightgun-specific cores have options forCrosshair Type,Gun Con Offset, orMouse Index. Experiment with these to fine-tune accuracy. For multiple lightguns, ensure each gun is assigned a uniqueMouse Index(e.g., Player 1 = Mouse 1, Player 2 = Mouse 2). - Save Game/Core Remap File: Crucially, go to
Controls->Manage Core OptionsorManage Game Optionsand selectSave Core OverridesorSave Game Overrides. This saves your specific lightgun settings for that core or game, so you don’t have to configure it every time.
MAME Configuration
MAME’s setup is generally more straightforward for lightgun games.
- Launch MAME: Start MAME and load a lightgun game (e.g.,
Area 51,House of the Dead). - Access MAME Menu: While the game is running, press
TABto open MAME’s in-game menu. - Input (This Game): Select
Input (This Game). - Analog Controls: Scroll down to the
Analog Controlssection.- P1 Lightgun X Analog / P1 Lightgun Y Analog: These should automatically be assigned to
Mouse XandMouse Yaxes once your Sinden is connected and detected as a mouse. If not, click on them and move your Sinden Lightgun to assign. - P1 Lightgun Button 1 (Trigger): Assign this to
Mouse Button 1(left click). - P1 Lightgun Button 2 (Reload): Assign this to
Mouse Button 2(right click) or a dedicated Sinden button.
- P1 Lightgun X Analog / P1 Lightgun Y Analog: These should automatically be assigned to
- Save Configuration: Once configured, exit the
TABmenu, and MAME will usually save these settings automatically for that specific game or globally.
For other emulators like Demul or specific PC games, the process will involve finding their input configuration settings and mapping the Sinden Lightgun’s mouse output and button presses accordingly. Always refer to the emulator’s documentation or community guides for precise instructions.
Optimizing Your Sinden Lightgun Experience
Installation is just the beginning. To truly enjoy your Sinden Lightgun, you’ll want to optimize its performance and troubleshoot any minor hiccups.
Calibration Tips for Precision Aiming
Achieving pixel-perfect accuracy requires a bit of finesse.
- Consistent Border: Ensure the white border generated by the Sinden software is always visible, clear, and encompasses the entire game area. Any obstruction or inconsistency can affect tracking.
- Lighting Conditions: The Sinden Lightgun’s camera works best in well-lit rooms, but direct glare or extremely bright, changing light sources near the screen can confuse it. Avoid pointing strong lights directly at your display.
- Distance and Angle: Experiment with your distance from the screen. Most users find a comfortable and accurate range between 5-10 feet. The gun also needs to be held relatively straight-on to the screen; extreme angles can reduce accuracy.
- In-Game Calibration: Many lightgun games (especially arcade titles) have their own in-game calibration routines. Always run these after initial Sinden setup to fine-tune aim for that specific game.
- Sinden Software Calibration Tool: The Sinden application itself often has a detailed calibration tool. Utilize this for periodic checks and recalibration if you move your setup or notice a drop in accuracy.
- Display Settings: Ensure your monitor’s refresh rate and resolution are set correctly in both Windows and the Sinden software. Incorrect settings can cause visual artifacts or tracking issues.
Troubleshooting Common Issues
Even with careful setup, you might encounter minor problems. Here are solutions to common Sinden Lightgun issues:
- Lightgun Not Detected:
- Check USB connection. Try a different USB port, preferably a direct one on the motherboard.
- Verify drivers are installed. Rerun the Sinden software’s driver installer.
- Restart your PC.
- Check Device Manager (Windows) to see if the device is listed and has no error symbols.
- Tracking Issues / Inaccurate Aim:
- Is the white border visible? If not, the Sinden software isn’t running or isn’t projecting the border.
- Lighting: Adjust room lighting to avoid glare or overly dark conditions.
- Recalibrate: Rerun the Sinden software’s calibration routine.
- Dirty Camera Lens: Gently clean the camera lens on the Sinden Lightgun with a microfiber cloth.
- Refresh Rate: Ensure your display’s refresh rate is stable and matches Sinden software settings if applicable.
- Recoil Not Working:
- Is the recoil power adapter plugged in? This is the most common oversight.
- Is it switched on (if applicable)? Some models have a separate power switch for recoil.
- Check Sinden software settings: Ensure recoil is enabled and the strength is set above zero.
- USB Power: Even with the adapter, some USB issues can interfere. Try a different USB port.
- Input Lag:
- Ensure your monitor is in “Game Mode” to reduce display latency.
- Disable any unnecessary background applications that might consume CPU cycles.
- Check your emulator’s video settings (e.g., VSync, hard GPU sync) and experiment with them.
- Ensure the Sinden software and drivers are up to date.
- Antivirus Interference: If you added an exception, double-check it. Sometimes antivirus updates can revert exceptions.
Enhancing Immersion with Games and Settings
Once your Sinden Lightgun is working reliably, explore these options to boost your gaming experience:
- Recoil Strength: Tweak the recoil strength in the Sinden software to match the game’s feel. A heavy machine gun might warrant maximum recoil, while a pistol could use a lighter touch.
- Rumble Feedback: If your gun supports rumble, adjust its intensity.
- Game-Specific Settings: Many emulators allow per-game configurations. Use this to tailor button mappings, sensitivity, and core options for each lightgun title.
- Game Overlays/Crosshairs: Some emulators offer customizable crosshairs or overlays. While the Sinden Lightgun is designed for “point and shoot” without a reticle, some players prefer a subtle on-screen guide.
- Dedicated Setup: Consider a dedicated lightgun gaming setup with optimal viewing distance and minimal distractions for the ultimate arcade-at-home experience.
Beyond Installation: Expanding Your Lightgun Library
With your Sinden Lightgun fully operational and optimized, the real fun begins: exploring the vast world of lightgun games.
Discovering Compatible Games
The Sinden Lightgun opens the door to hundreds of titles across various platforms:
- Arcade Classics: Dive into iconic MAME titles like
Time Crisis,House of the Dead,Virtua Cop,Lethal Enforcers,Point Blank,Duck Hunt(original arcade version), andGunblade NY. - Console Gems: Revisit console lightgun masterpieces on RetroArch-supported cores. Think
Duck Hunt(NES),Lethal Enforcers(SNES/Genesis),Time CrisisandPoint Blankseries (PlayStation 1),House of the Dead(Sega Saturn/Dreamcast), andVirtua Cop(Sega Saturn). - PC Lightgun Titles: Many PC games that use mouse input for aiming can be configured to work with the Sinden Lightgun, providing a fresh way to experience them.
- Modern Emulation: Explore more recent arcade emulation with tools like Demul (for Atomiswave/Naomi) and TeknoParrot (for PC-based arcade systems), bringing titles like
Rambo Arcadeand newerHouse of the Deadentries to your setup.
Always research game compatibility and recommended emulator settings for the best experience. The lightgun gaming community is a fantastic resource for this information.
Community and Support
The Sinden Lightgun has a vibrant and active community that is an invaluable resource for support, troubleshooting, and discovering new ways to enjoy your device.
- Official Sinden Forums/Discord: The Sinden Lightgun website usually links to its official forums or a Discord server. These are excellent places to ask questions, share tips, and get updates directly from the Sinden team or experienced users.
- Retro Gaming Communities: Websites like Reddit (e.g., r/RetroArch, r/MAME), dedicated emulation forums, and YouTube channels often feature discussions and tutorials related to the Sinden Lightgun.
- Firmware Updates: Periodically check the official Sinden website for firmware updates. These can introduce new features, improve performance, or fix bugs, ensuring your lightgun remains at its best.
By staying engaged with the community, you’ll not only resolve issues faster but also discover new games, configurations, and ways to push the boundaries of your lightgun gaming setup.

Conclusion
The Sinden Lightgun is more than just a peripheral; it’s a gateway to a beloved genre of gaming that many thought was lost to time. By embracing modern technology, it skillfully resurrects the tactile thrill of arcade lightgun action, making it accessible to anyone with a contemporary display.
While the initial setup might seem daunting with its blend of hardware connection, software installation, and emulator configuration, the steps are logical and rewarding. With this comprehensive guide, you now possess the knowledge to confidently install, calibrate, and optimize your Sinden Lightgun. From the nostalgic blasts of Duck Hunt to the intense firefights of Time Crisis, your modern gaming rig is now ready to deliver an authentic arcade experience. So, load up your favorite lightgun game, grab your Sinden, and prepare to aim for high scores once again!
aViewFromTheCave is a participant in the Amazon Services LLC Associates Program, an affiliate advertising program designed to provide a means for sites to earn advertising fees by advertising and linking to Amazon.com. Amazon, the Amazon logo, AmazonSupply, and the AmazonSupply logo are trademarks of Amazon.com, Inc. or its affiliates. As an Amazon Associate we earn affiliate commissions from qualifying purchases.