In the dynamic world of technology, data reigns supreme. Behind every successful website, mobile application, and enterprise system lies a robust database, meticulously storing and managing the information that fuels our digital lives. Among the pantheon of database management systems, MySQL stands out as a colossal, open-source relational database management system (RDBMS) that has powered countless applications globally, from small-scale personal projects to the expansive infrastructures of tech giants like Facebook, Twitter, and YouTube.
For developers, system administrators, and anyone venturing into the realm of data management, mastering MySQL installation and configuration is an indispensable skill. It’s a foundational step that unlocks the ability to build data-driven applications, analyze vast datasets, and ensure the seamless operation of digital services. This comprehensive guide will walk you through the entire process of installing MySQL across various popular operating systems, delve into crucial post-installation configurations, and touch upon security best practices, ensuring you have a secure and functional database environment ready for your projects.

Understanding MySQL and Its Importance
Before we dive into the intricate steps of installation, let’s establish a clear understanding of what MySQL is, why it’s so widely adopted, and what essential prerequisites you should consider. This foundational knowledge will empower you to make informed decisions throughout the setup process and beyond.
What is MySQL?
MySQL is an open-source relational database management system (RDBMS) that operates on a client-server model. It’s renowned for its speed, reliability, and ease of use. Relational databases store data in tables, which are structured with rows and columns, allowing data to be organized, searched, and related across multiple tables using SQL (Structured Query Language). MySQL’s open-source nature means it’s free to use and modify, backed by a large community of developers who contribute to its continuous improvement and provide extensive support.
The “SQL” in MySQL refers to the standard language used to interact with databases. With SQL, you can create, modify, and retrieve data from a MySQL database, making it a powerful tool for data manipulation and analysis. Its compatibility with virtually all major programming languages and operating systems makes it a universal choice for development.
Why Choose MySQL?
The popularity of MySQL isn’t accidental; it’s a direct result of its compelling features and benefits, especially relevant in today’s fast-paced tech landscape:
- Performance and Reliability: MySQL is designed for high performance, capable of handling large datasets and high transaction volumes efficiently. Its robust architecture ensures data integrity and system stability, crucial for mission-critical applications.
- Open Source and Cost-Effective: Being open source, MySQL eliminates licensing costs, making it an attractive option for startups, small businesses, and individual developers. This affordability doesn’t compromise on features or performance, offering enterprise-grade capabilities without the hefty price tag.
- Scalability: From powering a personal blog to managing the data for a multi-million-user web application, MySQL can scale to meet diverse demands. It supports various storage engines, allowing you to optimize for specific performance or reliability needs.
- Security Features: MySQL comes with a strong security framework, offering robust user management, access control, and encryption capabilities to protect sensitive data. Proper configuration, which we’ll cover, enhances its inherent security.
- Ease of Use and Comprehensive Documentation: With a relatively straightforward learning curve, extensive documentation, and a vast community, finding resources and support for MySQL is easy. Tools like MySQL Workbench further simplify database administration.
- Wide Compatibility: MySQL is a cornerstone of the LAMP (Linux, Apache, MySQL, PHP/Python/Perl) and LEMP (Linux, Nginx, MySQL, PHP/Python/Perl) stacks, which are fundamental technologies for web development. It integrates seamlessly with popular programming languages and frameworks, making it a versatile choice for modern application development.
Key Prerequisites Before You Begin
Before embarking on the installation journey, ensure your system meets these basic requirements and considerations:
- Operating System: MySQL supports a wide range of operating systems, including Windows, macOS, and various Linux distributions (Ubuntu, Debian, CentOS, Fedora, etc.). Ensure your OS is up to date.
- System Resources: While MySQL can run on modest hardware, allocate sufficient RAM (at least 2GB recommended for development, more for production) and disk space (depending on your data needs) for optimal performance.
- Internet Connection: An active internet connection is necessary to download installation packages and updates.
- Administrative Privileges: You will need administrative or root privileges on your system to install software and configure services.
- Basic Command-Line Familiarity: While graphical installers exist, some steps, especially post-installation security, are best handled via the command line. A basic understanding will be beneficial.
Step-by-Step Installation Guides for Major Operating Systems
The installation process for MySQL varies slightly depending on your operating system. We’ll cover the most common methods for Windows, macOS, and Linux, focusing on ease of use and reliability.
Installing MySQL on Windows
The recommended method for installing MySQL on Windows is using the MySQL Installer for Windows, a comprehensive package that simplifies the installation of MySQL server, client applications (like MySQL Workbench), and connectors.
- Download MySQL Installer:
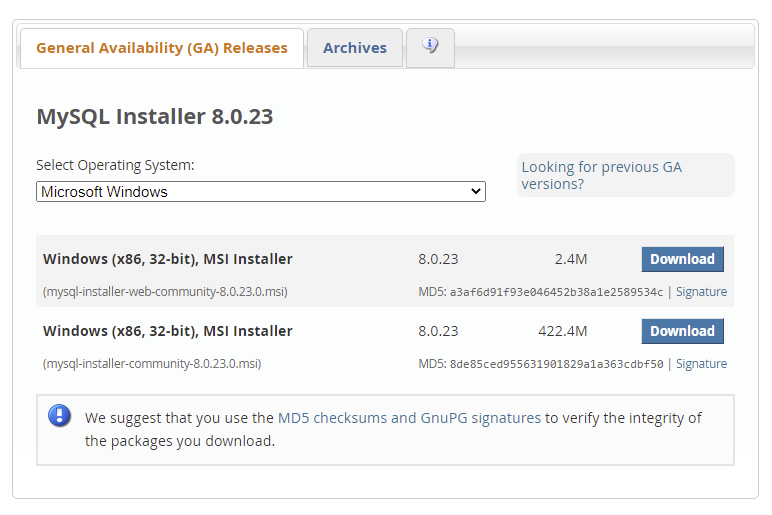
- Navigate to the official MySQL Community Downloads page:
dev.mysql.com/downloads/installer/. - Download the “mysql-installer-community-x.x.x.x.msi” file (choose the recommended version). You might be prompted to log in or sign up for an Oracle Web account, but you can usually bypass this by clicking “No thanks, just start my download.”
- Navigate to the official MySQL Community Downloads page:
- Run the Installer:
- Locate the downloaded
.msifile and double-click it to launch the MySQL Installer. - Choose a Setup Type: Select “Developer Default” to install MySQL Server, Workbench, Shell, Router, Connectors, and documentation. For more control, “Custom” allows you to pick specific components.
- Check Requirements: The installer will check for missing prerequisites (e.g., Visual C++ Redistributable). Install any missing components as prompted.
- Locate the downloaded
- Installation and Configuration:
- Follow the on-screen instructions, accepting the license agreement.
- Product Configuration: This is a crucial step.
- MySQL Server:
- Config Type: Keep “Development Computer” for local development. For production, consider “Server Computer” or “Dedicated Computer.”
- Port: The default port is
3306. Keep this unless you have a conflict. - Authentication Method: “Use Strong Password Encryption for Authentication (RECOMMENDED)” is the best choice.
- Root Password: Set a strong password for the ‘root’ user. This is critical for security. Remember it!
- Windows Service: Configure MySQL Server as a Windows Service (recommended for automatic startup).
- MySQL Workbench: This powerful graphical tool helps manage your databases.
- MySQL Server:
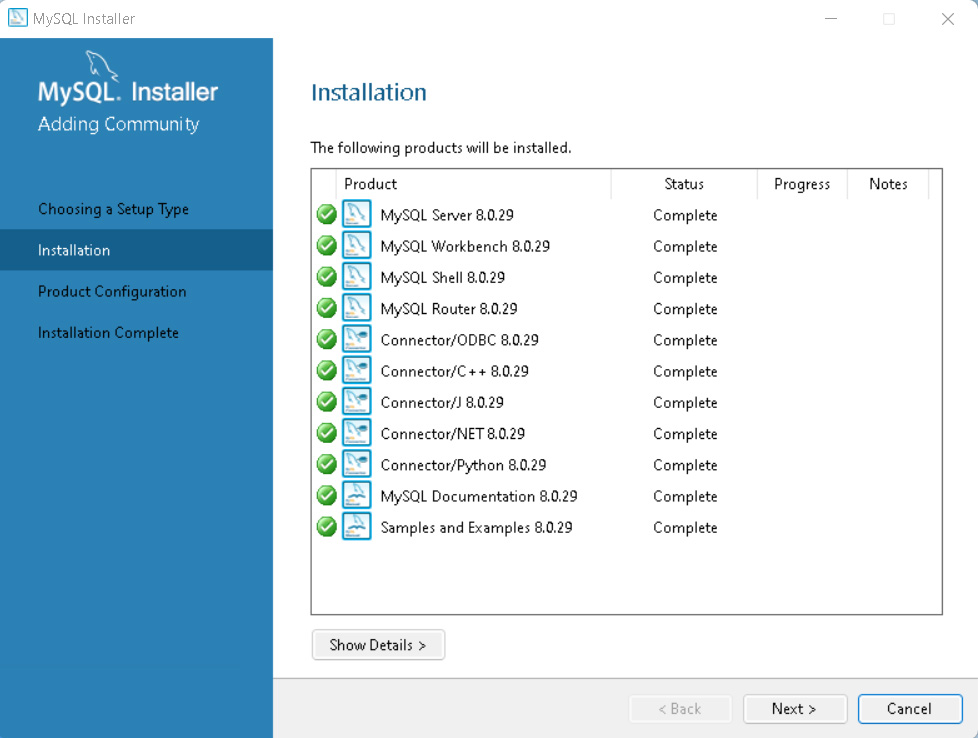
- Apply Configuration: Click “Execute” to apply all configurations. The installer will create necessary files, start the service, and set up your root password.
- Finish: Once all steps are complete, click “Finish.” You can launch MySQL Workbench immediately to test your connection.
Installing MySQL on macOS
For macOS users, there are two primary methods: using the official DMG package or via Homebrew, a popular package manager for macOS. Homebrew is often preferred by developers for its simplicity and ease of updates.
Method 1: Using the Official DMG Package
- Download MySQL Community Server:
- Go to
dev.mysql.com/downloads/mysql/. - Select macOS from the operating system dropdown.
- Download the
.dmgarchive for your macOS version (x86_64 for Intel, ARM for Apple Silicon).
- Go to
- Run the Installer:
- Open the downloaded
.dmgfile. - Double-click on the
mysql-x.x.x-macos-x86_64.pkgormysql-x.x.x-macos-arm64.pkginstaller package.
- Open the downloaded
- Follow On-Screen Instructions:
- Proceed through the installation wizard. During the configuration, you will be prompted to set a root password. Choose “Use Strong Password Encryption (RECOMMENDED)” and set a robust password. Store this securely.
- The installer will automatically start the MySQL server after installation.
- Add MySQL to PATH (Optional but Recommended):
- Open your terminal.
- Edit your shell’s profile file (e.g.,
~/.zshrcfor zsh,~/.bash_profilefor bash):
bash

nano ~/.zshrc
- Add the following line (adjust version number if needed):
bash

export PATH="/usr/local/mysql/bin:$PATH"
- Save the file and source it:
source ~/.zshrc
- Start/Stop MySQL: You can manage MySQL from System Settings (in newer macOS versions) or via the command line:
- Start:
sudo /usr/local/mysql/support-files/mysql.server start - Stop:
sudo /usr/local/mysql/support-files/mysql.server stop
- Start:
Method 2: Using Homebrew
- Install Homebrew (if not already installed):
- Open Terminal and run:
bash

/bin/bash -c "$(curl -fsSL https://raw.githubusercontent.com/Homebrew/install/HEAD/install.sh)"
- Follow the prompts to complete the installation.
- Open Terminal and run:
- Install MySQL:
- In Terminal, run:
bash

brew install mysql
- Homebrew will download and install the latest stable version of MySQL.
- In Terminal, run:
- Start MySQL Service:
- To start MySQL immediately and have it launch on system startup:
bash

brew services start mysql
- Alternatively, to start manually:
mysql.server start
- To start MySQL immediately and have it launch on system startup:
- Secure Installation:
- Run the security script (important for setting root password and other security measures):
bash

mysql_secure_installation
- Follow the prompts to set the root password, remove anonymous users, disallow remote root login, remove test databases, and reload privilege tables.
- Run the security script (important for setting root password and other security measures):
Installing MySQL on Linux (Ubuntu/Debian Example)
For Debian-based distributions like Ubuntu, the preferred method is using the apt package manager, which provides a straightforward and integrated installation.
- Update Package List:
- Open a terminal and update your system’s package list:
bash

sudo apt update
- Open a terminal and update your system’s package list:
- Install MySQL Server:
- Install the MySQL server package:
bash

sudo apt install mysql-server
- During the installation, you might be prompted to set a root password. If not, you’ll set it in the next step.
- Install the MySQL server package:
- Secure Installation:
- Run the MySQL security script, which helps improve the security of your MySQL installation:
bash

sudo mysql_secure_installation
- This script will guide you through:
- VALIDATE PASSWORD COMPONENT: You can choose to enable this to enforce strong password policies.
- Setting root password: Crucial for security.
- Removing anonymous users: Recommended.
- Disallowing remote root login: Recommended unless specifically needed and properly secured.
- Removing test database and access: Recommended.
- Reloading privilege tables: Necessary for changes to take effect.
- Run the MySQL security script, which helps improve the security of your MySQL installation:
- Check MySQL Service Status:
- Verify that the MySQL service is running:
bash

sudo systemctl status mysql
- You should see “active (running)” in the output. If not, start it with
sudo systemctl start mysql.
- Verify that the MySQL service is running:
- Connect to MySQL:
- You can connect as the root user from the command line:
bash

sudo mysql
- To connect with password authentication (especially after securing):
bash

mysql -u root -p
Enter the root password you set.
- You can connect as the root user from the command line:
Post-Installation Configuration and Security Best Practices
Installing MySQL is only half the battle. Proper post-installation configuration and diligent security practices are paramount to ensure your database is robust, reliable, and protected against unauthorized access.
Initializing and Securing Your MySQL Installation
After the initial installation, especially if you didn’t explicitly set a root password during the process (common in some Linux installations), the mysql_secure_installation script is your first port of call. We’ve mentioned it for Linux and Homebrew macOS, but it’s universally applicable if manual setup was done or if you want to re-evaluate security.
Running mysql_secure_installation will prompt you to:
- Set/Change the root password: This is the most critical step. Always use a strong, unique password.
- Remove anonymous users: Anonymous users can access the database without credentials. Removing them enhances security.
- Disallow root login remotely: By default, the root user can connect from anywhere. Disabling remote root login is a key security measure, forcing administrators to connect locally or via a more restricted user.
- Remove the test database: The
testdatabase and its associated privileges are often created by default. Removing them eliminates a potential entry point for attackers. - Reload privilege tables: This ensures all changes made by the script take immediate effect.
Managing MySQL Service and Connecting to the Database
Once installed and secured, you’ll need to know how to manage the MySQL service and connect to your database.
- Managing the MySQL Service:
- Linux (systemd-based):
- Start:
sudo systemctl start mysql - Stop:
sudo systemctl stop mysql - Restart:
sudo systemctl restart mysql - Status:
sudo systemctl status mysql
- Start:
- macOS (Homebrew):
- Start:
brew services start mysql - Stop:
brew services stop mysql - Restart:
brew services restart mysql
- Start:
- Windows: MySQL typically runs as a Windows Service. You can manage it through the Services application (
services.msc) or from the command line (as administrator):- Start:
net start MySQL(whereMySQLis your service name, e.g., MySQL80) - Stop:
net stop MySQL
- Start:
- Linux (systemd-based):
- Connecting to MySQL:
- Command-Line Client:
bash

mysql -u root -p
Enter your root password when prompted. Once connected, you’ll see themysql>prompt. - MySQL Workbench: A powerful graphical tool that provides a unified visual interface for database architects, developers, and DBAs.
- Launch Workbench.
- Click the “+” sign next to “MySQL Connections” to create a new connection.
- Enter connection details (e.g., Connection Name, Hostname
127.0.0.1, Port3306, Usernameroot). - Click “Test Connection,” enter your root password, and if successful, click “OK” to save. You can then open the connection to manage your databases visually.
- Command-Line Client:
Essential Security Measures for Production Environments
While mysql_secure_installation provides a good baseline, production environments demand even stricter security protocols.
- Create Dedicated Users with Specific Privileges: Never use the
rootuser for application connections. Create specific users for each application or service and grant them only the minimum necessary privileges (Principle of Least Privilege).
sql

CREATE USER 'your_app_user'@'localhost' IDENTIFIED BY 'your_strong_password';

GRANT SELECT, INSERT, UPDATE, DELETE ON your_database.* TO 'your_app_user'@'localhost';

FLUSH PRIVILEGES;
- Network Security:
- Firewall Configuration: Configure your operating system’s firewall (e.g.,
ufwon Linux, Windows Defender Firewall) to restrict access to MySQL’s port (3306 by default) only from trusted IP addresses or internal networks. - Bind Address: In the MySQL configuration file (
my.cnformy.ini), setbind-addressto127.0.0.1(localhost) if your application connects from the same server. If remote access is needed, specify the exact IP address or a range, not0.0.0.0(all interfaces) unless absolutely necessary and heavily firewalled.
- Firewall Configuration: Configure your operating system’s firewall (e.g.,
- Regular Backups: Implement a robust backup strategy. Regular, automated backups are crucial for disaster recovery and protecting your data against corruption or malicious attacks.
- Logging: Enable and regularly review MySQL’s error log, general query log, and slow query log. These provide insights into database activity, potential issues, and performance bottlenecks, which can also signal security incidents.
- Keep MySQL Updated: Regularly apply security patches and updates released by the MySQL community. Updates often fix vulnerabilities and improve performance.
- TLS/SSL for Connections: For remote connections, especially over untrusted networks, always encrypt communication between clients and the MySQL server using TLS/SSL.
Verifying Your Installation and Next Steps
Once MySQL is installed and configured, it’s time to verify its functionality and explore basic operations.
Testing Your MySQL Connection
After connecting via the command line or MySQL Workbench, you can perform a simple check:
- Check Server Version:
sql

SELECT VERSION();
This command should return the installed MySQL version, confirming the server is running and accessible. - List Databases:
sql

SHOW DATABASES;
You should see default databases likeinformation_schema,mysql,performance_schema, and possiblysys.
Basic Database Operations
Let’s perform a few fundamental SQL operations to ensure everything is working as expected.
- Create a New Database:
sql

CREATE DATABASE my_first_database;
- Use the Database:
sql

USE my_first_database;
- Create a Table:
sql

CREATE TABLE users (

    id INT AUTO_INCREMENT PRIMARY KEY,

    name VARCHAR(100),

    email VARCHAR(100) UNIQUE

);
- Insert Data:
sql

INSERT INTO users (name, email) VALUES ('John Doe', 'john.doe@example.com');

INSERT INTO users (name, email) VALUES ('Jane Smith', 'jane.smith@example.com');
- Retrieve Data:
sql

SELECT * FROM users;
This should display the data you just inserted, confirming full read/write functionality.
Exploring Advanced Tools and Further Learning
Your journey with MySQL doesn’t end with installation. To truly harness its power and enhance your productivity, consider exploring:
- MySQL Workbench: As mentioned, it’s an invaluable graphical tool for database design, development, and administration.
- phpMyAdmin: A web-based administration tool, particularly popular for managing MySQL databases in web hosting environments.
- Programming Language Connectors: Learn how to connect to MySQL from your preferred programming language (Python, Node.js, PHP, Java, etc.) to build dynamic, data-driven applications.
- Database Design Principles: Study normalization, indexing, and other database design concepts to build efficient and scalable schemas.
- Cloud Services: Explore managed MySQL services offered by cloud providers like AWS RDS, Google Cloud SQL, or Azure Database for MySQL, which abstract away much of the infrastructure management.
Troubleshooting Common MySQL Installation Issues
Despite careful steps, you might encounter issues. Here are solutions to common problems.
Service Not Starting
- Check Logs: The most crucial step. MySQL error logs (location varies, often
/var/log/mysql/error.logon Linux, or in the data directory on Windows) provide detailed reasons for service failure. - Port Conflicts: Another application might be using port 3306. Check for listening processes:
- Linux/macOS:
sudo netstat -tulnp | grep 3306 - Windows:
netstat -ano | findstr :3306
If a conflict exists, change the MySQL port inmy.cnformy.iniand restart.
- Linux/macOS:
- Configuration Errors: Review your
my.cnf/my.inifile for syntax errors or incorrect paths. - Permissions: Ensure the MySQL user and group have appropriate read/write permissions to the data directory and log files.
Access Denied Errors
- Incorrect Root Password: The most common cause. Try
sudo mysql -u root -p(for Linux) to ensure you’re using the correct password. If forgotten, you’ll need to follow a password reset procedure specific to your OS. - Incorrect User/Host: Ensure the user you’re trying to connect with (
-u) exists and is allowed to connect from your host (@'localhost'vs.@'%'). - Firewall: A firewall might be blocking your connection attempt, especially for remote connections.
Port Conflicts
As mentioned, if another service is using port 3306, MySQL won’t start.
- Identify the conflicting process: Use
netstatcommands as above. - Stop the conflicting service or change MySQL’s port: Edit
port=3306in yourmy.cnformy.inifile to an unused port (e.g.,3307), then restart MySQL. Remember to update any applications connecting to MySQL to use the new port.
By carefully following these installation and configuration steps, and by adhering to security best practices, you’ll establish a solid foundation for all your data-driven endeavors. MySQL’s power and versatility, combined with your growing expertise, will be invaluable assets in navigating the ever-evolving landscape of technology and software development.
aViewFromTheCave is a participant in the Amazon Services LLC Associates Program, an affiliate advertising program designed to provide a means for sites to earn advertising fees by advertising and linking to Amazon.com. Amazon, the Amazon logo, AmazonSupply, and the AmazonSupply logo are trademarks of Amazon.com, Inc. or its affiliates. As an Amazon Associate we earn affiliate commissions from qualifying purchases.