Java remains one of the most foundational and widely-used programming languages in the world, powering everything from enterprise-level applications and big data processing to mobile apps and cutting-edge web services. For developers, system administrators, and even end-users who rely on Java-based applications, installing and managing Java on a Linux system is a common and essential task. Linux, with its robust and flexible environment, provides an ideal platform for running Java applications and development environments. This comprehensive guide will walk you through the various methods of installing Java on different Linux distributions, ensuring you have a stable and secure setup for all your Java-related needs.

The importance of Java in today’s technological landscape cannot be overstated. From the backend systems of global banks to the interactive elements of your favorite websites, Java’s “write once, run anywhere” philosophy has cemented its place as a cornerstone of modern computing. On a Linux system, Java enables a vast ecosystem of tools and applications, from integrated development environments (IDEs) like Eclipse and IntelliJ IDEA, to build automation tools like Maven and Gradle, and critical server-side technologies like Apache Tomcat and Apache Kafka. Understanding how to correctly install and configure Java is not just a technical skill; it’s a gateway to unlocking immense productivity and capability on your Linux machine, contributing directly to streamlined workflows and robust digital security practices.
Understanding Java and Its Importance on Linux
Before diving into the installation process, it’s crucial to understand what Java is, why it’s so pervasive, and specifically why Linux users often find themselves needing it. This foundational knowledge will help you make informed decisions about which Java distribution and version are right for your specific requirements.
What is Java and Why is it Ubiquitous?
At its core, Java is a high-level, class-based, object-oriented programming language designed for minimal implementation dependencies. This means that code written in Java can run on any platform that supports Java without the need for recompilation. This “write once, run anywhere” (WORA) capability is achieved through the Java Virtual Machine (JVM), which acts as an interpreter, translating Java bytecode into machine-specific instructions.
Java’s ubiquity stems from several key factors:
- Platform Independence: As mentioned, the WORA principle allows developers to create applications that can run seamlessly across different operating systems, including Windows, macOS, and Linux, without modification. This is invaluable for enterprise-level deployments and cross-platform compatibility.
- Robustness and Security: Java was designed with security in mind, incorporating features like a security manager and automatic memory management (garbage collection) that reduce common programming errors and bolster application stability. Its strong typing and exception handling further contribute to robust and reliable software.
- Scalability and Performance: Java is highly scalable, making it suitable for large-scale applications and systems that require high performance and concurrent processing. It’s the backbone of many high-traffic websites, distributed systems, and big data platforms.
- Vast Ecosystem and Community: Java boasts one of the largest and most active developer communities in the world. This translates into an abundance of open-source libraries, frameworks, tools, and extensive documentation, accelerating development and problem-solving.
- Versatility: From desktop applications (though less common now) to enterprise servers, Android mobile apps, cloud computing, and IoT devices, Java’s versatility allows it to be applied across a broad spectrum of use cases.
Why Linux Users Need Java
For Linux users, Java is indispensable for several reasons, touching upon development, system administration, and daily productivity:
- Developer Tooling: Many essential development tools and IDEs (Integrated Development Environments) for various languages, not just Java, are themselves written in Java. Tools like Apache Maven, Gradle, Jenkins, Eclipse, and IntelliJ IDEA rely on a functioning Java Runtime Environment (JRE) or Java Development Kit (JDK) to operate. Without Java, a developer’s toolkit on Linux would be severely limited.
- Server-Side Applications: Linux servers are the preferred environment for deploying a vast number of Java-based server applications. Technologies such as Apache Tomcat, JBoss/WildFly, Apache Kafka, Apache Cassandra, Elasticsearch, and Hadoop are all Java-centric and form the backbone of modern enterprise infrastructure. System administrators regularly need to install and manage Java on their Linux servers to deploy and maintain these critical services.
- Cross-Platform Desktop Applications: While less prevalent than in the past, some cross-platform desktop applications still leverage Java Swing or JavaFX for their user interfaces. These applications require a JRE to run, offering consistent functionality across Linux, Windows, and macOS desktops.
- Educational and Research Purposes: Universities and research institutions frequently use Java for teaching programming concepts and developing scientific applications. Linux often serves as the primary OS in these environments due to its open-source nature and powerful command-line interface.
- Productivity and Digital Security: Many productivity applications, data processing tools, and even some digital security utilities might have Java dependencies. Ensuring Java is properly installed and updated contributes to a secure and efficient computing environment, preventing compatibility issues and potential vulnerabilities.
Choosing the Right Java Distribution: OpenJDK vs. Oracle JDK
When it comes to installing Java on Linux, you’ll primarily encounter two main distributions: OpenJDK and Oracle JDK. While they share a common codebase, understanding their differences is crucial for making the best choice for your specific needs, whether for personal use, development, or enterprise deployment.
The Open-Source Advantage: OpenJDK
OpenJDK (Open Java Development Kit) is the free and open-source implementation of the Java Platform, Standard Edition (Java SE). It’s licensed under the GNU General Public License (GPL) with a Classpath Exception, making it freely distributable and modifiable.
- Freedom and Flexibility: OpenJDK is the reference implementation for Java SE. It is truly open-source, meaning it’s developed collaboratively by Oracle, Red Hat, SAP, IBM, and other companies and individuals. This collaborative effort ensures transparency, community involvement, and rapid innovation.
- Default for Linux Distributions: Most Linux distributions, including Ubuntu, Debian, CentOS, and Fedora, provide OpenJDK packages directly through their official repositories. This makes installation incredibly simple and ensures seamless integration with the system’s package management tools for updates and security patches.
- Compatibility: OpenJDK is the foundation for virtually all Java deployments. Applications developed with OpenJDK are generally fully compatible with Oracle JDK, and vice-versa, as they adhere to the same Java SE specifications.
- Cost-Effective for Enterprise: For businesses and enterprises, OpenJDK offers a compelling advantage by eliminating licensing costs, which can be significant with Oracle JDK, especially for commercial use cases or large-scale deployments. This aligns with financial prudence and can greatly impact budgeting for IT infrastructure.
- Recommended for Most Users: For the vast majority of developers and users, OpenJDK is the recommended choice due to its open-source nature, ease of installation, and robust performance. Unless you have specific reasons to use Oracle JDK, OpenJDK will serve your needs perfectly.
Oracle JDK: When Specific Requirements Dictate Choice
Oracle JDK is the commercial build of Java SE from Oracle. Historically, it was the de facto standard and free for general use. However, since Java 11, Oracle changed its licensing model, making Oracle JDK free for personal and development use, but requiring a commercial license for enterprise and production environments.
- Historical Precedence and Trust: Oracle JDK has historically been seen as the “official” and most stable distribution, often preferred by enterprises due to perceived better support and certification.
- Specific Features (Historically): In the past, Oracle JDK sometimes included proprietary features or performance enhancements that were not immediately available in OpenJDK. However, with modern Java versions, the differences between OpenJDK builds (like Adoptium/Eclipse Temurin, Amazon Corretto, Azul Zulu) and Oracle JDK have largely converged, making them practically interchangeable in terms of features and performance for most users.
- Commercial Support and Licensing: The primary reason for choosing Oracle JDK in a commercial setting today is access to Oracle’s commercial support and specific licensing agreements. This might be a requirement for organizations with strict compliance or vendor preference policies.
- Development and Personal Use (Free): For individual developers and personal projects, Oracle JDK can still be downloaded and used without charge. However, many developers prefer OpenJDK builds due to their open-source principles and the ease of managing them with tools like SDKMAN! or system package managers.
In summary, for most Linux users, OpenJDK is the clear choice. It’s free, open-source, easily installable via package managers, and fully compliant with Java SE standards. Only specific enterprise requirements for commercial support or historical preference would typically lead one to choose Oracle JDK.
Step-by-Step Installation Guides
Now, let’s get into the practical steps of installing Java on your Linux system. We’ll cover the most common methods for different distributions, focusing on OpenJDK as the recommended option.
Installing OpenJDK via Package Manager (Debian/Ubuntu)
Debian and Ubuntu, along with their derivatives (like Linux Mint), use the APT package manager. This is the simplest and most recommended method for these distributions.
-
Update Package List:
Always start by updating your package list to ensure you’re getting the latest available versions and dependencies.sudo apt update -
Install OpenJDK (LTS Version):
For most purposes, installing a Long-Term Support (LTS) version of Java is recommended for stability. Java 11 and Java 17 are current LTS versions.
To install OpenJDK 17 (the latest LTS at the time of writing):sudo apt install openjdk-17-jdkIf you need an older LTS like Java 11:
sudo apt install openjdk-11-jdkTo install just the Java Runtime Environment (JRE) if you only need to run Java applications and not compile them (less common for developers):
sudo apt install openjdk-17-jreThe
jdkpackage includes thejre, so installingjdkis usually sufficient for development and running applications. -
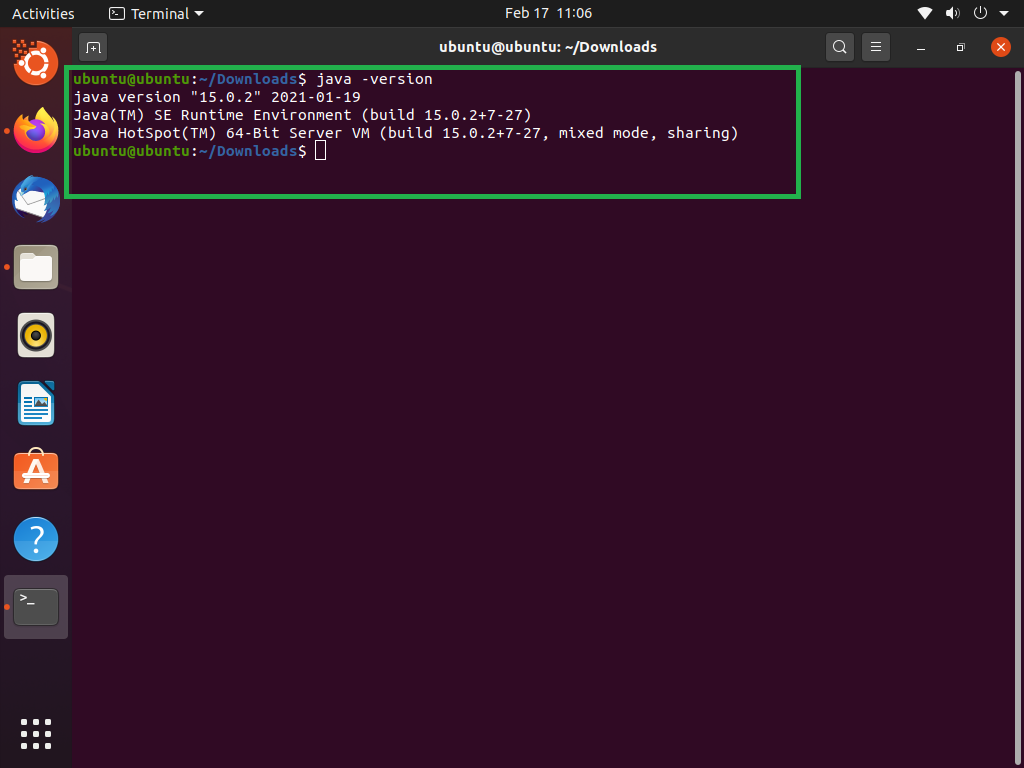
Verify Installation:
After the installation completes, verify that Java has been installed correctly and check its version:java -version javac -versionYou should see output indicating the Java version you just installed. For example:
openjdk version "17.0.8" 2023-07-18 OpenJDK Runtime Environment (build 17.0.8+7-Ubuntu-122.04) OpenJDK 64-Bit Server VM (build 17.0.8+7-Ubuntu-122.04, mixed mode, sharing) -
Managing Multiple Java Versions (Optional):
If you have multiple Java versions installed, you can useupdate-alternativesto switch between them:
bash
sudo update-alternatives --config java
sudo update-alternatives --config javac
This will present a list of installed Java versions, and you can choose the default one by entering its selection number.
Installing OpenJDK via Package Manager (CentOS/RHEL/Fedora)
For Red Hat Enterprise Linux (RHEL), CentOS, Fedora, and other RHEL-based distributions, yum or dnf are used. dnf is the successor to yum and is generally preferred on newer systems.
-
Update System Packages:
Always good practice to update your system first.sudo dnf update # For Fedora/CentOS 8+/RHEL 8+ sudo yum update # For CentOS 7/RHEL 7 and older -
Install OpenJDK (LTS Version):
To install OpenJDK 17:sudo dnf install java-17-openjdk-devel # For Fedora/CentOS 8+/RHEL 8+For older versions or distributions still using
yum:sudo yum install java-11-openjdk-devel # For CentOS 7/RHEL 7The
-develsuffix indicates the Development Kit (JDK), which includes the JRE and development tools. If you only need the JRE, you can installjava-17-openjdk. -
Verify Installation:
Check the installed Java version:java -version javac -versionExpected output will show the OpenJDK version.
-
Managing Multiple Java Versions (Optional):
Similar to Debian/Ubuntu,alternativescan be used to manage different Java versions on RHEL-based systems:
bash
sudo alternatives --config java
sudo alternatives --config javac
Manual Installation of Oracle JDK or Specific OpenJDK Versions
There might be scenarios where you need to install a specific version of Java not available in your distribution’s repositories, or you prefer to use Oracle JDK, or a specific OpenJDK build from a vendor like Adoptium (Eclipse Temurin) or Azul (Zulu). This involves downloading the tar.gz archive and configuring it manually.
-
Download the JDK Archive:
- Oracle JDK: Visit the Oracle Java SE Downloads page. Choose the desired Java SE version (e.g., Java 17) and download the Linux x64 Compressed Archive (
.tar.gz). - Adoptium (Eclipse Temurin): Visit the Adoptium website for free, open-source OpenJDK builds. Download the Linux x64 (
.tar.gz) for your chosen version. - Other OpenJDK Builds: Other vendors like Azul (Zulu), Amazon (Corretto), or Red Hat also provide their OpenJDK builds, typically available on their respective websites.
- Oracle JDK: Visit the Oracle Java SE Downloads page. Choose the desired Java SE version (e.g., Java 17) and download the Linux x64 Compressed Archive (
-
Create an Installation Directory:
It’s good practice to install manually downloaded JDKs in a consistent location, such as/opt/javaor/usr/local/java.sudo mkdir -p /opt/java -
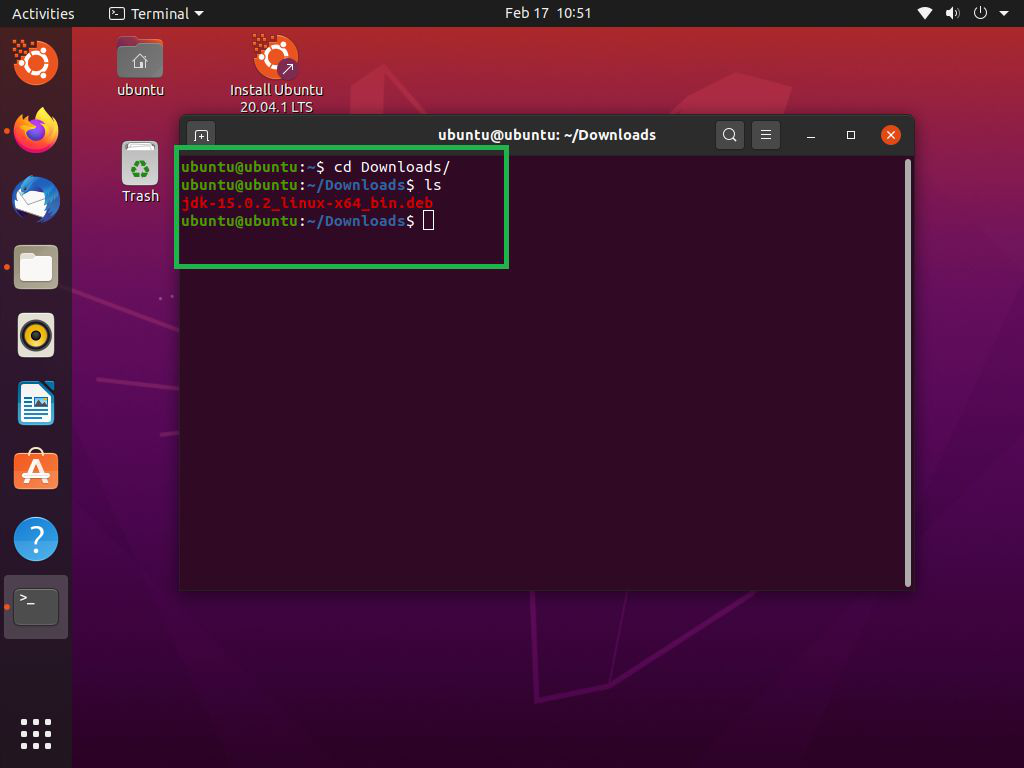
Extract the Archive:
Navigate to your Downloads directory (or wherever you saved the.tar.gzfile) and extract it to the designated installation directory. Replacejdk-VERSION-linux-x64.tar.gzwith your downloaded filename.cd ~/Downloads sudo tar -xvf jdk-VERSION-linux-x64.tar.gz -C /opt/java/This will extract the JDK into a directory like
/opt/java/jdk-VERSION. You might want to create a symbolic link for easier management:sudo ln -s /opt/java/jdk-VERSION /opt/java/current_jdk(Replace
jdk-VERSIONwith the actual directory name, e.g.,jdk-17.0.8) -
Configure Environment Variables (JAVA_HOME and PATH):
For your system to recognize the manually installed Java, you need to set theJAVA_HOMEenvironment variable and add the Javabindirectory to your system’sPATH.
Edit your shell's configuration file (e.g., `~/.bashrc` for Bash, `~/.zshrc` for Zsh, or `/etc/profile` for system-wide configuration). Using `~/.bashrc` is common for user-specific settings.
```bash
nano ~/.bashrc
```
Add the following lines at the end of the file. Adjust the `JAVA_HOME` path if you didn't create a symlink or installed it elsewhere.
```bash
# Java Environment Variables
export JAVA_HOME=/opt/java/current_jdk
export PATH=$PATH:$JAVA_HOME/bin
```
Save and close the file (Ctrl+O, Enter, Ctrl+X in nano).
-
Apply Changes:
Reload your shell configuration for the changes to take effect:source ~/.bashrcIf you modified
/etc/profile, you might need to reboot orsource /etc/profile. -
Verify Installation:
bash
java -version
javac -version
echo $JAVA_HOME
The output should reflect your manually installed Java version and theJAVA_HOMEpath.
Using SDKMAN! for Version Management (Advanced)
SDKMAN! (Software Development Kit Manager) is an excellent tool for developers who frequently work with multiple versions of Java, Groovy, Scala, Kotlin, Maven, Gradle, and other SDKs. It simplifies installation, switching, and removal of these tools.
-
Install SDKMAN!:
Open a terminal and run the installation script:curl -s "https://get.sdkman.io" | bashFollow the on-screen instructions, which typically involve sourcing a script. Restart your terminal or
sourcethe script manually:source "$HOME/.sdkman/bin/sdkman-init.sh" -
List Available Java Versions:
You can see a list of all Java versions and vendors available through SDKMAN!:sdk list javaThis will show various OpenJDK builds (e.g., Temurin, Zulu, Corretto) and Oracle JDK.
-
Install a Java Version:
To install a specific version (e.g., Temurin 17):sdk install java 17.0.8-temReplace
17.0.8-temwith the identifier fromsdk list java. -
Set as Default or Use Temporarily:
To set a version as your default:sdk default java 17.0.8-temTo use a version only for the current shell session:
sdk use java 17.0.8-tem -
Verify Installation:
bash

java -version

echo $JAVA_HOME
SDKMAN! automatically sets upJAVA_HOMEand modifies yourPATHfor the active version.
SDKMAN! is highly recommended for developers as it greatly enhances productivity by allowing seamless switching between different Java versions required for various projects, aligning with best practices for efficient software development.
Verifying Your Java Installation and Setting Environment Variables
Regardless of your chosen installation method, it’s vital to confirm that Java is correctly installed and configured. Properly setting the JAVA_HOME environment variable is also a common requirement for many Java-based applications and build tools.
Checking the Installation
After running the installation commands, always verify the installation:
- Check Java Runtime Environment (JRE):
bash

java -version
This command checks the version of the Java Runtime Environment (JRE). It should display the version number, build date, and information about the runtime environment. - Check Java Development Kit (JDK):
bash

javac -version
This command checks the version of the Java Compiler (javac), which is part of the Java Development Kit (JDK). If this command returns a version number, it confirms that the JDK is installed. If it shows “command not found,” it means only the JRE is installed or the JDK’s path isn’t correctly configured.
If these commands don’t return the expected versions, double-check your installation steps, ensure you don’t have conflicting older versions, and review your PATH environment variable.
Configuring JAVA_HOME
The JAVA_HOME environment variable is a crucial setting that points to the root directory of your Java installation. Many Java applications, build tools (like Maven and Gradle), and server software (like Tomcat) rely on JAVA_HOME to locate the Java binaries and libraries.
-
Why is it important?
- Tool Compatibility: Ensures that build tools and IDEs can find the correct Java installation.
- Application Startup: Some Java applications require
JAVA_HOMEto be set to start correctly. - Version Control: Helps in managing different Java versions on the same system, especially when using multiple JDKs.
-
How to Set JAVA_HOME (System-Wide or User-Specific):
For User-Specific (Recommended for most developers):
Add the following lines to your~/.bashrc(for Bash shell) or~/.zshrc(for Zsh shell) file. If you used SDKMAN!, it usually handles this for you.- Open the file:
bash

nano ~/.bashrc
- Add the lines (adjust
/usr/lib/jvm/java-17-openjdk-amd64to your actual Java installation path – this is a common path foraptinstalled JDKs, or/opt/java/current_jdkfor manual installations):
bash

export JAVA_HOME="/usr/lib/jvm/java-17-openjdk-amd64" # Or wherever your JDK is installed

export PATH="$JAVA_HOME/bin:$PATH" # Add JDK bin to PATH
- Save and exit (Ctrl+O, Enter, Ctrl+X for nano).
- Apply changes:
bash

source ~/.bashrc
For System-Wide (Requires root privileges, affects all users):
This is useful for server environments or when all users on a system need the same Java version. You can create a file in/etc/profile.d/or edit/etc/environment.
Let’s create a new file/etc/profile.d/java.sh:- Create and open the file:
bash

sudo nano /etc/profile.d/java.sh
- Add the lines (again, adjust the path):
bash

export JAVA_HOME="/usr/lib/jvm/java-17-openjdk-amd64"

export PATH="$JAVA_HOME/bin:$PATH"
- Save and exit.
- Make the script executable:
bash

sudo chmod +x /etc/profile.d/java.sh
- For these changes to take effect, you might need to log out and log back in, or reboot your system.
- Open the file:
-
Verify
JAVA_HOME:
bash

echo $JAVA_HOME
This command should display the path you just set.
Correctly configuring JAVA_HOME and PATH is a critical step in setting up a robust Java development and runtime environment on Linux, ensuring seamless integration with other tech tools and boosting overall system productivity.
Troubleshooting Common Issues and Best Practices
Even with clear instructions, issues can sometimes arise during or after Java installation. Knowing how to troubleshoot and following best practices can save significant time and ensure a secure, high-performing environment.
Resolving Version Conflicts
One of the most common issues is having multiple Java versions installed, leading to confusion about which one is active.
- Symptoms:
java -versionshows an unexpected version, or applications fail to launch withjava.lang.UnsupportedClassVersionError. - Solution:
- Use
update-alternatives(Debian/Ubuntu/RHEL): As mentioned earlier,sudo update-alternatives --config javaandsudo update-alternatives --config javacallow you to select the default system-wide Java. - Check
PATHVariable: Your shell’sPATHvariable determines the order in which directories are searched for executables. If an older Javabindirectory appears before your desired Javabindirectory inPATH, the older version will be picked up. Inspectecho $PATHand adjust your~/.bashrcor similar. - SDKMAN!: If you use SDKMAN!, ensure you’ve set the correct
defaultorusecommand for your session or globally. SDKMAN! manages thePATHdynamically. - Application-Specific Configuration: Some applications or build tools might have their own internal settings or configuration files that specify a
JAVA_HOMEdirectly. Check these configurations ifjava -versiongives the correct output but an application still fails.
- Use
Security and Maintenance Considerations
Keeping your Java installation secure and up-to-date is paramount, particularly in production environments.
- Regular Updates: Java releases receive regular security updates and bug fixes.
- Package Manager Installations: For OpenJDK installed via
aptordnf, regular system updates (sudo apt update && sudo apt upgradeorsudo dnf update) will keep your Java installation current. This is a significant advantage of using package managers. - Manual Installations: For manually installed JDKs (Oracle JDK, Adoptium, etc.), you must periodically check the vendor’s website for new releases and manually download and update your installation. SDKMAN! simplifies this with
sdk upgrade java.
- Package Manager Installations: For OpenJDK installed via
- Remove Unused Versions: Having multiple, unmaintained Java versions on your system can pose a security risk. If you no longer need an older version, uninstall it.
- Package Manager:
sudo apt remove openjdk-11-jdkorsudo dnf remove java-11-openjdk-devel. - Manual: Delete the directory where it was installed (e.g.,
/opt/java/old_jdk_version). Remember to remove itsJAVA_HOMEandPATHentries from your shell configuration files.
- Package Manager:
- Least Privilege: When running Java applications or services, always do so with the minimum necessary user privileges. Avoid running applications as root unless absolutely essential.
- Firewall Configuration: If your Java application is a server component, ensure your firewall is correctly configured to allow necessary inbound and outbound traffic, but restrict unnecessary ports. This is a basic digital security best practice for any network-facing service.
Uninstalling Java
If you need to remove Java completely or specific versions:
- Package Manager (Debian/Ubuntu):
bash

sudo apt remove openjdk-17-jdk

sudo apt purge openjdk-17-jdk # Removes configuration files as well

sudo apt autoremove # Clean up unused dependencies
- Package Manager (CentOS/RHEL/Fedora):
bash

sudo dnf remove java-17-openjdk-devel # Or yum
- Manual Installation:
- Remove the Java directory:
bash

sudo rm -rf /opt/java/jdk-VERSION
- Remove or comment out the
JAVA_HOMEandPATHentries from your~/.bashrc,~/.zshrc, or/etc/profile.d/java.shfiles. - Source your shell configuration or reboot.
- Remove the Java directory:
- SDKMAN!:
bash

sdk uninstall java 17.0.8-tem
Successfully installing and managing Java on your Linux system is a fundamental skill for anyone working in the tech sphere, from developers building next-generation applications to system administrators maintaining critical infrastructure. By following the steps outlined in this guide, you can ensure a robust, secure, and efficient Java environment, contributing to enhanced productivity and seamless integration within the broader technological ecosystem. Regular maintenance and adherence to best practices will help you leverage Java’s full potential on your preferred Linux distribution.
aViewFromTheCave is a participant in the Amazon Services LLC Associates Program, an affiliate advertising program designed to provide a means for sites to earn advertising fees by advertising and linking to Amazon.com. Amazon, the Amazon logo, AmazonSupply, and the AmazonSupply logo are trademarks of Amazon.com, Inc. or its affiliates. As an Amazon Associate we earn affiliate commissions from qualifying purchases.