
In the vast digital landscape, a web browser serves as your primary gateway to information, entertainment, and productivity. For users navigating the Apple ecosystem, specifically those running Mac OS X (or its later iterations, macOS), the choice of browser significantly impacts their online experience. While Safari is the default, Google Chrome consistently stands out as a formidable contender, renowned for its speed, extensive feature set, and seamless integration with the broader Google ecosystem. Its cross-device synchronization capabilities, robust security features, and a colossal library of extensions make it an indispensable tool for millions globally, from casual browsers to seasoned tech professionals.
This guide will walk you through the entire process of installing Google Chrome on your Mac OS X device, ensuring a smooth and secure setup. We’ll delve beyond the basic clicks, offering insights into preparing your system, optimizing your Chrome experience post-installation, and troubleshooting common issues. Whether you’re a long-time Mac user looking for a change or new to the Apple platform and seeking a familiar browser, this comprehensive tutorial is designed to empower you with the knowledge needed to get Chrome up and running efficiently. By the end, you’ll not only have Chrome installed but also understand how to leverage its powerful features to enhance your digital workflow, aligning perfectly with the core tenets of technology, productivity, and digital security that our platform champions.
Preparing for Installation: Ensuring a Seamless Experience
Before diving into the installation process, a little preparation can go a long way in preventing potential hiccups and ensuring a smooth, efficient setup. Understanding your system’s capabilities and the benefits Chrome offers will set the stage for an optimal browsing experience.
System Requirements & Compatibility
Google Chrome is designed to be highly compatible across various operating systems, but like all software, it has minimum system requirements. For Mac OS X users, Google Chrome typically requires:
- Mac OS X El Capitan 10.11 or later: While “Mac OS X” refers to older versions, modern Chrome installers are generally compatible with macOS 10.11 (El Capitan) and newer versions, including macOS Sierra, High Sierra, Mojave, Catalina, Big Sur, Monterey, Ventura, and Sonoma. To check your current macOS version, click the Apple logo in the top-left corner of your screen and select “About This Mac.”
- Sufficient Free Disk Space: The Chrome application itself doesn’t take up a massive amount of space, but it’s always good practice to have at least 500 MB to 1 GB of free space for the application and its temporary files, cache, and extensions.
- An Active Internet Connection: This is crucial for downloading the installer file and for Chrome to perform its initial setup and subsequent updates.
Ensuring your system meets these basic criteria will prevent installation failures or performance issues down the line. If your Mac OS X version is older than 10.11, you might need to consider updating your operating system if your hardware supports it, not just for Chrome but for overall security and feature compatibility.
Why Choose Chrome? A Glimpse into its Core Advantages
With several excellent browsers available for Mac, why do millions gravitate towards Google Chrome? Its enduring popularity stems from a blend of performance, versatility, and integration, making it a powerful tool for modern digital life, aligning perfectly with trends in technology and productivity.
- Blazing Speed and Performance: Chrome is engineered for speed, offering quick page loads and smooth navigation. Its JavaScript engine and rendering capabilities are continuously optimized, contributing to a fluid browsing experience even on complex websites.
- Cross-Device Sync with Google Account: One of Chrome’s most compelling features is its seamless integration with your Google account. By signing in, you can synchronize your bookmarks, browsing history, passwords, extensions, and open tabs across all your devices (Mac, Windows, iOS, Android). This ensures a consistent and personalized browsing experience wherever you go, a true boon for productivity.
- Vast Extension Library: The Chrome Web Store boasts an enormous collection of extensions that can transform your browser into a highly customized productivity powerhouse. From ad blockers and grammar checkers to task managers and developer tools, these extensions enhance functionality and tailor Chrome to your specific needs, making it a versatile platform for various digital tasks.
- Robust Security Features: Google prioritizes user security, and Chrome reflects this with features like Safe Browsing, which warns you about malicious websites, phishing attempts, and dangerous downloads. Automatic updates ensure you always have the latest security patches, protecting you from emerging threats. This focus on digital security is paramount in today’s interconnected world.
- Comprehensive Developer Tools: For those in tech or web development, Chrome’s built-in developer tools are indispensable. They offer powerful features for inspecting elements, debugging JavaScript, analyzing network performance, and more, making it a go-to browser for professionals.
- Integration with the Google Ecosystem: For users deeply embedded in Google services like Gmail, Google Drive, Google Docs, and YouTube, Chrome offers unparalleled integration, making access and switching between services effortlessly smooth. This ecosystem approach streamlines workflows and enhances overall digital efficiency.
By understanding these advantages, you can appreciate the value Google Chrome brings to your Mac OS X device, positioning it as more than just a browser but a critical component of your digital toolkit.
The Step-by-Step Guide: Installing Google Chrome on macOS
Now that you’re prepared, let’s walk through the actual installation process. This section provides a detailed, step-by-step guide to get Google Chrome up and running on your Mac OS X system.
Step 1: Downloading the Google Chrome Installer
The very first step is to acquire the official installer file. It’s crucial to always download software from its legitimate source to avoid malware or compromised versions.
- Open Your Current Browser: Launch Safari (your Mac’s default browser) or any other web browser you currently use.
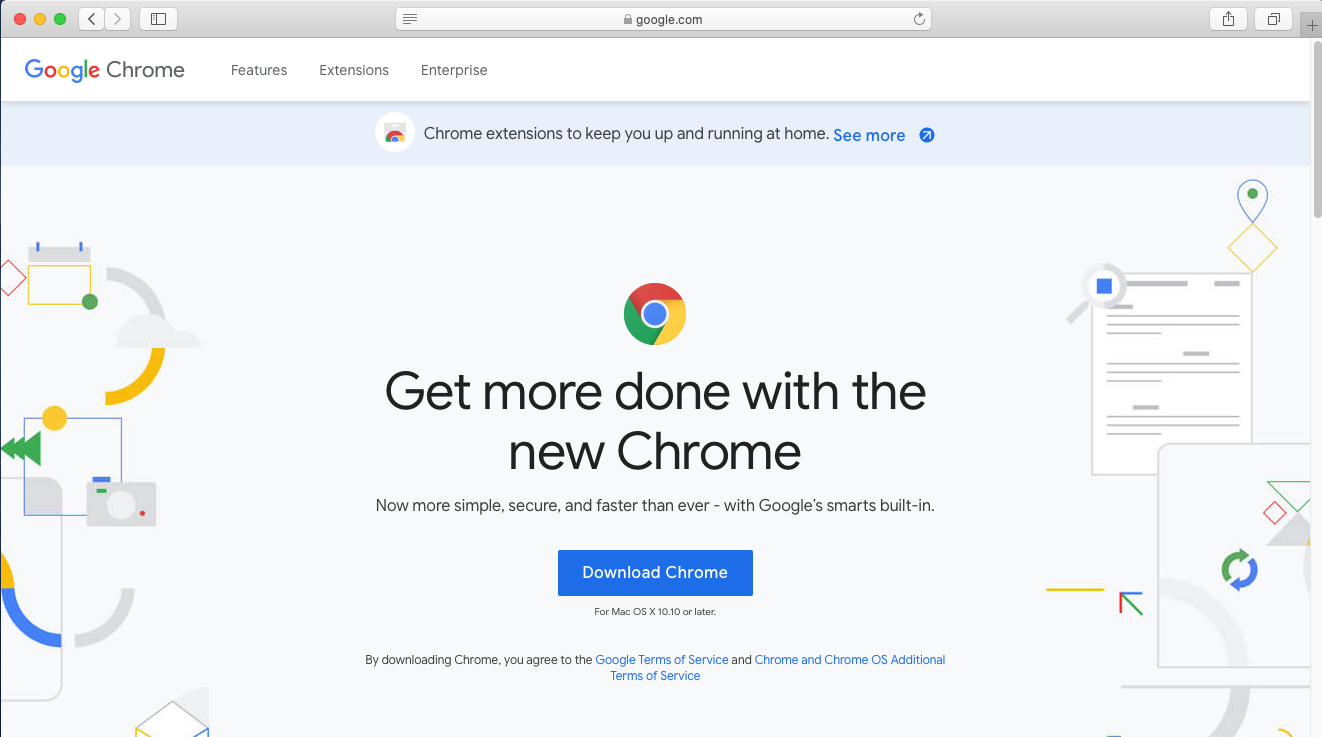
- Navigate to the Official Chrome Website: In the address bar, type
google.com/chromeand press Enter. This will take you to Google’s official Chrome download page. - Click the “Download Chrome” Button: On the download page, you’ll see a prominent button, usually labeled “Download Chrome” or “Download Chrome for Mac.” Click this button. The website should automatically detect your operating system (macOS) and offer the correct version.
- Review Terms of Service (Optional): Before the download begins, you might be presented with Google’s Terms of Service. It’s a good practice to quickly review these, then click “Accept and Install” or a similar button to proceed.
- Save the File: Your browser will likely ask you where to save the file. The default “Downloads” folder is usually the most convenient location. The file will be named something like
googlechrome.dmg. A.dmgfile is a Disk Image, which is a common format for distributing applications on macOS.
Once the download is complete, you’ll see the googlechrome.dmg file in your Downloads folder or at the bottom of your browser window.
Step 2: Opening the Installer and Initiating the Process
With the installer downloaded, the next step is to open the disk image and prepare the application for installation.
- Locate the Downloaded File: Go to your “Downloads” folder (you can access it from the Finder sidebar, your Dock, or by pressing
Command + Option + L). - Double-Click the
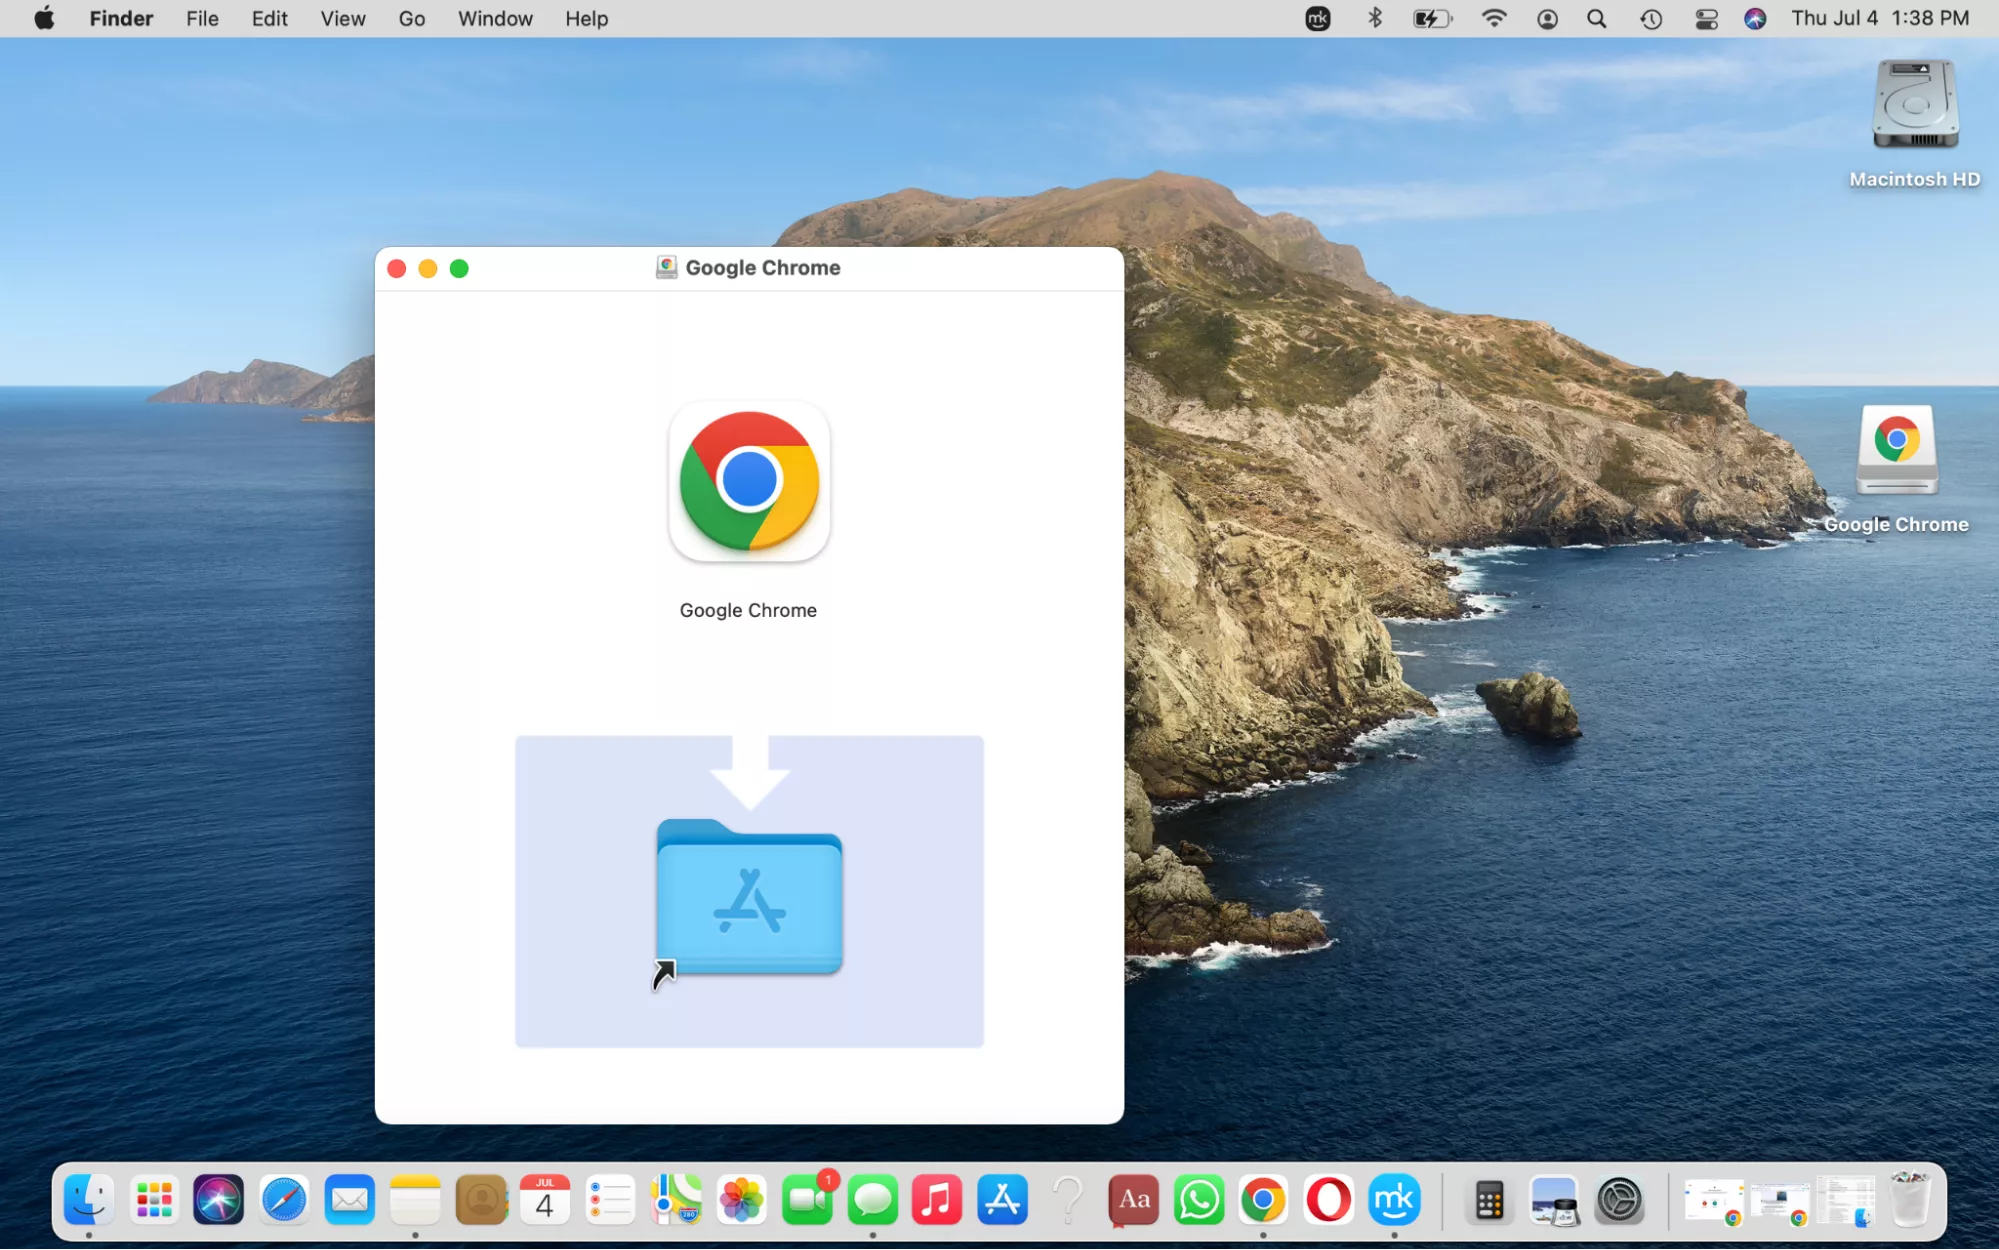
googlechrome.dmgFile: This action will “mount” the disk image, essentially making its contents accessible as if it were a physical drive. A new Finder window will typically pop open, displaying the contents of the disk image. This window usually contains the “Google Chrome” application icon and an “Applications” folder alias. - Confirm the Disk Image Window: You should see a window titled “Google Chrome” with two main icons: one for “Google Chrome.app” and another for “Applications.”
Step 3: Dragging Chrome to Your Applications Folder
This is the core step for installing applications on macOS from a disk image.
- Drag the Google Chrome Icon: Click and hold the “Google Chrome.app” icon within the mounted disk image window.
- Drop it into the Applications Folder: Drag the icon over to the “Applications” folder shortcut (also within the mounted disk image window) and release your mouse button. Alternatively, you can drag it directly to the “Applications” folder in your Finder sidebar.
- Wait for the Copying Process: Your Mac will begin copying the Google Chrome application bundle from the disk image to your Applications folder. A progress bar will appear, indicating the status of the transfer. This process usually takes only a few moments.
Once the copying is complete, Google Chrome is technically installed on your Mac.
Step 4: Ejecting the Disk Image
After successfully copying Chrome, it’s good practice to “eject” the disk image. This unmounts it from your system, freeing up resources and decluttering your desktop.
- Eject from the Finder Sidebar: In any Finder window, locate “Google Chrome” under the “Locations” or “Devices” section in the sidebar. Click the “Eject” icon (an upward-pointing arrow with a line underneath) next to it.
- Eject from the Desktop: If the Google Chrome disk image icon is visible on your desktop, you can right-click (or Ctrl-click) it and select “Eject ‘Google Chrome’.” Another common method is to drag the desktop icon to the Trash can in your Dock; the Trash icon will transform into an Eject symbol.
- Delete the Original
.dmgFile: Once the disk image is ejected, you can optionally drag the originalgooglechrome.dmgfile from your Downloads folder to the Trash and empty it. You won’t need it again unless you plan to reinstall Chrome.
Step 5: Launching Google Chrome for the First Time
You’re almost there! Let’s open Chrome and begin your new browsing experience.
- Open the Applications Folder: Navigate to your “Applications” folder (from Finder’s sidebar or by pressing
Shift + Command + A). - Locate Google Chrome: Scroll down or use the search bar to find “Google Chrome.”
- Launch Chrome: Double-click the “Google Chrome” icon.
- Security Prompt: The first time you launch an application downloaded from the internet, macOS Gatekeeper might present a security warning: “Google Chrome is an application downloaded from the Internet. Are you sure you want to open it?” Click “Open” to confirm. This is a standard security measure.
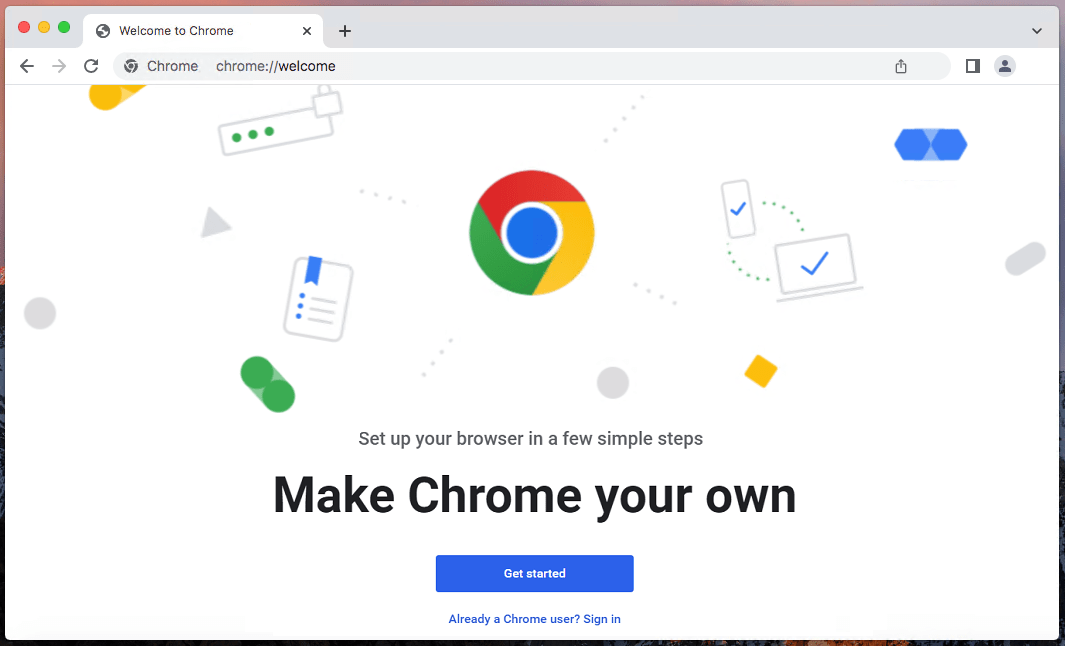
- Initial Setup: Chrome will launch, and you’ll typically be greeted with a welcome screen. You’ll have options to:
- Set Chrome as your default browser: If you want links to always open in Chrome.
- Sign in to Chrome: This is highly recommended for syncing your data across devices.
- Import bookmarks and settings: From your previous browser.
Congratulations! Google Chrome is now successfully installed and running on your Mac OS X device.
Post-Installation & Optimization: Maximizing Your Chrome Experience
Installing Chrome is just the beginning. To truly unlock its potential and tailor it to your workflow, a few post-installation steps and optimization tips can significantly enhance your browsing experience, improving productivity and digital security.
Setting Google Chrome as Your Default Browser
Making Chrome your default browser ensures that all web links, whether clicked in emails, documents, or other applications, automatically open in Chrome. This streamlines your workflow and ensures consistency.
- From Chrome Settings:
- Open Google Chrome.
- Click the three vertical dots (More options) in the top-right corner.
- Select “Settings.”
- In the left sidebar, click “Default browser.”
- Click the “Make default” button.
- macOS will open System Settings/Preferences for you to confirm.
- From macOS System Settings:
- Go to “System Settings” (or “System Preferences” on older macOS versions) from the Apple menu.
- Navigate to “Desktop & Dock” (or “General” on older macOS).
- Find the “Default web browser” dropdown menu.
- Select “Google Chrome” from the list.
Signing In to Google Chrome for Sync and Personalization
Signing into Chrome with your Google account is perhaps the most impactful step for personalizing your browsing and enhancing cross-device productivity.
- Initiate Sign-In: In Chrome, click the profile icon (usually a circle with your initial or a generic person icon) in the top-right corner, then select “Turn on sync…” or “Sign in.”
- Enter Google Account Credentials: Follow the prompts to enter your Google email address and password. If you have two-factor authentication enabled, you’ll need to complete that step as well.
- Confirm Sync: Once signed in, Chrome will ask if you want to “Turn on sync.” Confirm this.
- Benefits:
- Bookmarks: Access all your saved websites across all synced devices.
- History: Pick up browsing where you left off on another device.
- Passwords: Securely autofill login credentials.
- Extensions & Settings: Your preferred extensions and browser settings are replicated.
- Open Tabs: See and reopen tabs from your other devices.
This seamless synchronization is a cornerstone of the modern digital experience, allowing you to maintain consistency and efficiency whether you’re on your Mac, phone, or another computer.
Enhancing Productivity with Chrome Extensions
Chrome’s vast ecosystem of extensions can transform your browser into a highly specialized tool tailored to your needs, significantly boosting productivity and even digital security.
- Access the Chrome Web Store:
- Open Chrome.
- Click the three vertical dots (More options) > “More tools” > “Extensions.”
- Click the “three lines” menu icon in the top-left of the Extensions page and select “Open Chrome Web Store.”
- Explore and Install: Browse categories, search for specific functionalities, or check out recommended extensions. Popular categories include:
- Productivity: Evernote Web Clipper, Grammarly, Todoist, Momentum.
- Security & Privacy: AdBlock Plus/uBlock Origin, LastPass/Dashlane, HTTPS Everywhere.
- Developer Tools: React Developer Tools, JSON Viewer.
- Shopping & Deals: Honey, Rakuten.
- Install with Caution: While extensions are powerful, install them discerningly. Too many extensions can slow down your browser, and some may have privacy implications. Always check reviews and permissions requested by an extension before adding it. Focus on reputable and widely-used extensions.
By strategically adding extensions, you can streamline tasks, block distractions, manage passwords, and generally make Chrome work smarter for you, contributing directly to personal and professional efficiency.
Keeping Chrome Updated and Secure
Maintaining an updated browser is critical for both performance and digital security. Google regularly releases updates that include new features, performance enhancements, and, most importantly, security patches to address vulnerabilities.
- Automatic Updates: Chrome is designed to update itself automatically in the background. When a new version is available, Chrome typically downloads it and prompts you to relaunch the browser to complete the update.
- Manually Checking for Updates:
- Click the three vertical dots (More options) in the top-right corner.
- Go to “Help” > “About Google Chrome.”
- Chrome will immediately check for available updates. If an update is pending, it will download and prompt you to “Relaunch” the browser.
- Importance of Updates: Failing to update Chrome can leave you vulnerable to newly discovered security flaws, making your browsing experience less safe. Updates also bring performance improvements and new features that enhance usability. Staying current is a fundamental aspect of maintaining digital security and optimal technology performance.
Regularly checking and ensuring Chrome is up-to-date is a simple yet vital habit for a secure and efficient online experience.
Troubleshooting Common Installation Issues
While the Chrome installation process on macOS is generally straightforward, sometimes users encounter minor hurdles. Here’s how to address some of the most common issues you might face.
“Chrome can’t be opened because it was downloaded from an unidentified developer”
This is a common macOS security warning, especially when you download applications directly from a website rather than the App Store. macOS Gatekeeper is designed to protect your system from potentially malicious software.
- Solution: When you encounter this message, instead of just double-clicking, right-click (or Ctrl-click) the Google Chrome icon in your Applications folder, then select “Open” from the contextual menu. A dialog box will appear again, but this time, it will include an “Open” button allowing you to bypass Gatekeeper for this specific application. macOS will remember your choice for future launches.
Installation Stuck or Fails
If the dragging process freezes, or you get an error message during copying, consider these steps:
- Check Internet Connection: Ensure your internet connection is stable. A corrupted download file due to a flaky connection can cause issues.
- Restart Your Mac: A simple restart can often resolve temporary system glitches that might be interfering with the installation.
- Re-download the
.dmgFile: The original downloaded.dmgfile might be corrupted. Delete it from your Downloads folder and download a fresh copy fromgoogle.com/chrome. - Check Disk Space: Although Chrome is relatively small, ensure you have sufficient free disk space on your Mac. Go to Apple menu > About This Mac > Storage to check. If your disk is nearly full, consider clearing some space.
- Force Quit and Retry: If the copying process is stuck, you might need to force quit Finder (Apple menu > Force Quit… > Finder > Relaunch) or restart your Mac, then try the installation steps again.
Chrome Crashing on Launch or Not Launching
If Chrome installed successfully but crashes immediately upon opening or refuses to launch, try these solutions:
- Restart Your Mac: Again, a system restart can often resolve underlying issues.
- Clear Browser Data (If It Launched Briefly): If Chrome launched even for a moment, it might have corrupted profile data. You could try deleting the Chrome profile folder. Caution: This will delete your bookmarks, history, passwords, and extensions if you’re not signed in and syncing. To do this:
- Close Chrome completely.
- In Finder, go to the menu bar, click “Go” > “Go to Folder…”
- Type
~/Library/Application Support/Google/Chrome/and press Enter. - Move the “Default” folder (or “Profile 1,” etc., if you have multiple profiles) to your Desktop as a backup. Try launching Chrome. If it works, the issue was with your profile. You can then try to selectively move data back, or just start fresh by signing in to re-sync.
- Reinstall Chrome: If all else fails, a clean reinstallation is often the most effective solution.
- Uninstall Chrome completely: Drag the “Google Chrome.app” from your Applications folder to the Trash. Empty the Trash. For a more thorough uninstall, delete the Chrome application support folder mentioned above (
~/Library/Application Support/Google/Chrome/). - Then, follow the installation steps from the beginning with a fresh
.dmgfile.
- Uninstall Chrome completely: Drag the “Google Chrome.app” from your Applications folder to the Trash. Empty the Trash. For a more thorough uninstall, delete the Chrome application support folder mentioned above (
Dealing with Old Versions or Corruption (Uninstalling Chrome)
If you have an old, problematic version of Chrome, or if you simply want a completely fresh start, uninstalling it thoroughly before reinstalling is best.
- Quit Google Chrome: Ensure Chrome is completely closed (even from the Dock, right-click and choose “Quit”).
- Move to Trash: Open your “Applications” folder, find “Google Chrome,” and drag its icon to the Trash in your Dock.
- Empty Trash: Right-click the Trash icon and select “Empty Trash.”
- Delete Associated Files (Optional, but Recommended for Clean Slate): To remove all user data (bookmarks, history, cache, extensions), you’ll need to delete the Chrome application support folder.
- In Finder, click “Go” in the menu bar, then “Go to Folder…”
- Type
~/Library/Application Support/Google/and press Enter. - Locate the “Chrome” folder and drag it to the Trash.
- Empty the Trash again.
- Be aware: This will remove all local Chrome data. If you are signed in and syncing with your Google account, most of your data (bookmarks, passwords) will be restored when you sign in to a fresh installation.
After a thorough uninstall, you can proceed with the installation steps from the beginning, ensuring a clean and optimal setup.
Conclusion
Installing Google Chrome on your Mac OS X device is a straightforward process that opens up a world of possibilities for enhanced browsing, productivity, and digital interaction. By following this comprehensive guide, you’ve not only successfully navigated the installation steps but also gained valuable insights into optimizing your Chrome experience, from setting it as your default browser and leveraging Google account synchronization to harnessing the power of extensions and maintaining robust digital security through regular updates.
Chrome’s blend of speed, versatility, and integration with the Google ecosystem makes it an invaluable tool for anyone looking to maximize their online efficiency. Whether you’re managing complex projects, engaging with the latest technology trends, or simply enjoying your favorite content, a well-configured Chrome browser empowers you to do it all with greater ease and security. Embrace its features, personalize your experience, and stay updated to ensure your digital gateway remains fast, secure, and perfectly attuned to your needs in an ever-evolving digital landscape. Your journey towards a more efficient and secure online presence on your Mac begins with Chrome.
aViewFromTheCave is a participant in the Amazon Services LLC Associates Program, an affiliate advertising program designed to provide a means for sites to earn advertising fees by advertising and linking to Amazon.com. Amazon, the Amazon logo, AmazonSupply, and the AmazonSupply logo are trademarks of Amazon.com, Inc. or its affiliates. As an Amazon Associate we earn affiliate commissions from qualifying purchases.