
In the ever-evolving digital landscape, fonts are more than just a collection of characters; they are the silent architects of our visual communication. From crafting compelling presentations and eye-catching designs to personalizing your digital workspace, the right typeface can profoundly impact how information is perceived and how engaging your content becomes. Windows 11, with its sleek interface and enhanced features, offers a straightforward yet powerful way to manage and install fonts, opening up a world of creative possibilities.
This guide will walk you through the process of installing fonts on your Windows 11 system, ensuring you can easily enhance your projects, whether you’re a graphic designer, a content creator, a student, or simply someone who appreciates the aesthetic nuances of typography. We’ll explore different installation methods, where to find fonts, and offer some tips to keep your font library organized and optimized.
Unlocking the Power of Typography: Why Install New Fonts?
Before diving into the “how-to,” let’s briefly touch upon the “why.” The default fonts included with Windows 11 are perfectly functional, but they often lack the distinct character and flair needed for truly impactful visual content. Installing new fonts allows you to:
- Elevate Your Brand Identity: For businesses, a unique font can become an integral part of a brand’s visual identity, conveying personality and professionalism. Consistent font usage across marketing materials, websites, and internal documents reinforces brand recognition.
- Enhance Design Projects: Whether you’re designing a logo, a flyer, a social media graphic, or a website, having access to a diverse font library gives you the tools to express your creative vision accurately. Different fonts evoke different moods and styles, from modern and minimalist to classic and elegant.
- Improve Readability and Accessibility: Certain fonts are designed for specific purposes, such as improving the readability of long texts or catering to users with visual impairments. Installing these specialized fonts can make your content more accessible to a wider audience.
- Personalize Your Digital Workspace: For individual users, new fonts can make the computing experience more enjoyable and personalized. From changing the look of your desktop icons to customizing document styles, fonts can add a unique touch to your digital life.
- Boost Productivity: Having the right tools readily available can significantly streamline your workflow. When you can quickly access the exact font you need for a project without extensive searching, you save valuable time and maintain creative momentum.
Finding Your Next Favorite Font: A World of Options
The journey of installing new fonts begins with finding them. Fortunately, the internet is brimming with both free and premium font resources. Here are some popular and reliable places to explore:
Free Font Resources:
- Google Fonts: A vast, high-quality, and completely free library of open-source fonts. You can easily browse, preview, and download fonts directly from their website. Google Fonts are designed to be web-friendly and perform well across various devices.
- Microsoft Typography: While Windows 11 comes with pre-installed fonts, Microsoft also offers additional font families through its typography website. These are often high-quality and professionally designed.
- Font Squirrel: Curates free fonts for commercial use, ensuring you can use them in your projects without licensing concerns. They offer excellent search and filtering options.
- DaFont: A popular repository of a wide variety of free fonts, often submitted by individual designers. While great for personal projects and exploration, always double-check the licensing if you plan to use them commercially.
Premium Font Marketplaces:
- Adobe Fonts (formerly Typekit): If you’re an Adobe Creative Cloud subscriber, you have access to a massive library of professional-grade fonts that can be activated directly within your Adobe applications and on your desktop.
- MyFonts: One of the largest marketplaces for commercial fonts, offering an extensive selection from numerous foundries. You’ll find everything from the latest trending designs to established classics.
- Fontspring: Another excellent source for premium fonts, known for its straightforward licensing and good customer support.
- Creative Market: A marketplace for design assets, including fonts. You can often find unique and stylish fonts here, sold by independent creators.
When choosing fonts, consider the purpose of your project. Think about legibility, the mood you want to convey, and how the font will pair with other design elements. Always be mindful of font licensing, especially if you intend to use them for commercial purposes.
Installing Fonts on Windows 11: Step-by-Step Methods
Windows 11 offers several intuitive ways to install fonts. Whether you’ve downloaded a single font file or a whole collection, these methods will ensure your new typefaces are ready for use.
Method 1: The Easiest Way – Double-Click and Install
This is the most common and straightforward method for installing individual font files or a small batch.
Step 1: Locate Your Font File(s)
After downloading your font(s), extract them from any compressed folders (like .zip files) to a location you can easily access, such as your Downloads folder or a dedicated “Fonts” folder you create. Most fonts come in formats like TrueType (.ttf) or OpenType (.otf).
Step 2: Open the Font File
Navigate to the folder where you saved your font file(s). Double-click on the font file you wish to install. This will open a preview window for that font, displaying various characters and sizes.
Step 3: Click the “Install” Button
In the font preview window, you’ll see an “Install” button, usually located at the top of the window. Click this button.
Windows 11 will then automatically install the font into your system’s font library. You’ll see a progress bar, and once it’s complete, the button will change to indicate the font is already installed.
Installing Multiple Fonts via Double-Click:
If you have several font files in the same folder, you can select them all (using Ctrl + Click or Shift + Click), then right-click on the selection. Look for an “Install” or “Install for all users” option in the context menu. Selecting “Install for all users” is generally recommended as it makes the font available to all user accounts on the computer.
Method 2: Using the Windows Settings App
The Windows Settings app provides a centralized location to manage your fonts and offers another simple way to add new ones.
Step 1: Open Windows Settings
You can do this by:
- Pressing the
Windows key + Ion your keyboard. - Clicking the Start button and selecting “Settings.”
Step 2: Navigate to Personalization
In the Settings app, click on “Personalization” from the left-hand sidebar.
Step 3: Select “Fonts”
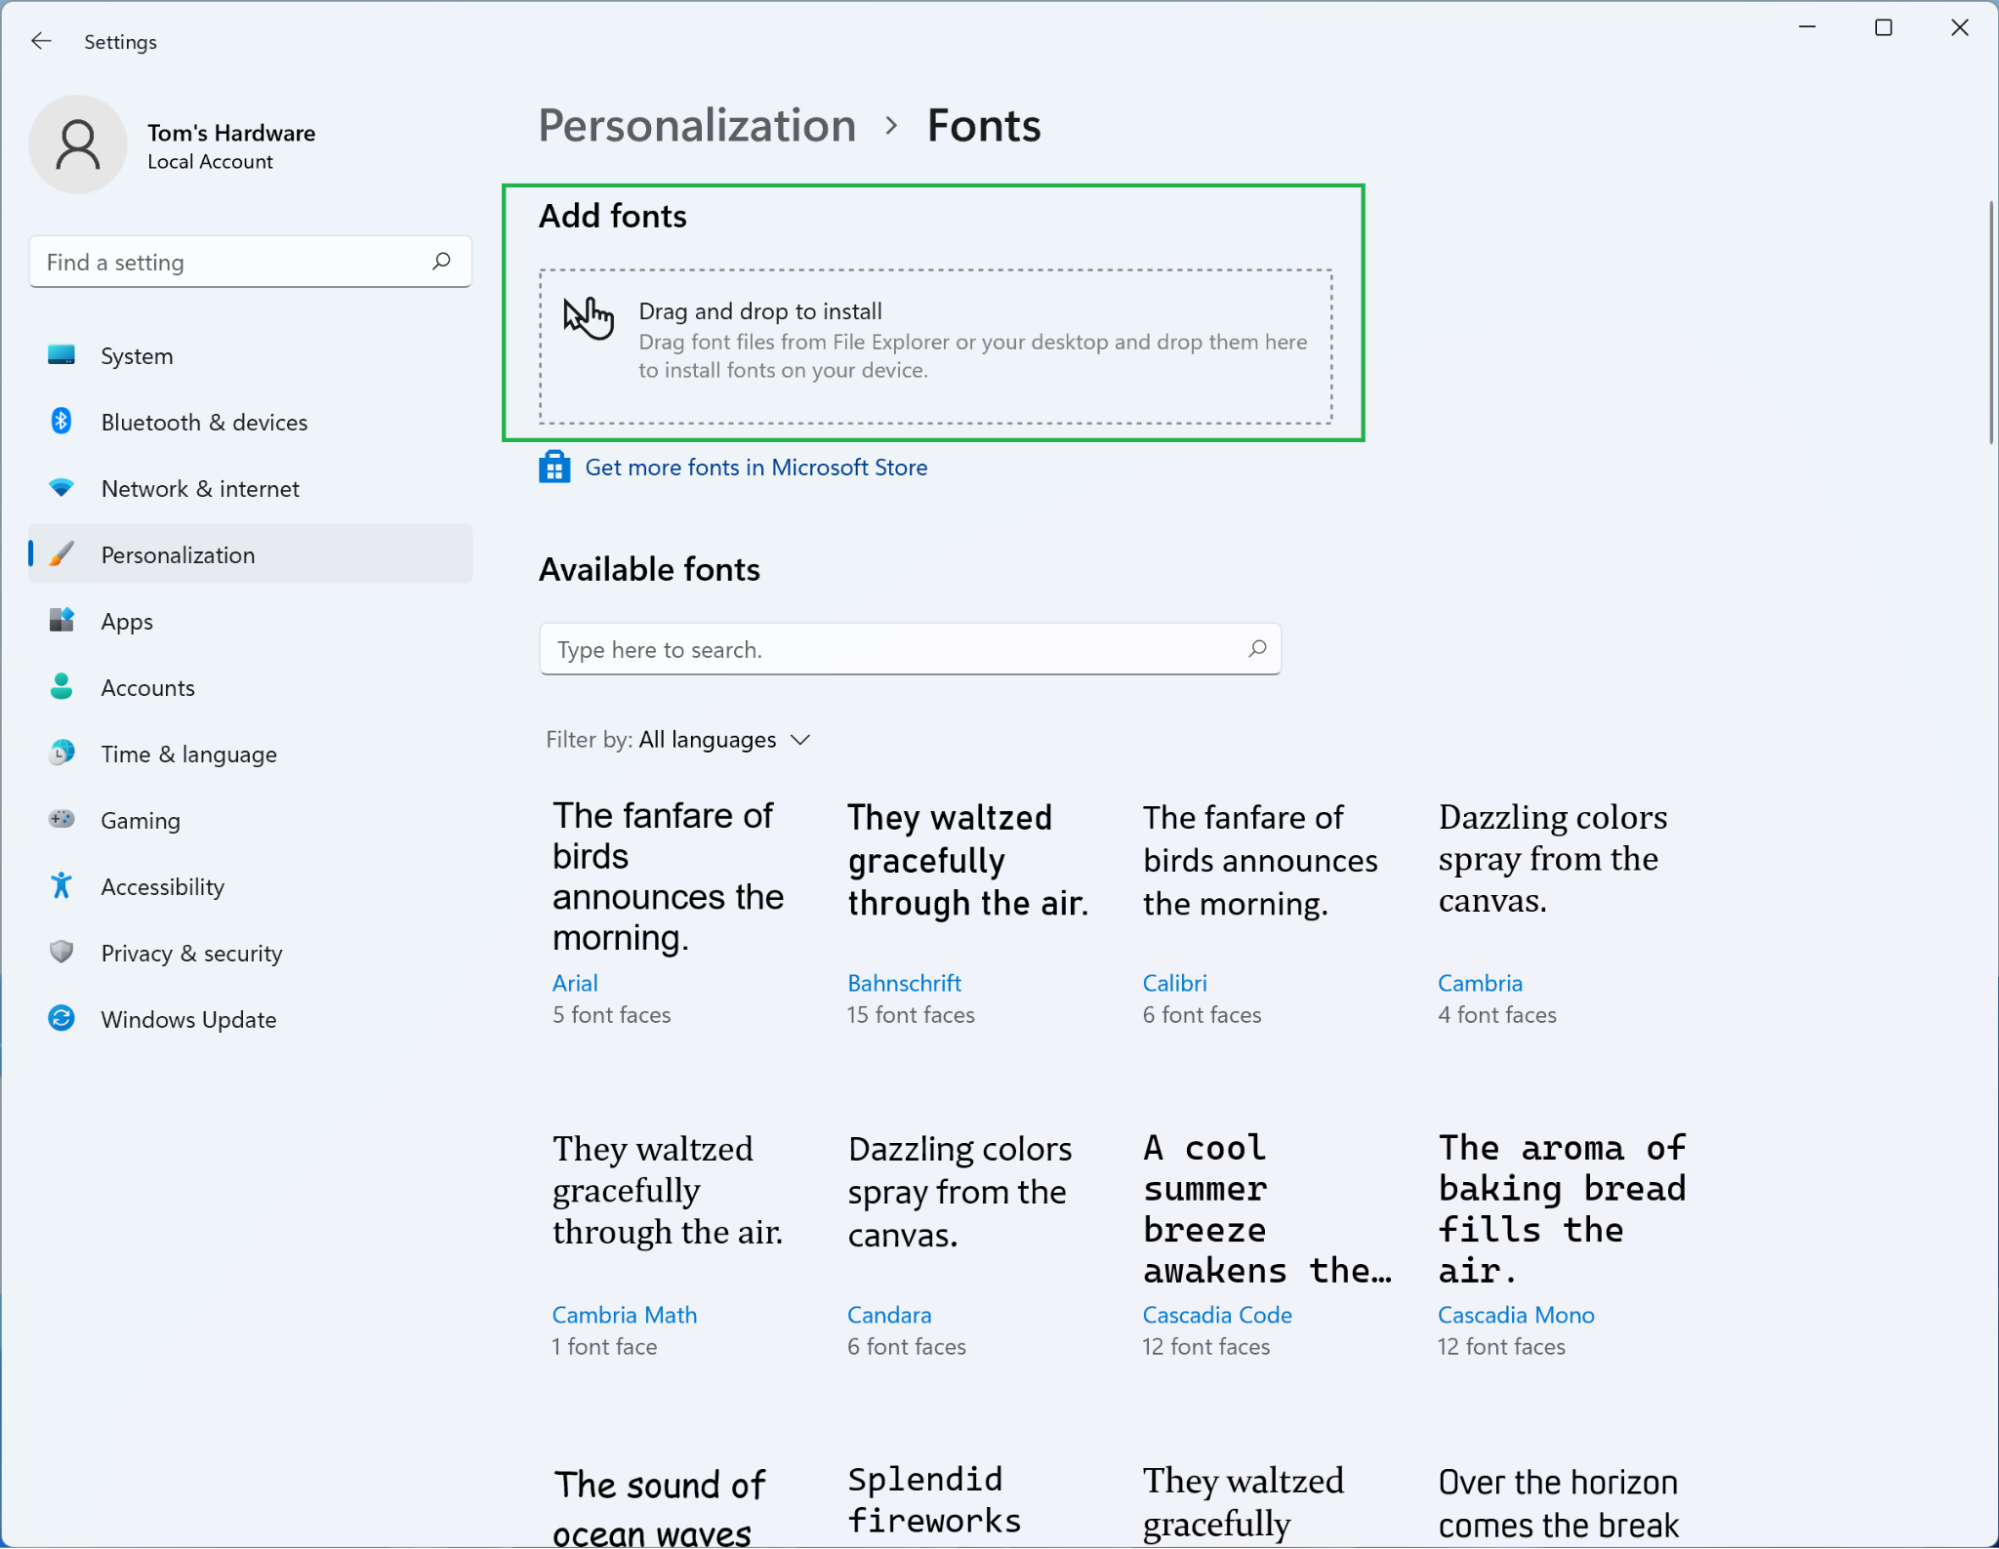
On the Personalization page, scroll down or look for the “Fonts” option and click on it.
Step 4: Drag and Drop or Browse
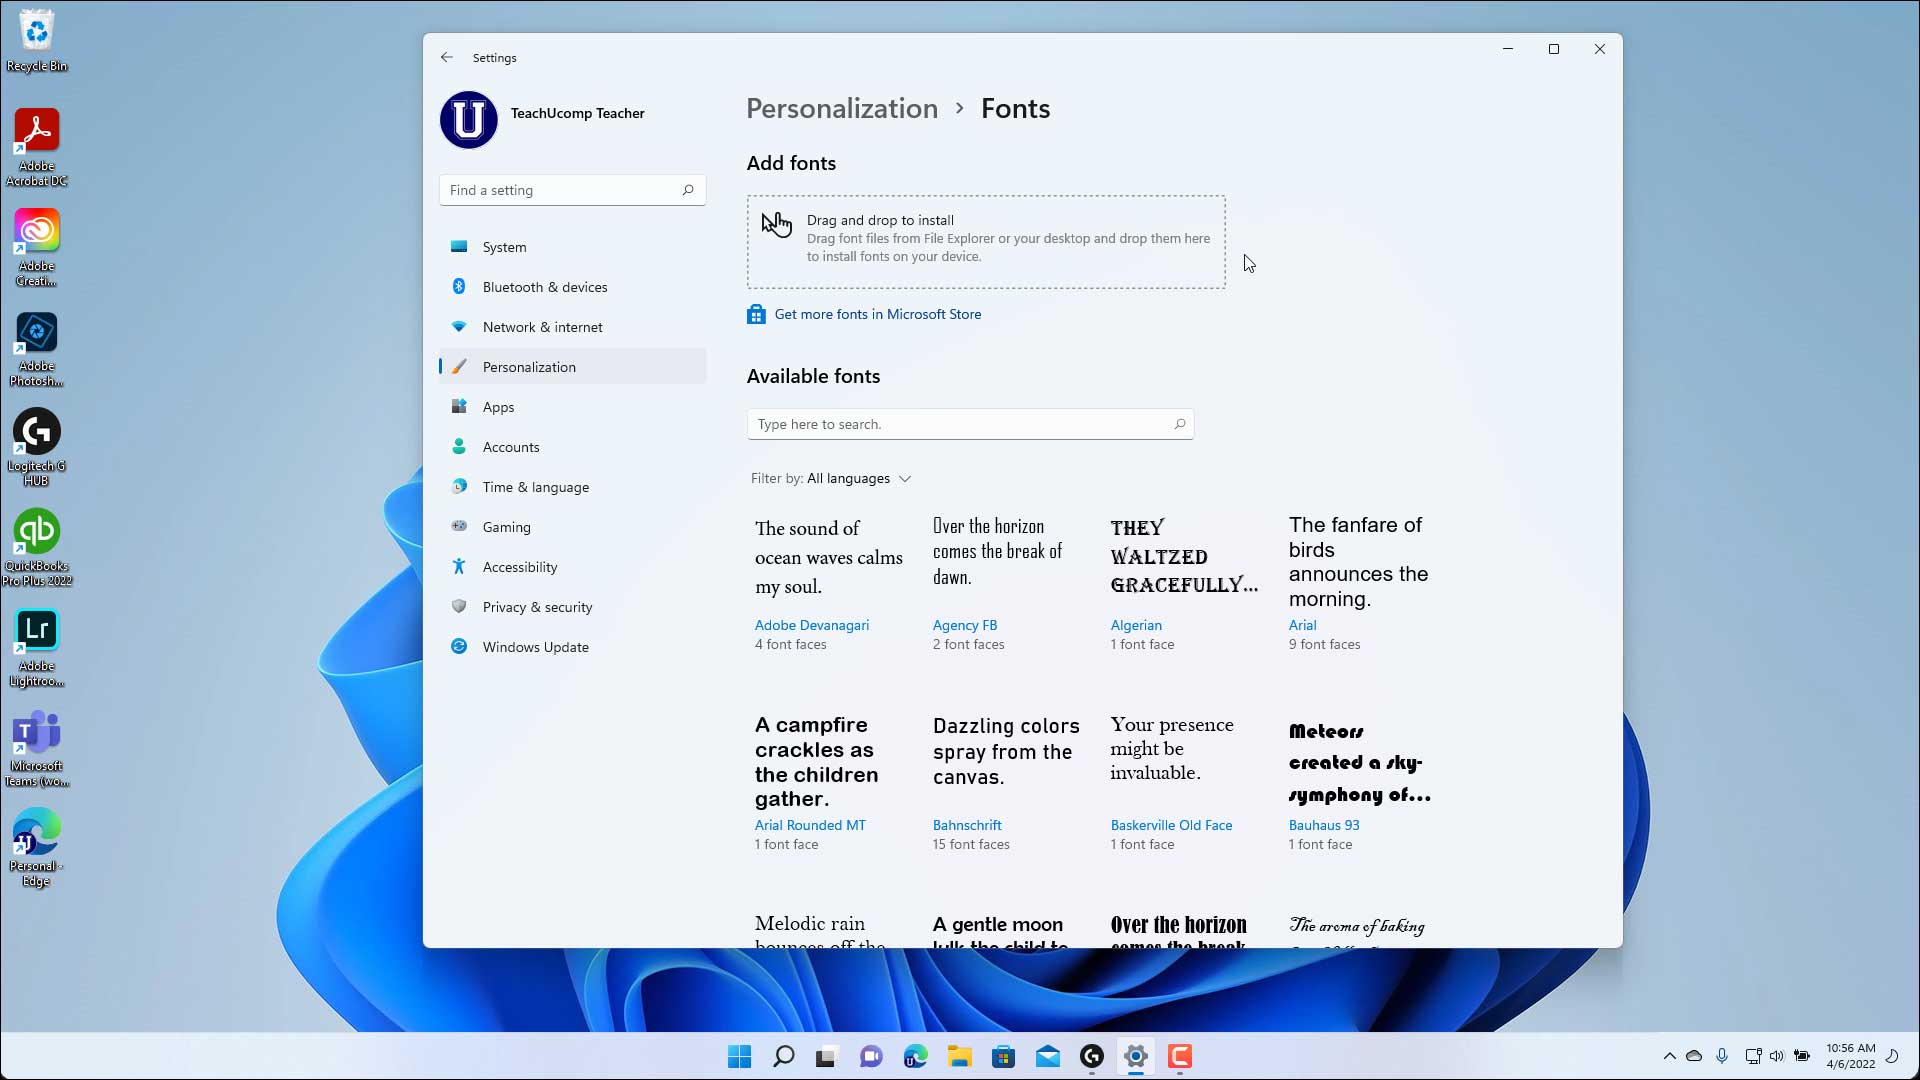
You’ll see a section with a box that says “Drag and drop to install.”
- Drag and Drop: Open your file explorer, locate your font files, select them, and drag them directly into this designated box in the Fonts settings.
- Browse: Alternatively, you can click the “Browse” button (though the drag-and-drop method is often quicker). This will open a file explorer window, allowing you to navigate to and select your font files.
Windows 11 will process the fonts and install them. Similar to the double-click method, you’ll see a confirmation once they are successfully added.
Method 3: Using the Control Panel (Legacy Method)
While the Settings app is the modern approach, the classic Control Panel still offers a way to manage fonts, which might be familiar to users of older Windows versions.
Step 1: Open the Control Panel
You can find the Control Panel by:
- Typing “Control Panel” into the Windows search bar and clicking on the result.
- Right-clicking the Start button and selecting “Run,” then typing
controland pressing Enter.
Step 2: Change View to “Large icons” or “Small icons”
In the Control Panel, if your view is set to “Category,” change it to “Large icons” or “Small icons” using the dropdown menu in the top-right corner. This will make it easier to find the “Fonts” option.
Step 3: Open the Fonts Folder
Click on the “Fonts” icon. This will open the Fonts folder, which displays all the fonts currently installed on your system.
Step 4: Drag and Drop into the Fonts Folder
Open a separate File Explorer window showing your downloaded font files. Select the font files you want to install and drag them directly into the Control Panel’s Fonts folder.
Windows will automatically install the fonts. This method is functionally similar to dragging and dropping into the Settings app but uses the older interface.
Verifying Your Installation and Using New Fonts
Once you’ve installed your fonts using any of the methods above, it’s important to verify that they are available and then learn how to use them.
Checking if Fonts are Installed
After installation, you can confirm if your fonts are recognized by Windows:
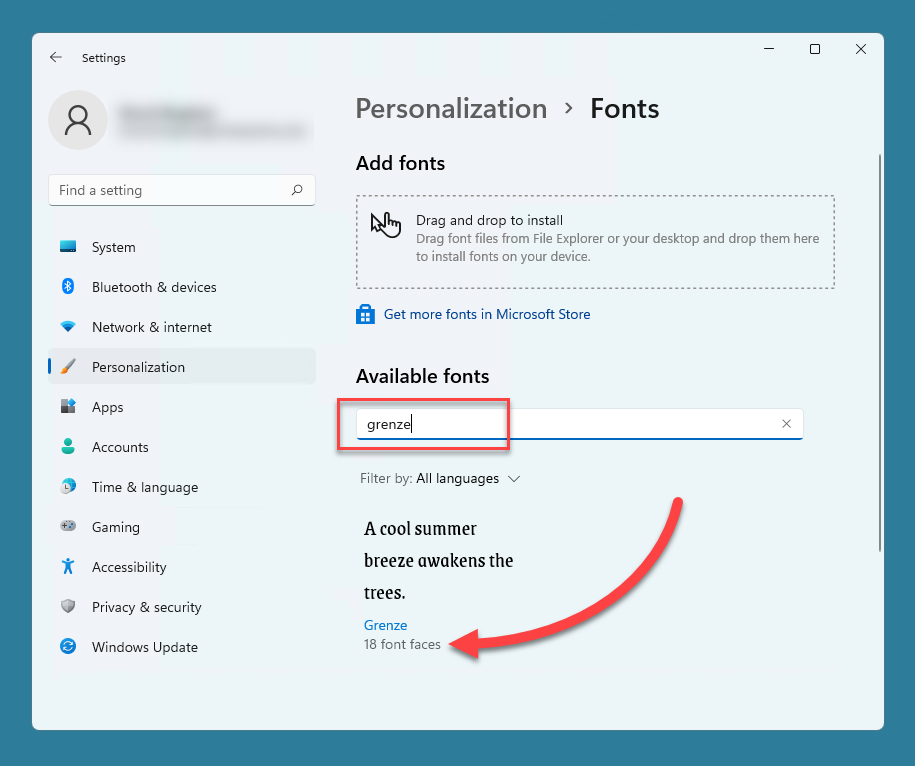
- Settings App: Go back to
Settings > Personalization > Fonts. Your newly installed fonts should appear in the list of available fonts. You can search for them by name to confirm. - Control Panel: Open the Control Panel and go to
Fonts. Your new fonts should be listed here. - In Applications: The most practical way to verify is to open an application where you typically use fonts, such as Microsoft Word, PowerPoint, Paint, or a graphics editor like Adobe Photoshop or GIMP. Open the font selection dropdown menu, and your newly installed fonts should be listed alphabetically.
Using Your New Fonts in Applications
The process of using your installed fonts is application-dependent:
- Microsoft Office Suite (Word, Excel, PowerPoint): When you’re working on a document, spreadsheet, or presentation, simply select the text you want to change, then click on the font dropdown menu in the Home tab (or relevant formatting toolbar). Your newly installed fonts will be available in this list.
- Graphics and Design Software (Photoshop, Illustrator, GIMP, Inkscape): In these programs, select the Text Tool. Then, look for the font selection dropdown in the options bar or character panel. Your new fonts will appear in this list.
- Web Browsers and Other Applications: Many other applications that allow text customization will also recognize system-installed fonts.
Important Note: For some applications, especially older ones or those that were running during the font installation, you might need to restart the application for the new fonts to appear in their font lists. In rare cases, a system restart might be necessary, though this is less common with Windows 11.
Font Management: Keeping Your Library Tidy
As you download more fonts, your font library can grow rapidly, potentially slowing down your system or making it difficult to find the fonts you need. Effective font management is key.
Tips for Font Management:
- Organize Your Downloaded Fonts: Create a dedicated folder on your computer (e.g., “My Font Collection”) and further subdivide it by category (e.g., “Serif,” “Sans-Serif,” “Script,” “Display,” “Commercial,” “Free”).
- Uninstall Unused Fonts: If you find you’re not using certain fonts regularly, consider uninstalling them. This frees up system resources and keeps your font menus cleaner. To uninstall a font, go to
Settings > Personalization > Fonts, find the font, and click the “Uninstall” button. - Use Font Management Software: For users with extensive font collections (hundreds or thousands of fonts), specialized font management software can be invaluable. These applications allow you to preview, organize, activate, and deactivate fonts without permanently installing them to the system. Popular options include FontBase, NexusFont, and Suitcase Fusion. These tools can significantly improve workflow and system performance.
- Be Mindful of Font Formats: While .ttf and .otf are the most common, you might encounter other formats. Windows 11 generally supports these widely used formats.
By following these practices, you can ensure your font library remains a powerful asset for your creative and professional endeavors, rather than a source of clutter.
Conclusion
The ability to install and manage fonts on Windows 11 is a fundamental skill for anyone looking to enhance their digital creations and personalize their computing experience. Whether you’re aiming to strengthen your brand’s visual identity, bring a unique aesthetic to your design projects, or simply enjoy a more visually appealing workspace, a well-curated font library is essential.
With the simple double-click method, the user-friendly Settings app, or the classic Control Panel, adding new fonts to your Windows 11 system is a quick and accessible process. Remember to explore the vast resources available online, always paying attention to licensing, and to keep your font collection organized for optimal performance and usability. Happy designing, and may your words always find their perfect typographic voice!
aViewFromTheCave is a participant in the Amazon Services LLC Associates Program, an affiliate advertising program designed to provide a means for sites to earn advertising fees by advertising and linking to Amazon.com. Amazon, the Amazon logo, AmazonSupply, and the AmazonSupply logo are trademarks of Amazon.com, Inc. or its affiliates. As an Amazon Associate we earn affiliate commissions from qualifying purchases.