In an increasingly interconnected world, where digital threats loom large and privacy concerns are at an all-time high, securing your home network is no longer a luxury but a necessity. While installing VPN software on individual devices offers a layer of protection, it often comes with limitations: device limits, compatibility issues with smart home gadgets, and the hassle of managing multiple subscriptions. Enter the VPN router – a powerful solution that extends robust privacy and security to every device connected to your network, all from a single point.
This comprehensive guide will demystify the process of setting up a VPN router, transforming your entire home network into a fortress of digital security. Whether you’re a tech enthusiast looking to optimize your setup or a privacy-conscious individual seeking whole-home protection, understanding how to install a VPN router is a crucial step towards true digital empowerment. We’ll delve into what makes these devices so vital, how to choose the right components, and walk through the installation process, ensuring you can navigate the digital landscape with confidence and peace of mind.
Understanding VPN Routers and Why They Matter
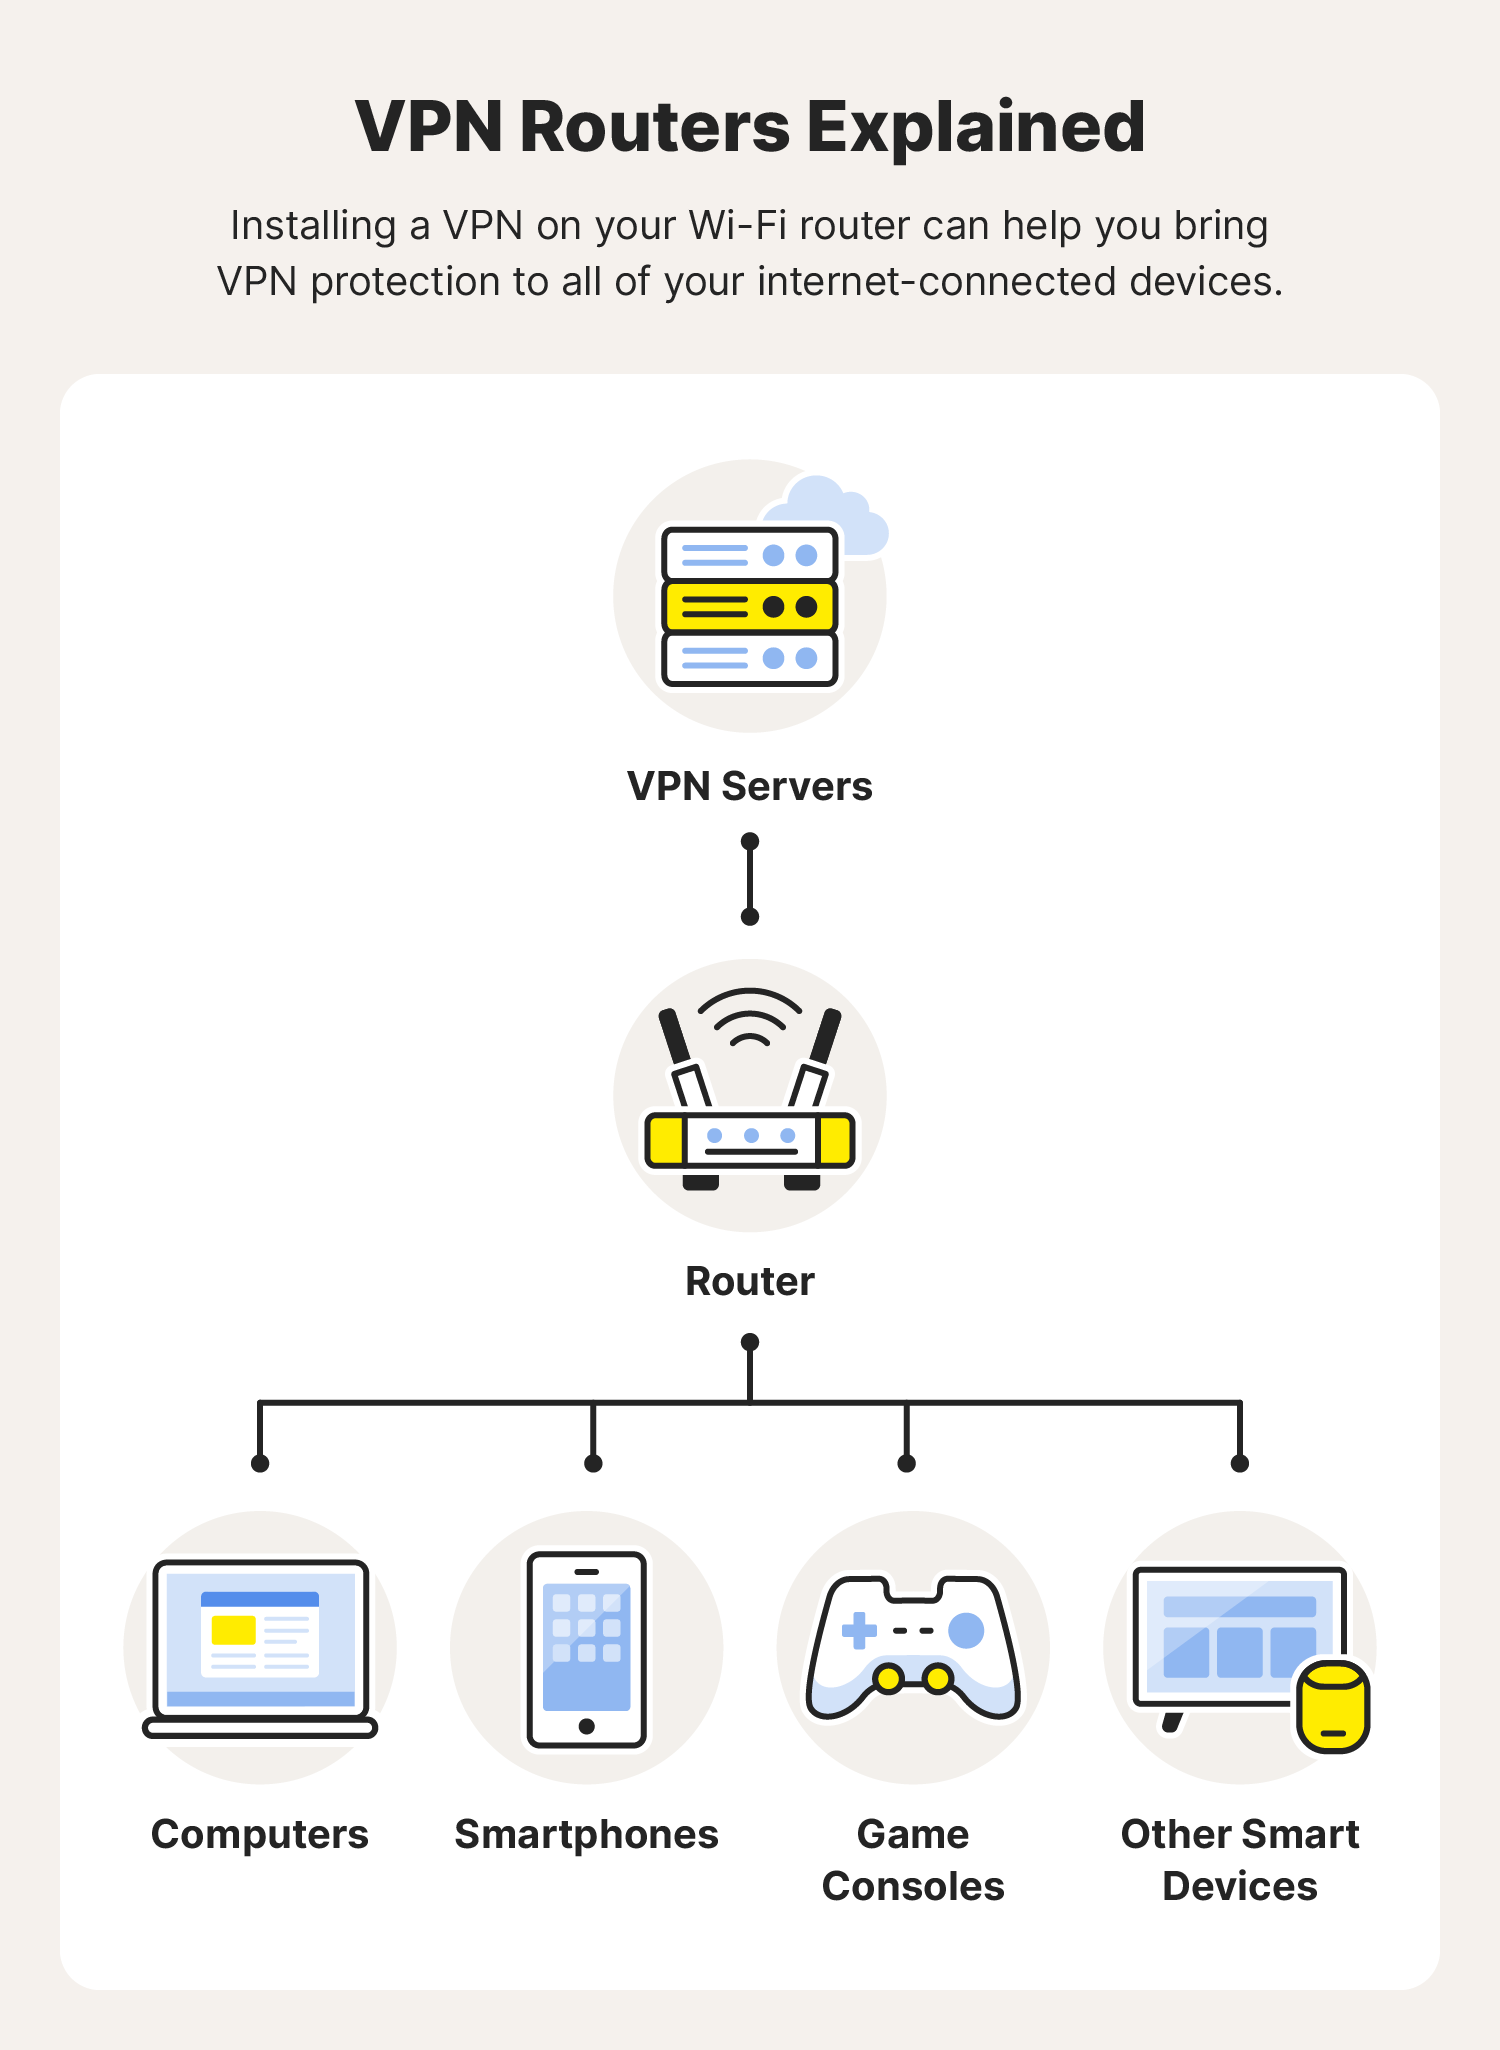
The concept of a VPN router might seem complex at first glance, but its core function is elegantly simple: it routes all internet traffic from every device connected to it through a Virtual Private Network (VPN) tunnel. This means that unlike traditional setups where each device requires its own VPN application, a VPN router provides blanket protection, safeguarding everything from your laptop and smartphone to your smart TV, gaming console, and even IoT devices that might not natively support VPN software.
What is a VPN Router and How Does It Differ?
At its heart, a VPN router is essentially a standard Wi-Fi router that has been configured to run a VPN client. This client connects directly to your chosen VPN service provider, encrypting all outgoing and decrypting all incoming internet traffic for your entire network.
The key distinction lies in its operational scope. When you install a VPN application on a laptop, only that specific device’s traffic is routed through the VPN. If you then switch to your tablet, you’d need to activate the VPN app on that device too. A VPN router, however, handles this at the network level. Once configured, every device that connects to your Wi-Fi network automatically benefits from the VPN’s security and privacy features, without needing individual VPN software installations. This includes devices like Apple TVs, smart refrigerators, security cameras, and game consoles that typically cannot run VPN apps on their own.
Beyond the convenience, this network-wide encryption capability significantly enhances your overall digital security posture, making it a cornerstone for anyone serious about protecting their online identity and data.
The Unparalleled Security and Convenience
The advantages of a VPN router extend far beyond simple convenience. In the realm of digital security, it offers a robust, always-on shield against various online threats.
Firstly, persistent, network-wide encryption is paramount. Every byte of data leaving your home network is encrypted, protecting you from snooping by ISPs, government surveillance, and malicious actors on public Wi-Fi networks (if you’re connected to your home network remotely or using its capabilities to create a secure hotspot). This is particularly critical for sensitive data like banking transactions, personal communications, and work-related information.
Secondly, a VPN router liberates you from device limitations. Many VPN providers impose a cap on the number of simultaneous device connections. A VPN router counts as just one device, allowing you to protect an unlimited number of devices within your home without worrying about subscription tiers or juggling connections. This makes it an incredibly cost-effective solution for households with numerous gadgets.
Furthermore, it’s a game-changer for bypassing geo-restrictions on streaming services or accessing region-locked content. Since all devices on the network appear to be connecting from the VPN server’s location, you can unlock a world of entertainment and information that would otherwise be inaccessible. This seamless access across all your devices, from your smart TV to your gaming console, enhances your digital productivity and entertainment options without the usual regional barriers.
A Smart Investment for Your Digital Lifestyle
From a financial perspective, investing in a VPN router setup can be remarkably prudent. While there’s an initial outlay for a compatible router and a VPN subscription, the long-term value often outweighs these costs.
Consider the alternative: subscribing to a VPN service for each individual user or device in a multi-person household could quickly become expensive. With a VPN router, a single premium VPN subscription covers everyone and everything, leading to significant savings in the long run. This makes it a smart investment, especially for families or shared living spaces where multiple users require strong online protection.
Beyond the direct cost savings, think about the value of enhanced digital security and privacy. Protecting your personal data from breaches, identity theft, and online tracking prevents potential financial losses and the emotional distress associated with such incidents. In an era where data is currency, safeguarding your digital footprint through a VPN router is akin to securing a valuable asset. It transforms your home network into a private, secure ecosystem, ensuring that your online income streams, financial transactions, and sensitive personal information remain confidential and protected. This proactive approach to digital security aligns perfectly with sound personal finance principles, emphasizing prevention over costly recovery.
Choosing the Right Foundation: Router and VPN Service
Embarking on the VPN router journey requires careful consideration of two primary components: the router itself and your chosen VPN service. The synergy between these two elements will define the performance, reliability, and security of your entire network.
Router Compatibility and Firmware
Not all routers are created equal when it comes to VPN capabilities. You essentially have three main paths:
- Pre-flashed VPN Routers: These are routers that come with VPN-compatible firmware (like DD-WRT, OpenWRT, or Tomato) already installed and pre-configured for a specific VPN service. They offer the easiest plug-and-play experience, ideal for those who prefer convenience over DIY. Many reputable VPN providers and third-party vendors offer these, often at a premium. While the initial cost might be higher, the ease of setup and customer support can be invaluable.
- VPN-Ready Routers with Native Client Support: Some newer, higher-end routers from manufacturers like Asus (with AsusWRT-Merlin firmware), Netgear, or Linksys now include native VPN client functionality in their factory firmware. This means you don’t need to flash custom firmware; you can configure your VPN connection directly through the router’s web interface. These offer a good balance of ease of use and performance.
- Flashing Your Own Router with Custom Firmware: This is the most cost-effective option if you already own a compatible router or wish to purchase a standard router and customize it. Custom firmware like DD-WRT, OpenWRT, or Tomato replaces the manufacturer’s default software, adding advanced features, including VPN client capabilities. However, this method requires more technical acumen and carries a small risk of “bricking” your router if not done correctly.
When selecting a router, prioritize models with powerful processors and ample RAM. Running a VPN client requires significant processing power, as it encrypts and decrypts all traffic. A weak processor can lead to severe speed reductions, defeating the purpose of a fast internet connection. Brands like Asus, Linksys, Netgear, TP-Link, and GL.iNet are often recommended for their compatibility and performance. Always check the specific router model’s compatibility with your desired custom firmware or native VPN client support before making a purchase. Reviews and benchmarks from tech review sites can also provide valuable insights into real-world performance.
Selecting Your Ideal VPN Provider
The VPN service you choose is as critical as the router itself. It’s the engine that powers your secure network, and its quality directly impacts your privacy, security, and connection speeds. Here are key criteria to consider:
- No-Logs Policy: This is paramount for privacy. A reputable VPN provider should have a strict, audited no-logs policy, meaning they do not record your online activities. This ensures your data remains truly private, even from the VPN provider itself.
- Strong Encryption: Look for providers that use robust encryption standards, typically AES-256, and secure protocols like OpenVPN or WireGuard. These are industry standards for military-grade security.
- Server Network and Speed: A large network of servers across many countries offers greater flexibility for bypassing geo-restrictions and usually ensures better connection speeds by allowing you to connect to a server closer to your physical location. Test the provider’s speeds during their trial period, if available.
- Router Compatibility and Setup Guides: Ensure the VPN provider explicitly supports router configuration and offers clear, detailed setup guides for your specific router model or custom firmware. Many top-tier providers like ExpressVPN, NordVPN, Surfshark, and ProtonVPN excel in this area.
- Customer Support: Responsive and knowledgeable customer support is vital, especially if you encounter issues during setup or operation. Look for 24/7 live chat support.
- Cost and Value: While price shouldn’t be the sole determining factor, compare subscription costs across providers. Often, longer-term plans offer better value. Consider what features are included (e.g., dedicated IP, split tunneling, kill switch) and how they align with your needs and budget. A higher upfront cost for a premium, reliable VPN service often translates to a better, more secure experience, preventing potential frustrations and security compromises down the line.

By meticulously researching both your router and VPN provider, you lay a solid foundation for a secure, private, and efficient home network. This proactive approach ensures that your digital infrastructure is not just functional but also resilient against the ever-evolving landscape of online threats.
The Installation Journey: Step-by-Step Guide
The actual installation process for a VPN router varies depending on whether you have a pre-flashed router, one with native VPN client support, or if you’re flashing custom firmware. We’ll cover the most common scenarios. Always back up your router’s current configuration before making significant changes.
Method 1: Pre-Flashed VPN Router Setup (Simplest Approach)
This method is the most straightforward, designed for users who want a quick and easy solution.
- Unboxing and Initial Connection:
- Unbox your new pre-flashed VPN router.
- Connect the router to your modem using an Ethernet cable (from the modem’s LAN port to the router’s WAN/Internet port).
- Plug in the power adapter and turn on the router.
- Connect your computer to the new router, either via an Ethernet cable (to one of the router’s LAN ports) or by connecting to its temporary Wi-Fi network (SSID and password usually found on a sticker on the router or in the quick start guide).
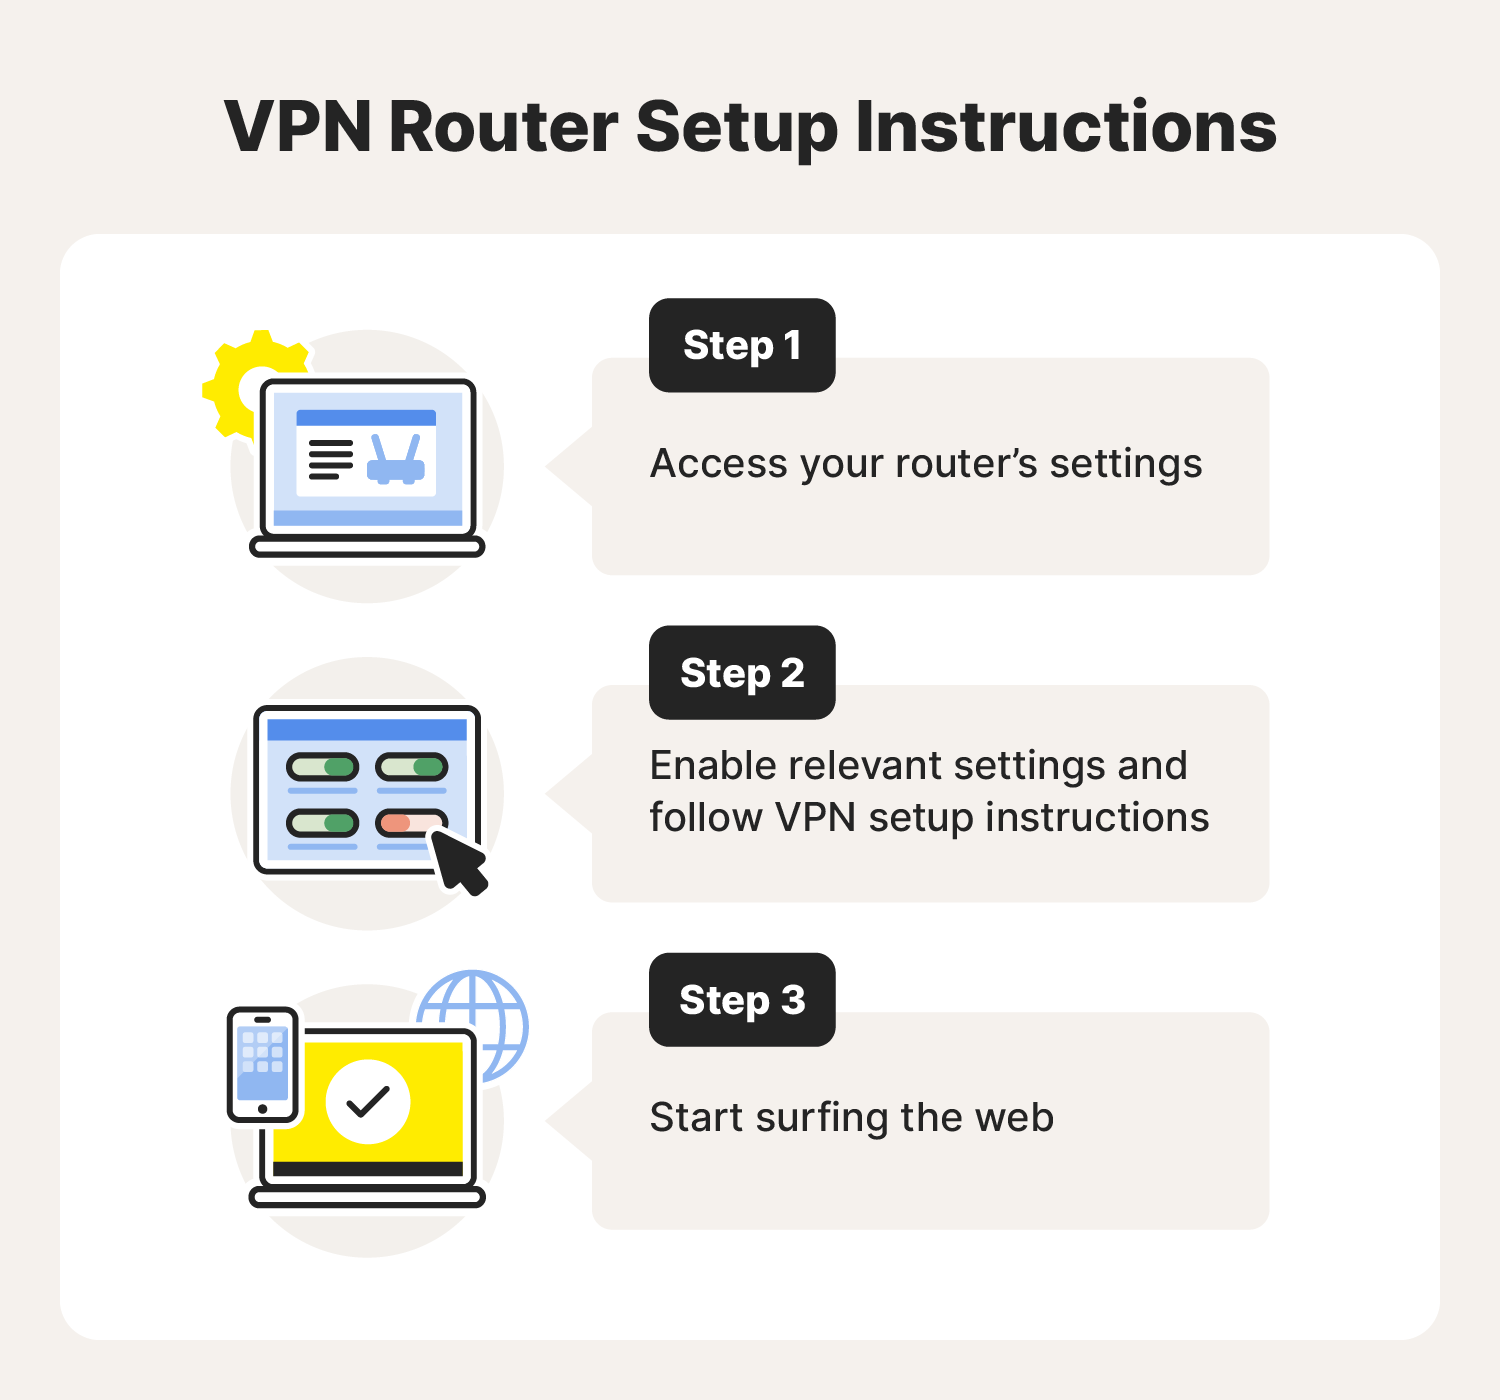
- Accessing the Router’s Admin Panel:
- Open a web browser (Chrome, Firefox, Edge, etc.).
- In the address bar, type the router’s default IP address (commonly 192.168.1.1, 192.168.0.1, or 10.0.0.1) or the provided domain name (e.g.,
router.asus.com). This information will be in your router’s manual or on a sticker. - Enter the default username and password (e.g., admin/admin, admin/password). Immediately change these default credentials to strong, unique ones for security.
- Entering VPN Credentials:
- Navigate through the router’s interface to find the VPN client settings. This might be under sections like “VPN,” “Advanced Settings,” “WAN,” or “Internet.”
- Select “VPN Client” mode (if applicable) and choose your VPN protocol (usually OpenVPN or WireGuard, as recommended by your VPN provider).
- You will typically need to upload configuration files (.ovpn files for OpenVPN) provided by your VPN service or manually enter server addresses, your VPN username, and password.
- Enable the “Kill Switch” feature if your router firmware supports it. This prevents data leaks if the VPN connection drops.
- Testing the Connection:
- After applying the settings, wait for the router to establish the VPN connection.
- On a connected device, open a web browser and visit an IP address checker website (e.g.,
whatismyipaddress.comoriplocation.net). - Verify that your displayed IP address matches the location of the VPN server you selected, and not your actual geographical location.
- Perform a DNS leak test (many IP checker sites offer this) to ensure your DNS requests are also routed through the VPN.
Method 2: Flashing a Router with Custom VPN Firmware (Advanced)
This method requires more technical confidence but offers flexibility and can be more budget-friendly if you already own a compatible router. Proceed with caution; incorrect flashing can permanently damage your router.
- Check Router Compatibility:
- First and foremost, verify that your router model is supported by DD-WRT, OpenWRT, or Tomato firmware. Visit the official firmware websites (e.g.,
dd-wrt.com/site/support/router-database) and search for your specific model number. - Note the correct firmware file for your router’s exact hardware version. Downloading the wrong file is a common cause of bricking.
- First and foremost, verify that your router model is supported by DD-WRT, OpenWRT, or Tomato firmware. Visit the official firmware websites (e.g.,
- Download the Firmware:
- Download the appropriate firmware file (e.g., a
.binor.trxfile) from the official website.
- Download the appropriate firmware file (e.g., a
- Backup Current Configuration:
- Access your router’s stock web interface (as described in Method 1, step 2).
- Find the “Backup” or “Save Configuration” option, usually under “Administration” or “System Tools.” Save the current settings file to your computer. This allows you to revert if necessary.
- Reset Router to Factory Defaults:
- It’s often recommended to perform a factory reset on your router before flashing. This clears any lingering settings that might conflict with the new firmware. This can usually be done through the web interface or by pressing and holding the physical reset button for 10-30 seconds.
- Flashing the Firmware:
- Connect your computer to the router via an Ethernet cable (do not use Wi-Fi during flashing).
- Access the router’s web interface.
- Navigate to the “Administration,” “Firmware Upgrade,” or “Router Upgrade” section.
- Select the downloaded custom firmware file and initiate the upgrade process.
- Crucially, DO NOT interrupt the process, unplug the router, or close your browser until the upgrade is complete and the router has rebooted. This can take several minutes.
- Configuring the VPN Client on New Firmware:
- Once the new firmware is installed, the router will reboot. You’ll likely need to access it again using its new default IP (e.g., 192.168.1.1 for DD-WRT) and log in (default username/password will be in the firmware’s documentation).
- Change the default login credentials immediately.
- Navigate to the VPN client section (e.g., “Services” > “VPN” in DD-WRT).
- Select your VPN protocol (OpenVPN or WireGuard) and follow your VPN provider’s specific guide for that firmware. This usually involves:
- Uploading
.ovpnconfiguration files. - Entering your VPN username and password.
- Configuring security settings (e.g., CA certificate, TLS authentication).
- Enabling the VPN client.
- Uploading
- Save and apply changes, then reboot the router.
- Testing the Connection:
- As with Method 1, verify your IP address and perform a DNS leak test on a connected device.
Method 3: Configuring a Router with Native VPN Client Support
Many modern premium routers offer built-in VPN client functionality without needing custom firmware. The process is similar to Method 1 but uses the manufacturer’s own interface.
- Initial Setup and Access:
- Set up your router as you normally would, connecting it to your modem and accessing its default web interface.
- Log in and change default credentials.
- Locate VPN Client Settings:
- Navigate through the router’s settings menu to find the “VPN” section. This might be under “Advanced Settings,” “WAN,” or “Security.”
- Look for an option specifically labeled “VPN Client” or “VPN Fusion” (e.g., on Asus routers).
- Input VPN Details:
- Select your desired VPN protocol (OpenVPN, PPTP, L2TP, or WireGuard, depending on what your router and VPN provider support).
- Upload the configuration file (.ovpn) if using OpenVPN, or manually enter the server address, username, password, and any other required cryptographic details provided by your VPN service.
- Enable the VPN client and apply the settings.
- Testing the Connection:
- Verify your IP address and perform a DNS leak test to confirm the VPN is active and protecting your network.
Regardless of the method, patience and attention to detail are key. Refer constantly to your VPN provider’s setup guides and your router’s specific documentation.
Post-Installation: Optimizing and Troubleshooting
Once your VPN router is up and running, a few final steps can help ensure optimal performance and address any potential hiccups.
Verifying Your VPN Connection
The first and most critical step post-installation is to confirm that your VPN connection is indeed active and functioning as intended.
- IP Address Check: On any device connected to your VPN router’s network, open a web browser and visit a site like
whatismyipaddress.comoriplocation.net. The IP address displayed should correspond to the location of your VPN server, not your actual geographical location. - DNS Leak Test: While on the same IP checker sites, look for an option to perform a DNS leak test. A DNS leak occurs when your internet service provider’s DNS servers are still being used, even if your IP is masked by the VPN. This can reveal your true location and compromise privacy. A successful test should show that your DNS requests are being handled by your VPN provider’s DNS servers.
- Speed Test: Use a reliable speed test website (e.g.,
speedtest.net) to check your download and upload speeds. While some speed reduction is expected with VPN encryption, significant drops (more than 30-50% on a fast connection) might indicate a bottleneck in your router’s processor or an issue with the VPN server you’re connected to.
Split Tunneling and Kill Switches
Many advanced VPN router firmwares offer sophisticated features that provide greater control over your network traffic:
- Split Tunneling: This feature allows you to choose which devices or applications on your network route their traffic through the VPN, and which connect directly to the internet. For example, you might want your streaming devices to use the VPN for geo-unblocking, but your gaming console to connect directly for lower latency. This offers a balance between security and performance.
- Kill Switch: A kill switch is a critical security feature. If your VPN connection unexpectedly drops, the kill switch automatically blocks all internet traffic from leaving your network, preventing your real IP address and data from being exposed. Always enable this feature if your router’s firmware supports it, as it acts as a last line of defense for your privacy.
Configuring these features can usually be done within the VPN settings section of your router’s web interface.
Common Issues and Solutions
Even with careful setup, you might encounter issues. Here are some common problems and their troubleshooting steps:
- Slow Speeds:
- Solution: Try connecting to a different VPN server, preferably one closer to your physical location. Ensure your router has a powerful enough processor for encryption/decryption. Check your internet connection speed without the VPN. Reduce the encryption level if your VPN provider offers different options (though this compromises security).
- VPN Not Connecting:
- Solution: Double-check your VPN username, password, and server details for typos. Ensure your router’s firmware is up-to-date. Try rebooting both your modem and router. Verify your VPN subscription is active. Firewall settings on your router or ISP might be blocking VPN protocols – consult your ISP if you suspect this.
- DNS Leaks:
- Solution: Ensure your router is configured to use your VPN provider’s DNS servers, or a public privacy-focused DNS like Cloudflare (1.1.1.1) or Google (8.8.8.8) within the VPN tunnel. Sometimes flushing your device’s DNS cache can help.
- Router Bricked After Flashing:
- Solution: This is the most severe issue. If your router becomes unresponsive after a firmware flash, you may need to attempt a recovery procedure specific to your router model (often involving a TFTP server and recovery mode). This is why confirming compatibility and following instructions precisely are so important. If recovery fails, the router may be permanently damaged.
By proactively verifying your setup, leveraging advanced features, and knowing how to troubleshoot common problems, you can ensure your VPN router provides reliable, always-on protection for your entire digital ecosystem. This robust approach to network security not only protects your personal data but also contributes to a more secure and efficient digital lifestyle, safeguarding your online income streams, financial dealings, and overall peace of mind.
The journey to installing a VPN router might seem daunting at first, but the benefits it brings to your digital security, privacy, and overall online experience are immense. By centralizing your VPN protection at the router level, you create a seamless, always-on shield for every device in your home, liberating you from the complexities of individual VPN installations and device limits. This strategic investment in your home network’s foundation transforms it into a bastion of digital security, empowering you to navigate the internet with confidence and control. In an age where digital security is synonymous with financial well-being and personal peace of mind, a VPN router is not just a technological upgrade, but an essential component of a modern, secure digital life.
aViewFromTheCave is a participant in the Amazon Services LLC Associates Program, an affiliate advertising program designed to provide a means for sites to earn advertising fees by advertising and linking to Amazon.com. Amazon, the Amazon logo, AmazonSupply, and the AmazonSupply logo are trademarks of Amazon.com, Inc. or its affiliates. As an Amazon Associate we earn affiliate commissions from qualifying purchases.