
In the rapidly evolving landscape of technology, our personal computers are the hubs of our digital lives, facilitating everything from work and communication to entertainment and creativity. Yet, over time, even the most robust machines can start to feel sluggish, burdened by accumulated software, temporary files, fragmented data, and perhaps even stubborn malware. This is where a “clean install” of Windows becomes your system’s ultimate reset button – a powerful maintenance procedure that can breathe new life into your PC, restoring its performance, security, and responsiveness to factory-fresh levels.
This comprehensive guide will walk you through every step of performing a clean install of Windows, explaining not only the “how” but also the “why.” We’ll delve into the benefits, the crucial preparatory steps, the installation process itself, and what to do once your sparkling new operating system is up and running. Whether you’re a seasoned tech enthusiast or a first-time user looking to reclaim your PC’s lost potential, this tutorial is designed to empower you with the knowledge to execute a flawless clean install, ensuring a smoother, more secure, and ultimately more productive computing experience.

Why a Clean Install is Your PC’s Best Friend (and Yours!)
Before we dive into the technicalities, it’s essential to understand the compelling reasons why a clean install is often the most effective solution for a multitude of PC ailments. Think of it as spring cleaning for your digital world – a thorough decluttering that yields significant advantages.
Rejuvenate Performance and Speed
One of the most immediate and noticeable benefits of a clean install is the dramatic improvement in your PC’s performance. Over months or years of use, Windows accumulates digital “clutter.” This includes remnants of uninstalled programs, orphaned registry entries, temporary files from countless applications, and potentially even conflicting drivers. Each piece of this digital baggage adds overhead, consuming valuable system resources like RAM and CPU cycles, leading to slower boot times, unresponsive applications, and general system lag.
A clean install wipes the slate entirely clean, removing all these accumulated inefficiencies. Your operating system starts fresh, with only the essential components and files it needs. The result is a computer that boots faster, launches applications more swiftly, and multitasks with greater fluidity, offering a user experience akin to unboxing a brand-new machine. For anyone struggling with a perpetually slow PC, this performance boost alone makes the effort worthwhile.
Eradicate Stubborn Malware and Bloatware
In our connected world, digital security is paramount. Despite our best efforts with antivirus software, some particularly tenacious malware, rootkits, or adware can embed themselves deep within the operating system, making them incredibly difficult to remove conventionally. These threats can compromise your data, steal personal information, or simply make your PC unusable with constant pop-ups and redirects.
Similarly, “bloatware” – pre-installed, often unwanted software from manufacturers – can hog resources and clutter your system from day one. A clean install provides the ultimate solution to both these problems. By completely erasing the hard drive and reinstalling Windows from scratch, you effectively obliterate any persistent malware infections and bypass all manufacturer bloatware, ensuring that your new system is lean, clean, and secure from the ground up. This fresh start significantly enhances your digital security posture and frees up valuable disk space and system resources.
Resolve Persistent System Issues
Have you ever encountered a cryptic error message that reappears no matter what you try? Or perhaps your applications crash randomly, your peripherals refuse to work correctly, or your system experiences inexplicable blue screens of death (BSODs)? These persistent, hard-to-diagnose issues often stem from corrupted system files, conflicting software, or deeply ingrained driver problems that standard troubleshooting steps simply can’t fix.
A clean install acts as a universal fix for such elusive problems. By replacing the entire operating system, you eliminate the underlying cause of these issues, offering a fresh, stable environment where software and hardware can operate harmoniously. It saves you countless hours of frustrating troubleshooting and provides a reliable foundation for your computing tasks.
Optimize for Productivity and Security
Beyond fixing problems, a clean install empowers you to optimize your system specifically for your needs. Without the burden of pre-installed junk or leftover files, you have full control over what software goes onto your machine. This allows you to install only the applications you genuinely use, reducing background processes and freeing up resources for your most important tasks.
Furthermore, a fresh operating system provides an excellent opportunity to review and configure privacy settings from the outset, ensuring your digital footprint is exactly as you intend. With a clean, uncompromised system, you establish a strong foundation for both productivity and digital security, enabling you to work more efficiently and with greater peace of mind.
Essential Preparations Before You Begin
A clean install is a powerful procedure, but it’s also destructive to data on your primary drive. Skipping the preparatory steps is a recipe for disaster, potentially leading to irreversible data loss. Meticulous preparation is the cornerstone of a successful and stress-free clean install.
Backup, Backup, Backup Your Data!
This cannot be stressed enough: backing up your data is the single most critical step before performing a clean install. Remember, the process involves erasing everything on your primary drive. If you haven’t backed up, it’s gone forever.
Identify all personal files you wish to keep: documents, photos, videos, music libraries, downloads, browser bookmarks, email archives (PST files, for example), and any important project files.
Consider these backup methods:
- External Hard Drive: A reliable and straightforward solution. Simply drag and drop your important folders.
- Cloud Storage: Services like Microsoft OneDrive, Google Drive, or Dropbox offer convenient syncing and access from anywhere. Ensure all your critical folders are synced before proceeding.
- Network Attached Storage (NAS): For those with a home network, a NAS offers centralized backup and storage.
- USB Flash Drives: Suitable for smaller sets of critical files.
Double-check your backups. If possible, test accessing a few files from your backup medium to ensure they’re intact and readable.
Gather Your Tools: Windows Installation Media
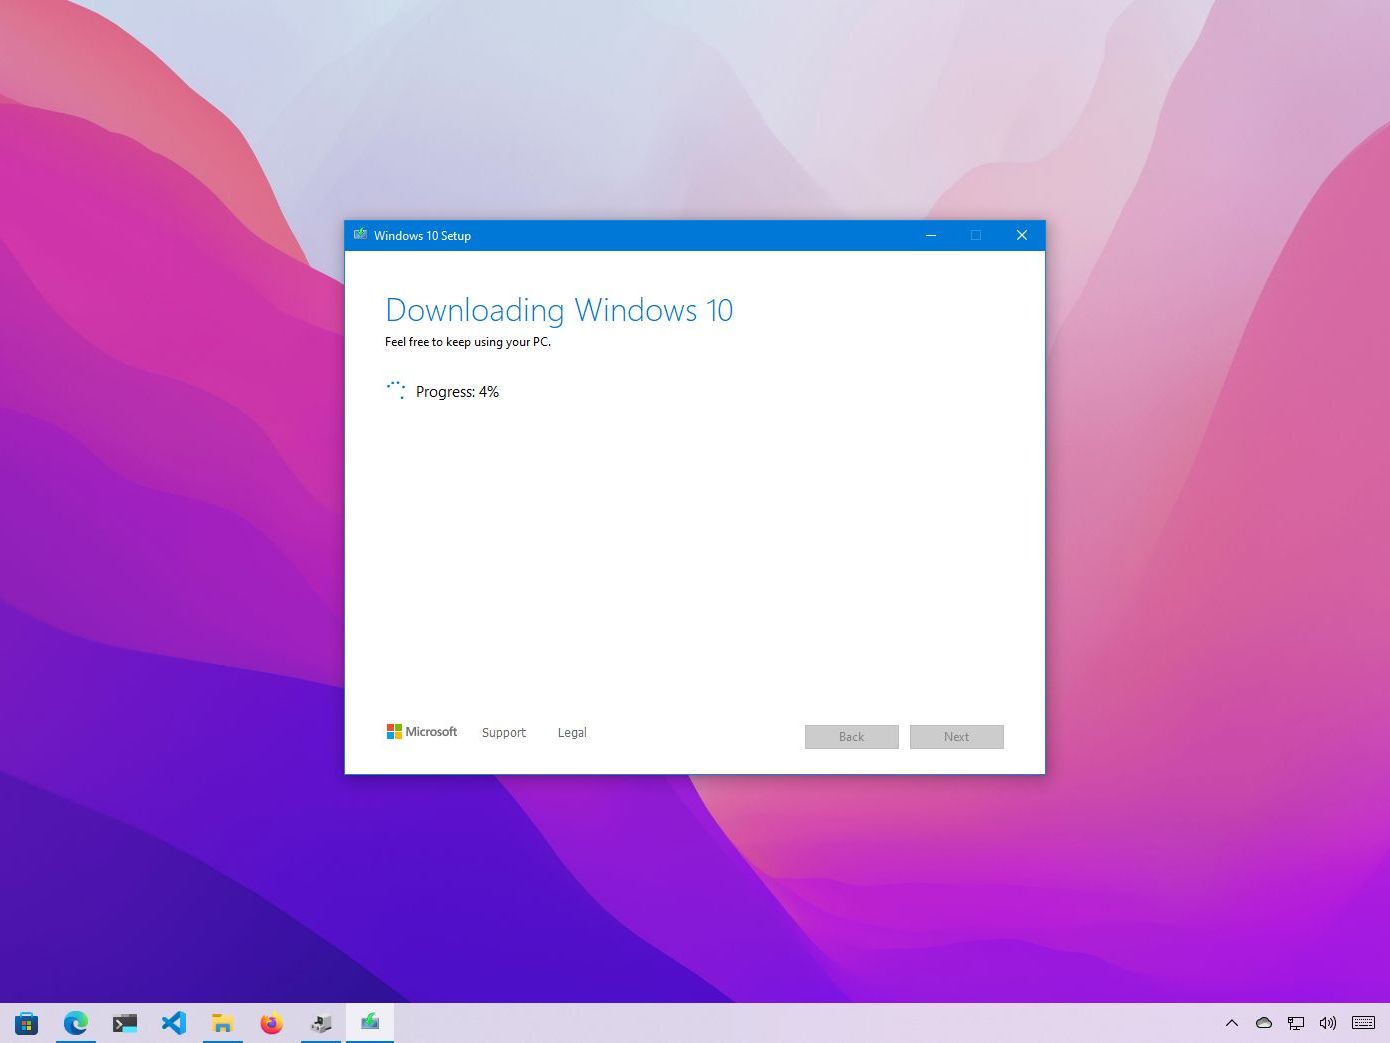
To install Windows, you’ll need bootable installation media. The easiest way to create this is using Microsoft’s Media Creation Tool, which can download the latest version of Windows (Windows 10 or 11) and create a bootable USB drive (requires an 8GB or larger USB flash drive).
- Download the Media Creation Tool: Visit Microsoft’s official website and download the tool.
- Run the Tool: Follow the on-screen instructions. Select “Create installation media (USB flash drive, DVD, or ISO file) for another PC.”
- Choose USB Flash Drive: Select your connected USB drive. The tool will download Windows and prepare the drive.
Alternatively, you can use a DVD, but USB is generally faster and more common today. Ensure the installation media is compatible with your PC’s architecture (32-bit or 64-bit), though most modern systems are 64-bit.
Secure Your Product Key (If Applicable)
For many modern PCs, Windows comes with a digital license linked to your Microsoft account or embedded in your computer’s UEFI firmware. In such cases, you often won’t need to manually enter a product key during installation, as Windows will automatically activate once connected to the internet.
However, if you have a retail product key (e.g., from a physical box or email purchase), it’s crucial to locate and note it down.
- Sticker on your PC: Some older PCs have a Windows product key sticker.
- Email Confirmation: If purchased digitally, check your purchase confirmation email.
- Command Prompt (for some existing installations): Open Command Prompt as an administrator and type
wmic path softwarelicensingproduct get OA3xOriginalProductKey(for OEM keys) or use third-party tools like NirSoft ProduKey (use with caution, ensure it’s from a trusted source).
Download Essential Drivers and Software
After a clean install, your PC might lack crucial drivers, especially network drivers (Ethernet or Wi-Fi). Without network connectivity, you can’t download anything online.
- Identify Your PC’s Manufacturer and Model: Look for a sticker on your laptop or desktop casing.
- Visit the Manufacturer’s Website: Go to the “Support” or “Downloads” section for your specific model.
- Download Essential Drivers: Prioritize network drivers (LAN/Wi-Fi adapter), chipset drivers, graphics card drivers (for dedicated GPUs), and audio drivers.
- Save to a Separate USB Drive: Store these downloaded drivers on a different USB drive than your Windows installation media, or on an external hard drive. This way, you can install them immediately after Windows is set up.
- List of Essential Software: Make a list of your most frequently used applications (web browser, productivity suite, antivirus, video player, etc.) so you remember to reinstall them.

Ensure Stable Power Supply
An interruption during the installation process can corrupt the installation and potentially damage your drive.
- Laptops: Ensure your laptop is fully charged and preferably plugged into its power adapter.
- Desktops: Connect your desktop to an Uninterruptible Power Supply (UPS) if you have one, or at least ensure it’s plugged directly into a reliable wall outlet, not a power strip prone to issues.
The Step-by-Step Clean Installation Process
With your preparations complete, you’re ready to embark on the installation journey. Follow these steps carefully to ensure a smooth process.
Booting from the Installation Media
The first step is to tell your computer to start from the USB drive containing the Windows installation rather than its internal hard drive.
- Insert the USB Installation Media: Plug your bootable Windows USB drive into an available USB port on your computer.
- Restart Your PC: Power off your computer and then turn it back on.
- Access BIOS/UEFI Settings: Immediately upon startup, you’ll need to press a specific key repeatedly to enter your computer’s BIOS or UEFI firmware settings. Common keys include
Del,F2,F10,F12, orEsc. The exact key varies by manufacturer (e.g., Dell, HP, Lenovo, ASUS, Acer). Look for a message on the screen during startup like “Press F2 for Setup” or “Press Del to enter BIOS.” - Change Boot Order: Once in BIOS/UEFI, navigate to the “Boot” or “Boot Order” section. You’ll need to move your USB drive to the top of the boot priority list. Save changes and exit.
- Start Installation: Your computer should now boot from the USB drive, and you’ll see the Windows setup screen. If it boots back into your old Windows installation, you didn’t successfully change the boot order, so restart and try again.
Navigating the Windows Setup Wizard
The Windows Setup Wizard is intuitive, but there are a few critical choices to make.
- Language and Region: On the first screen, choose your language, time and currency format, and keyboard layout. Click “Next.”
- Install Now: Click the “Install now” button.
- Product Key: If prompted, enter your Windows product key. If you have a digital license linked to your Microsoft account or embedded in your UEFI, you can often click “I don’t have a product key” or “Skip,” and Windows will activate automatically after installation.
- License Terms: Read and accept the Microsoft Software License Terms. Click “Next.”
- Choose Installation Type: This is a crucial step for a clean install. Select “Custom: Install Windows only (advanced).” Do NOT choose “Upgrade,” as that retains your old files and settings, defeating the purpose of a clean install.
Formatting and Partitioning Your Drive
This is where the “clean” aspect truly happens, as you’ll erase the existing data.
- Drive Partition Selection: You’ll see a list of drives and partitions. Your primary drive typically has several partitions: “Recovery,” “System,” and one or more “Primary” partitions (e.g., “Drive 0 Partition 1,” “Drive 0 Partition 2,” etc.).
- Delete All Partitions: For a truly clean install, you need to delete all existing partitions related to your primary drive where Windows was installed. Select each partition one by one and click “Delete.” Confirm any warnings about data loss.
- WARNING: This step will permanently erase all data on the selected partitions. Ensure your backups are complete.
- Unallocated Space: Once all partitions are deleted, you’ll be left with “Drive 0 Unallocated Space.”
- Create New Partition (Optional, but Recommended): Select the “Unallocated Space” and click “New.” You can accept the default maximum size (recommended for a single C: drive) or create smaller partitions if you wish (e.g., one for the OS and one for data). Windows will create additional small system partitions automatically.
- Select Target Partition: Choose the largest “Primary” partition you just created (or the default one if you just clicked “New”) as the location for Windows. Click “Next.”
Windows will now begin copying files, installing features, and installing updates. Your computer will restart multiple times during this phase. Let it restart naturally.
Completing the Installation and Initial Setup
After the restarts, you’ll be greeted by the Out-of-Box Experience (OOBE), where you’ll configure basic settings.
- Region and Keyboard Layout: Select your country/region and keyboard layout. You may add a second keyboard layout if needed.
- Network Connection: Connect to a Wi-Fi network (if applicable) or plug in an Ethernet cable. This is vital for activation and updates.
- Microsoft Account: Sign in with your Microsoft account (recommended for digital licenses and cloud syncing). You can also choose to create a local account if you prefer, but some features might be limited.
- Privacy Settings: Review the privacy settings carefully (e.g., location, diagnostic data, tailored experiences). Disable any you’re uncomfortable with.
- Other Options: You may be prompted for options like setting up Windows Hello, linking your phone, or enabling OneDrive. Configure these as desired.
- Desktop: Finally, Windows will prepare your desktop, and you’ll arrive at a fresh, clean operating system.
Post-Installation Checklist: Getting Your PC Ready for Action
Your Windows is installed, but the job isn’t quite done. A few critical steps remain to ensure your PC is fully functional, secure, and ready for your daily tasks.
Install Essential Drivers
This is often the first and most critical step after reaching the desktop.
- Start with Network Drivers: If Windows didn’t automatically detect your network adapter, install the network drivers you pre-downloaded (Ethernet and/or Wi-Fi) from your separate USB drive. Once you have internet, the rest becomes much easier.
- Install Other Drivers: Proceed to install chipset, graphics (especially for gaming or professional use), audio, and any other specific device drivers from your manufacturer’s website. Device Manager (accessible by right-clicking the Start button) can help you identify any missing drivers (look for devices with yellow exclamation marks).
- Windows Update for Remaining Drivers: Often, Windows Update will find and install many general drivers once an internet connection is established.
Run Windows Update
Keeping your operating system up-to-date is paramount for security and stability.
- Check for Updates: Go to
Settings > Update & Security(Windows 10) orSettings > Windows Update(Windows 11) and click “Check for updates.” - Install All Pending Updates: Download and install all available security patches, feature updates, and optional driver updates. This may require several restarts. Repeat this process until no more updates are found.
Reinstall Your Applications
Now that your system is stable and connected, it’s time to bring back your favorite software.
- Security Software First: Install your preferred antivirus or security suite immediately.
- Essential Productivity Tools: Install your web browser, Microsoft Office or other productivity suites, video players, image editors, communication apps, etc.
- Be Selective: Remember the goal of a clean install is to shed bloat. Only reinstall applications you genuinely need and use regularly. Avoid installing unnecessary software to maintain optimal performance.
Restore Your Data
With your applications in place, it’s time to bring back your precious files.
- Copy from Backup: Connect your external hard drive or access your cloud storage.
- Organize Files: Copy your documents, photos, videos, and other personal files back to their appropriate locations (e.g., Documents folder, Pictures folder). Take this opportunity to organize your files logically.
Optimize and Personalize
Finally, tailor your new system to your preferences.
- Privacy Settings Review: Revisit your privacy settings in
Settings > Privacy & securityto ensure they align with your preferences. - Personalization: Customize your desktop background, themes, taskbar, and Start menu layout.
- Notification Settings: Adjust which applications can send notifications to avoid distractions.
- Startup Programs: Check
Task Manager > Startupto disable any unnecessary programs from launching with Windows, further enhancing boot times. - Review Default Apps: Set your preferred default browser, email client, media player, etc., in
Settings > Apps > Default apps.
Performing a clean install of Windows might seem like a daunting task, but by following these detailed steps, you can successfully rejuvenate your computer. The benefits – from restored performance and enhanced security to a cleaner, more efficient workspace – far outweigh the effort. This process isn’t just about fixing problems; it’s about reclaiming control over your digital environment, optimizing it for maximum productivity, and ensuring a robust, secure foundation for all your computing needs. Embrace the fresh start, and enjoy your revitalized PC!
aViewFromTheCave is a participant in the Amazon Services LLC Associates Program, an affiliate advertising program designed to provide a means for sites to earn advertising fees by advertising and linking to Amazon.com. Amazon, the Amazon logo, AmazonSupply, and the AmazonSupply logo are trademarks of Amazon.com, Inc. or its affiliates. As an Amazon Associate we earn affiliate commissions from qualifying purchases.