
In the digital age, a well-performing computer is not merely a convenience; it’s a cornerstone of productivity, security, and even professional branding. Over time, however, even the most robust Windows systems can succumb to digital clutter. Bloatware, malware, fragmented files, and residual program data accumulate, leading to frustrating slowdowns, inexplicable errors, and potential security vulnerabilities. When your once-snappy machine begins to crawl, crashes become frequent, or you simply crave a fresh start, a clean Windows install is often the most effective solution.
Unlike a simple factory reset or a mere refresh, a clean install completely wipes your primary drive, removing all existing data, programs, and the operating system itself before installing a pristine copy of Windows. This comprehensive approach ensures that you’re starting with a blank slate, free from the accumulated digital baggage that can plague an aging system. It’s akin to moving into a newly built house compared to merely tidying up an old one – everything is fresh, optimized, and ready for you to customize from the ground up.

This in-depth guide will walk you through every critical step of performing a clean Windows install. From essential pre-installation preparations that safeguard your valuable data to navigating the intricacies of the installation process and optimizing your fresh system for peak performance and robust security, we’ll ensure you’re equipped with the knowledge to rejuvenate your PC. Embrace the power of a revitalized system, enhancing your digital security, boosting your productivity, and ultimately, reclaiming control over your computing experience.
The Imperative for a Fresh Start: Why a Clean Windows Install Matters
Before diving into the “how-to,” it’s crucial to understand the profound impact a clean Windows install can have on your computing experience. It’s more than just a troubleshooting step; it’s a strategic move to optimize performance, enhance security, and ensure long-term system health.
Reclaiming Performance and Productivity
Over months or years of use, Windows accumulates an astonishing amount of digital debris. Every program you install, every file you download, and every update your system receives contributes to a growing labyrinth of data. This digital clutter, often referred to as “bloatware” or “crapware” from pre-installed manufacturer software, along with fragmented files and an overburdened registry, inevitably takes its toll on system performance. Your computer might boot slower, applications might take longer to launch, and multitasking can become a sluggish nightmare.
A clean install acts as a powerful defragmenter and declutterer for your entire system. By wiping the slate clean, you eliminate all this accumulated baggage. The result is a Windows installation that is lean, agile, and incredibly responsive. This dramatic improvement in speed and efficiency directly translates into enhanced productivity. Whether you’re a student writing essays, a professional managing complex projects, or a creative working with demanding software, a faster, more reliable system allows you to accomplish tasks more quickly and with fewer frustrations. It minimizes downtime caused by system slowdowns, letting you focus on your work rather than battling your machine.
Fortifying Your Digital Defenses
Beyond performance, digital security is a paramount concern in today’s interconnected world. Malware, viruses, spyware, and ransomware pose constant threats, and even the most vigilant users can inadvertently encounter them. While antivirus software provides essential protection, a deeply ingrained infection can be incredibly difficult to eradicate completely. Residual files, hidden processes, and compromised system settings can linger, leaving your system vulnerable even after perceived “cleanup.”
A clean Windows install offers the most robust form of digital sanitization. By completely formatting your primary drive, you effectively erase any lingering malicious code, rootkits, or other security threats that might be deeply embedded within your operating system or file system. You’re starting with a verified, untainted copy of Windows, establishing a secure foundation upon which to rebuild your digital environment. This significantly reduces the risk of future breaches and gives you peace of mind, knowing your personal data and sensitive information are better protected. For anyone involved in professional work, maintaining a secure system is not just good practice, it’s a crucial component of digital security that safeguards client data and maintains professional integrity.
Resolving Persistent System Issues
Have you ever faced inexplicable crashes, frequent freezes, or mysterious error messages that no amount of troubleshooting seems to fix? These persistent system issues can be incredibly frustrating and time-consuming, often stemming from corrupted system files, driver conflicts, or deeply entrenched software conflicts that are difficult to pinpoint and resolve individually.
A clean install bypasses these complex diagnostic challenges entirely. By reinstalling Windows from scratch, you effectively eliminate the root causes of most software-related problems. It’s a comprehensive reset that often cures chronic instability, restores proper functionality, and eliminates those nagging issues that undermine your computing experience. This saves you valuable time and money that might otherwise be spent on professional repairs or endless online troubleshooting, solidifying the economic value of performing the install yourself.
Comprehensive Pre-Installation Preparations: Your Essential Checklist
Embarking on a clean Windows install is a significant undertaking, and proper preparation is non-negotiable. Skipping these crucial steps can lead to permanent data loss, frustrating delays, or a failed installation. Think of this as laying the groundwork for a smooth and successful project; meticulous planning now will save you headaches later.
Safeguarding Your Digital Life: The Critical Backup Strategy
This is, without a doubt, the most important step in the entire process. A clean install will erase everything on your primary drive. If you haven’t backed up your files, they will be gone forever. Do not proceed until you are absolutely certain all your essential data is safely stored elsewhere.
- Identify Critical Files: Go through your Documents, Pictures, Videos, Music, Downloads, and Desktop folders. Don’t forget browser bookmarks, email archives (PST files), game saves, and any custom application settings.
- Choose Your Backup Method:
- External Hard Drive: This is often the most straightforward and fastest method for large amounts of data. Simply connect an external drive and copy your folders over.
- Cloud Storage: Services like Google Drive, OneDrive, Dropbox, or iCloud offer convenient cloud-based backups. Ensure you have enough storage space and that the sync process is complete before proceeding.
- Network Attached Storage (NAS): If you have a home or office network server, you can back up your files there.
- System Image (Advanced): For a more comprehensive backup, you can create a full system image using Windows’ built-in tools or third-party software. This captures a snapshot of your entire drive, including the operating system and applications. While not strictly necessary for a clean install, it can be useful for quick restoration to the previous state if something goes wrong and you decide to revert.
- Verify Your Backup: Once the backup process is complete, take the extra time to verify that your most important files are indeed accessible and intact on your backup medium. Open a few files, check folder structures, and ensure nothing is corrupted or missing. This step is often overlooked but can prevent immense regret.
Gathering Your Arsenal: Product Keys, Installation Media, and Drivers
With your data secure, the next phase involves assembling the necessary tools and information to perform the installation itself.
- Your Windows Product Key:
- For Windows 10/11 (Digital License): If your computer originally came with Windows 10/11 or you upgraded from an activated Windows 7/8/8.1, your device likely has a digital license tied to your Microsoft account or hardware. In most cases, Windows will automatically activate after installation once it connects to the internet. You won’t need to manually enter a product key.
- For Windows 7/8/8.1 or Retail Keys: If you have an older version of Windows or a retail key, locate the 25-character product key. It might be on a sticker on your PC (especially laptops), in the packaging of your retail Windows disc, or in a confirmation email if you purchased it digitally. You can also use third-party tools like NirSoft’s ProduKey to retrieve it from your current installation before you wipe the drive. Write it down or save it somewhere safe, separate from your computer.
- Windows Installation Media:
- You’ll need a bootable USB flash drive (at least 8GB, empty) or a DVD. The easiest way to create this is using the official Windows Media Creation Tool from Microsoft’s website. Download the tool, run it, and follow the prompts to select your Windows version (e.g., Windows 11 or 10) and architecture (64-bit is standard for most modern PCs). The tool will download the necessary files and create the bootable media for you. Ensure you select the correct version (Home/Pro) that corresponds to your license.
- Essential Drivers:
- After a clean install, Windows will often have generic drivers that get you online and display basic graphics. However, for optimal performance and functionality, you’ll need specific drivers for your computer’s hardware, especially for network adapters (Wi-Fi/Ethernet), graphics cards, and potentially chipset drivers.
- Before you wipe: Visit your computer manufacturer’s website (e.g., Dell, HP, Lenovo, ASUS) or the motherboard manufacturer’s website (for custom-built PCs) and download the latest drivers for your specific model. Pay particular attention to your network (Wi-Fi and Ethernet) drivers – you’ll need these to get online and download other updates after the installation. Also, download your graphics card drivers (NVIDIA, AMD, Intel). Store these drivers on a separate USB drive or the same bootable USB (if there’s space) but in a clearly labeled folder.
- Other Essential Software: Make a list of all the critical applications you’ll need to reinstall, such as your web browser, antivirus software, office suite, and any specialized programs for work or hobbies. Consider downloading their installers to your backup drive as well, to save time later.
Navigating the Installation Journey: A Step-by-Step Guide
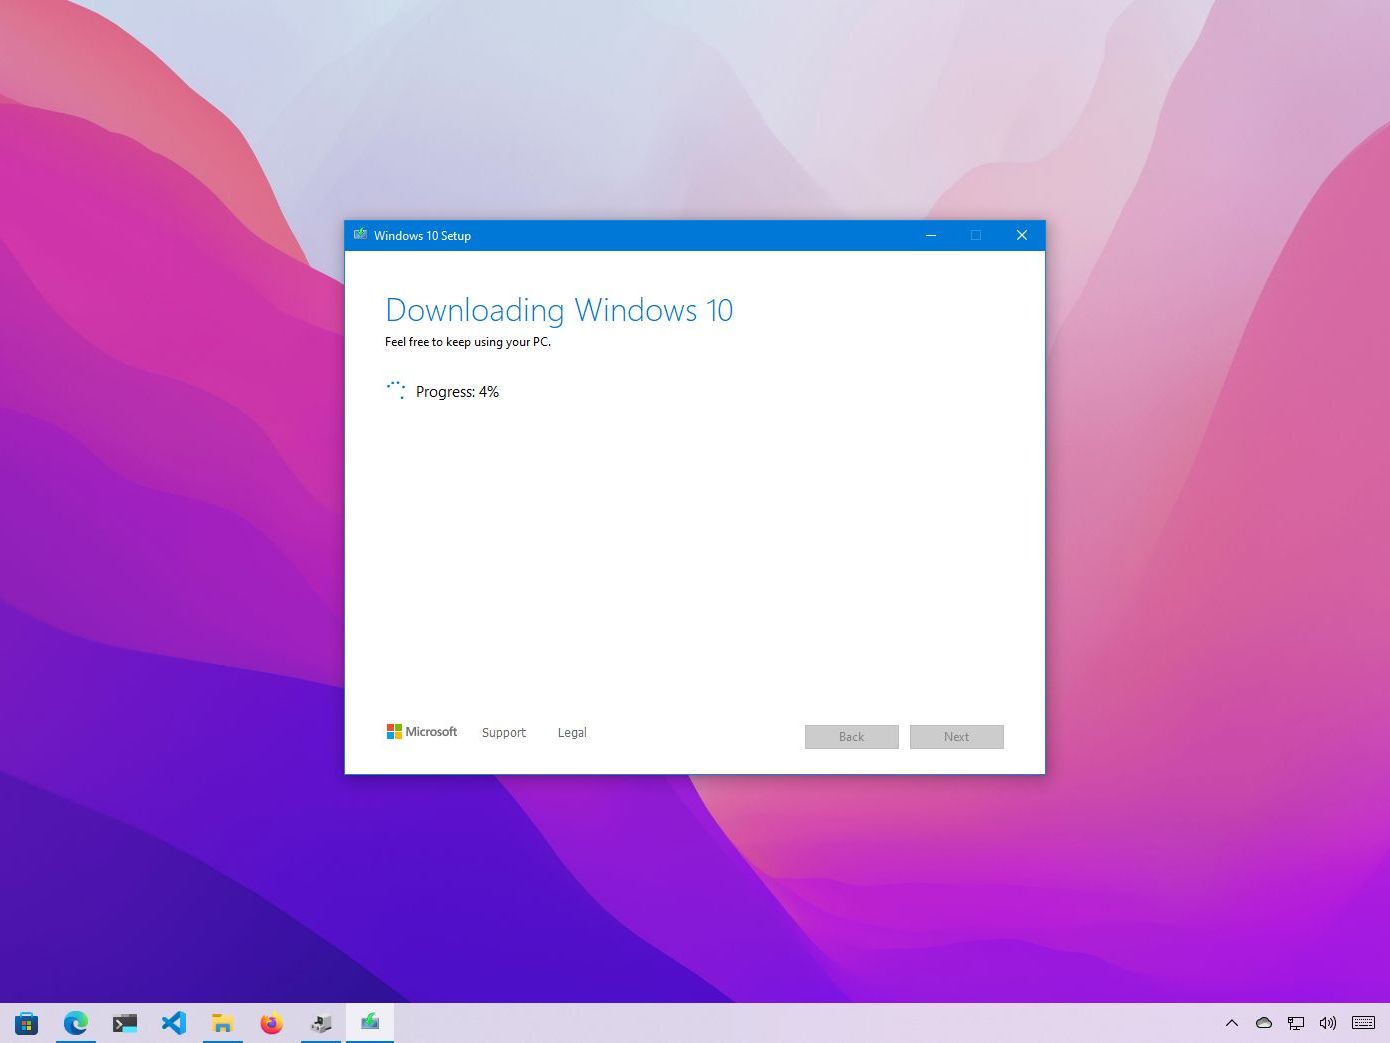
With your preparations complete, you’re ready to initiate the clean installation process. This section will guide you through booting from your installation media, navigating the Windows Setup wizard, and meticulously partitioning your drive.
Initiating the Process: Booting from Your Installation Media
The first step is to instruct your computer to boot from the USB drive or DVD containing the Windows installation files, rather than from your existing hard drive.
- Insert the Installation Media: Plug in your bootable USB flash drive or insert the DVD into your optical drive.
- Restart Your Computer: Restart your PC. As it starts up, you’ll need to repeatedly press a specific key to enter the BIOS/UEFI settings or access the boot menu. Common keys include
Del,F2,F10,F12, orEsc. The exact key varies by manufacturer (check your PC’s manual or look for a prompt on the screen during startup). - Access Boot Menu or BIOS/UEFI:
- Boot Menu (Recommended): If you can access a “Boot Menu,” select your USB drive or DVD drive from the list. This is usually temporary and won’t change your permanent boot order.
- BIOS/UEFI Settings: If you need to enter the BIOS/UEFI, navigate to the “Boot” tab or section. Change the boot order so that your USB drive or DVD drive is listed as the primary boot device. Save your changes and exit. Your computer will then restart and attempt to boot from the chosen media.
- Press Any Key to Boot: You might see a message like “Press any key to boot from CD or DVD…” or “Press any key to boot from USB…” Press a key quickly to proceed. If you miss this prompt, your computer might boot into your old Windows installation, and you’ll have to restart and try again.
The Windows Setup Wizard: Configuration and Customization
Once you’ve successfully booted from the installation media, the Windows Setup wizard will begin. Follow these steps carefully:
- Language, Time, and Keyboard: On the first screen, select your preferred language, time and currency format, and keyboard or input method. Click “Next.”
- Install Now: Click the “Install now” button in the center of the screen.
- Product Key (if applicable): If prompted for a product key and you have one, enter it now. If you have a digital license (common for Windows 10/11), you can often click “I don’t have a product key” or “Skip.” Windows will activate automatically later once you connect to the internet.
- Choose Operating System: If your installation media contains multiple versions of Windows (e.g., Home and Pro), select the edition you have a license for. Click “Next.”
- Accept License Terms: Read the Microsoft Software License Terms, check the “I accept the license terms” box, and click “Next.”
- Type of Installation: This is a crucial step. You’ll be presented with two options:
- Upgrade: Install Windows and keep files, settings, and applications. (This is NOT what we want for a clean install.)
- Custom: Install Windows only (advanced). This is the option you want for a clean installation. Click “Custom.”
Strategic Partitioning: Erasing and Formatting Your Drive
This is the most critical and potentially destructive part of a clean install. Here, you will be deleting existing partitions and creating new ones. Double-check that you have backed up all your data before proceeding.
- Identify Your Primary Drive: You will see a list of drives and partitions. It’s essential to identify your main hard drive (usually Disk 0, but verify by size). If you have multiple drives, be extremely careful to select the correct one.
- Delete Existing Partitions: For a truly clean install, you want to remove all existing partitions related to your old Windows installation. This often includes:
- “Recovery” partition
- “System” or “EFI System Partition”
- “MSR (Reserved)” partition
- Your main “Primary” partition (where Windows was installed)
- Any other partitions on that specific drive that you don’t need to keep.
- Select each partition on your target drive one by one and click the “Delete” button. Confirm the warning message. Your drive will eventually appear as “Drive 0 Unallocated Space” (or similar).
- Important Note: If you have multiple physical drives and a separate drive for data you want to keep, do not delete partitions on that data drive. Only delete partitions on the drive where you intend to install Windows.
- Create New Partition:
- Select the “Unallocated Space” on your target drive.
- Click “New.” Windows will usually suggest the maximum available size for a new partition. Accept this or adjust if you want to create a smaller OS partition and a separate data partition (an advanced choice).
- Click “Apply.” Windows will then create the primary partition and often a small system reserved partition alongside it.
- Select Target Partition: Make sure the newly created “Primary” partition (or the largest partition you just created) is selected. This is where Windows will be installed.
- Click “Next”: Windows will now begin copying files and installing. Your computer may restart multiple times during this process. Allow it to proceed without interruption.
Post-Installation Optimization: Building a Robust and Efficient System
After the core installation is complete and Windows boots up for the first time, your journey isn’t over. The post-installation phase is crucial for transforming your fresh, bare-bones system into a fully functional, secure, and productive workstation.
System Foundations: Drivers, Updates, and Essential Utilities
A clean Windows installation, while efficient, needs its specific hardware drivers and the latest security patches to perform optimally and safely.
- Connect to the Internet: If your PC doesn’t automatically connect, use the Ethernet connection (if available) or manually install the Wi-Fi driver you backed up earlier. Getting online is the first priority.
- Run Windows Update: This is paramount.
- Go to
Settings > Windows Update. - Click “Check for updates” and install all available updates. This includes critical security patches, feature updates, and often a significant number of hardware drivers that Windows automatically fetches.
- Restart your computer as prompted and repeat the process until no more updates are found. This ensures your system is up-to-date with the latest security fixes and performance enhancements, which is crucial for digital security and preventing vulnerabilities.
- Go to
- Install Essential Hardware Drivers (from your backup): While Windows Update handles many drivers, some specific components (especially graphics cards, specialized peripherals, or older hardware) might benefit from the manufacturer’s latest drivers.
- Install the graphics card drivers you downloaded earlier (NVIDIA, AMD, Intel).
- Install any other critical drivers for your motherboard chipset, sound card, or other peripherals that Windows Update didn’t fully address or where you prefer the manufacturer’s version.
- Restart your PC after installing significant driver updates.
- Set Up Basic System Utilities: Configure your essential security software. Install a reputable antivirus program immediately if Windows Defender isn’t sufficient for your needs. Consider a firewall and possibly a VPN, depending on your digital security requirements.
Reintegrating Your Digital Workflow: Software and Data Restoration
Now that your system’s foundation is solid, it’s time to bring back your personal touch and professional tools.
- Reinstall Your Applications: Begin reinstalling the software you use regularly. Start with your most critical applications:
- Web browser (Chrome, Firefox, Edge, etc.)
- Office suite (Microsoft 365, LibreOffice)
- Communication tools (Slack, Teams, Zoom)
- Creative software (Adobe Creative Suite, GIMP, Blender)
- Any other specialized software for your work or hobbies.
- Download installers directly from official websites to ensure you get the latest, clean versions.
- Restore Your Backed-Up Data: Copy your personal files (Documents, Pictures, Videos, Music, etc.) from your external hard drive or cloud storage back to their respective folders on your new Windows installation. Avoid simply dumping everything into one folder; maintain a clean, organized file structure for optimal productivity.
- Configure Settings and Preferences: Take the time to customize Windows to your liking. Adjust display settings, privacy settings, notification preferences, and other personalizations. This helps make your new system feel truly yours and optimized for your workflow.
Establishing Best Practices for Long-Term Health
A clean install provides a powerful fresh start, but maintaining system health is an ongoing process.
- Regular Backups: Make backups a routine habit. Use cloud services, external drives, or a combination. Regular backups are your ultimate safeguard against data loss, whether from hardware failure, malware, or accidental deletion.
- Keep Software Updated: Regularly check for updates for your operating system and all installed applications. Updates often include security patches and performance improvements, which are vital for maintaining both digital security and system efficiency.
- Smart Software Installation: Be selective about what you install. Avoid unnecessary “freeware” that might bundle unwanted programs. When installing software, always choose “Custom” installation if available and deselect any optional bundled software you don’t need.
- Periodic Maintenance: Run disk cleanup tools, defragment your hard drive (if it’s an HDD, SSDs don’t need defragmentation), and occasionally review your installed programs to uninstall anything you no longer use. This helps prevent the accumulation of digital clutter that led you to the clean install in the first place, ensuring your productivity remains high.
Conclusion
Performing a clean Windows install might seem like a daunting task, but it’s a powerful and often necessary procedure to reclaim your computer’s performance, fortify its security, and resolve persistent system issues. By meticulously following the steps outlined in this guide – from crucial data backups and gathering essential tools to navigating the installation wizard and optimizing your fresh system – you empower yourself to achieve a revitalized computing experience.
The benefits extend far beyond a mere speed boost. A clean system translates directly into enhanced productivity, fewer interruptions, and a more secure digital environment. In today’s interconnected world, a well-maintained, efficient, and secure computer is an invaluable asset, contributing to your professional effectiveness and peace of mind. Embrace this journey towards a cleaner, faster, and more reliable Windows experience, and enjoy the renewed confidence that comes with mastering your own technology.
aViewFromTheCave is a participant in the Amazon Services LLC Associates Program, an affiliate advertising program designed to provide a means for sites to earn advertising fees by advertising and linking to Amazon.com. Amazon, the Amazon logo, AmazonSupply, and the AmazonSupply logo are trademarks of Amazon.com, Inc. or its affiliates. As an Amazon Associate we earn affiliate commissions from qualifying purchases.